14
00176566
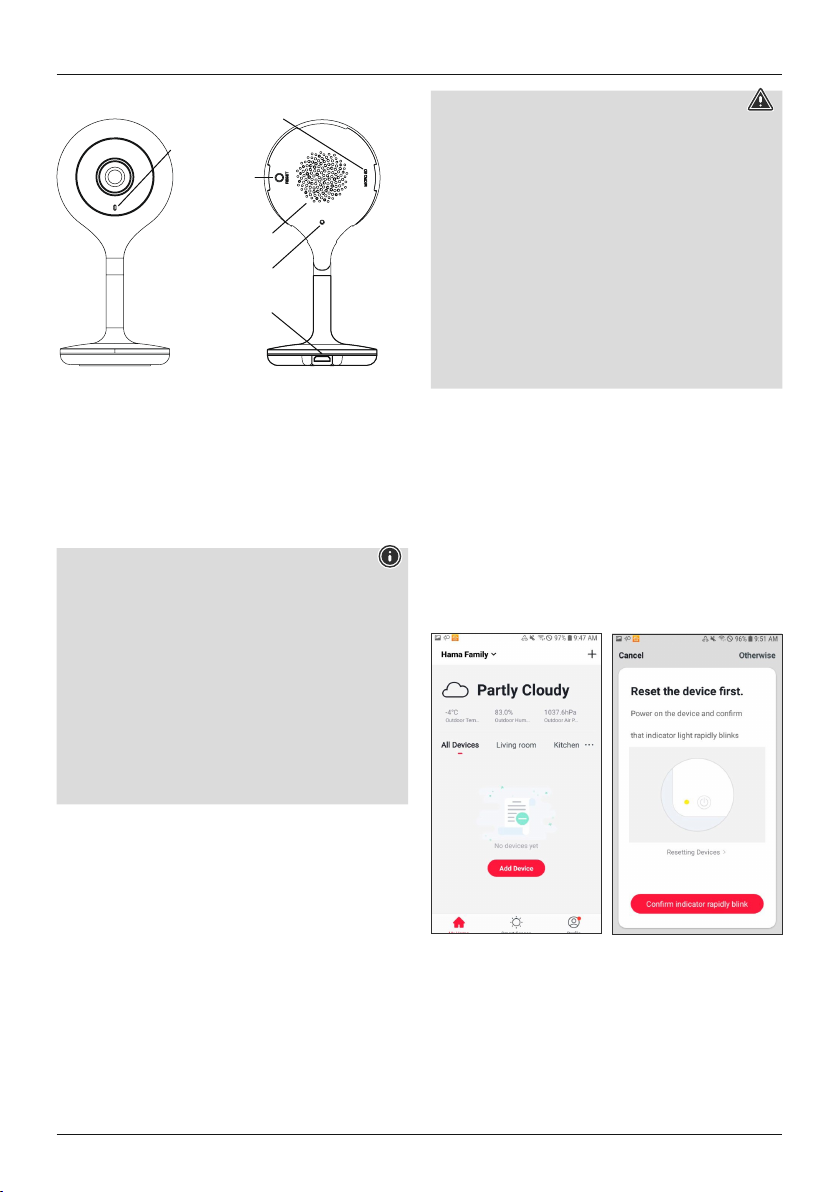
Status light
Reset
Speaker
Micro USB
Microphone
SD card slot
4.6.1 Product features
•Status LED is constantly lit red: Preparing for pairing
mode
•Status LED flashes red: Pairing mode active (device can
be connected)
•Status LED flashes blue: QR code was recognised
•Status LED is constantly lit blue: Connection set up
successfully
Note
•Protect the product from dirt, moisture and
overheating, and only use it in a dry environment.
•Connect the product only to a socket that has been
approved for the device. The socket must be installed
close to the product and must be easily accessible.
•Do not attempt to service or repair the product yourself.
Leave any and all service work to qualified experts.
•Do not continue to operate the device if it becomes
visibly damaged.
•The product is intended for indoor use only.
•Keep this product, as all electrical products, out of the
reach of children!
4.6.2 Installation
•You can attach the camera using adhesive pads.
•Power can be supplied to the camera only via USB.
•For USB operation, connect a Micro-USB cable (included
in delivery) to the Micro-USB port and to a suitable USB
power supply (included in delivery). Plug the power
supply unit into a socket. Connect the product only to a
socket that is approved for the device. The socket must
be installed close to the product and must be easily
accessible. When powering the device using a USB
power supply, make sure there are no batteries inside
the device.
Warning - Installation with adhesive pad
•All parts are intended for indoor use only. Do not
install them outdoors.
•Please note that the installation surface you choose
should be free of dust and grease. Use a suitable clean-
ing agent from a specialised dealer to clean the surface.
•Note that the adhesive pad attachment is permanent.
To remove the adhesive pad, carefully pull it off the
installation surface.
•Various environmental factors such as ambient
humidity, sunlight or cold can impair the durability of
the adhesive pad.
•We cannot guarantee that residue will not be left on the
mounting surface after the adhesive pad is removed.
4.6.3 Integrating devices into the Hama Smart
Solution app
•Connect the WiFi camera to the USB cable supplied and
the power supply unit. Plug the power supply unit into
a socket.
•Wait a moment until the camera emits a signal tone and
the LED begins to flash red.
•Open the app and tap ‘My home’ at the lower-left edge
of the screen.
•Then tap ‘+’ at the upper-right edge of the screen, select
the ‘Cameras’’.
•Tap ‘OK’ to confirm that the camera is flashing.
•Then enter the name of your WiFi network and the
password. Tap ‘OK’ to confirm your entries.
•Now scan the QR code with the camera. Tap ‘I heard
the beep’ to confirm that you heard a signal tone. The
camera will now be connected.