570229
13
Zoom out
Zoom in
Previous page
1/18
Next page
26
Preparation
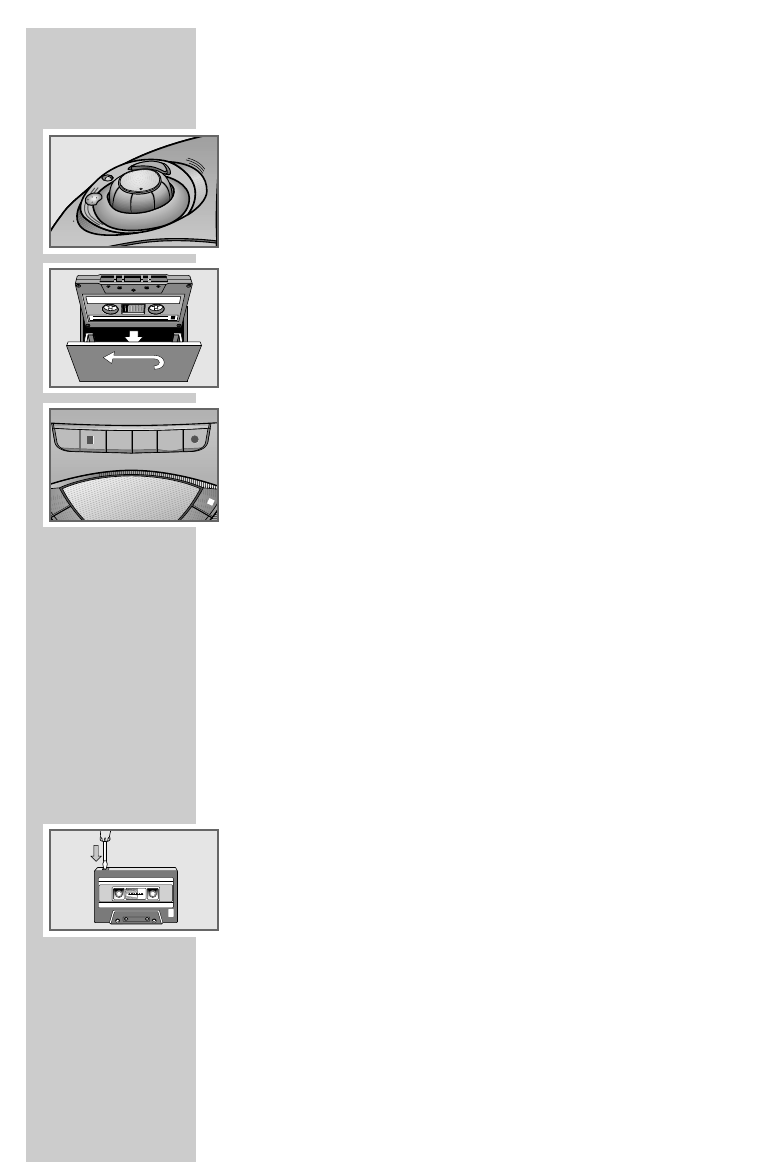
1 Switch on the Radio Recorder and set the »TAPE/OFF RADIO CD«
switch to »TAPE«.
2 Press »
/
ə
« to open the tape compartment.
3 Insert a tape in the compartment with the open side facing up and the
full reel on the left right (see »TAPE DIRECTION«).
4 Close the tape compartment by carefully pressing »CLOSE« on the
front of the tape compartment.
Tape playback
1 Press »
ľ
« to start playback.
– The »ON
« indicator lights up.
– Playback stops at the end of the side of the tape.
2 Press »II« to interrupt playback (pause).
Press »II« to resume playback.
3 Press »
/
ə
« to end playback.
4 To open the tape compartment, press »
/
ə
« again and take out the
cassette.
Note:
The device is switched off when no button on the cassette unit is pressed.
Fast forwarding and rewinding the tape
1 With the tape stopped, press »
ľľ
« or »
ıı
«.
– »
ľľ
« fast forwards to the end of the tape, »
ıı
« rewinds to the
beginning of the tape.
2 Press »
/
ə
« at the required position on the tape.
Tape recording
Erase protection
Every new recording overwrites the existing recording on the tape.
You can protect your own tapes against accidental erasure by breaking the
safety tabs on the top of the tape.
Pre-recorded commercial music tapes are already protected against acci-
dental erasure.
If you want to record on to a protected tape, cover the opening with
adhesive tape.
Note:
Only use NORMAL-type tapes (IEC I) for recording.
CHROME (IEC II) or METAL (IEC IV) tapes are not suitable. The volume
setting and the position of the Ultra Bass System switch do not affect the
recording level.
TAPE MODE
__________________________________________
1
!
!
ə
ə
4
4
3
3
8
8
P
R
O
G
S
T
O
P
A
N
D
O
M
R
E
P
E
O
P
ʀ
V
O
L
U
M
E
TAPE/
OFF
RADIO •
CD •
U
L
T
R
A
B
A
S
S
S
Y
S
T
E
M
U
B
S
ON
13


Need help? Post your question in this forum.

Forumrules


Report abuse

Libble takes abuse of its services very seriously. We're committed to dealing with such abuse according to the laws in your country of residence. When you submit a report, we'll investigate it and take the appropriate action. We'll get back to you only if we require additional details or have more information to share.

Product:

For example, Anti-Semitic content, racist content, or material that could result in a violent physical act.

For example, a credit card number, a personal identification number, or an unlisted home address. Note that email addresses and full names are not considered private information.

Forumrules

To achieve meaningful questions, we apply the following rules:

Register

Register getting emails for Grundig FREEZZ 10 RRCD 4300 at:


You will receive an email to register for one or both of the options.


Get your user manual by e-mail

Enter your email address to receive the manual of Grundig FREEZZ 10 RRCD 4300 in the language / languages: English as an attachment in your email.

The manual is 0,86 mb in size.


You will receive the manual in your email within minutes. If you have not received an email, then probably have entered the wrong email address or your mailbox is too full. In addition, it may be that your ISP may have a maximum size for emails to receive.

Others manual(s) of Grundig FREEZZ 10 RRCD 4300

Grundig FREEZZ 10 RRCD 4300 User Manual - German - 17 pages

Grundig FREEZZ 10 RRCD 4300 User Manual - Dutch - 17 pages


The manual is sent by email. Check your email

If you have not received an email with the manual within fifteen minutes, it may be that you have a entered a wrong email address or that your ISP has set a maximum size to receive email that is smaller than the size of the manual.

The email address you have provided is not correct.

Please check the email address and correct it.

Your question is posted on this page

Would you like to receive an email when new answers and questions are posted? Please enter your email address.


Info