67344
26
Zoom out
Zoom in
Previous page
1/31
Next page
26
Die Timerfunktionen
Sie können eine Aufnahme für einen angeschlossenen Videorecor-
der programmieren. Es stehen insgesamt 8 Aufnahmetimer zur Ver-
fügung.
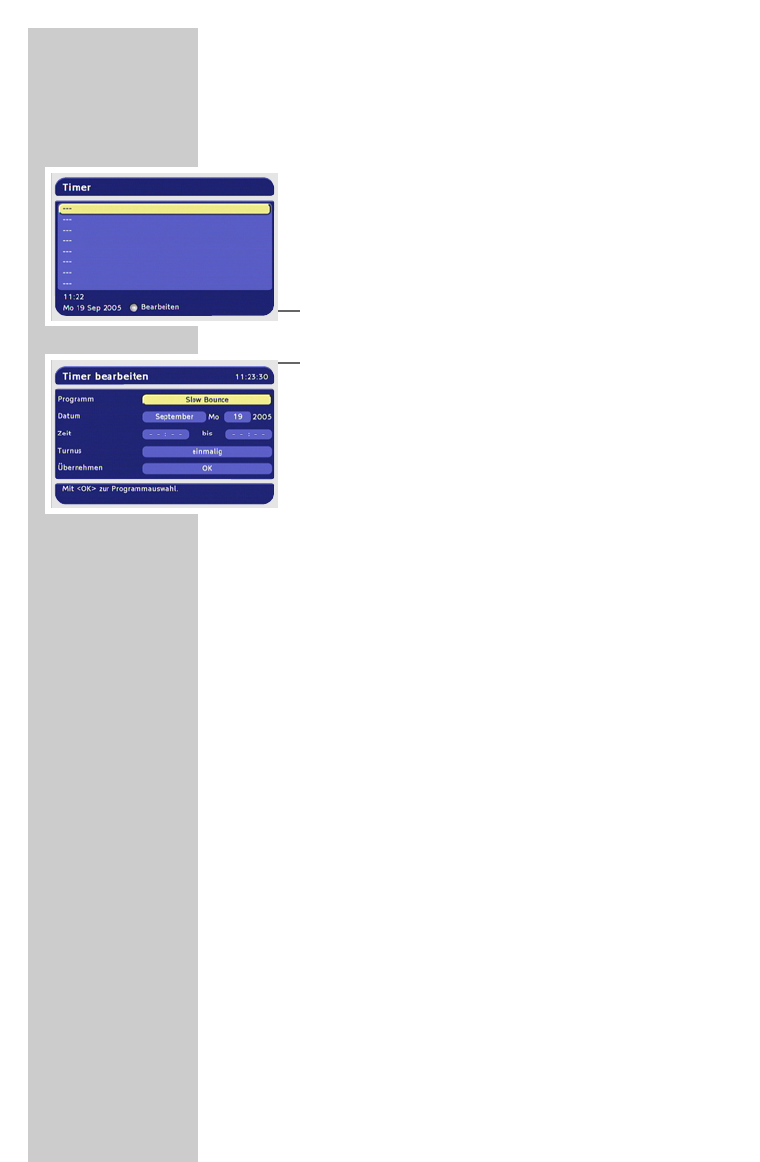
Aufnahmetimer programmieren
1 Im Hauptmenü Zeile »Timer« mit »P-« oder »P+« wählen und
mit »OK« bestätigen.
2 Mit »P-« oder »P+« den Timerplatz (---) wählen und mit »OK«
bestätigen.
3 Zeile »Programm« mit »P-« oder »P+« wählen und mit »OK«
bestätigen.
4 Programm mit »P-« oder »P+« aus der Programmtabelle
wählen und mit »OK« bestätigen.
5 Monat mit »
Ǹ
« oder »
Ƿ
«wählen und mit »OK« bestätigen.
6 Tag mit »
Ǹ
« oder »
Ƿ
«wählen und mit »OK« bestätigen.
7 Mit »0« - »9« die gewünschte Startzeit und Endzeit jeweils
vierstellig eingeben.
8 Turnus mit »
Ǹ
« oder »
Ƿ
« wählen und mit »OK« bestätigen.
9 Mit »OK« den Timer speichern.
– Der Timer wird in der Timerliste gespeichert.
– Sie können einzelne Timer mit »
z
« oder alle Timer mit »
ǷǷ
«
löschen.
10 Einstellung beenden, dazu »i« drücken.
Der Digital-Receiver schaltet sich zur voreingestellten Zeit auf
das gewählte Programm.
Hinweise:
Auch Ihr Videorecorder muss entsprechend programmiert wer-
den.
Während einer Timer-Aufnahme können keine Eingaben mit
der Fernbedienung gemacht werden.
Die Timeraufnahme kann durch Drücken der Taste »
Ǽ« und
»OK« unterbrochen werden.
Hat sich der Receiver vor Timerstart in Bereitschaft (Stand-by)
befunden, schaltet er sich auch nach Ablauf des Timers wieder
in Stand-by.
ZUSATZFUNKTIONEN
__________________________________
26


Need help? Post your question in this forum.

Forumrules


Report abuse

Libble takes abuse of its services very seriously. We're committed to dealing with such abuse according to the laws in your country of residence. When you submit a report, we'll investigate it and take the appropriate action. We'll get back to you only if we require additional details or have more information to share.

Product:

For example, Anti-Semitic content, racist content, or material that could result in a violent physical act.

For example, a credit card number, a personal identification number, or an unlisted home address. Note that email addresses and full names are not considered private information.

Forumrules

To achieve meaningful questions, we apply the following rules:

Register

Register getting emails for Grundig DTR 1560 at:


You will receive an email to register for one or both of the options.


Get your user manual by e-mail

Enter your email address to receive the manual of Grundig DTR 1560 in the language / languages: German as an attachment in your email.

The manual is 5,14 mb in size.


You will receive the manual in your email within minutes. If you have not received an email, then probably have entered the wrong email address or your mailbox is too full. In addition, it may be that your ISP may have a maximum size for emails to receive.

The manual is sent by email. Check your email

If you have not received an email with the manual within fifteen minutes, it may be that you have a entered a wrong email address or that your ISP has set a maximum size to receive email that is smaller than the size of the manual.

The email address you have provided is not correct.

Please check the email address and correct it.

Your question is posted on this page

Would you like to receive an email when new answers and questions are posted? Please enter your email address.


Info