Instructions
Instructions
Instructions
Instructions de
de
de
de r
r
r
r é
é
é
é glage
glage
glage
glage d'ann
d'ann
d'ann
d'ann é
é
é
é e/date/heure
e/date/heure
e/date/heure
e/date/heure
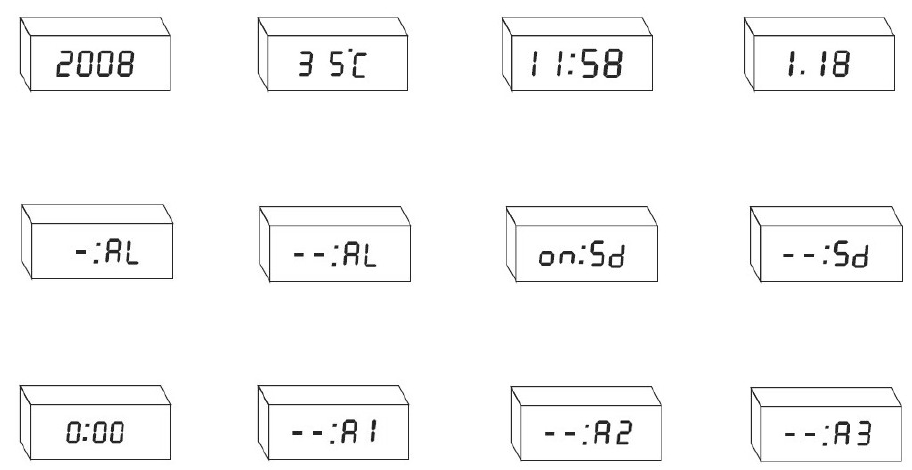
� Appuyez sur SET
SET
SET
SET pendant 3 secondes pour acc é der au mode r é glage.
� Quand ANNEE
ANNEE
ANNEE
ANNEE clignote, appuyez sur UP
UP
UP
UP ou DOWN
DOWN
DOWN
DOWN pour modifier l' ANNEE
ANNEE
ANNEE
ANNEE , puis appuyez sur SET
SET
SET
SET pour aller au r é glage de la DATE
DATE
DATE
DATE .
� Quand MOIS
MOIS
MOIS
MOIS clignote, appuyez sur UP
UP
UP
UP ou DOWN
DOWN
DOWN
DOWN pour modifier le MOIS
MOIS
MOIS
MOIS , puis appuyez sur SET
SET
SET
SET pour aller au r é glage du JOUR
JOUR
JOUR
JOUR .
� Quand JOUR
JOUR
JOUR
JOUR clignote, appuyez sur UP
UP
UP
UP ou DOWN
DOWN
DOWN
DOWN pour modifier le JOUR
JOUR
JOUR
JOUR , puis appuyez sur SET
SET
SET
SET pour aller au r é glage de l' HEURE
HEURE
HEURE
HEURE .
� Quand HEURE
HEURE
HEURE
HEURE clignote, appuyez sur UP
UP
UP
UP ou DOWN
DOWN
DOWN
DOWN pour modifier l' HEURE
HEURE
HEURE
HEURE , puis appuyez sur SET
SET
SET
SET pour aller au r é glage des MINUTES
MINUTES
MINUTES
MINUTES .
� Quand MINUTE
MINUTE
MINUTE
MINUTE clignote, appuyez sur UP
UP
UP
UP ou DOWN
DOWN
DOWN
DOWN pour modifier les MINUTES
MINUTES
MINUTES
MINUTES , puis appuyez sur SET
SET
SET
SET pour aller au r é glage du
format de l'heure.
� Quand le format horaire « 24H/12H
24H/12H
24H/12H
24H/12H » s'affiche, appuyez sur UP
UP
UP
UP ou DOWN
DOWN
DOWN
DOWN pour modifier le format de la date ; puis appuyez sur SET
SET
SET
SET
pour revenir à l'affichage normal.
Instructions
Instructions
Instructions
Instructions de
de
de
de r
r
r
r é
é
é
é glage
glage
glage
glage de
de
de
de format
format
format
format de
de
de
de temp
temp
temp
temp é
é
é
é rature
rature
rature
rature
�
�
�
� Appuyez sur UP
UP
UP
UP pour choisir le format de temp é rature entre
0
0
0
0
C/
C/
C/
C/
0
0
0
0
F
F
F
F en mode d'affichage horaire normal.
Instructions
Instructions
Instructions
Instructions de
de
de
de r
r
r
r é
é
é
é glage
glage
glage
glage des
des
des
des trois
trois
trois
trois alarmes
alarmes
alarmes
alarmes
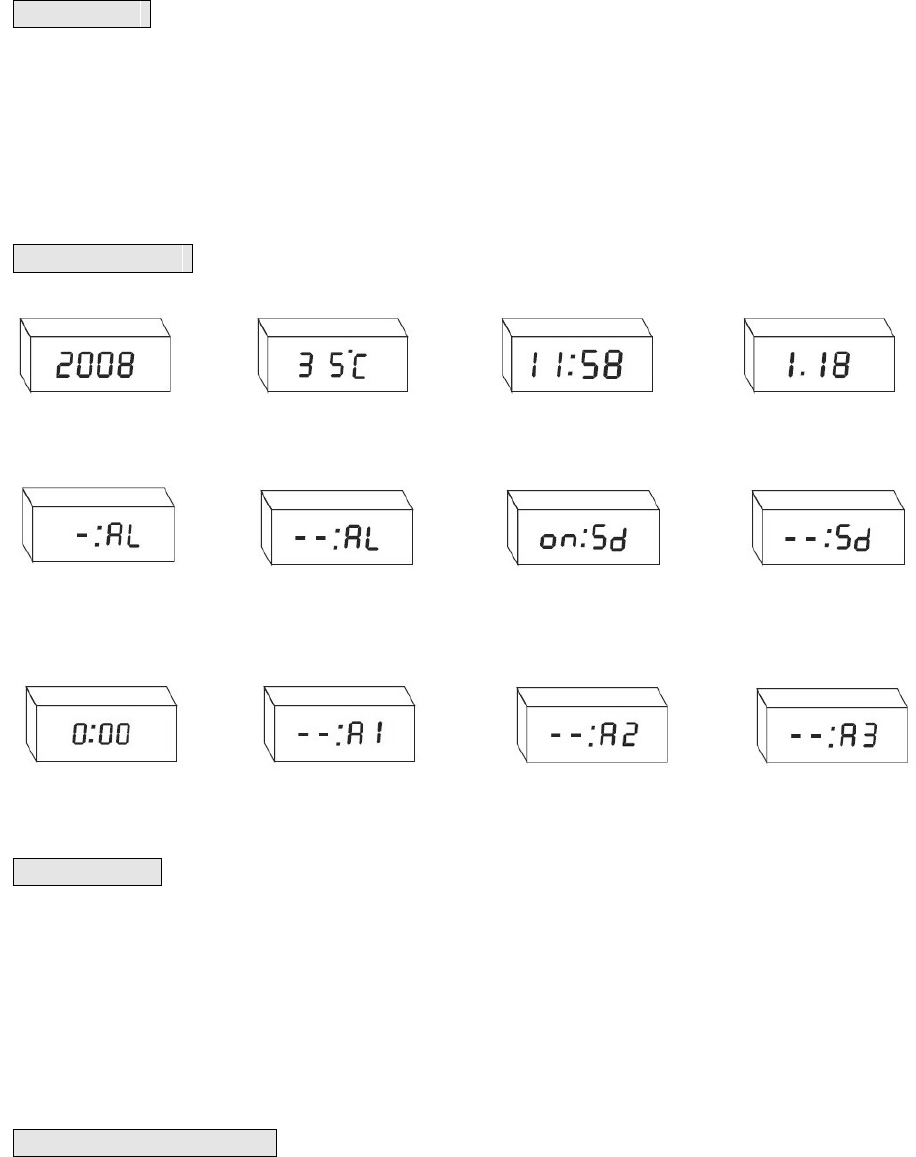
(Ce r é veil peut ê tre configur é avec 3 alarmes et elles peuvent ê tre r é gl é es avec le « mode normal d
’
alarme » ou le « mode d
’
alarme de
jour de la semaine » )
-
-
-
- -
-
-
- AL
AL
AL
AL Mode normal d
’
alarme : l
’
alarme se d é clenchera 7 jours par semaine
-
-
-
- AL
AL
AL
AL Mode d
’
alarme de jour de la semaine : l
’
alarme se d é clenchera durant les 5 jours ouvrables seulement
� Appuyer sur le bouton DOWN
DOWN
DOWN
DOWN pour acc é der au r é glage de l
’
alarme et le r é veil affichera d
’
abord « -
-
-
- -
-
-
- AL
AL
AL
AL » , appuyer sur UP
UP
UP
UP et
DOWN
DOWN
DOWN
DOWN pour choisir le mode d
’
alarme, et appuyer sur SET
SET
SET
SET pour confirmer ; alors le r é veil ira à la premi è re page de r é glage
d
’
alarme.
� La premi è re alarme est d
’
abord é teinte au d é but avec l
’
affichage « -
-
-
- -
-
-
- A1
A1
A1
A1 » (pour allumer
allumer
allumer
allumer l
’
alarme, appuyer sur le bouton UP
UP
UP
UP
pour afficher « 00:00 » ). Pour l
’é
teindre de nouveau, appuyer sur le bouton DOWN
DOWN
DOWN
DOWN .
� Pour r é gler la premi è re alarme, appuyez sur SET
SET
SET
SET , l'heure clignotera, puis appuyez sur les boutons UP
UP
UP
UP et DOWN
DOWN
DOWN
DOWN pour r é gler
l'heure ; appuyez encore sur SET
SET
SET
SET , les minutes clignoteront et appuyez sur UP
UP
UP
UP et DOWN
DOWN
DOWN
DOWN pour r é gler les minutes.
� Apr è s avoir r é gl é l'heure, appuyez encore sur SET
SET
SET
SET . Vous arriverez à l'heure de la deuxi è me alarme, le mode initial sera « --:A2
--:A2
--:A2
--:A2 »
(pour activer
activer
activer
activer l'alarme, appuyez sur le bouton UP
UP
UP
UP pour afficher « 00:00
00:00
00:00
00:00 » ). Pour d
d
d
d é
é
é
é sactiver
sactiver
sactiver
sactiver l
’
alarme, appuyez sur le bouton
DOWN
DOWN
DOWN
DOWN . Suivez les m ê mes instructions que ci-dessus pour r é gler l'heure.
� Apr è s avoir appuy é sur SET
SET
SET
SET , vous arriverez au mode initial d'affichage de la troisi è me alarme « --:A3
--:A3
--:A3
--:A3 » (pour activer
activer
activer
activer l'alarme,
appuyez sur le bouton UP
UP
UP
UP pour afficher « 00:00
00:00
00:00
00:00 » ). Pour d
d
d
d é
é
é
é sactiver
sactiver
sactiver
sactiver l
’
alarme , appuyez sur le bouton DOWN
DOWN
DOWN
DOWN . Suivez les m ê mes
instructions que ci-dessus. Apr è s avoir appuy é sur SET
SET
SET
SET , vous serez sur l'affichage normal.
R
R
R
R é
é
é
é glage
glage
glage
glage de
de
de
de la
la
la
la fonction
fonction
fonction
fonction d'activation
d'activation
d'activation
d'activation sonore
sonore
sonore
sonore et
et
et
et de
de
de
de l'affichage
l'affichage
l'affichage
l'affichage de
de
de
de l'heure
l'heure
l'heure
l'heure
La fonction d
’
activation sonore peut ê tre d é sactiv é e, de sorte que l'heure puisse s'afficher en continu sans s' é teindre. L' activation
activation
activation
activation de
cette fonction pr é servera l'autonomie des piles. Le r é veil peut aussi ê tre r é gl é pour afficher l'heure seulement, sans la date ni la
temp é rature.
� Pour activer
activer
activer
activer la fonction d'activation sonore, appuyez sur le bouton V/S
V/S
V/S
V/S . Quand le r é veil affiche « on:Sd
on:Sd
on:Sd
on:Sd » , la fonction
d'activation sonore est activ
activ
activ
activ é
é
é
é e
e
e
e .
� Appuyez encore sur le bouton V/S
V/S
V/S
V/S pour que le r é veil affiche « --:Sd
--:Sd
--:Sd
--:Sd » , ce qui indique que cette fonction est d
d
d
d é
é
é
é sactiv
sactiv
sactiv
sactiv é
é
é
é e
e
e
e .
� Continuez à appuyer sur le bouton V/S
V/S
V/S
V/S pendant 3 secondes jusqu' à entendre un « Bip » , le r é veil affichera l'heure seulement.
Pour revenir à l'affichage de l'heure, de la date et de la temp é rature, continuez à appuyer sur le bouton V/S
V/S
V/S
V/S jusqu' à entendre
un « Bip » .