Using this mode for slow synchro shots with red-eye
reduction.
• Flash: Slow Synchro
This allows for night scenery photos that include
people in the foreground. The use of a tripod is
recommended when shooting with this setting.
• Flash: Red-Eye Reduction
The camera emits a brief ash before the picture is
taken to reduce red-eye eects.
• Flash: Auto
Camera ash goes o automatically based on
existing light conditions.
To enable the self-timer function, press the Down/Self-timer
button to enter the self-timer selection interface, press the
Left/Right button to switch among three self-timer modes:
•Self-Timer: O
Disables the self-timer.
• Self-Timer: 2 sec
A single picture is shot 2 seconds after the Shutter
button is pressed.
• Self-Timer: 10 sec
A single picture is shot 10 seconds after the Shutter
button is pressed.
Self-Timer
20212021
Press the Left/Close-up button to enter the close-up shooting
interface, press the Left/Right button to switch between two
close-up shot modes:
•Macro: On
Select this to focus on subjects 5cm from the lens.
•Macro: O
Select this option to disable Macro.
Macro Mode
Using Quick Record
In Shooting mode, press the Recording Shortcut button to
enter the recording mode directly and begin video recording.
After recording, press the Recording shortcut button or
Shutter button again and you can store the video and return
to the shooting screen.
20212021
Advanced Functions Menu
The Advanced Functions Menu of the camera includes image
Size, Image Quality, White Balance, Image Colour, ISO and EV
values. These functions allow advanced users better control for
shooting under dicult lighting conditions.
To set the Advanced Functions:
1.Pull up the Advanced Function Menus by pressing the Pull up the Advanced Function Menus by pressing thePull up the Advanced Function Menus by pressing the
button.
2. Press Down button to enter the advanced function
selection screen, press the Left/Right button to select the
function that you want to set.
3.Press the Up button to enter the advanced function setting Press the Up button to enter the advanced function setting
interface.
4. Use the Left/Right buttons to change the settings and
then pressto conrm the new settings and close this
Advanced Function Menu.
22
Size
The size setting refers to the image resolution in pixels. A
higher image resolution allows you to print that image in
larger sizes without degrading the image quality.
The bigger the number of recorded pixels is, the better
the image quality becomes. As the number of recorded
pixels becomes smaller, you will be able to record more
images on a memory card.
Quality
The camera's quality setting adjusts the compression ratio
of the images. Higher quality settings produce better quality
photos, but will take up more memory space.
There are three options for picture quality:
• Quality : Best
• Quality : Fine
•Quality : Normal
23
Color
The color setting allows you to add artistic color eects when
taking pictures. You can try dierent color tones to alter
the mood of your pictures. (The Color setting feature is only
available when the camera is in the
M
Manual mode).
The color options include:
•Color : Auto
•Color : Vivid
•Color : Black & White
•Color : Sepia
WB (White Balance)
The White Balance allows you to adjust the color temperature
for dierent lighting sources to ensure accurate color
reproduction. (The WB setting is only available when the
camera is in the
M
Manual mode).
The options of White Balance include:
• WB : Auto
• WB : Daylight
• WB : Cloudy
•WB : Fluorescent
•WB : Fluorescent CWF
•WB : Incandescent
•WB : Manual (Press the shutter button to set WB)
242425
Exposure Compensation
The exposure compensation adjustment allows you to adjust
the light exposure value to control the brightness of the
image.
The adjustable range of exposure value is from EV -2.0 to
EV+2.0.
ISO
The ISO function allows you to set the sensitivity of the
camera's light sensor based on the brightness of the scene.
To improve the camera's sensor performance in darker
environments, a higher ISO value is required. A lower ISO value
is needed when shooting in bright conditions. (The ISO setting
is only available when the camera is in the
M
Manual
mode).
Pictures at higher ISO will generally have more noise than
those at lower ISO.
The options of ISO include automatic, 64, 100, 200, 400, 800
and 1600.
2425
LCD Screen Display
USING THE MODES
Still Picture Mode Display
Mode:
M
12345678
9
10
11
1213
14
8
15
16
M
1718192021
8
M
1 Shooting Mode Icons
Auto Mode
Manual ModeManual Mode
ASCN Mode
Panorama ModePanorama Mode
Scene Mode
Stabilization
Mode
Portrait Mode
2 AF Mode
Single-AF
Multi-AF
3 Expo Metering
Spot
Center
AiAE
4 Image Size
5 Image Quality
26
6 Remaining number of pictures
7 Memory card/built-in memory
8 Battery Status
9 WT Ratio (Displayed only when the zoom is activated)
10 Zoom scale
11 Exposure value
12 ISO Value (Adjustable only in
M
Manual Mode)
13 Histogram
14 Focus Frame
15 Continuous Shot
16 Face Detection
17 Picture Color (Adjustable only in
M
Manual Mode)
18 White Balance (Adjustable only in
M
Manual Mode)
19 Macro Mode
20 Self-timer
2-sec
10-sec
21 Flash Mode
Flash: Flash O
Flash: Forced Flash
Flash: Red-Eye + Slow Synchro
Flash: Slow Synchro
Flash: Red-Eye reduction
Flash : Auto
27
Video Shooting Mode Display
Mode :
1
13
23456789
10
11
12
1 Video Mode icon
2 Continuous AF
3 Metering
Spot
Center
AiAE
4 Video Quality
5 Macro mode
6 Self-timer
10-sec
7 Remaining Time for Video Recording
8 Memory Card/Built-in Memory
9 Battery Status
10 Zoom
11 Zoom Value Scale (Displayed only when zoom is activated)
12 Exposure Value
13 Recording Status Icon
Recording standby
Recording
For optimal video shooting, it is recommended that an
SD memory card be used. If you shoot video using only
the internal memory the results may display image
jitter, image noise and short recording times.
HD recording time is limited to below 29min.
During video shooting, optical zoom is xed but the
highest 6x digital zoom is still available.
282829
Playback mode display
Mode:
123456
7
8
9
1011
13
12
1 Playback Mode Icon
2 DPOF File
3 File Protection
4 Picture Number
5 Memory Card/Built-in Memory
6 Battery Status
7 Image ZoomImage Zoom
8 Zoom Magnication Area Indicator
9 Field of view indicatorField of view indicator
10 Memory Space (this picture/Total number of pictures)
11 Recording Date and Time
12 OK: PLAY
13 HDR
2829
In the "ASCN" mode, dierent recording conditions are
detected intelligently and the most suitable settings will be
automatically selected.
To use "ASCN":
1. Turn the mode dial to "ASCN", The LCD screen will display
the following icons.
2. Hold the camera steadily and aim at the subject. The
optimum scene mode will be selected automatically.
3. Press the Shutter button halfway down to focus.
4. Press the Shutter button all the way down to take the
picture.
IconMode nameIconMode name
Landscape Mode
Night Landscape
Mode
Portrait ModeMacro Mode
Night PortraitAuto Mode
Backlit Portrait
Landscape Mode
For landscapes, ASCN will automatically adjust the exposure
and reproduce vivid green and blue colors.
Portrait Mode
For portraits, ASCN will automatically adjust the exposure and
skin tones to produce natural looking photos.
Auto Scene Mode (ASCN)
303031
Night Portrait
When taking portraits at night, or in low light conditions, ASCN
will automatically adjust the exposure for people and night
scenes.
Backlit Portrait
When the sun or any other light source is behind you, ASCN
will automatically adjust the foreground exposure to produce
the best pictures possible.
Night Landscape Mode
For night scenes, ASCN will automatically increase the ISO
value to compensate for low light.
Macro Mode
To produce more detailed close-ups, ASCN will automatically
engage the camera's Macro mode and automatically focus the
lens.
Auto Mode
The camera will automatically adjusts the exposure and focus
to ensure the best possible pictures.
3031
Panorama mode
Panorama Mode allows you to create a panoramic picture. The
camera will automatically compose a panoramic picture using
the individual shots that you take.
Follow these easy steps to create a panoramic picture:
1. Press the Mode button and use the Left/Right button
to select Panorama mode, then press the button to
conrm the setting.
2. Use the Left/Right button to select the direction of image
stitching, e.g. left to right or right to left. Then press the
button to conrm the setting; if no selection is made
the camera will default to left to right stitching after 2
seconds.
3. After the rst shot is taken, two target icons will appear on
the left and right side of the LCD screen. Pan the camera
and the circle icon on the screen will move towards the
square frame icon. When the circle icon and square frame
overlap and turn green, the camera will capture the next
picture automatically. Repeat the same step for the third
picture to nish the stitching.
The camera will then stitch the pictures into a panorama
automatically. Press the playback button to enter Playback
mode and review the panorama result.
After selecting Panorama mode, Flash, Self-timer,
Macro mode and Exposure Compensation can not be
adjusted.
Before ending the shooting sequence, pressing the
Delete button will cancel the shooting sequence.
Panorama Mode can stitch 2 or 3 pictures maximum.
3233
In Manual Scene mode, you can select from a total of 20
scene types to suit your needs. The camera will automatically
adjust to the optimal settings based on the scene type that is
chosen.
To enter the Scene Mode, turn the mode dial to Manual
Scene mode. The Scene Mode menu will appear.
Manual Scene Mode (SCN)
Select a scene using the Up/Down/Left/Right button and press
the button.
IconMode NameIconMode Name
LandscapeSport
BeachSunset
FireworksNight Landscape
Night PortraitGathering
ChildrenIndoor
SnowID
MuseumPhoto frame
Travel shootingText
LeafGlass
Fish eyeSketch
323333
Landscape
For landscapes. Vivid reproduction of green and blue.
Sport
For fast-moving subjects. Capture sharp action shots with
minimal blur. This mode is not recommended for shooting
indoors.
Beach
For taking pictures in areas with strong sunlight.
Sunset
For sunsets. Capture subjects in strong sunlight.
Fireworks
For reworks at night. Slow er shutter speed adjusted for
brilliant images. The use of a tripod is recommended.
Night Landscape
For night scenes. The use of tripod is recommended.
Night Portrait
For portraits against night scenery.
Gathering
For taking pictures of large groups or in areas with uneven
lighting.
Children
For children and pets. Flash is disabled for eye protection.
Indoor
For indoor settings. Reduce blur and improve color accuracy.
Snow
For snow scenes. Reproduce natural and clear white scenes.
ID
For shooting ID size photos.
Museum
For museum or ash-free area. Retain color and reduce blur.
Photo frame
For adding interesting frame eects to the photo.
343435
1. After selecting the Scene Type, press the button to
activate.
2. After setting the option, press the button to conrm
the setting and enter the selected Scene Selection mode
for shooting.
The main functions menu also allows you to adjust the image
quality and image size. Please refer to the "Advanced
Functions Menu" section on page 21 for detailed
instructions.
Travel shooting
Produces background image blur that emphasizes the motion
of the main subject.
Text
For taking pictures of text, documents or white boards.
Leaf
For plants. Capture brilliant shots of greenery and blossoms.
Glass
For objects behind transparent glass.
Fish Eye
Simulates sh-eye eect, by distorting the center of the
image.
Sketch
For taking photos with pencil sketch eect.
3435
This mode can help reduce photo blur caused by unintentional
hand shake, low light and slow shutter speed.
Use Stabilization Mode in dark environments or when
using a slow er shutter speed.
Shooting in a windy or unstable environment (such as a
moving vehicle) may cause blurred images.
Stabilization mode
36373637
Face Detection
Blink Detection
This function automatically detects facial features and directs
the camera to focus on them.
In face detection mode, press the shutter button halfway
and the camera will automatically detect faces and display a
rectangular focus frame around them. The focus frame will turn
green to indicate that the face or faces are in focus. Press the
shutter button the rest of the way to take the picture.
Blink Detection is enabled by default unless disabled by the
user. When shooting, if a subject is detected with its eyes closed,
the Blink Detection icon will appear on the screen to show
that a blink was detected.
36373637
Viewing Photos and Videos
PLAYBACK
To view the captured photos and video clips on the LCD screen:
1. After pressing the button, the last photo or video clip
taken will be displayed on the LCD screen.
2. Use the Left/Right navigation buttons to scroll through
the photos or video clips stored in the internal memory or
on the SD memory card.
3. To play a selected video clip, press the button to enter
the movie playback mode.
During video playback, the operating instructions will appear
on the screen. Press the Left/Right button, and press the
button to engage the following actions.
1
2
3
4
5
6
The operating instruction icons are as follows.
1Return to the rst
frame and play
4Return to the
rst frame
2Play5Rewind
3Fast Forward6Pause
383839
When playing a movie, press the Up/Down arrow button to
raise or lower the volume, to mute the volume press the down
arrow until the mute icon appears.
3839
Thumbnail View
4. Use the Up/Down/Left/Right button to select a picture
or video clip, then press the button to return to the
original size.
Date Folders are displayed in order, based on the
shooting date.
If the icon appears on the LCD, then a movie le is
currently being displayed.
When in Playback mode, press the to display thumbnail
images of photos and videos on the screen.
1. Use the Zoom button to switch between 3x3, 4x4 and the
Date Folder thumbnail display.
2. When displaying 3x3 and 4x4 thumbnails, use the Up/
Down/ Left/Right button to select a picture or video for
viewing; press the button to return to the original size.
3. When displaying date folder thumbnails, use the Up/Down
button to select a date folder. pressing the button will
enter the date information index.
4041
4041
Using Zoom Playback (for still pictures only)
The zoom buttons can also be used during playback. This
allows you to magnify photos from 2x to 8x.
1. Press the button to enter the Playback mode.
2. Use the Left/Right navigation buttons to select a photo to
magnify.
3. Press one end of the Zoom button to zoom in.
4. Use the Zoom buttons to zoom in and out. The zoom
magnication area scale and the total photo area scale
will display on the screen.
5. Use the navigation buttons to pan across the image.
6. Press the button to return the image to its original
size.
Movie images cannot be magnied.
4041
4041
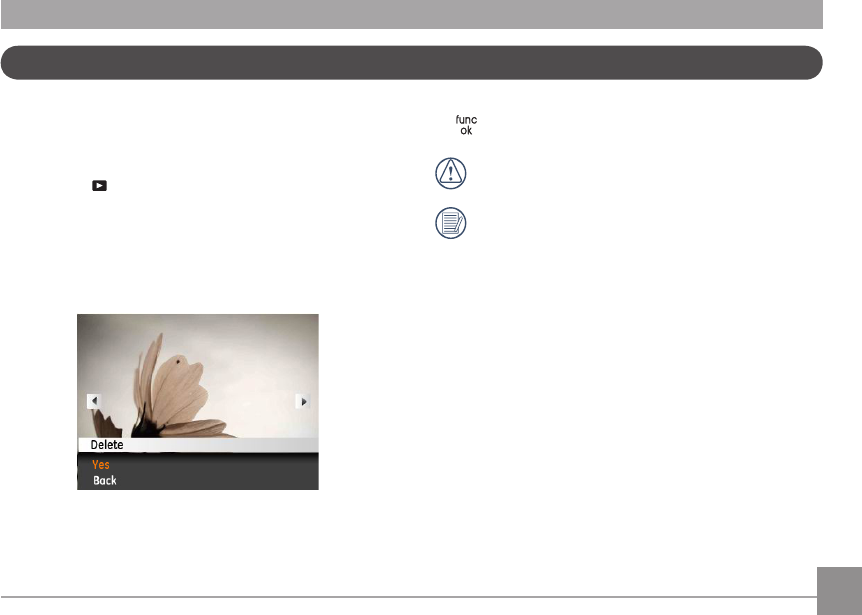
Using the Delete Button
In Playback Mode, you can press the Up/Delete button to
delete an unwanted photo or video.
To delete pictures or videos:
1. Press the button to switch to playback mode.
2. Select the picture or video clip you want to delete with the
Left/Right button.
3. After pressing the Up/Delete button, the delete screen will
display on the screen.
4. Select Yes or Back with the Up/Down button and press the
button for conrmation.
Erased photos/video clips cannot be recovered.
Please refer to page 52 for instructions on the Delete
Menu options.
4243
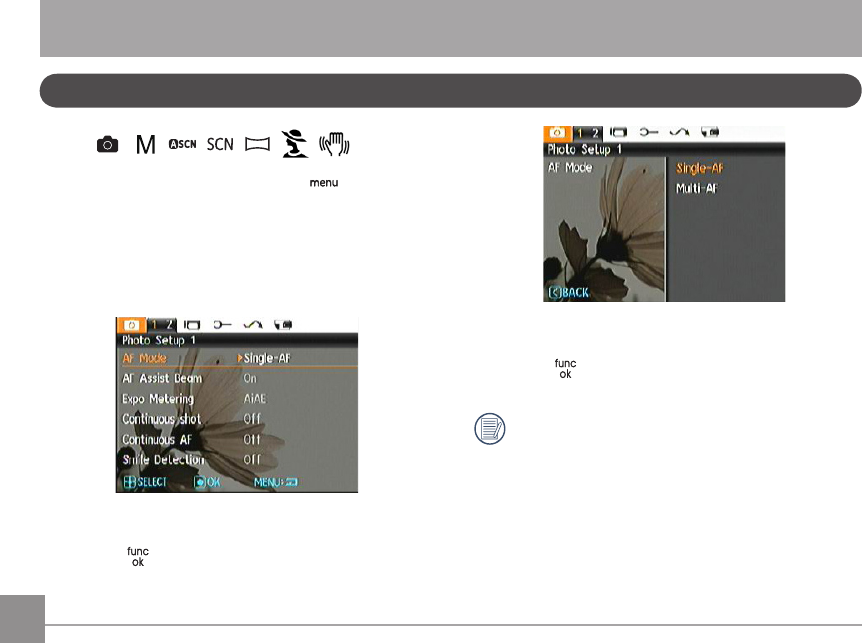
Still Menu
USING THE MENUS
Mode:
M
In any of the above Photo Modes, press thebutton to go
to the Photo Setup Manu.
To adjust each setting:
1. In the Photo Setup Menu, use the Left/Right button to
select the Tab (at the top of the screen) corresponding to
the page containing the function you wish to change.
2. Press the Up/Down buttons to select the function.
3. Press the or Right button to go to the submenu.
4. Press the Up/Down button to select an option or press the
Left button to return to the menu.
5. Press the button to conrm the setting and return to
the previous page.
After selecting a function, you can press the Up button
to return to the Still Picture menu for other Photo Setup
or Camera Setup pages. Or you can press the Down
button several times to move to the next setup menu
page.
Refer to the following pages for more details about each
setting.
424343
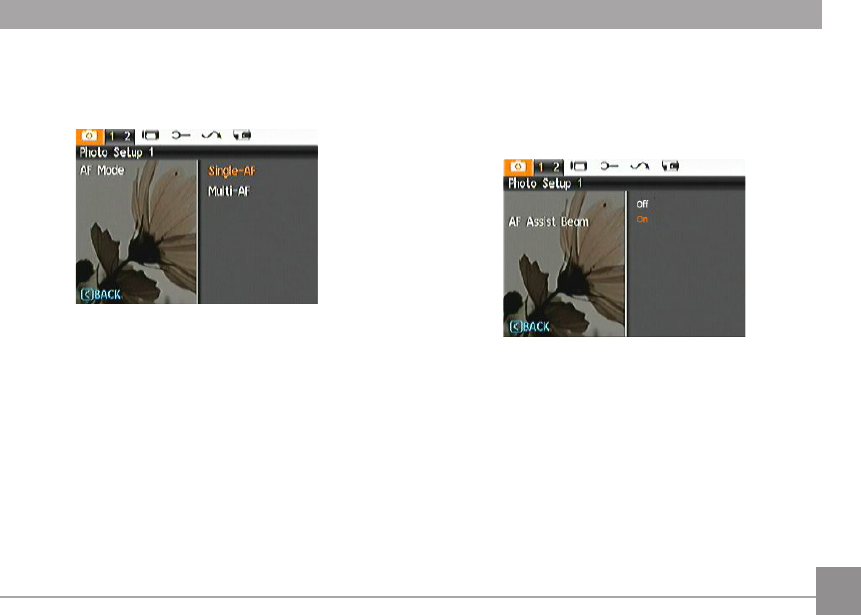
AF Mode (Auto-Focus Mode)
Use this setting to control the Auto-Focus mechanism while
taking pictures.
Two options are available:
• Single-AF: The focus frame appears in the center of the
LCD screen to focus on the subject.
• Multi-AF: The camera automatically focuses the subject
in a wide area to nd the focus point.
AF-Assist Beam
This option can turn on or turn o the AF assist lamp. The AF
assist beam is useful for focusing in the dark or in low lighting
conditions.
44
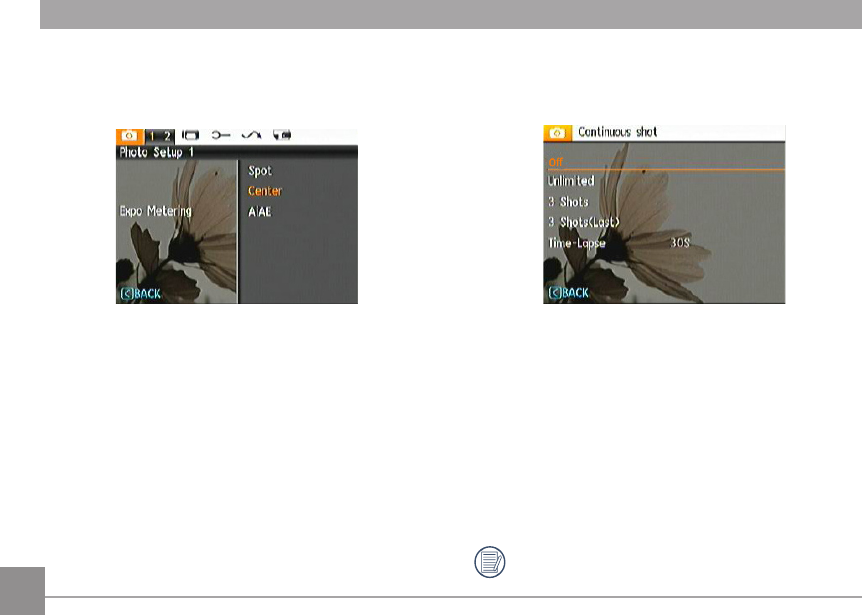
Expo Metering (Exposure Metering)
Use this setting to select the "target" size of the camera's eld
of view to be metered.
Three metering "target" sizes are available to choose from:
• Spot metering targets a small area in the center of the
camera's eld of view.
• Center metering targets a slightly larger area in the
center of the cameras eld of view.
• AiAE (Articial Intelligence AE) targets the camera's
entire eld of view.
Continuous Shot
Use this setting to perform continuous shooting. After entering
this mode, you can shoot multiple images by continuously
holding the shutter button down.
There are ve available options:
• O: Turns o the Continuous Shot function.
• Unlimited: Press and hold down the shutter button to
shoot continuously until you release the shutter button
or until the memory card has run out of space.
• 3Shots: Capture up to 3 consecutive pictures.
• 3 Shots (Last): Capture pictures continuously until the
Shutter button is released but only the last 3 shots are
recorded.
• Time Lapse: Automatically capture pictures at
predened intervals.
The ash is disabled in this mode in order to enable
quick succession of shots.
45
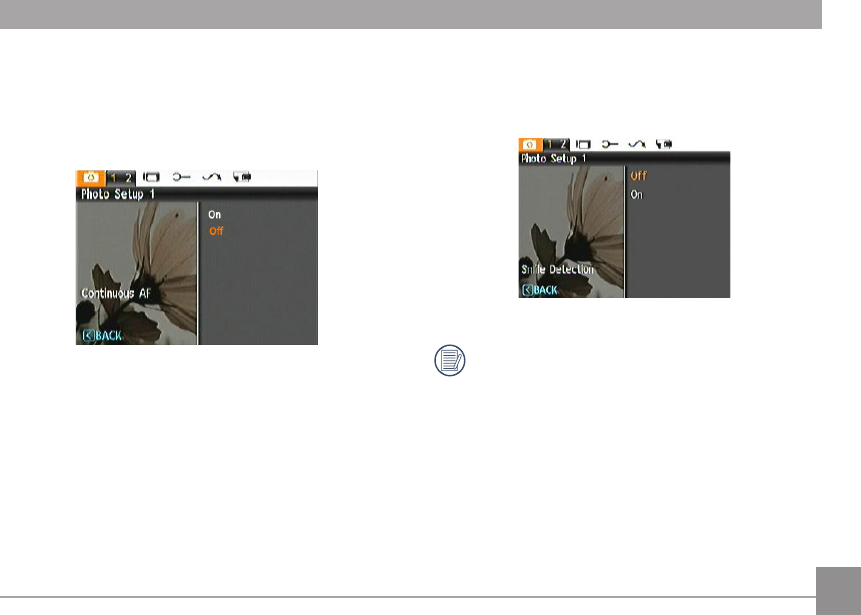
Smile Detection
With the "Smile Detection" feature, the camera automatically
detects and captures a person smiling.
A face must be detected by the camera in order for
smile detection to function correctly.
Continuous AF
With Continuous AF turned on, the camera will continually
adjust focus automatically in response to any camera or
subject movement.
46
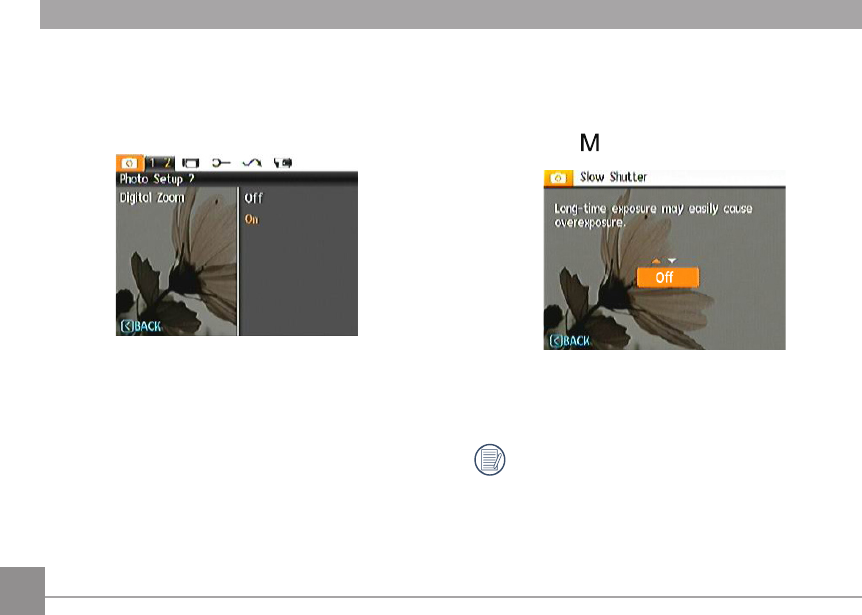
Digital Zoom
Use this setting to enable or disable the Digital Zoom function.
When Digital Zoom is turned o, only the optical zoom is
functional.
Slow Shutter
In Slow shutter mode, the shutter will remain open as long as
the Shutter button is pressed. This gives you complete control
over the duration of the exposure. (The slow shutter mode is
available only in
M
manual mode).
• Manual : To take a long exposure time between 2~30
sec.
The use of tripod is recommended when using
prolonged exposure times.
47
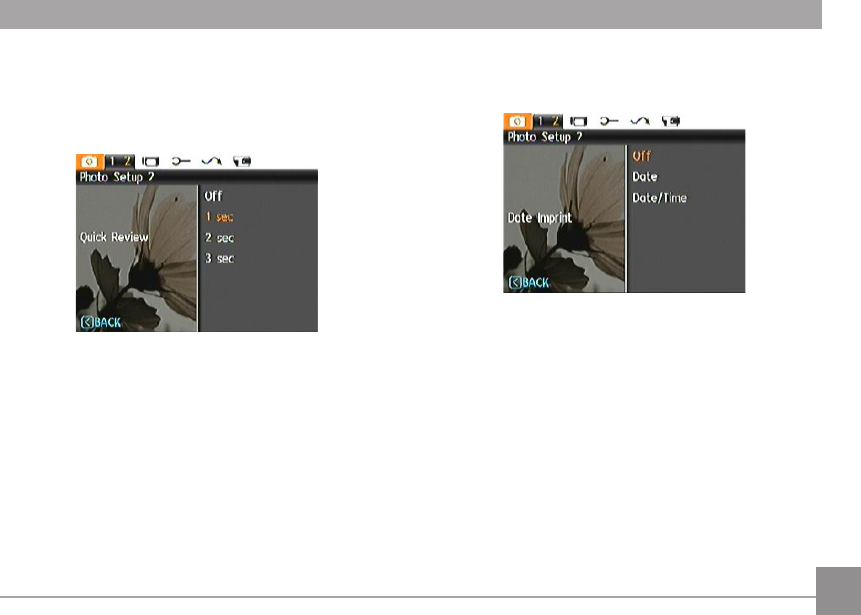
Date Imprint
Include a Date/Time stamp in the photo image.
• O
• Date
• Date/Time
Quick Review
This setting refers to the brief photo review immediately after
taking a picture. The picture stays on the LCD screen for an
adjustable period of time.
Four options are available:
• O
• 1sec
• 2sec
• 3sec
4849
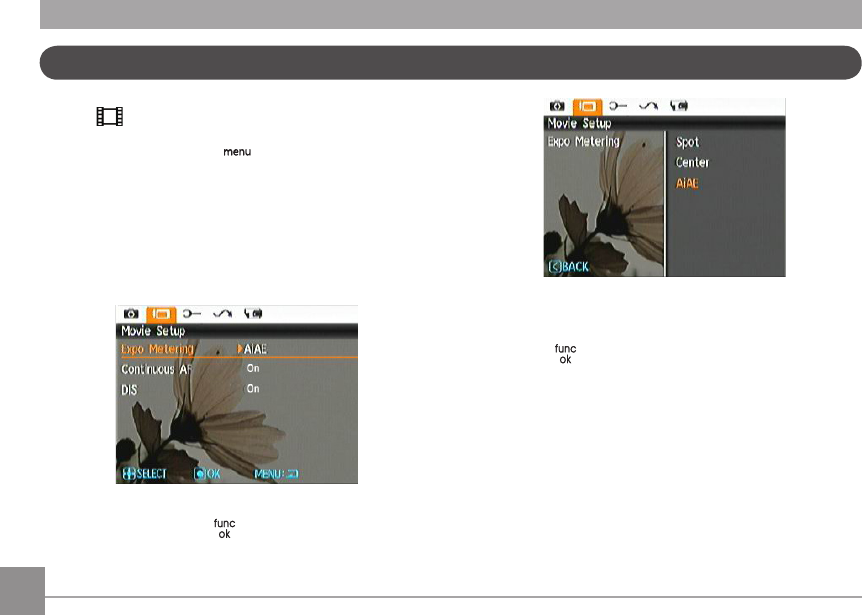
Movie Mode Menu
Mode:
In the Movie Mode, press the button to go to the
corresponding Movie menu.
To congure each setting:
1. In the Movie menu, switch between the Movie Setup or
dierent Camera Setup pages using the Left/Right button,
select the page with the function you want to adjust and
press the Down button.
2. Press the Up/Down arrow button to select the function
to be set, and press the or Right button to enter the
submenu.
3. Press the Up/Down button to select an option or the Left
button to return to the menu.
4. Press the button to conrm the setting and return to
the previous page.
Refer to the following pages for more details about each
setting.
484949
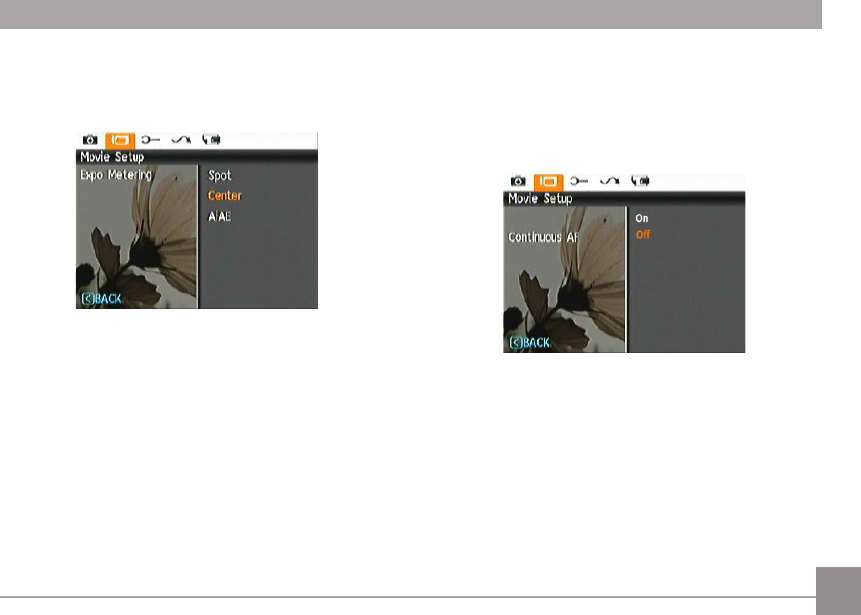
Continuous AF
After Continuous AF is turned on, the camera will adjust
focus automatically in response to any camera or subject
movement.
Expo Metering (Exposure Metering)
Use this setting to select the "target" size of the camera's eld
of view to be metered.
Three metering "target" sizes are available to choose from:
• Spot metering targets a small area in the center of the
camera's eld of view.
• Center metering targets a slightly larger area in the
center of the cameras eld of view.
• AiAE (Articial Intelligence AE) targets the camera's
entire eld of view.
505051
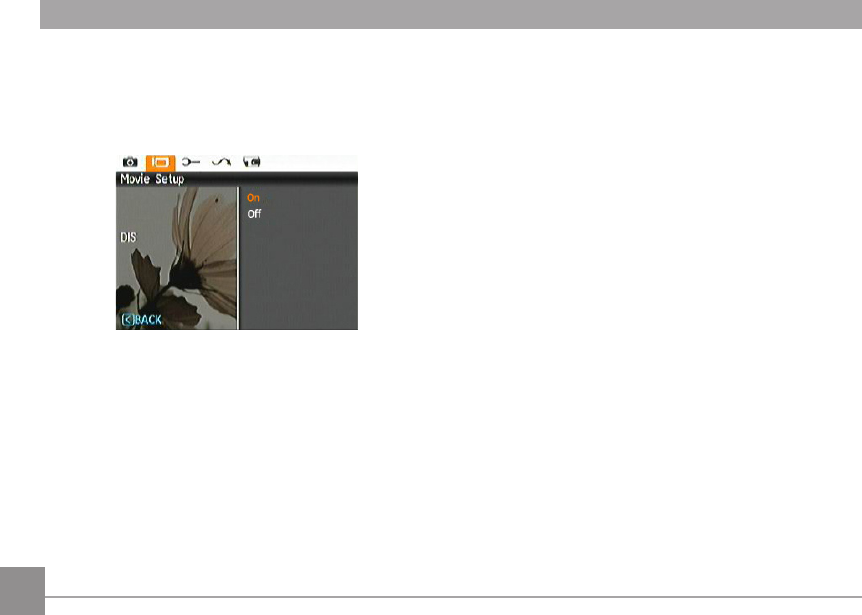
DIS
Using this function will ensure maximum stability of the screen
when recording.
5051
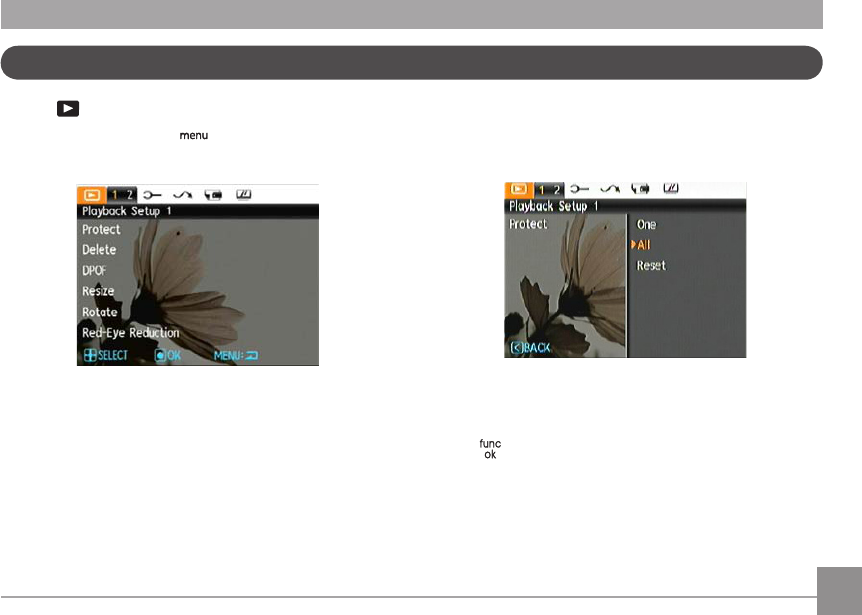
Playback Menu
Mode :
In Playback mode, press the button to enter the
Playback menu.
The following section provides detailed instructions on the
various menu options.
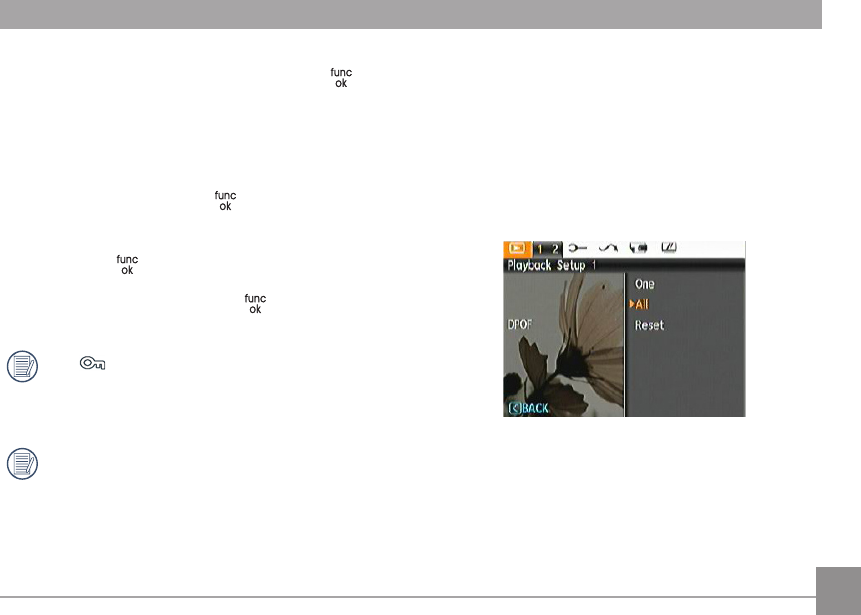
Protect
To prevent any pictures or videos from being accidentally
erased, use this setting to lock one or all of the les.
To protect/unprotect a picture or video:
1. Use the Up/Down arrow button and select Protect, press
the or Right button to enter the submenu.
52
2. Use the Up/Down button and select "One" to protect
individual photos or movies; or select "All" to protect
all photos and movies stored in the memory card. Press
the button to conrm and enter the photo/movie
protection interface.
3. Press the button then select Yes to lock displayed
photos or videos, or select Unprotect to unlock them, then
press the Up/Down button and select Back to return to the
playback menu.
Selecting "reset" will unprotect all previously protected
photos and videos.
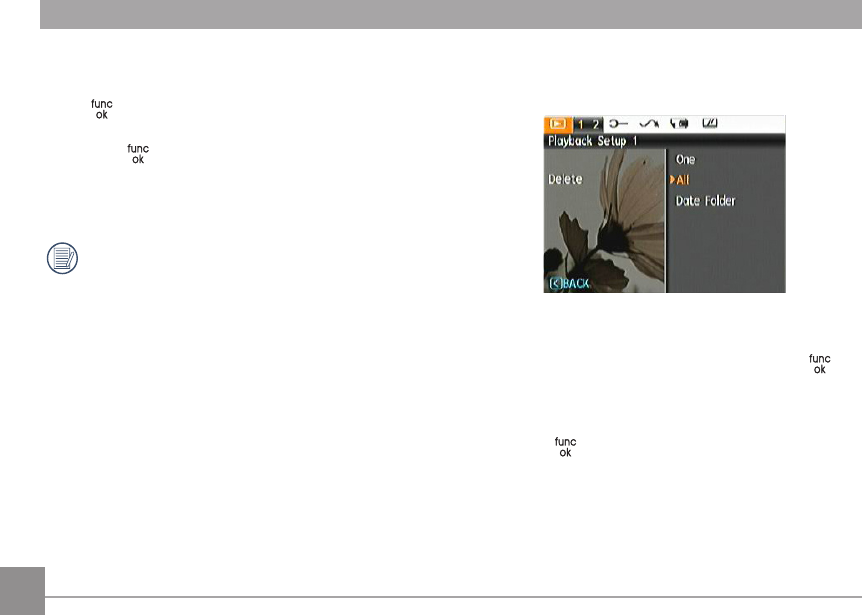
Delete
There are two ways to delete les.
• Delete One:
1. In the Delete Option, select One and then press the
button.
2. Press the Left/Right button to locate the photo or video to
be deleted. Press the Up/Down button and select yes and
press the button to delete the item or select "back" to
return to the previous menu.
53
• Delete All:
1. In the Delete option, select All and then press the
button.
2. Use the Up/Down button and select Yes to delete all les,
or select Back to return to the menu.
• Delete Date Folder:
1. In the Delete option, press the button after selecting
Date Folder.
2. Use the Up/Down button to select a Date Folder to be
deleted, press to conrm, then press the Up/Down
button to select item (Yes: to delete the le, or Cancel: to
return to the menu) and then press to conrm.
The “ ” indicator means a le is protected. File
protection must be removed rst before a le can be
deleted.
Deleting les will cause the DPOF settings to be reset.
DPOF (Digital Print Order Format)
The DPOF feature allows you to compile a selection of pictures
that you would like to have printed, and will save your
selection in the memory card so that you can simply hand your
SD memory card to a photo printing service without having to
individually specify which photos you would like to print.
54
Rotate
You can use this setting to change the orientation of the
picture.
1. Select the Rotate setting from the Playback menu as
described previously.
2. Use the Left/Right navigation buttons to select a picture
to rotate.
3. Use the Up/Down navigation buttons to select the
direction of rotation or Back to cancel and return to the
Playback menu.
4. Press the button to conrm the setting.
Videos and panoramic pictures cannot be rotated.
The rotated picture le will replace the original one.
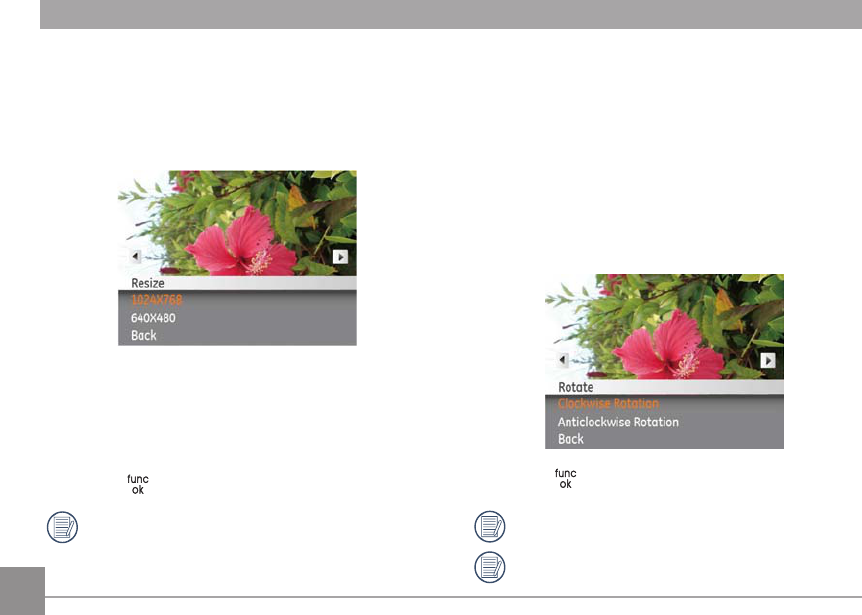
Resize
This setting allows you to resize a picture to a specied
resolution, and saves it as a new picture.
1. Select the Resize setting from the Playback menu as
described previously.
2. Use the Left/Right navigation buttons to select a picture
to resize.
3. Use the Up/Down navigation buttons to select a
resolution (1024X768 or 640X480) to resize the image or
Back to cancel and return to the Playback menu.
4. Press the button to conrm the setting.
Resizing an image creates a new le that contains the
image in the size you select. The le with the original
image also remains in the memory.
55
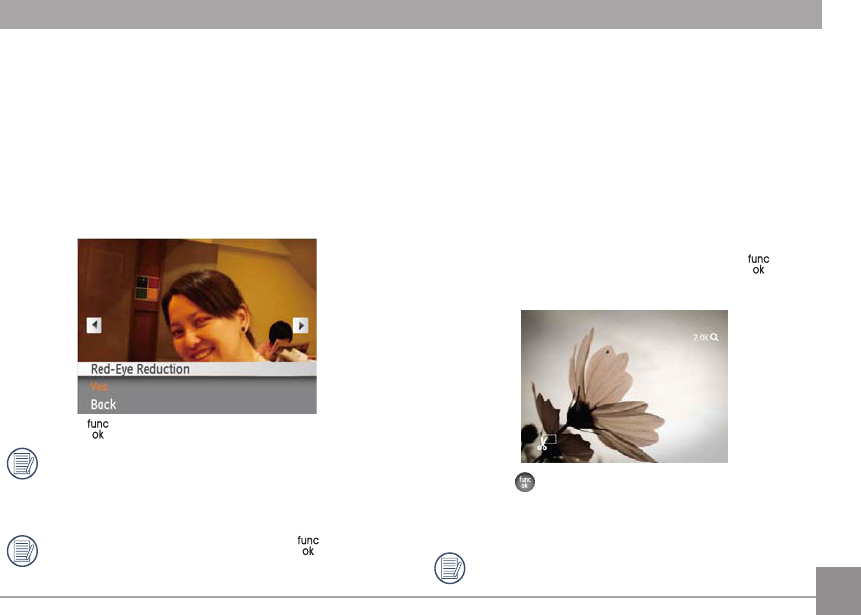
Red-Eye Reduction
Use this setting to remove red-eye eect in your photos.
1. Select the Red-EyeReduction in the Playback menu as
described previously.
2. Use the Left/Right button to select the picture that
requires red eye removal.
3. Use the Up/Down navigation buttons and select Yes to
x the selected image or Back to cancel and return to the
Playback menu.
4. Press the button to conrm the setting.
For best results, the face of the subject should be
relatively large in the LCD screen, the subject should
be facing the camera and the red-eye eect should be
clearly visible.
If there is no red eyes in the image, press button
after selecting “Yes”, such prompt will appear on the
screen: red eye is not detected!
Trim
The Trim setting allows you to crop photos and save them as
new pictures.
To trim a picture:
1. With the camera in Playback mode press the menu button
to access the Photo Menu. Then use the Left/Right button
and select the "playback setup 2" tab. Use the Down
button to select Trim and press the function button to
enter the Trim sub-menu.
2. Using the Left/Right buttons, locate the photo that you want
to crop. After the photo is displayed on the LCD screen press
the Down button, select Yes and press the function button.
3. Use the zoom buttons and navigation buttons to compose
the picture.
4. Press the button and a ‘Save Changes?’ prompt will
appear. Select “O” to conrm the changes and save the
new image, or select “X” to cancel the changes and return
to the previous menu.
The image can not be clipped/trimmed again once it
has been clipped to 640X480.
565657
HDR-High Dynamic Range
With the HDR function, pictures that are overexposed may be
corrected to optimize the highlights and lowlights captured to
more accurately represent the actual scene.
1. Select HDR setting in the Playback menu as described
previously.
2. Press the Left and Right button to nd the picture youPress the Left and Right button to nd the picture you
want to optimize and then select Conrm to perform HDR
optimization or select Return to go back to Playback menu.
3. After using the HDR function, the image will be saved as a
new le, and the original le is still stored in the memory.
5657
Display Setup
Mode:
Press thebutton in Playback mode to enter the Display
Setup menu.
Refer to the following sections for details of every setting.
Slideshow
This setting allows you to view all stored pictures as a
slideshow.
1. Select Slide Show menu, then press the or Right button
to enter the slide show setup interface.
2. Press the Up/Down button to select playback eect,
playback interval or repeat interval, and press the or
Right button to enter and adjust settings. press the
button to conrm settings.
3. Use the Up/Down navigation buttons and select Start
to run the slideshow or Cancel to return to the Playback
menu.
4. Press the button to conrm the setting.
58
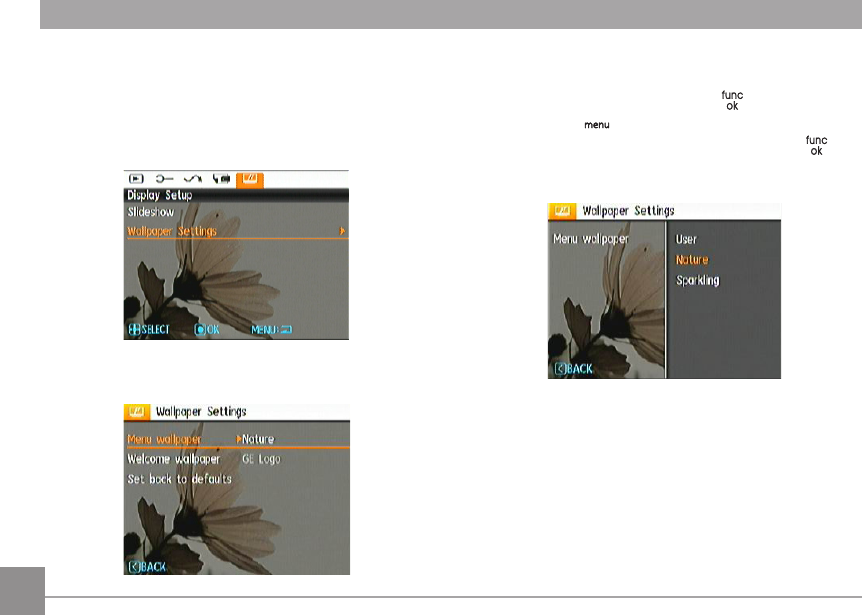
Wallpaper Settings
Use this setting to select your favorite picture as a background
on the LCD screen.
1. Press the Down button to select the Wallpaper Setting
menu.
2. Press Right, and the camera will enter the WallpaperWallpaper
Settinginterface. interface.
Menu Wallpaper:
From the Display Setup tab use the Up/Down button to select
the Wallpaper Settings option, press the button then press
Right to enter the wallpaper sub-menu. Press Right and
select either User, Nature, or Sparkling. Press function to
conrm the setting.
• UserUser
• Nature
• Sparkling
59
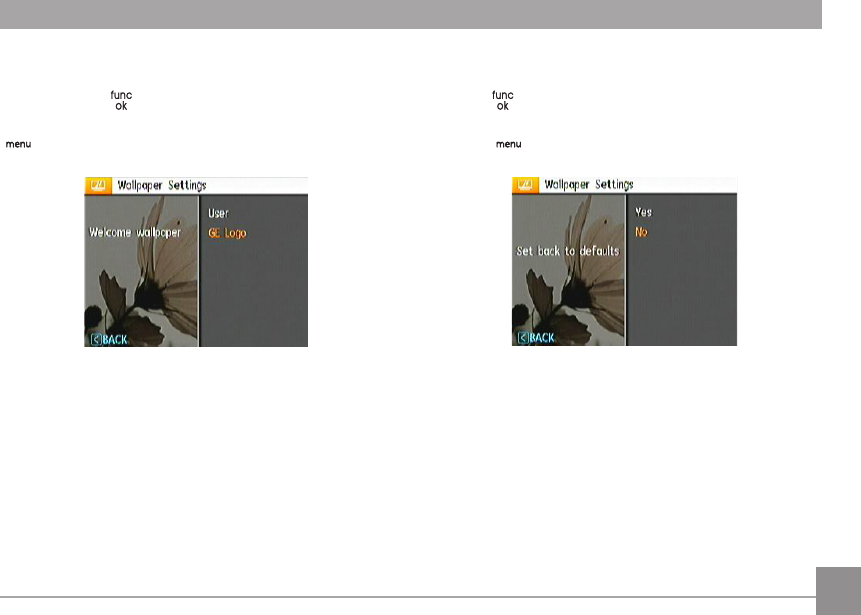
Startup Screen:
Use the UP/Down button to select the Welcome Wallpaper
option, press the or Right button to select welcome
wallpaper, press Left button to return to last page, and press
to exit the menu.
• UserUser
• GE Logo
Back To Default:
Use the Up/Down button to select the Back to Default option,
press the or Right button to select whether to take the
default settings, press the Left Button to return to last page,
and press to exit the menu.
• YesYes
• NoNo
6061
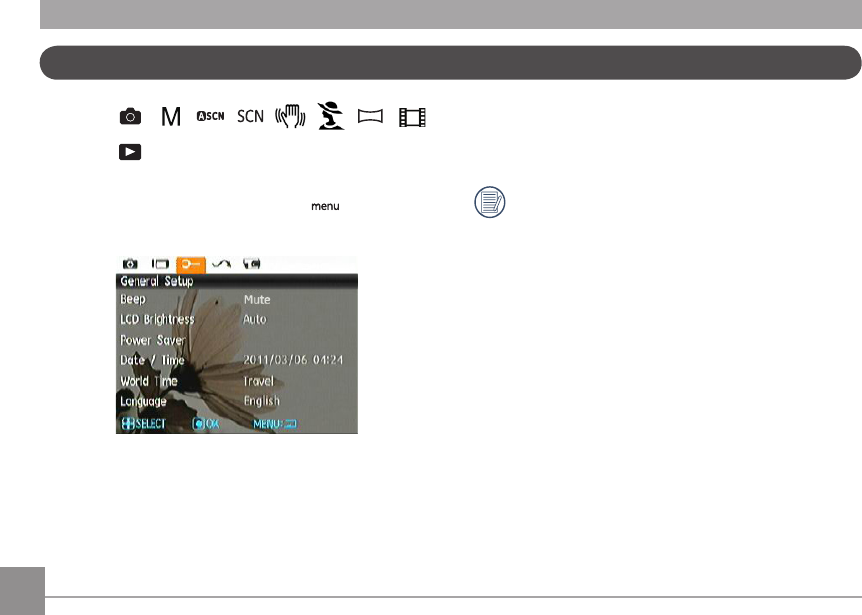
Setup Menu
Mode :
M
The Setup menu for the camera is available in all modes. Each
menu page can be selected by pressing the button and
switching between tabs with the Left/Right button.
To adjust the settings:
1. Select the menu tab that corresponds with the function
you want to adjust and press the Down button.
2. Switch between dierent functions with the Up/Down
button.
3. Press the Right button to enter the submenu.
After selecting a function option, you can press the Up
button to return to the menu for other Camera Setup
pages. Or you can press the Down button to switch to
the next menu page.
Refer to the following pages for more details about each
setting.
606161
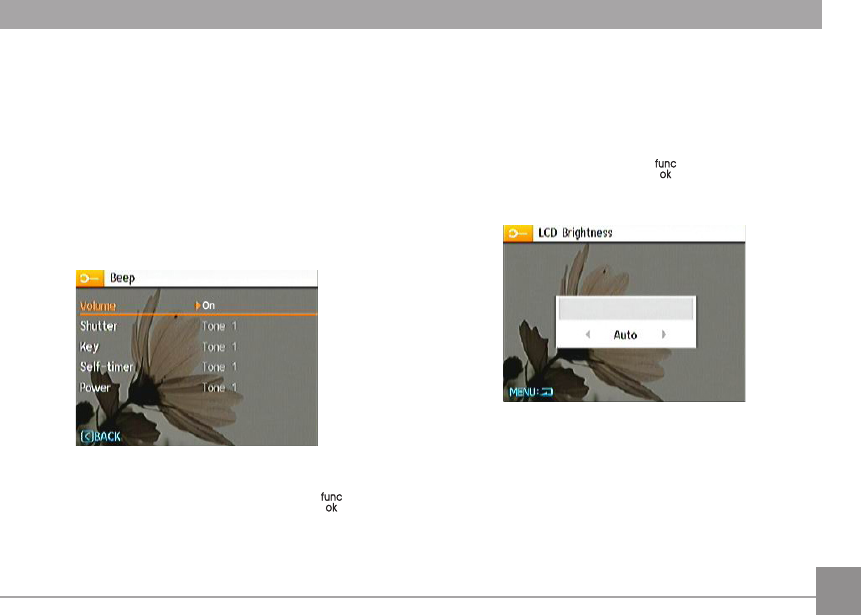
Beep
Use this setting to adjust the beep volume when buttons are
pressed and change the tones for Shutter button, self-timer,
and power-on/power-o.
To change this setting:
1. Select the Beep setting from the Setup menu as described
previously.
2. Use the Up/Down navigation buttons to switch between
volume, shutter, key, self-timer, and power elds.
3. Press the Right button, then press the Up/Down button to
adjust volume and change tones, and press the button
to conrm the setting.
LCD Brightness
Use this setting to adjust the brightness of your LCD screen.
1. Select the LCDBrightness setting from the Setup menu
as described previously.
2. Select auto or adjust the brightness level by using the
Left/Right button, and press the button to conrm the
setting.
626263
Power Saver
This setting allows you to save power and get the maximum
possible running time from your batteries. Follow the steps
below to turn o the LCD screen and camera automatically
after a period of inactivity.
1. Select the PowerSave setting from the Setup menu as
described previously.
2. Press the Up/Down button to select the power items for
the screen and camera and press the Right button.
3. Press the Up/Down button to adjust the selected item.
Both items have the following options:
• LCD O :
30 sec, 1 min, 2 min, and On.
• Camera O :
3 min, 5 min, 10 min, and On.
4. Press the button to conrm.
Date/Time
See “SettingtheDateandTime“ section on page 15.
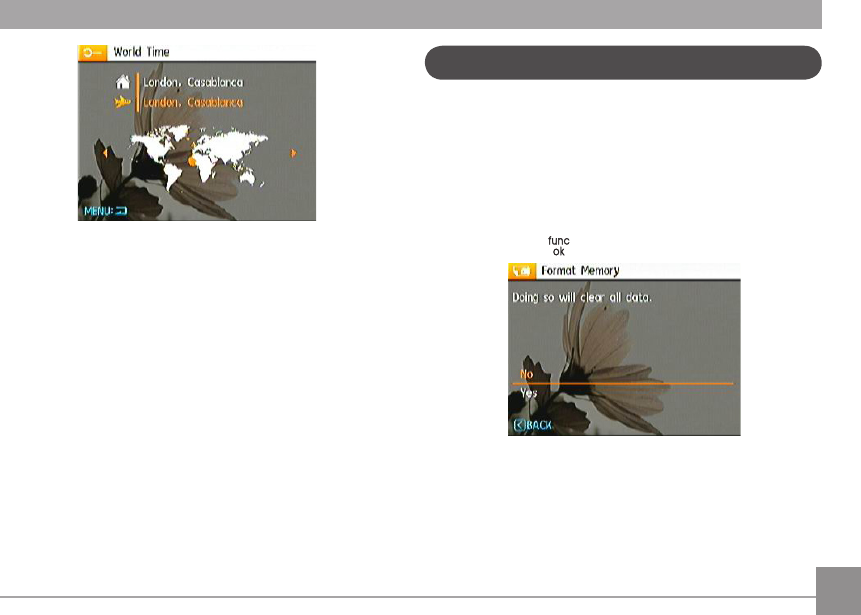
Zone
The Zone setting is a useful function on your overseas trips.
This feature enables you to display the local time on the LCD
screen while you are overseas.
1. Select the Zone setting from the Setup menu as
described previously. The world time screen will appear.
2. Use the Up/Down navigation buttons to switch between
the hometown ( ) and travel destination ( ) elds.
3. Use the Left/Right navigation buttons to select a city
close to the desired time zone. Then press the button
to conrm.
6263
Language
See “SettingtheLanguage“ section on page 15.
Format Memory
Please note: formatting enables you to delete all contents in
the memory card and built-in memory, including protected
photo and movie les.
To use this setting:
1. Select Format in the File and Software menu.
2. Use the Up/Down navigation buttons to select Yes or No.
Then press the button to conrm the setting.
3. Select Yes, and the camera will format the selected media.
4. Note that when you perform the Format Memory
function, it only formats the active memory. If a SD
memory card is inserted, the SD memory card is active
and will be formatted. If there is no SD memory card, the
internal memory is active and the internal memory will
be formatted. Formatting the SD memory card will not
automatically format the internal memory.
File and Software
64
File Numbering
After you take a picture or video clip, the camera will save
it in a sequential number. You can use this to reset the le
numbering to 1. (When there are more than 999 images on the
SD memory card, the use of this features will have no eect).
1. Select File Numbering in the File/Software menu, then
press Right.
2. Select the option with the Up/Down button and press the
button for conrmation.
Copy to Card (Copy internal memory to memory
card)
Use this setting to copy the les stored in the internal memory
to the memory card.
1. Select Copy to Card in the File/Software menu, then press
Right.
2. Use the Up/Down navigation buttons to select Yes or No.
Then press the button to conrm the setting.
65
FW Version (Firmware Version)
Use this setting to view the current camera rmware version.
Select FW Version in the File/Software menu, then press
Right.
To update to the latest rmware version, you can go to
the following website:
www.ge.com/digitalcameras and look under Support.
Reset Settings
Use this setting to restore the camera to its original factory
default settings.
1. Select Reset Settings in the File/Software menu, then press
Right.
2. Use the Up/Down navigation buttons to select Yes or No.
Then press the button to conrm the setting.
66676667
The video output signal can be switched to NTSC or PAL
to accommodate dierent regional TV standards. The
appropriate setting will vary between regions.
NTSC: USA, Canada, Taiwan, Japan, etc.
PAL: Europe, Asia (excluding Taiwan), Oceania, etc.
Note: The TV output will not display properly if an incorrect
video system is selected.
Use this feature to switch the video system from either NTSC
or PAL.
1. Select Video System in the Transmission menu, then
press Right.
2. Use the Up/Down navigation buttons to select NTSC or
PAL. Then press the button to conrm.
Video System
Transmission
66676667
Connecting to a PC
Use the included USB cable and ArcSoft software (CD-ROM)
supplied with your camera to copy (transfer) pictures to a
computer.
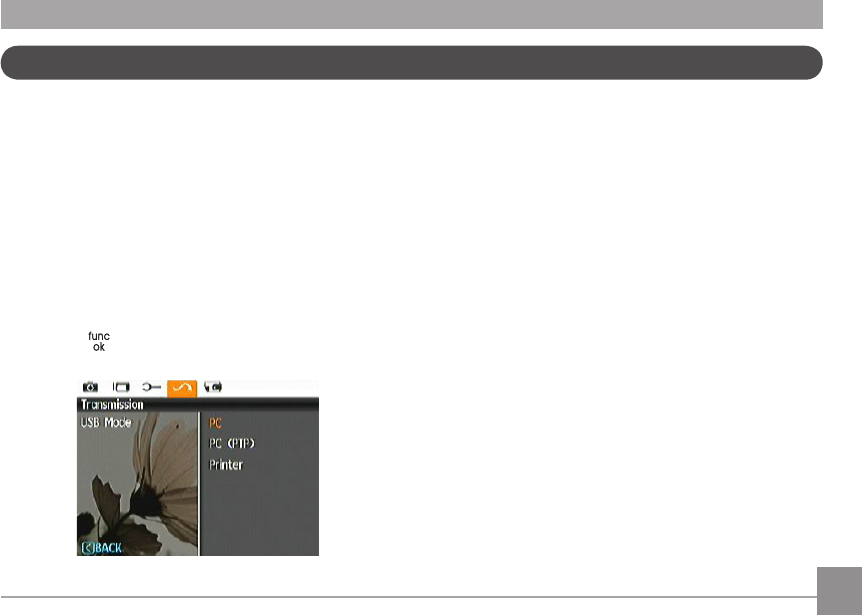
Setting the USB mode
The camera’s USB port can be set to connect with either a PC
or a Printer, the following steps will allow you to ensure that
the camera is correctly congured to connect with a PC.
1. Go to the Transmission menu, then select USB connection
with the Up/Down button, and press the Right button.
2. Use the Up/Down navigation buttons to select PC.
3. Press the button to conrm the setting.
Transferring les to your PC
The computer will automatically detect the camera as a
removable drive. Double-click the MyComputer icon on the
desktop to locate the removable drive and to copy folders and
les in the drive to a directory on your PC as you would copy
any typical folder or le.
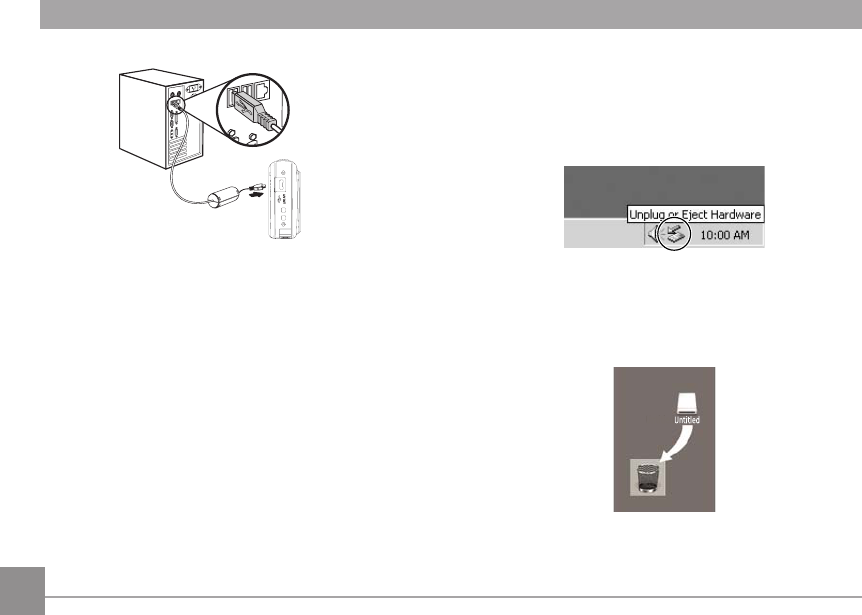
By using the included USB cable, you can transfer the captured
photos and videos to a PC. Follow the steps below to connect
the camera to a PC.
1. Start a computer in which the included ArcSoft software
has been installed.
2. Make sure both the camera and PC are turned on.
3. Connect one end of the supplied USB cable to the USB/AV
OUT port on your camera.
4. Connect the other end of the cable to an available USB
port on your PC.
686869
Windows operating system (Windows 2000, Windows XP,
Windows Vista, Windows 7).
Click the [Safely remove the hardware] icon and remove
the USB connector according to the appeared menu.
Macintosh
Drag the untitled icon to the Trash. ("Untitled")
5. Disconnect the camera once transfer is completed.
If the USB option is set to [PC] :
Turn the camera o and disconnect the USB cable.
If the USB option is set to [PC (PTP) ] :
Remove the camera from the system as described below
before turning the camera o and disconnecting the USB
cable.
6869
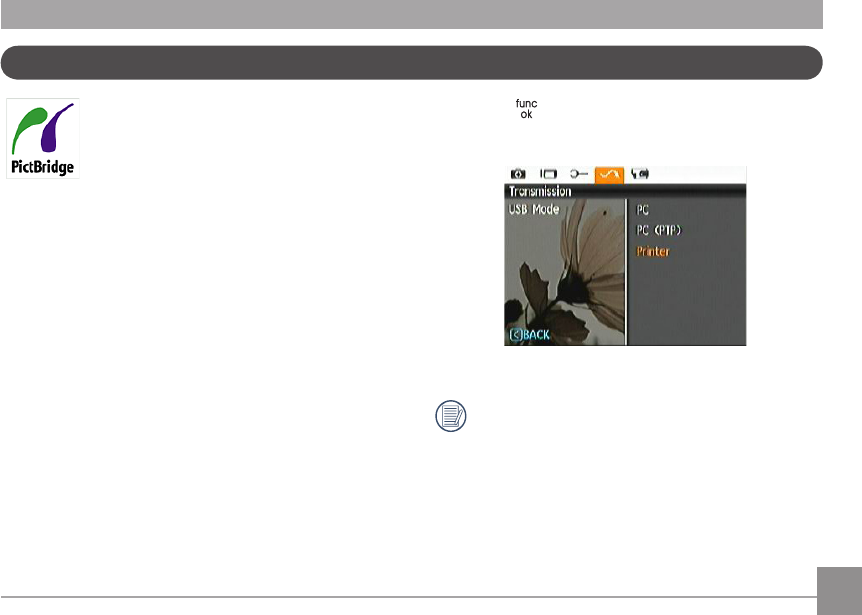
Connecting to a PictBridge Compatible Printer
PictBridge allows printing images from a SD
memory card in a digital camera directly to
a printer, regardless of brand. To nd out if a
printer is PictBridge compatible, simply look for
the PictBridge logo on the packaging or check
the manual for specications. With the PictBridge function on
your camera, you can print the captured photos directly to a
PictBridge compatible printer using the supplied USB cable,
without the need for a PC.
Setting the USB mode
The camera’s USB port can be set to connect with either a PC
or a Printer, the following steps will ensure that the camera is
correctly congured to connect with a Printer.
1. Go to the camera's Transmission menu and, select USB
connection with the Up/Down button, then press the Right
button.
2. Use the Up/Down button and select Printer.
3. Press the button to conrm the setting.
After the camera is reset, it will switch to PC mode
automatically from USB mode.
707071
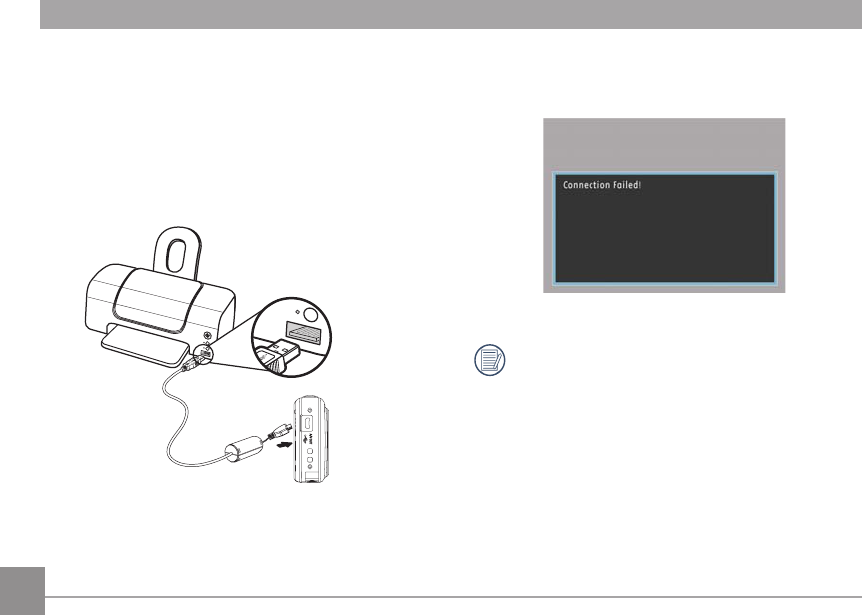
Connecting the camera and printer.
1. Make sure both the camera and printer are turned on.
2. Connect one end of the supplied USB cable to the USB port
on your camera.
3. Connect the other end of the cable to the USB port on the
printer.
If the camera is not connected to a PictBridge compatible
printer, the following error message will appear on the LCD
screen.
The above error message would also appear if the USB
mode was set incorrectly, in which case you should
disconnect the USB cable, check the USB mode settings,
ensure that the Printer is turned on, and then try
connecting the USB cable again.
7071
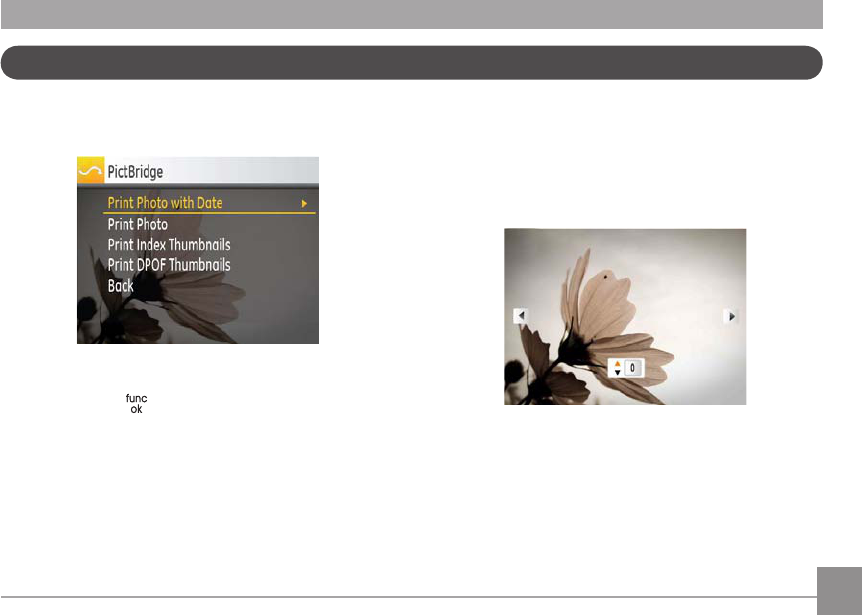
After setting the USB mode to Printer, the PictBridge menu
will appear.
Select a menu item with the Up/Down button and press the
Right button or the button to enter the item.
Refer to the following sections for more detailed information
on each setting.
Print with Date
If you have set the date and time on your camera, the date
and time will be recorded and saved with each photo you take.
1. Select Print withDate from the PictBridge menu. The
following screen will appear.
2. Use the Left/Right navigation buttons to scroll through
the photos.
Using the PictBridge Menu
72
3. Use the Up/Down navigation buttons to select the
number of prints for the current displayed photo.
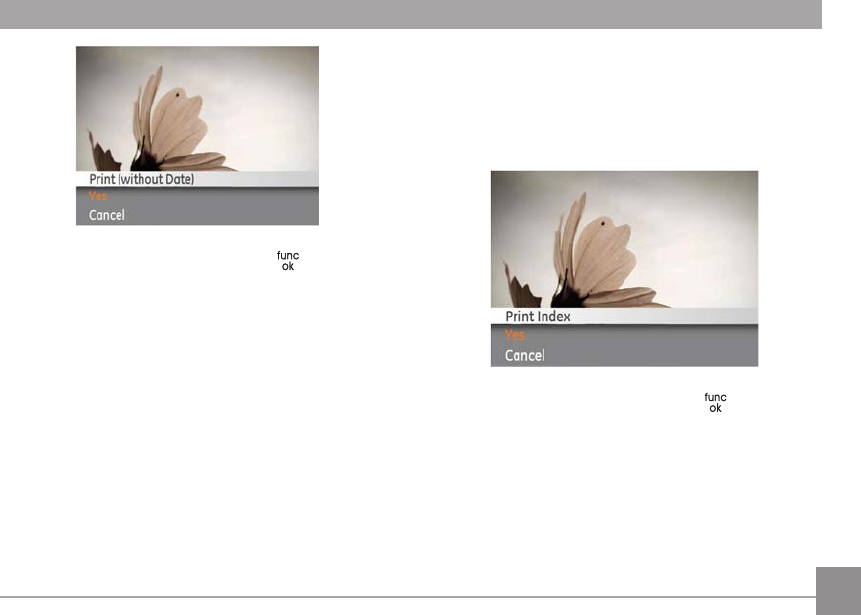
4. Press the button and the following screen will appear:
5. Select Yes to print or exit, then press button again.
Print without Date
Use this setting to print the photos without dates on them.
1. Select PrintwithoutDate from the PictBridge menu.
The following screen appears.
2. Use the Left/Right navigation buttons to scroll through
the images.
3. Use the Up/Down navigation buttons to select the
number of prints for the current displayed image.
4. Press the button and the following screen will appear.
73
5. Select Yes to print or exit, then press the button again.
Print Index
You can use this setting to print an index of all the photos
currently in your camera's memory.
1. Select Printindex from the PictBridge menu. The
following screen will appear.
2. Select Yes to print or exit, then press the button again.
747475
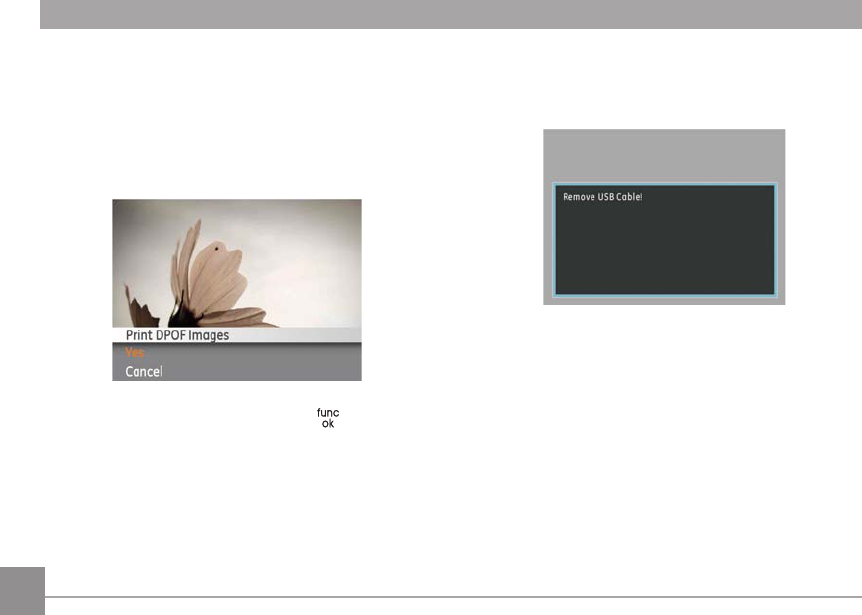
Exit
To exit the PictBridge menu, select Exit. The “Remove USB
cable” message will be displayed.
Disconnect the USB cable from the camera and printer.
Print DPOF (Digital Print Order Format)
To use DPOF printing, you must make the selection of photos
for printing using the DPOF settings beforehand. See “DPOF”
section on page 53.
1. Select PrintDPOF from the PictBridge menu. The follow-
ing screen will appear.
2. Select Yes to print or exit, then press the button again.
7475
Specications
APPENDICES
Design and specications are subject to change without notice.
Active Image Sensor Pixels14.20 Megapixels
Total Image Sensor Pixels14.48 Megapixels [1/2.3” (CCD)]
Lens
Focal Length F =5.0mm (Wide) ~ 25.0mm (Tele)
35mm lm equivalent28mm (Wide) ~ 140mm (Tele)
F numberF3.5 (Wide) ~ F5.2 (Tele)
Lens Construction10 groups 10 elements
Optical Zoom5X
Focusing Range
Normal: (Wide) 60cm ~∞, (Tele) 100cm ~ ∞;
Macro: (Wide) 5cm ~ ∞;
Anti-HandshakeDIS
Digital Zoom6x Digital Zoom (Combined Zoom: 30x)
76
Number of
Recording
Pixels
Still Image 14MP, 12MP(3:2), 10MP(16:9), 8MP, 5MP, 3MP, 0.3MP
Libble takes abuse of its services very seriously. We're committed to dealing with such abuse according to the laws in your country of residence. When you submit a report, we'll investigate it and take the appropriate action. We'll get back to you only if we require additional details or have more information to share.
Product:
Forumrules
To achieve meaningful questions, we apply the following rules:
First, read the manual;
Check if your question has been asked previously;
Try to ask your question as clearly as possible;
Did you already try to solve the problem? Please mention this;
Is your problem solved by a visitor then let him/her know in this forum;
To give a response to a question or answer, do not use this form but click on the button 'reply to this question';
Your question will be posted here and emailed to our subscribers. Therefore, avoid filling in personal details.
Register
Register getting emails for GE J1456W at:
new questions and answers
new manuals
You will receive an email to register for one or both of the options.
Get your user manual by e-mail
Enter your email address to receive the manual of GE J1456W in the language / languages: English as an attachment in your email.
The manual is 5,8 mb in size.
You will receive the manual in your email within minutes. If you have not received an email, then probably have entered the wrong email address or your mailbox is too full. In addition, it may be that your ISP may have a maximum size for emails to receive.
If you have not received an email with the manual within fifteen minutes, it may be that you have a entered a wrong email address or that your ISP has set a maximum size to receive email that is smaller than the size of the manual.
The email address you have provided is not correct.
Please check the email address and correct it.
Your question is posted on this page
Would you like to receive an email when new answers and questions are posted? Please enter your email address.