3.14.2.4 Tuindekking instellen
Volg onderstaande stappen om de tuindekking in te
stellen:
1. Gebruik de pijltoetsen links/rechts om
Gebied 1, 2
of
3
te kiezen.
2. Bevestig door op de OK-knop te drukken.
3. Gebruik de pijltoetsen omhoog/omlaag om te
wijzigen hoe ver de robotmaaier de
begeleidingsdraad moet volgen.
4. Druk op de pijltoets rechts en stel in hoe vaak dit
moet gebeuren.
5. Bevestig door op de OK-knop te drukken.
6. Druk op de knop Menu om terug te gaan naar het
overzichtsmenu van Tuindekking.
7. Ga verder met de instellingen van het volgende
Gebied
.
3.14.2.5 Area 1, 2 or 3 > Uitschakelen
Elk gebied kan worden uitgeschakeld en ingeschakeld
zonder dat de instellingen opnieuw moeten worden
ingevoerd. Selecteer
Uitschakelen
en druk op OK.
3.14.2.6 Gebied 1, 2 of 3 > Meer > Test
Het testen van geselecteerde instellingen kan worden
beschouwd als een normaal onderdeel van de
installatie.
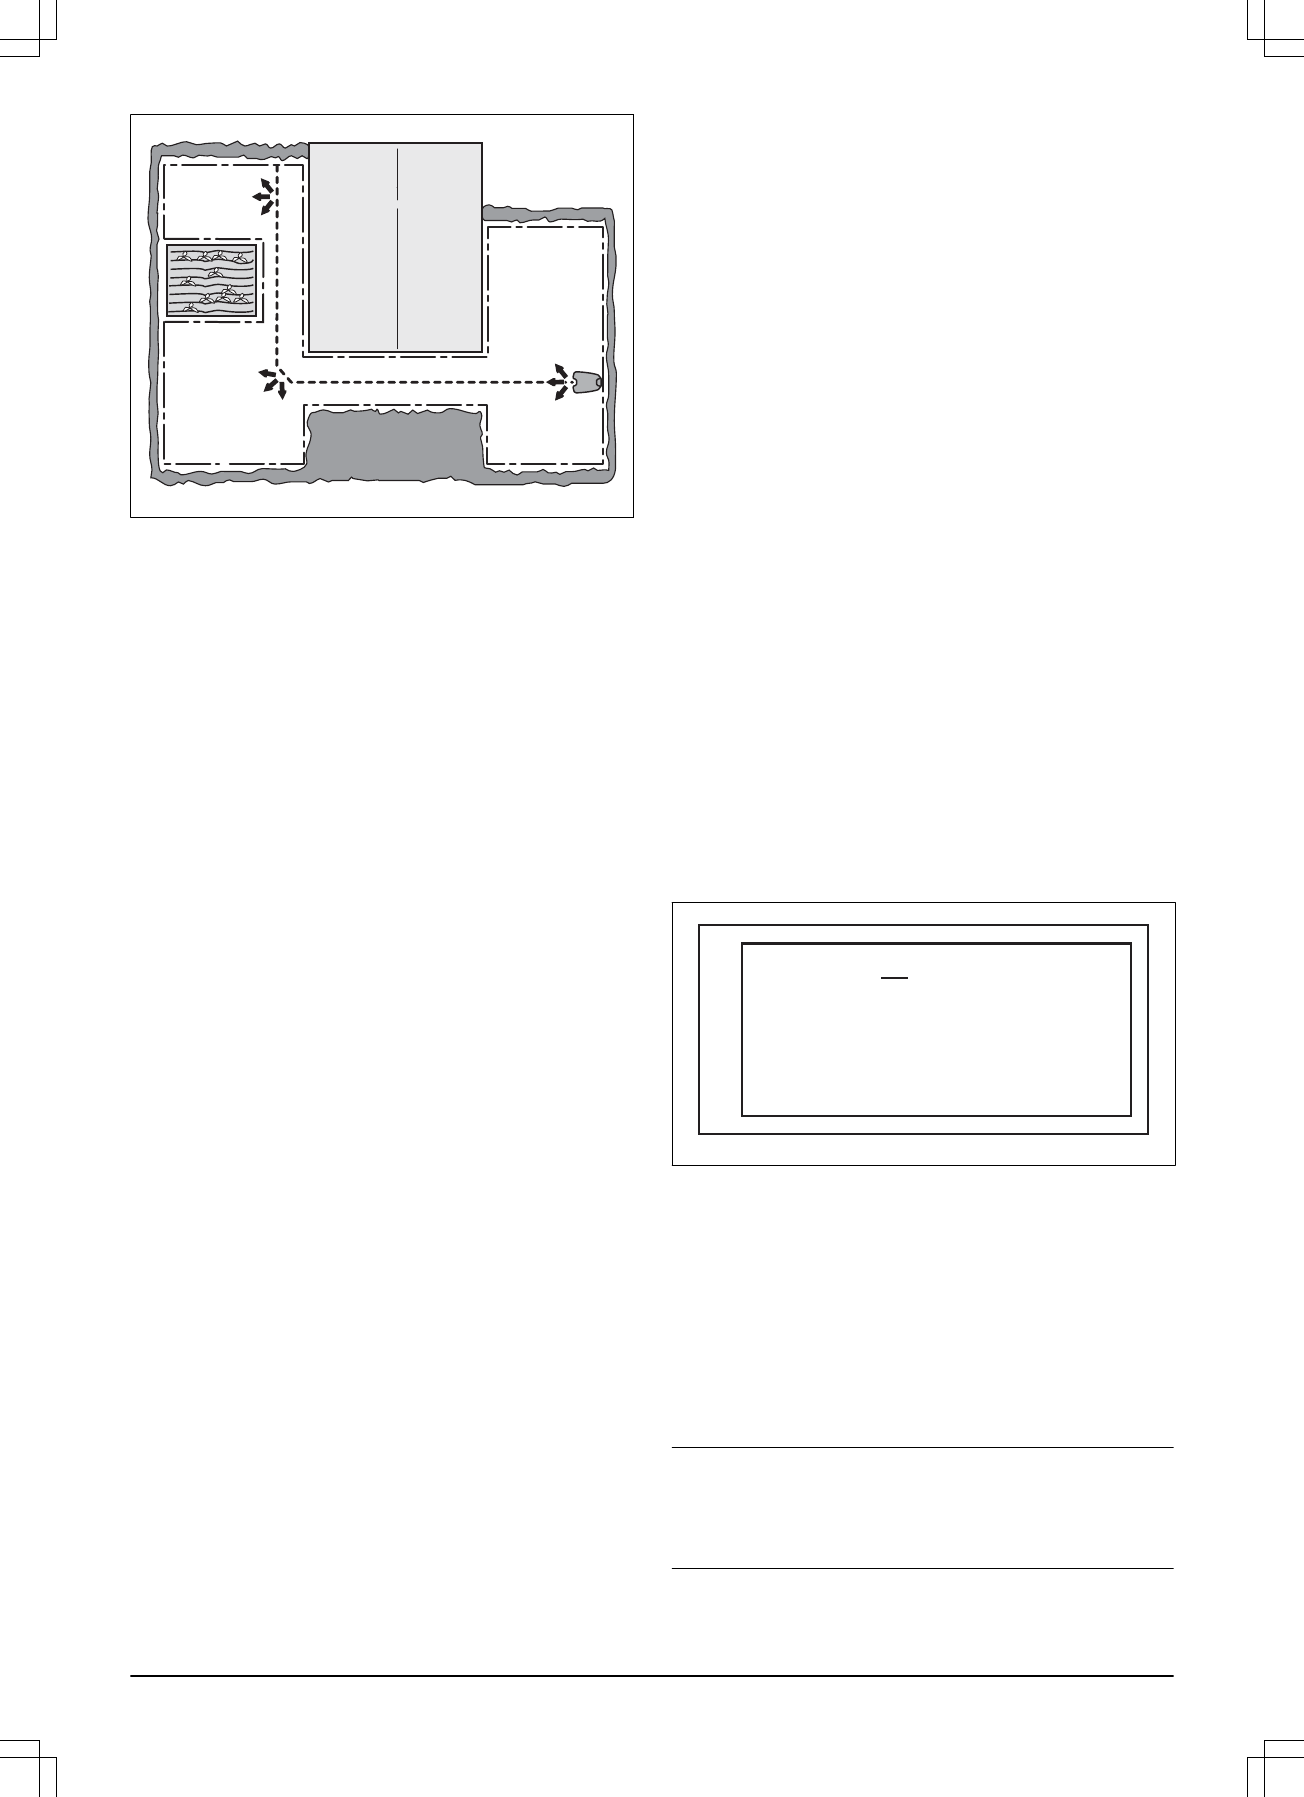
Als de functie
Test
wordt geactiveerd, rijdt de
robotmaaier zo ver mogelijk weg van de
begeleidingsdraad als is toegestaan op basis van de
doorrijbreedte.
Test: Area 1, 2 or 3
Om de geselecteerde instellingen te testen:
1. Plaats de robotmaaier in het laadstation.
2. Gebruik de pijltoetsen omlaag en rechts/links om het
te testen gebied te selecteren op het scherm
Overzicht tuindekking
. Druk op OK.
3. Selecteer
Meer
en druk op OK.
4. Selecteer
Test
en druk op OK.
5. Druk op de Start-knop en sluit de klep.
6. De robotmaaier zal nu het laadstation verlaten en de
begeleidingsdraad in de richting van het afgelegen
gebied gaan volgen. Controleer of de robotmaaier
de vereiste afstand langs de begeleidingsdraad
helemaal kan volgen.
7. De test is gelukt als de robotmaaier de
begeleidingsdraad zonder problemen kan volgen
naar het vereiste startpunt.
De afstand tot een afgelegen gebied meten
1. Parkeer de robotmaaier in het laadstation.
2. Voer in de menufunctie
Area 1, 2 or 3
>
Hoe ver?
een afstand in, die bij twijfel, hoger is dan het
werkelijke getal. De maximale afstand die kan
worden ingevoerd is 500 meter.
3. Selecteer
Area 1, 2 or 3
>
Meer
>
Test
en druk op
OK.
4. Druk op de Start-knop en sluit de klep.
5. Druk op STOP op de gewenste positie. De afstand
wordt nu weergegeven in het display. Dit getal kan
nu worden opgeslagen in
Area 1, 2 or 3
>
Hoe ver?
.
Area 1, 2 or 3 > Meer > Reset
Via deze functie kan een afzonderlijke gebiedsinstelling
worden teruggezet naar de fabrieksinstelling. Selecteer
Area 1, 2 or 3
> Meer >
Reset
met behulp van de
pijltoetsen links/rechts gevolgd door OK om een
gebiedsinstelling te resetten.
3.14.3 Installatie
Voor veel werkgebieden is er geen noodzaak tot
wijziging van de fabrieksinstellingen, maar soms kan
afhankelijk van de gazoncomplexiteit het maairesultaat
worden verbeterd door handmatige instellingen te
maken.
3.14.3.1 Start punt
Met deze functies kunt u bepalen hoe ver de
robotmaaier uit het laadstation rijdt voordat deze begint
te werken (maaien of tuindekking). Dit is een nuttige
functie wanneer het laadstation bijvoorbeeld onder een
veranda of in een andere krappe ruimte is geplaatst.
Gebruik de cijfertoetsen om de gewenste afstand in
centimeters in te voeren. De fabrieksinstelling is 60 cm
en de maximale afstand is 300 cm. Zie
Ingebruikname
op pagina 22
.
Let op: Het kiezen van een goed startpunt is belangrijk
zodat het kalibratieproces van de begeleiding kan
worden geoptimaliseerd. Zie
Kalibratie
begeleidingsdraad op pagina 22
.
367 - 004 - 16.02.2018 Installatie - 29