38
en Cleaning and maintenance
Notes
– Remove all accessories from the cooking
compartment before starting the descaling
programme (wire rack, cooking containers, core
temperature probe).
– The strainer filter must remain inserted in the
cooking compartment floor while the descaling
programme is in progress.
– Always allow the descaling programme to run to the
end. The descaling programme cannot be
cancelled.
Starting the descaling program
1Set the function selector to S.Use the rotary
selector to select the descaling program.
2The ‘ symbol will be displayed. Press ™ to
confirm.
3Remove all accessories from the cooking
compartment. Press ™ to confirm.
4Remove the descaling tablet from the plastic
packaging.
mWarning – Risk of injury!
Descaling tablets may cause chemical burns in the
mouth, throat, eyes and on the skin. Follow the
safety instructions on the packaging of the
descaling tablets. Avoid the skin coming into
contact with the descaling tablets. Keep children
away from descaling tablets.
mWarning – Risk of injury!
The descaling solution may cause chemical burns in
the mouth, throat and eyes or on the skin. Avoid the
skin coming into contact with the descaling
solution. Keep children away from descaling
solution. Do not drink the descaling solution. The
descaling solution must not come into contact with
food. Rinse out the water tank thoroughly before
you next use the appliance.
Caution!
Risk of damage to the appliance
Using the wrong descaler may damage the
appliance. Only use the specified descaling tablets.
5Remove the fresh water tank from the appliance and
take off the lid.
6Place the descaling tablet in the compartment at
the back of the fresh water tank. Fill the fresh water
tank with water up to the "Max." mark (1.7 litres).
7Position the lid on the fresh water tank and click it
into place.
8Slide the fresh water tank into the appliance.
9Close the appliance door. Press ™ to confirm.
A descaling time of 1 hour 50 minutes is displayed.
10 Press I to start. The descaling time will count down
on the display. The light in the cooking
compartment remains switched off.
11 After 1 hour 30 minutes, a message appears in the
display. Drain the used-water tank, clean it
thoroughly and insert it into the appliance. Clean
the fresh-water tank thoroughly, fill it with 1.7l
water and insert it into the appliance. Press ™ to
confirm.
mWarning – Risk of injury!
The descaling solution may cause chemical burns in
the mouth, throat and eyes or on the skin. Avoid the
skin coming into contact with the descaling
solution. Keep children away from descaling
solution. Do not drink the descaling solution. The
descaling solution must not come into contact with
food. Rinse out the water tank thoroughly before
you next use the appliance.
O
0D[
0D[
/
used water tank after descaling. You must therefore
descaling program has ended.
from the appliance and take off their lids.
tank lid in the dishwasher.
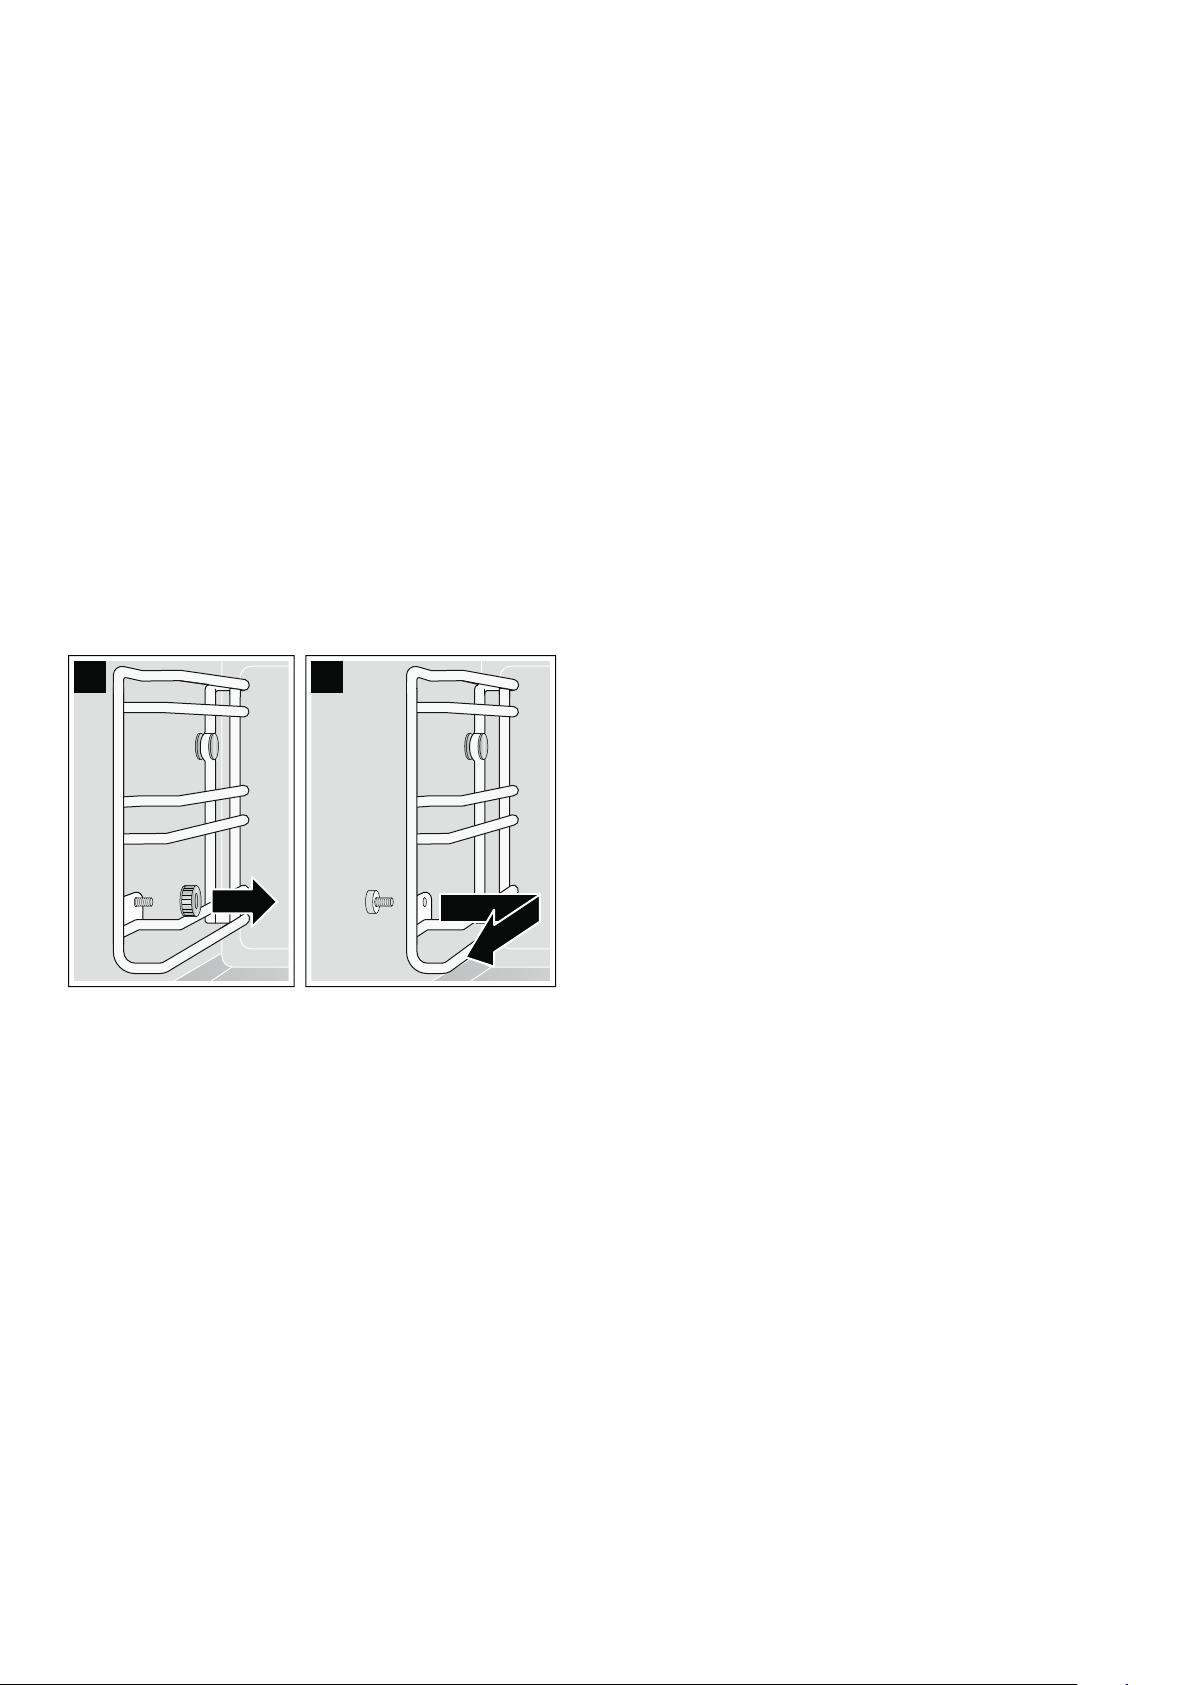
The wire racks can be removed for cleaning.
protect the enamel from scratches.
screw and pull them out towards the front (Fig. B).
You can clean the wire racks in the dishwasher.
end stop at the back.
reattach them at the front.
cooking compartment.