512112
98
Zoom out
Zoom in
Previous page
1/116
Next page
98
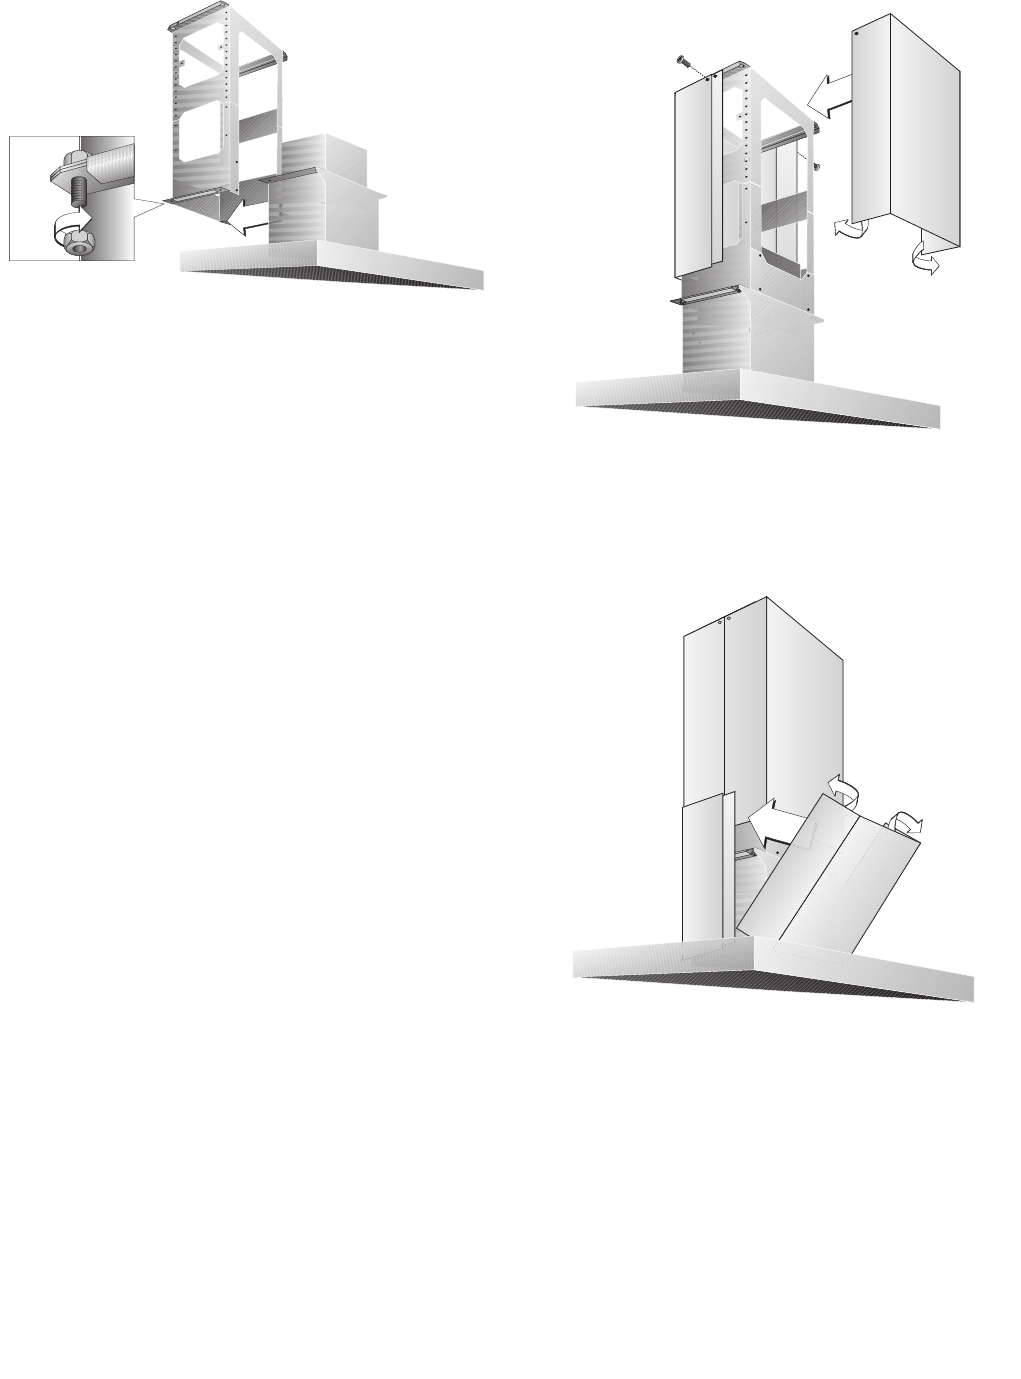
7 Deslice la campana de extracción dentro de las
pestañas laterales (Atención: No aplastar el
cable de conexión) y asegure la campana de
inmediato con 4 tornillos.
8 Atornille firmemente la cubierta de chapa en la
parte posterior del bastidor de soporte. La
cubier-ta de chapa es importante para la
estabilidad.
9 Sujete el tubo de aire de escape en la campana
de extracción de vahos y en la conexión para el
aire en el lado de techo o bien desvío de aire
para funcionamiento de recirculación de aire.
10 Establezca la conexión eléctrica.
11 Retire la lámina de protección del embellecedor
de la chimenea, siempre que aún este
colocada.
12 Preste atención durante el montaje del
revestimiento de chimenea de no arañar la
superficie sensible.
13 Fije la parte superior de la chimenea sin tiras
magnéticas con 2 tornillos en la parte superior
del bastidor de soporte.
14 Abrir ligeramente la segunda mitad superior de
chimenea (con tiras magnéticas) y deslizarla
sobre la primera mitad de chimenea, alinear
(sin ranura), y fijar con 2 tornillos en la parte
superior del bastidor de soporte.
15 Coloque la parte inferior de la chimenea inferior
sin tiras magnéticos sobre la campana de
extrac-ción de vahos. Doblar ligeramente hacia
arriba la segunda mitad de la chimenea (con
tiras magnéticas) deslizarla sobre la primera
mitad de chimenea y alinear (¡Sin fisura!).
16 Sólo para aire de recirculación: Inserte un
filtro de carbono activo. El filtro de carbono
activo no está contenido en el volumen de
suministro.
17 Compruebe el correcto funcionamiento del
aparato.
Indicación: Para el desmontaje de las mitades de
chimenea estirar ligeramente con las manos. No
utilice herramienta ya que podría conllevar daños en
la chimenea.
98


Need help? Post your question in this forum.

Forumrules


Report abuse

Libble takes abuse of its services very seriously. We're committed to dealing with such abuse according to the laws in your country of residence. When you submit a report, we'll investigate it and take the appropriate action. We'll get back to you only if we require additional details or have more information to share.

Product:

For example, Anti-Semitic content, racist content, or material that could result in a violent physical act.

For example, a credit card number, a personal identification number, or an unlisted home address. Note that email addresses and full names are not considered private information.

Forumrules

To achieve meaningful questions, we apply the following rules:

Register

Register getting emails for Gaggenau AI402120 at:


You will receive an email to register for one or both of the options.


Get your user manual by e-mail

Enter your email address to receive the manual of Gaggenau AI402120 in the language / languages: English, German, Dutch, French, Italian, Portuguese, Spanish as an attachment in your email.

The manual is 3,34 mb in size.


You will receive the manual in your email within minutes. If you have not received an email, then probably have entered the wrong email address or your mailbox is too full. In addition, it may be that your ISP may have a maximum size for emails to receive.

The manual is sent by email. Check your email

If you have not received an email with the manual within fifteen minutes, it may be that you have a entered a wrong email address or that your ISP has set a maximum size to receive email that is smaller than the size of the manual.

The email address you have provided is not correct.

Please check the email address and correct it.

Your question is posted on this page

Would you like to receive an email when new answers and questions are posted? Please enter your email address.


Info