GETTING STARTED WITH A BASIC HELICOPTER
This guideline is intended to help you set up a basic (SWH1) heli, to get acquainted with the radio, to give you a jump start
on using your new radio, and to give you some ideas and direction on how to do even more with this powerful system than
you may have already considered. It follows our basic format of all programming pages – a big picture overview of what
we're trying to accomplish; a “by name” description of the steps to help acquaint you with the radio; and then a step-by-
step instruction to leave out the mystery and challenge of setting up your model.
Briefly, the typical helicopter’s controls are as follows:
• Aileron: changes cyclic lateral (roll) . Rolls the helicopter. Tilts the swashplate to the left or right. CH1.
• Elevator: changes cyclic pitch. Changes the helicopter’s angle of attack (nose up or nose down). Tilts the entire
swashplate fore and aft. CH2.
• Rudder: changes the angle of the tail rotor. Yaws the helicopter left or right. CH4.
• Collective Pitch: adjusts main rotor collective [angle of the paddles], changing the main blades’ pitch. Increased collective
pitch (with throttle) causes the helicopter to rise. Moves in conjunction with throttle on the T
HROTTLE STICK. CH6.
• Throttle: opens/closes carburetor. Moves in conjunction with collective pitch on the THROTTLE STICK. CH3.
• REVO: mix that adds rudder in conjunction with pitch. This helps compensate for rotation of the helicopter caused by
the increased engine torque. (Never use revo. mixing with a heading-hold/AVCS gyro; the gyro already does this.)
For additional details, see that function's section in this manual — the page numbers are indicated in the first column for you..
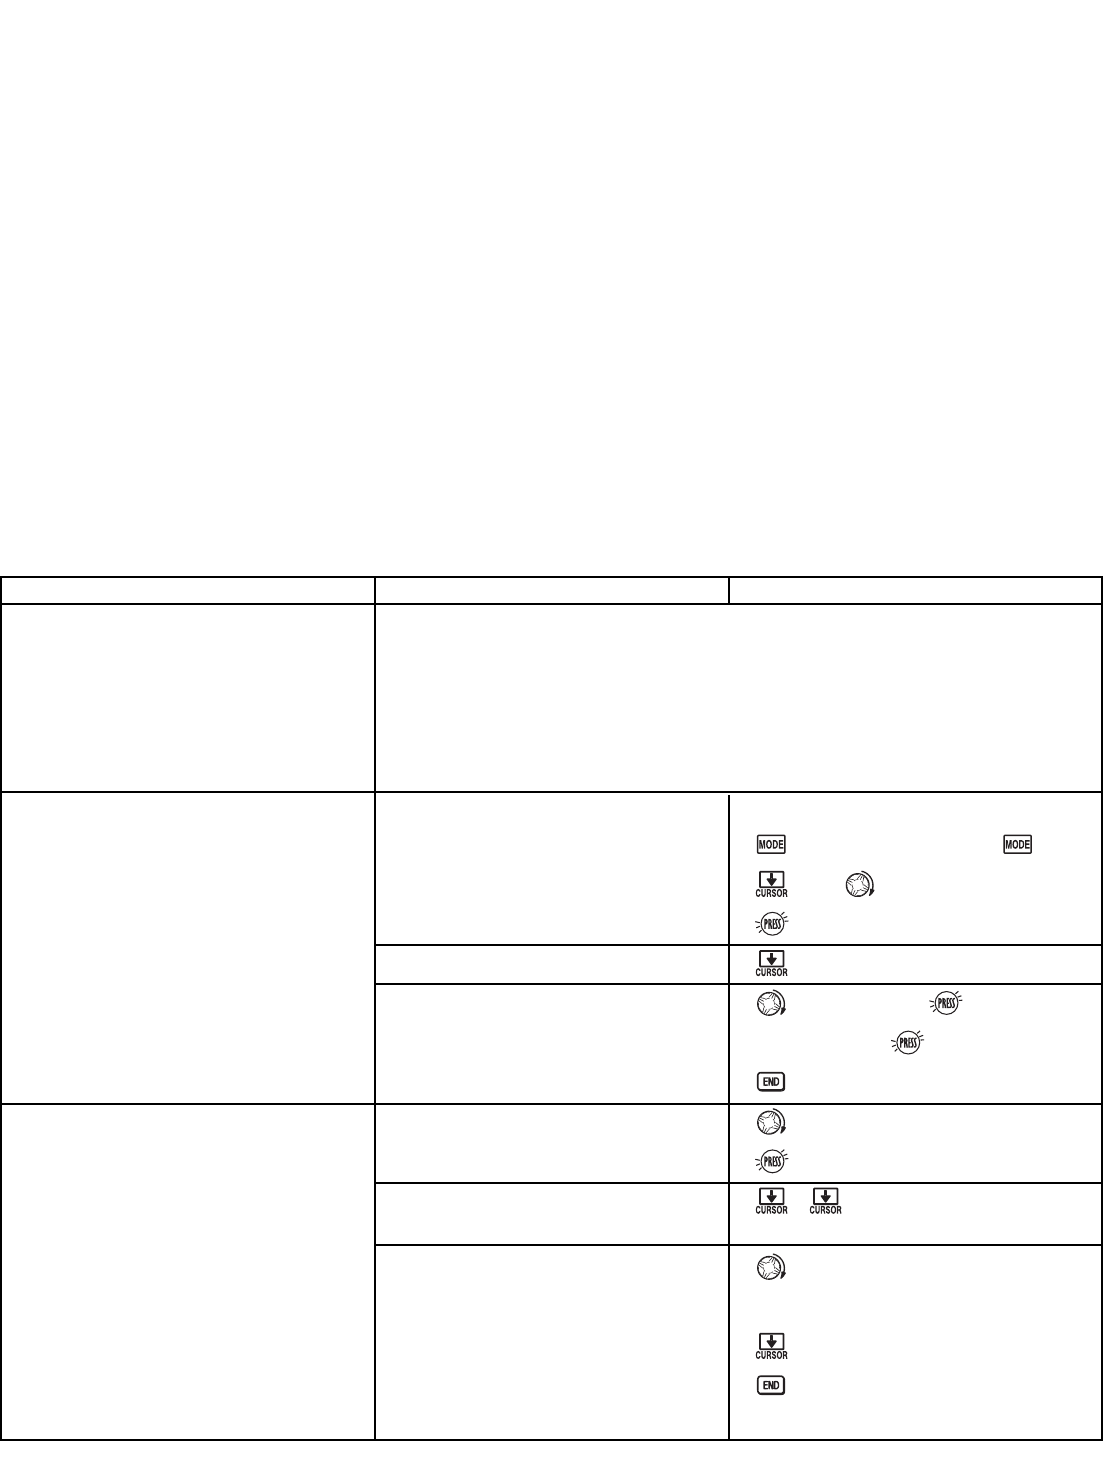
GOAL of EXAMPLE: STEPS: INPUTS:
74
Prepare your helicopter.
Select the proper MODEL TYPE for your
model. Ex: HELI (SWH1). See p. 77.
[NOTE: This is one of several
functions for which the radio requires
confirmation to make a change. Only
critical changes require additional
keystrokes to accept the change.]
(If the correct model type was already
displayed, be sure to do a model reset
to discard any unwanted settings.)
Then, NAME the model. P. 25.
(You do not need to do anything to
“save” or store this data.)
In the BASIC menu, open the
PARAMETER submenu.
Go to MODEL TYPE.
Select proper MODEL TYPE.
Ex: HELI(SWH1).
Confirm the change. Close PARAMETER.
In the BASIC menu, open the MODEL
submenu.
Go to MODEL NAME.
Input aircraft's name.
Close the MODEL submenu when done.
Turn on the transmitter.
for 1 second.
(If ADVANCE, again.)
then to highlight PARAMETER.
to choose PARAMETER.
to TYPE.
to HELI(SWH1). for 1 second.
sure? displays. to confirm.
to return to BASIC menu.
as needed to highlight MODEL.
to choose MODEL.
(First character of model's
name is highlighted.)
to change first character.
When proper character is displayed,
to move to next character. Repeat.
to return to BASIC menu.
Install all servos, switches, receiver per your model's instructions. Set all trims,
dials and sliders to neutral.
Confirm all control linkages are 90 degrees (or per instructions) from the servo
horn to the ball link for proper geometry and that no slop is present.
Mechanically adjust all linkages to get as close as possible to proper control
throws and minimize binding prior to radio set up.