Thank you for choosing the innovative, forward-looking Frama Matrix F12 franking solution which meets
all standards and therefore guarantees long-term protection of your investment. The information below in
this operating manual is intended to assist you in installing and operating your Frama Matrix F12 franking
system. It also shows how you can easily make settings yourself.
We have summarised the most impor-
tant points briefly here for you.
The most important points at a glance:
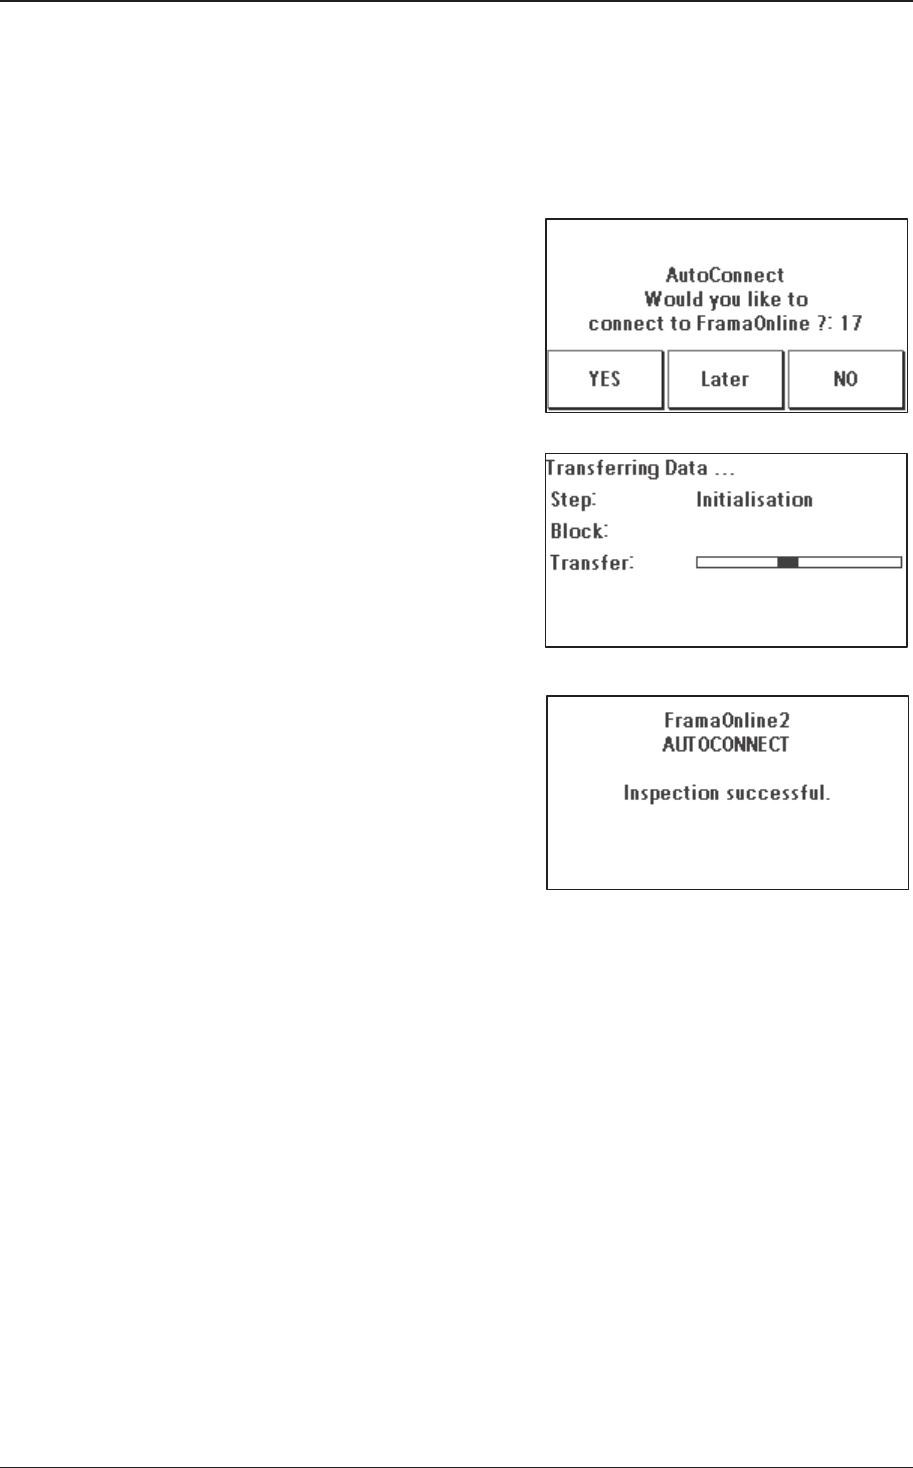
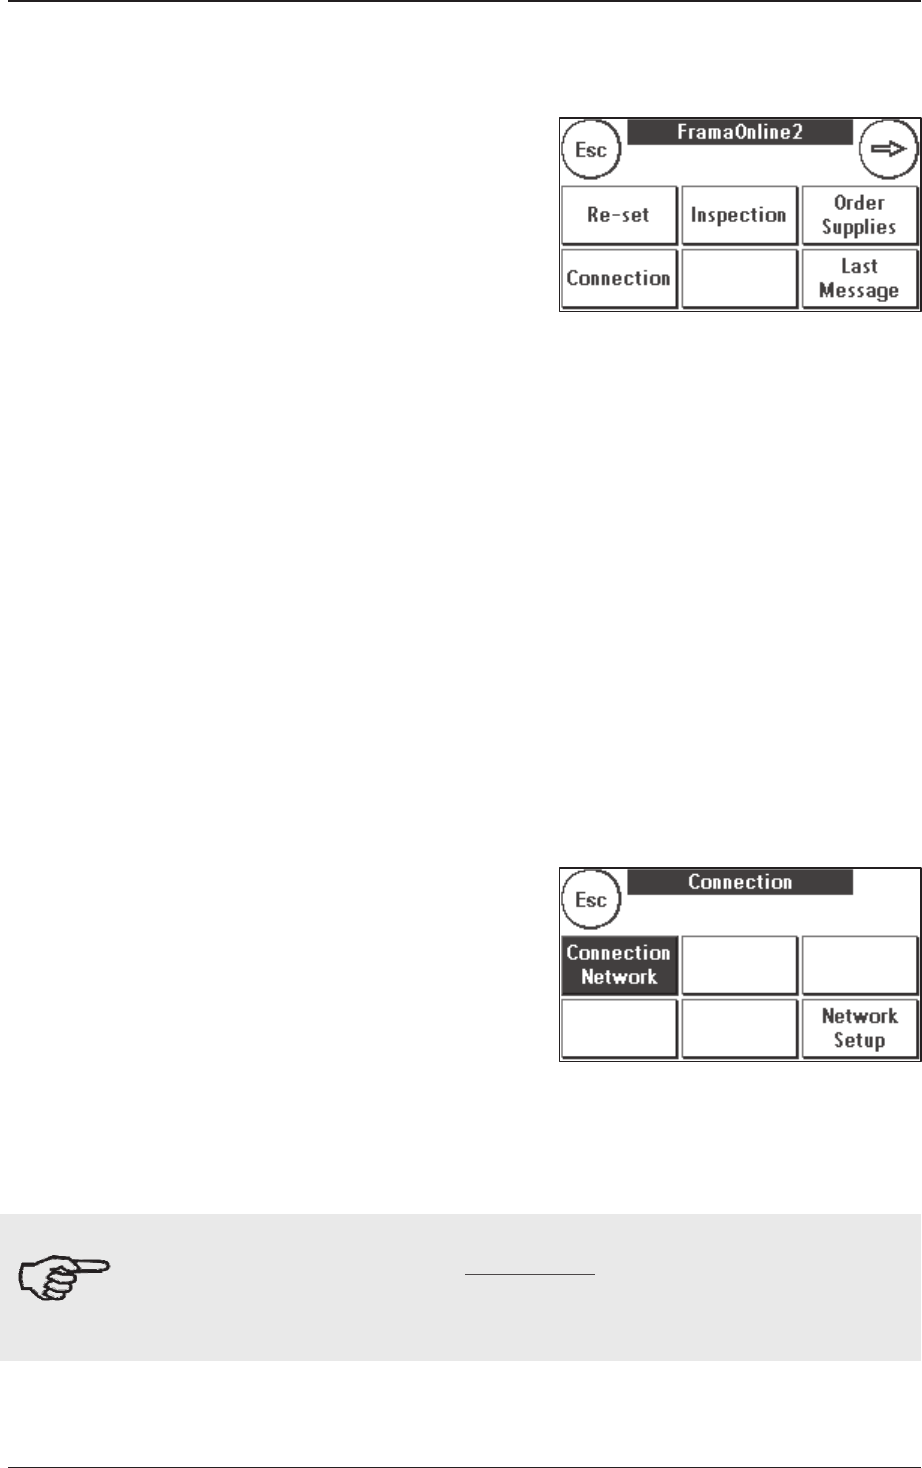
INSPECTION/AUTOCONNECT 17
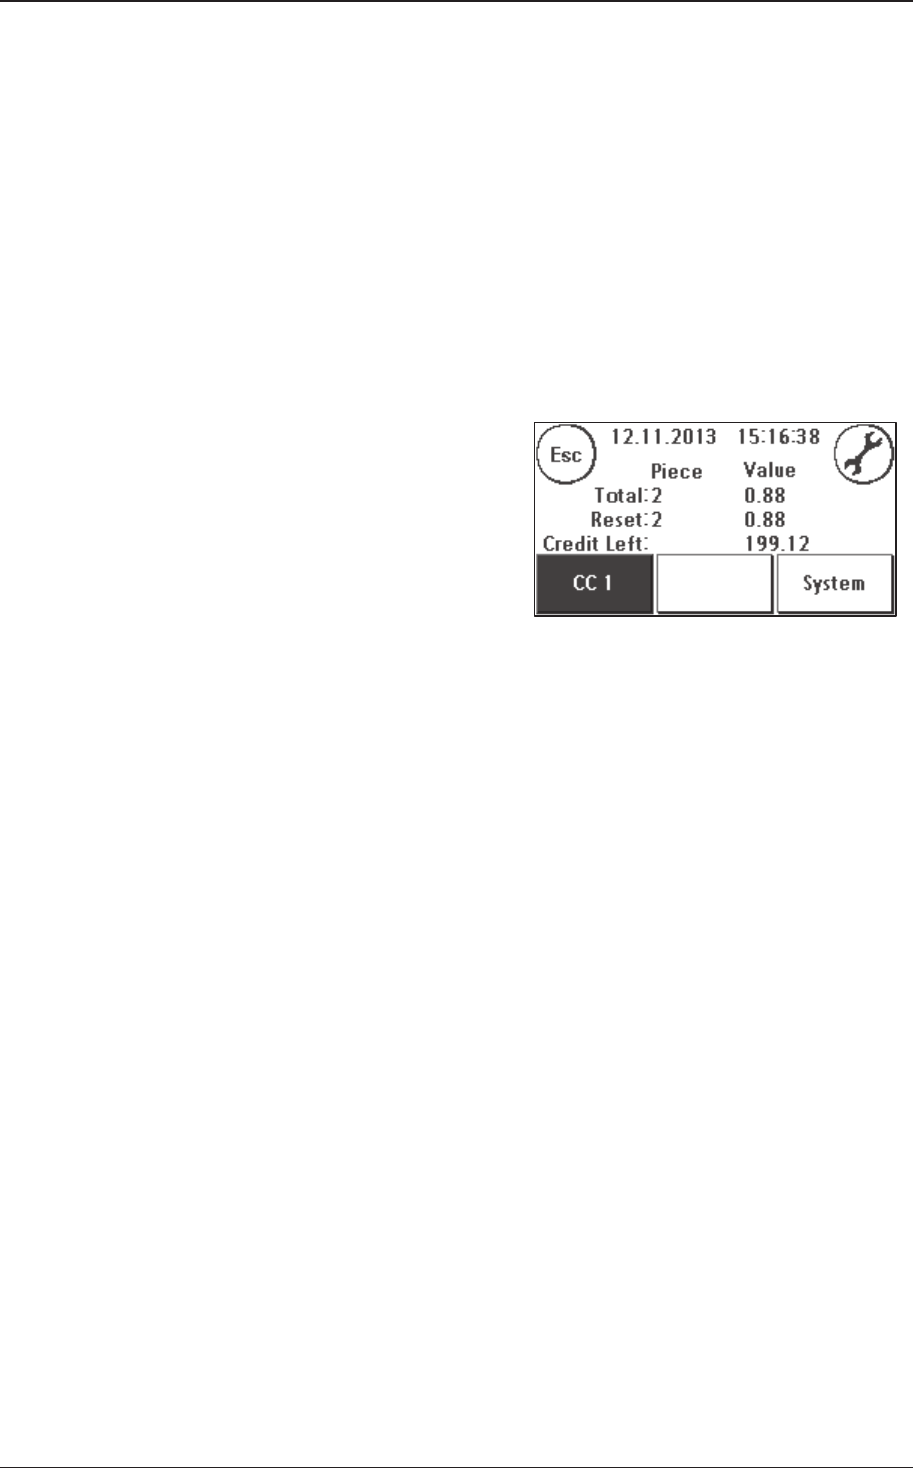
LOADING POSTAGE CREDIT
15
INSERTING/CH
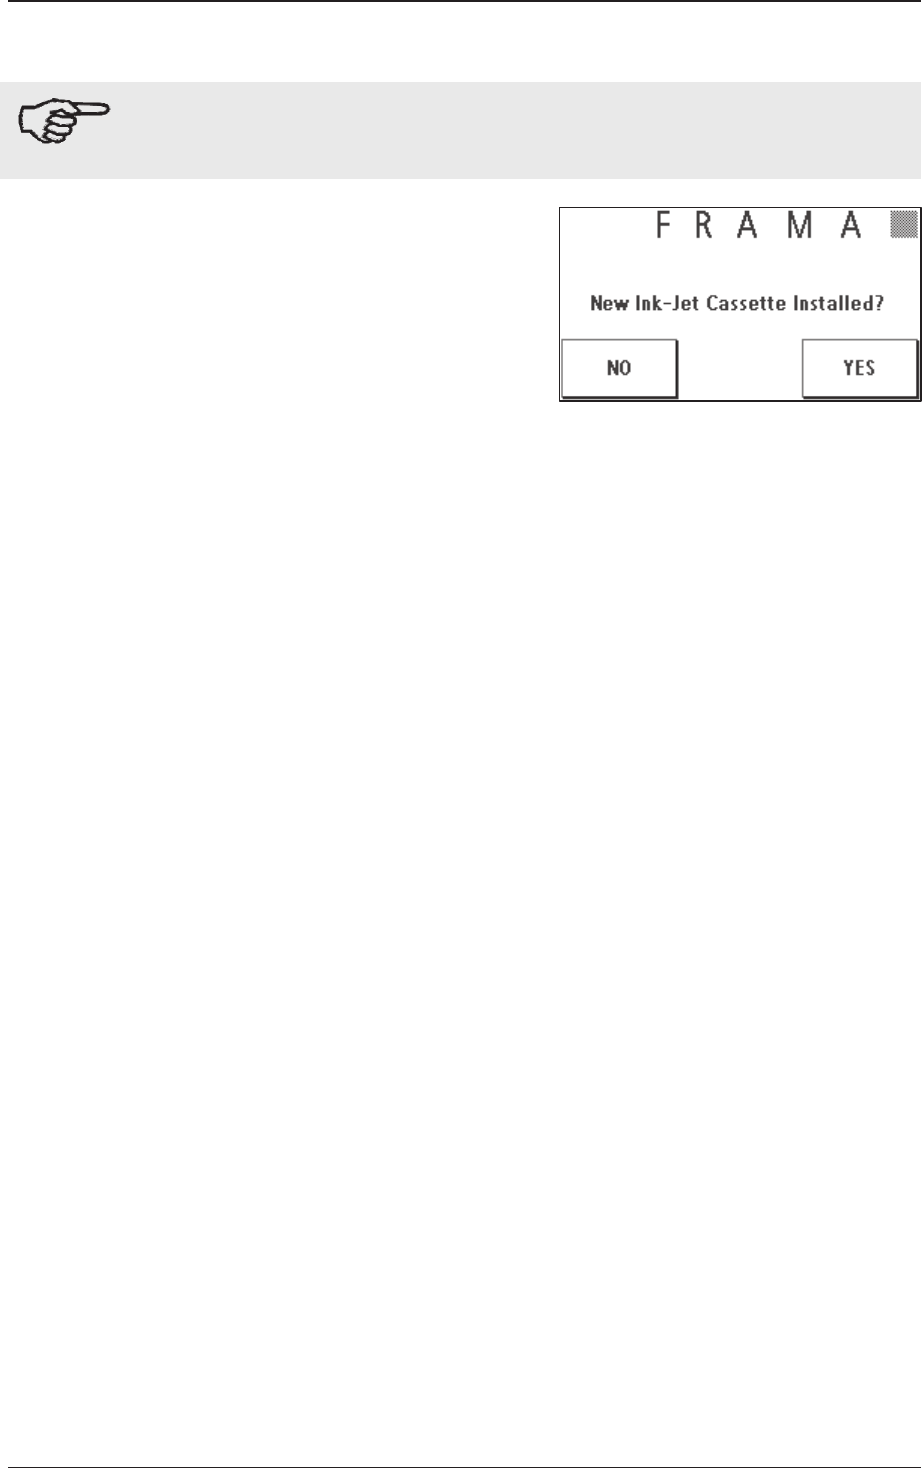
ANGING INK JET CASSETTE25
CHANGING FRANKING DATE (PRINT DATE)
31
DISPLAY MESSAGES AND TECHNICAL DATA42
You can get quick competent support from our
He
lp Line
01992 4
51125
The right to make changes in these instructions is reserved. Frama AG also reserves the right to change and/or modify parts of these
instructions and/or the product at any time without notice. The postage rates indicated and other information with time-limited
validity are provided solely as examples and make no claim to currency.
.
Frama Matrix F12
4
Safety information and warnings
Thank you for deciding to purchase the innovative Frama Matrix F12 franking system.
The information below in this operating manual is intended to assist you in installing and operating your Frama Matrix
F12 franking system. It also shows how you can easily make settings yourself.
This franking system meets current safety requirements. Incorrect use can, however, lead to injury and damage. With
this in mind, please read this guide before you start using your Frama Matrix F12 franking system. This will help you to
avoid injury and prevent damage to your franking system. Keep this guide in a safe place and pass it on to the new
user should you dispose of the machine.
Symbols used
This operating manual uses the following symbols:
Danger
This symbol indicates dangers and safety hazards which can cause injury when using, operating
and servicing the franking system.
Information
This symbol is intended to draw your attention to guidance and instructions you should be aware
of which can prevent the risk of damage to the franking system, the items to be posted or the
immediate surroundings when handling the franking system.
Tip
Hints and tips of interest for the efficient use of the franking system.
Frama Matrix F12
5
Table of contents
SAFETY INFORMATION AND WARNINGS ...................................................................................... 4
SYMBOLS USED ........................................................................................................................................................ 4
TABLE OF CONTENTS .................................................................................................................. 5
1.1. SAFETY INSTRUCTIONS/NOTES ON USE .............................................................................................................. 7
1.2. USE AS INTENDED/NOTES ON PRINT QUALITY .................................................................................................... 8
1.3. REQUIREMENTS FOR THE NETWORK ENVIRONMENT/INFORMATION SECURITY .................................................. 8
1.4. RECYCLING AND DISPOSAL ............................................................................................................................... 9
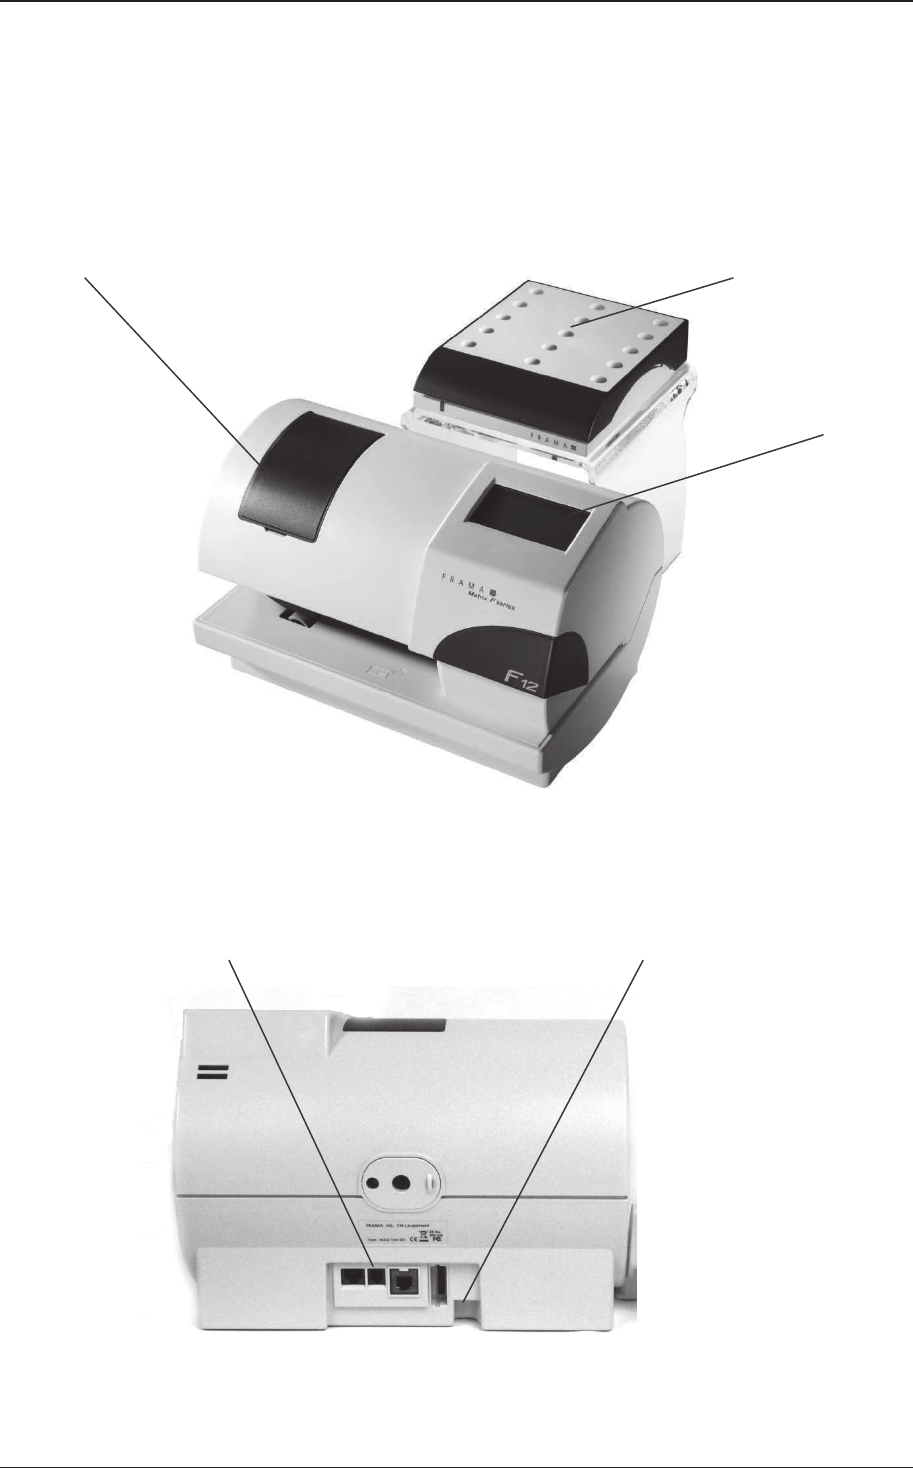
1.5. THE FRAMA MATRIX MACHINE ....................................................................................................................... 10
2.1. GENERAL NOTES AND SAFETY INFORMATION .................................................................................................. 12
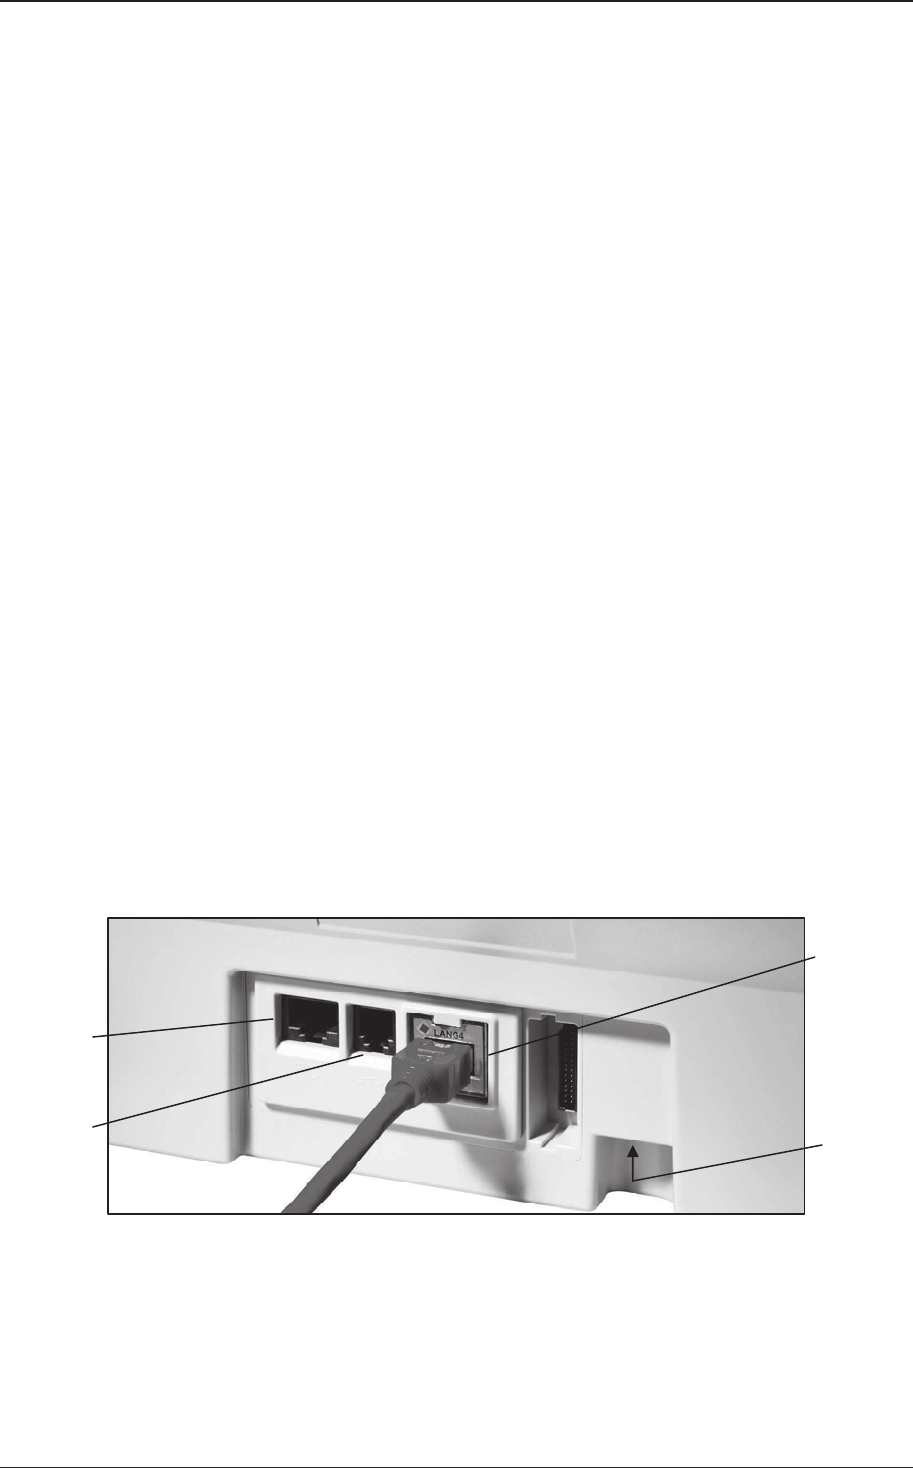
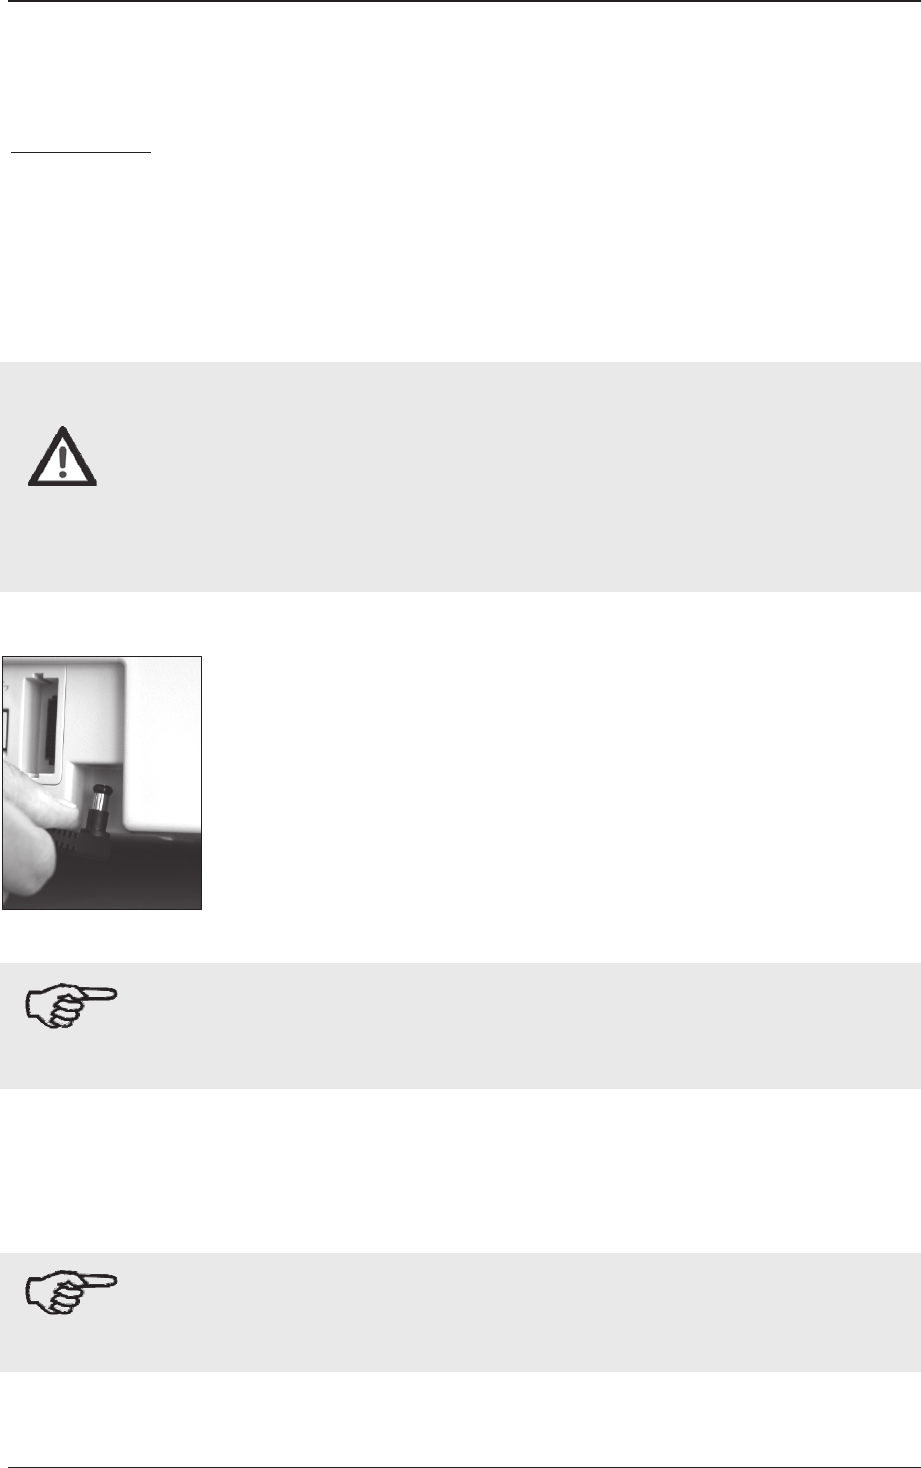
2.2. MAKING CONNECTIONS .................................................................................................................................. 12
2.3. CONNECTING TO THE MAINS ELECTRIC SUPPLY .............................................................................................. 13
2.4. FIRST USE ......................................................................................................................................................... 13
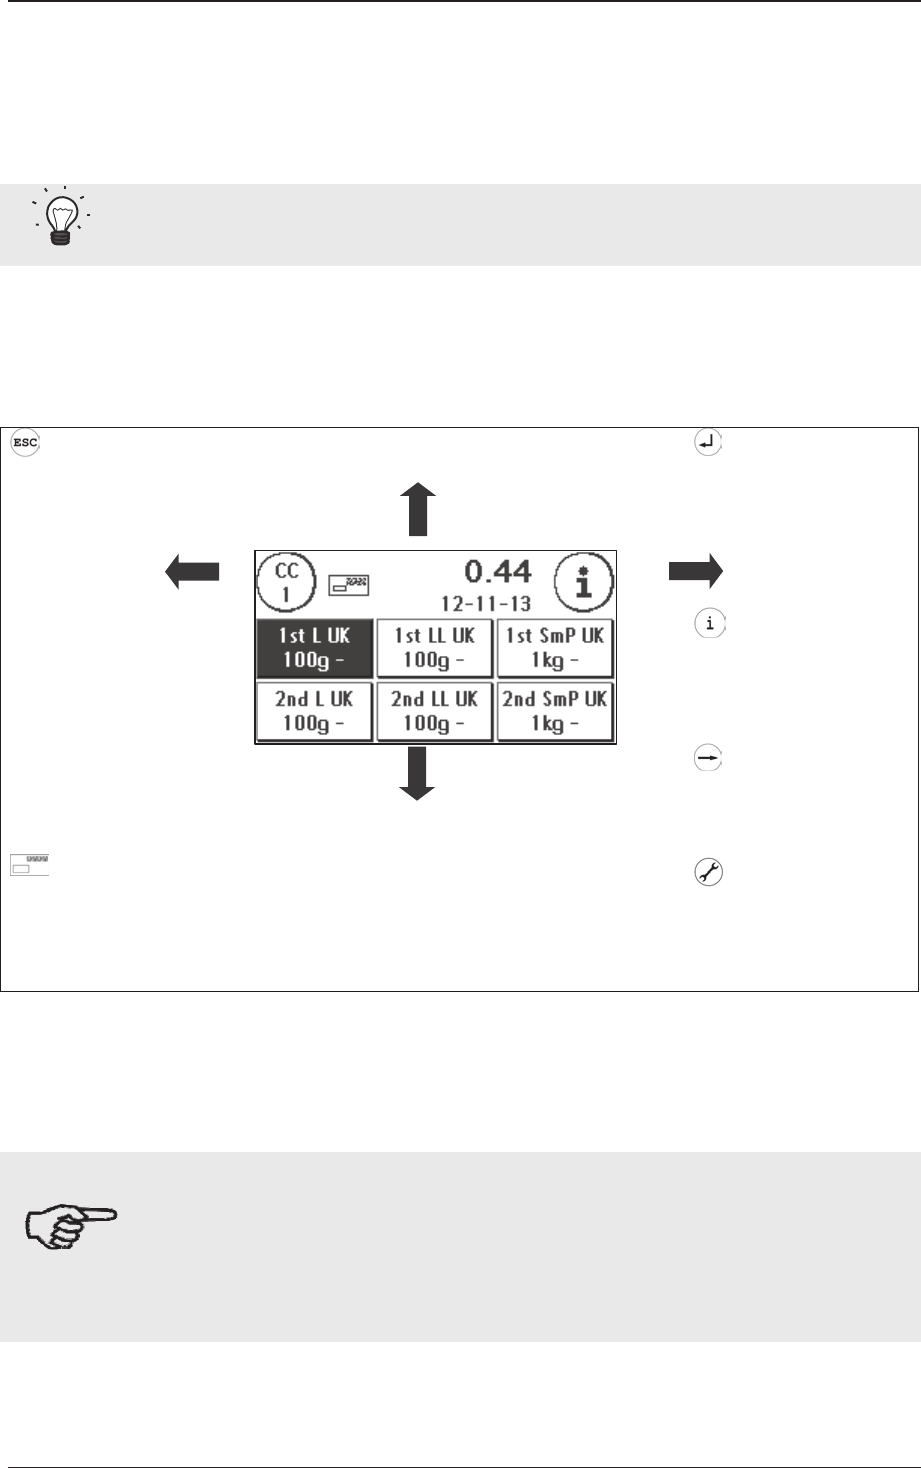
3.1. GENERAL NOTES .............................................................................................................................................. 15
4.1. SWITCHING ON AND OFF ................................................................................................................................ 18
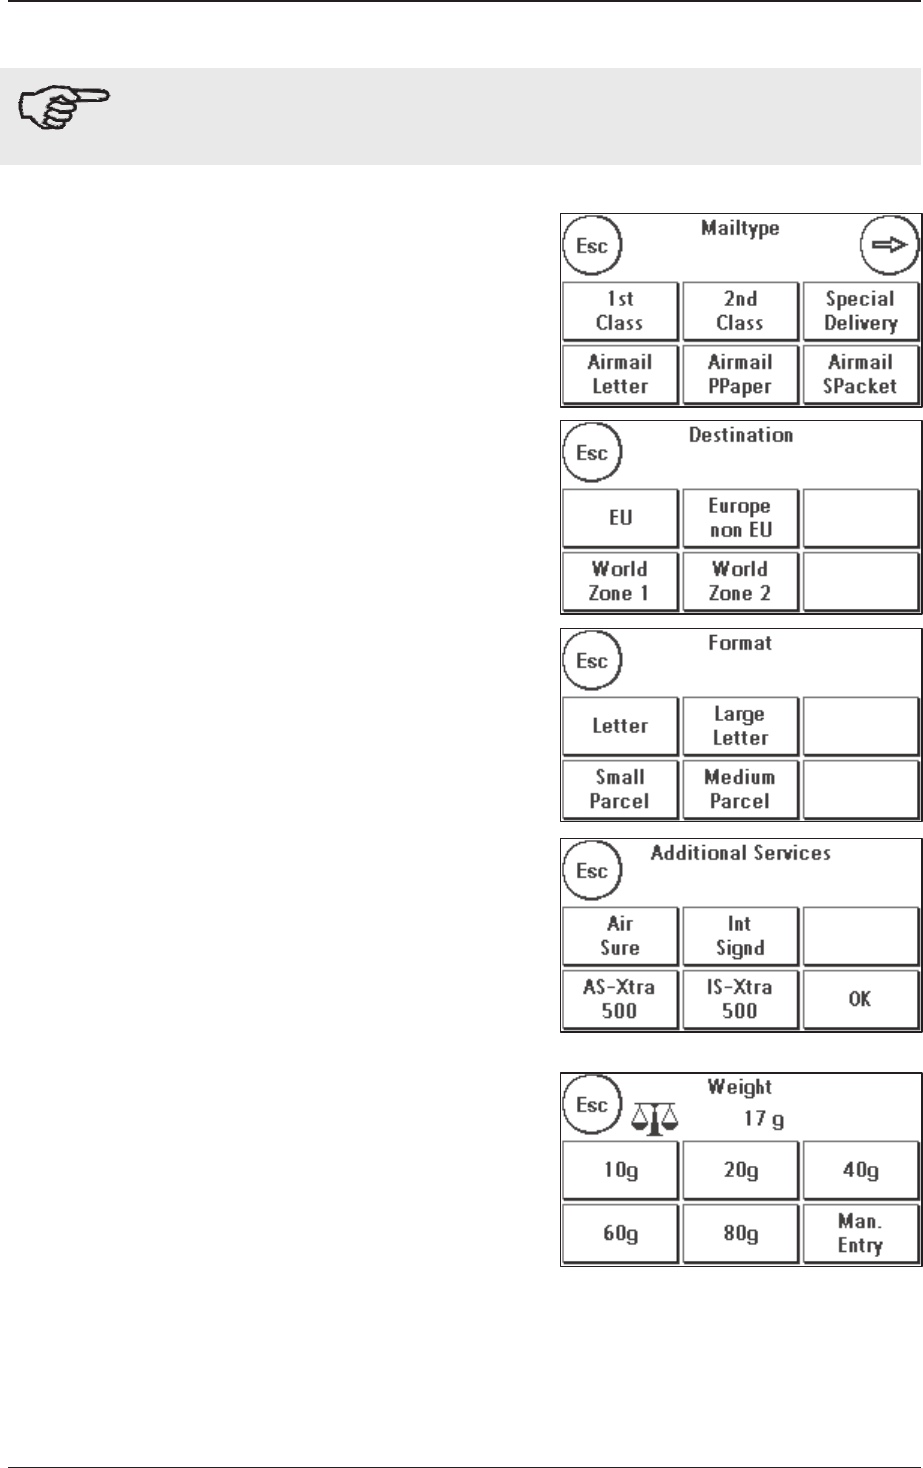
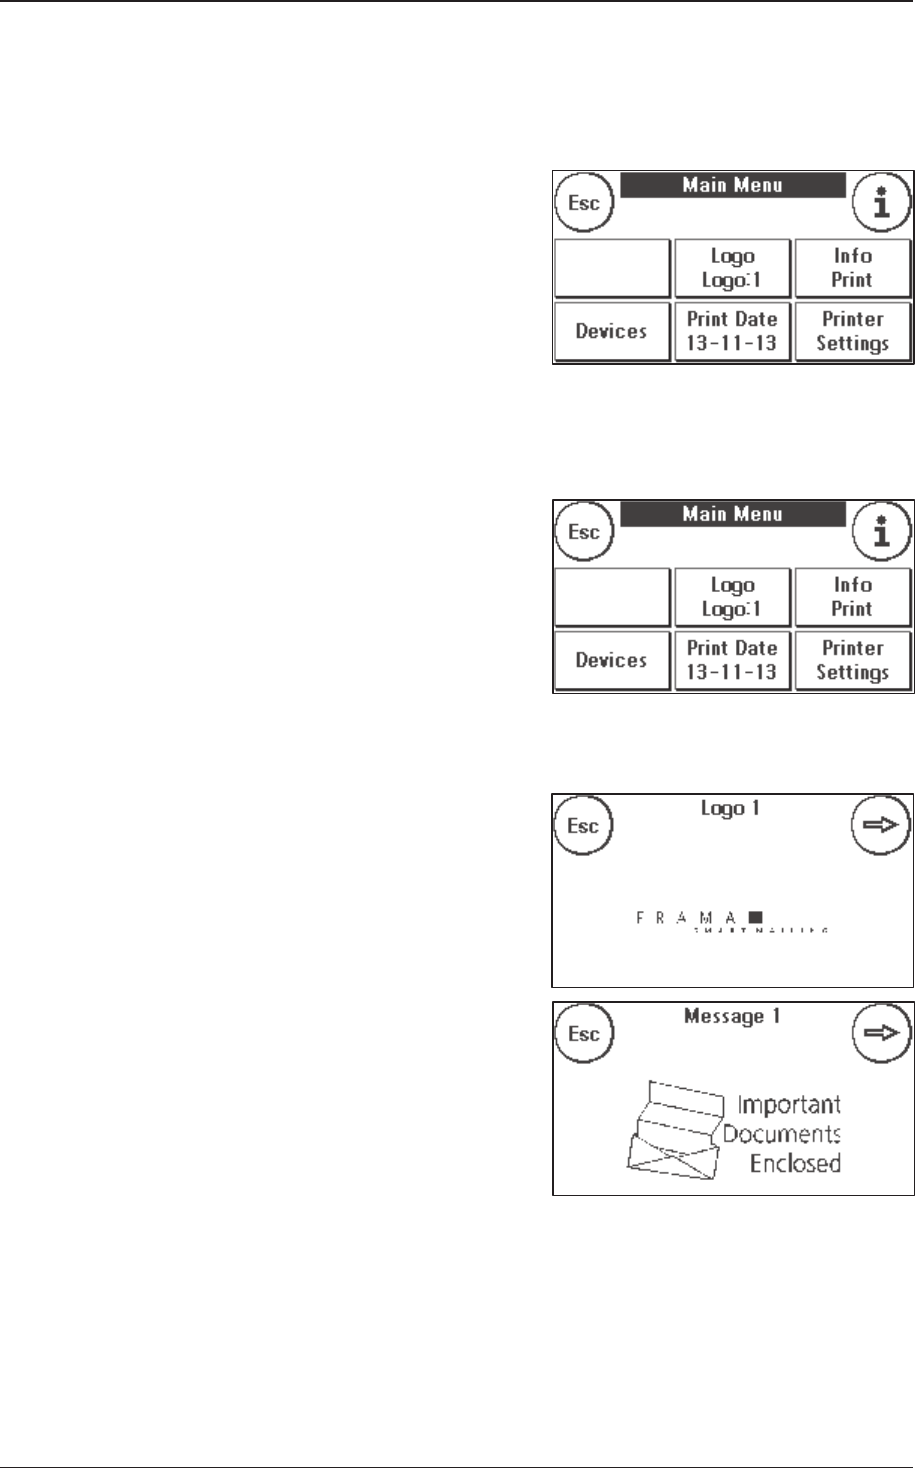
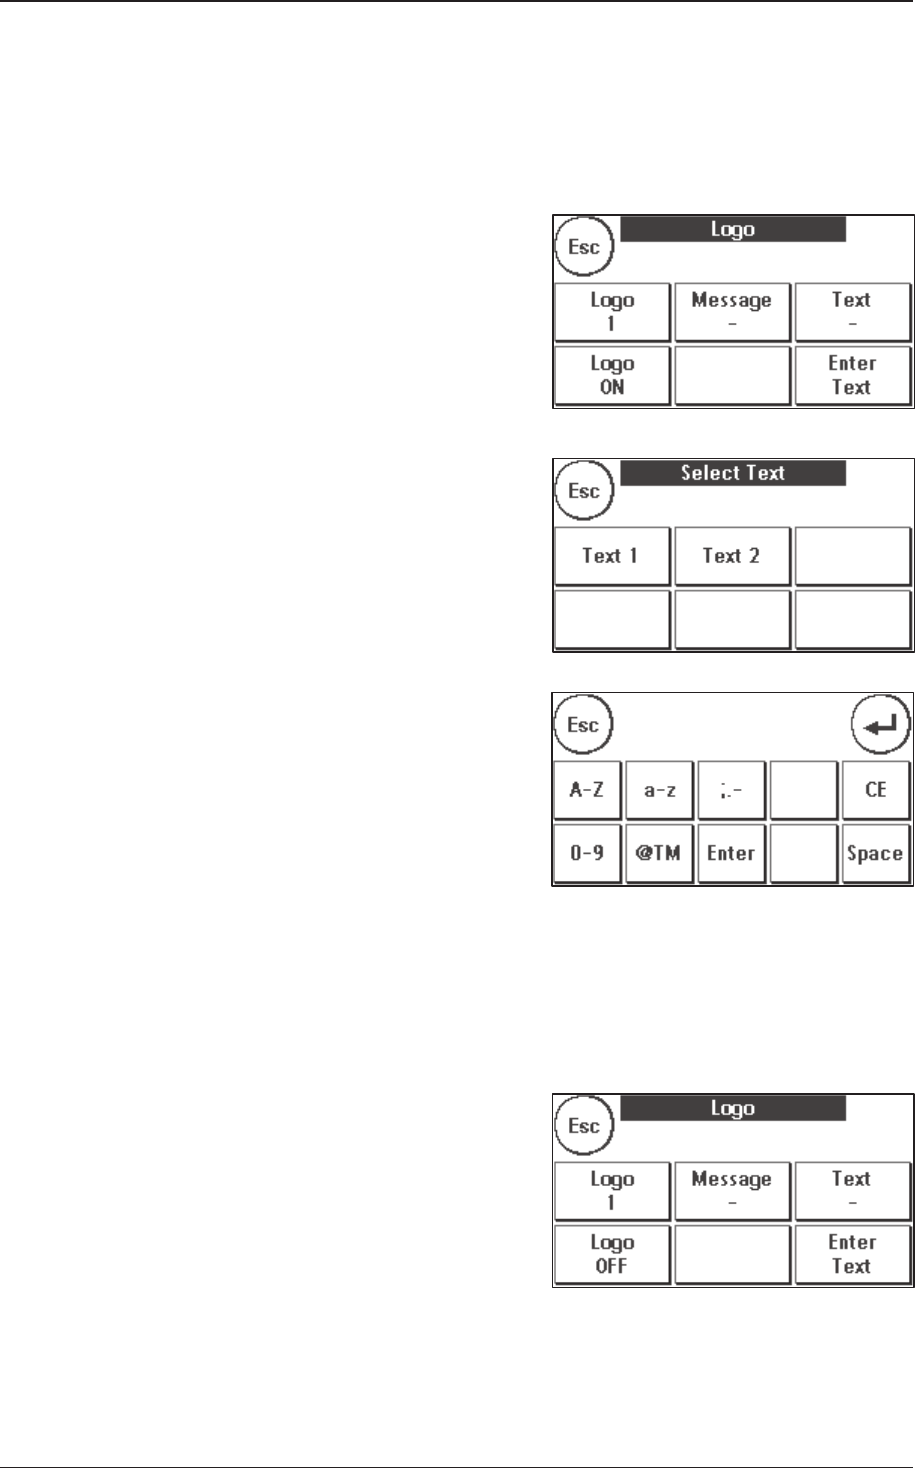
5.2. LOGO .............................................................................................................................................................. 28
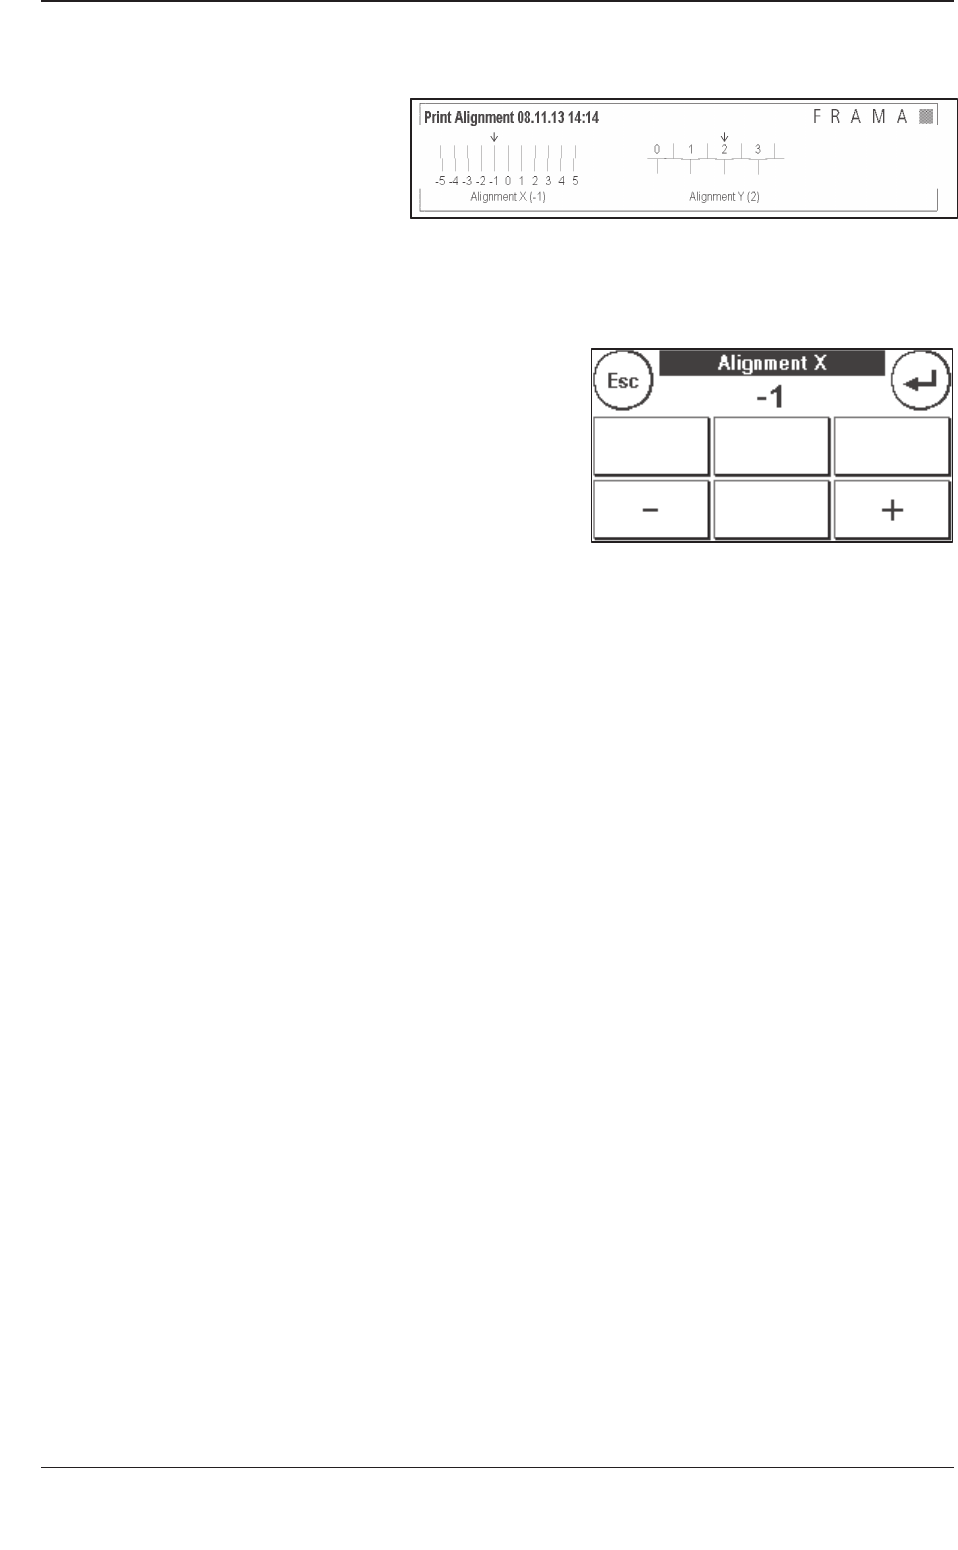
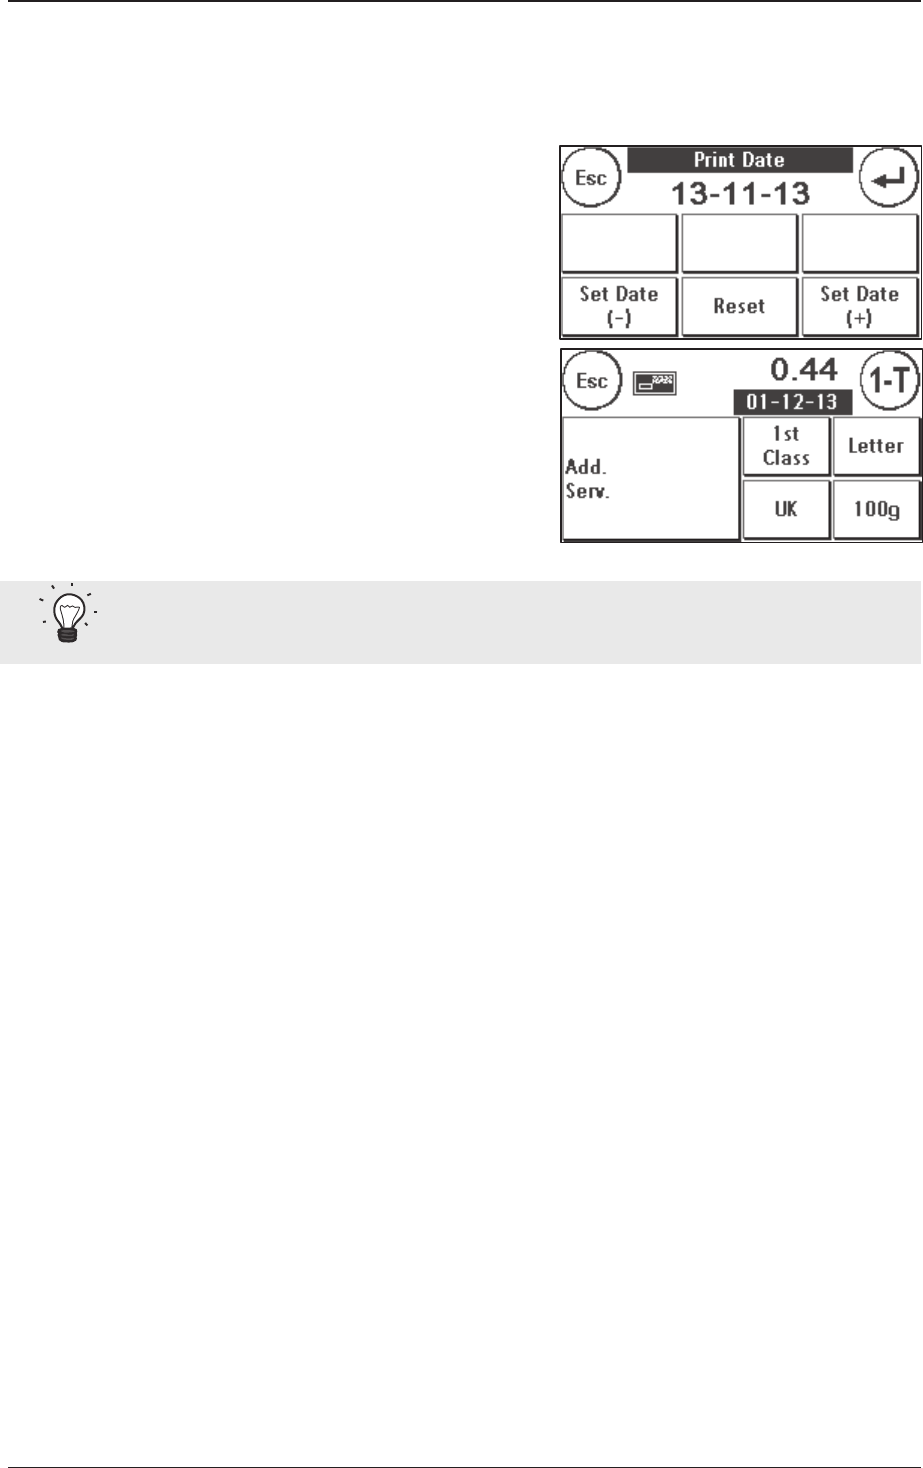
5.4. PRINT DATE ..................................................................................................................................................... 31
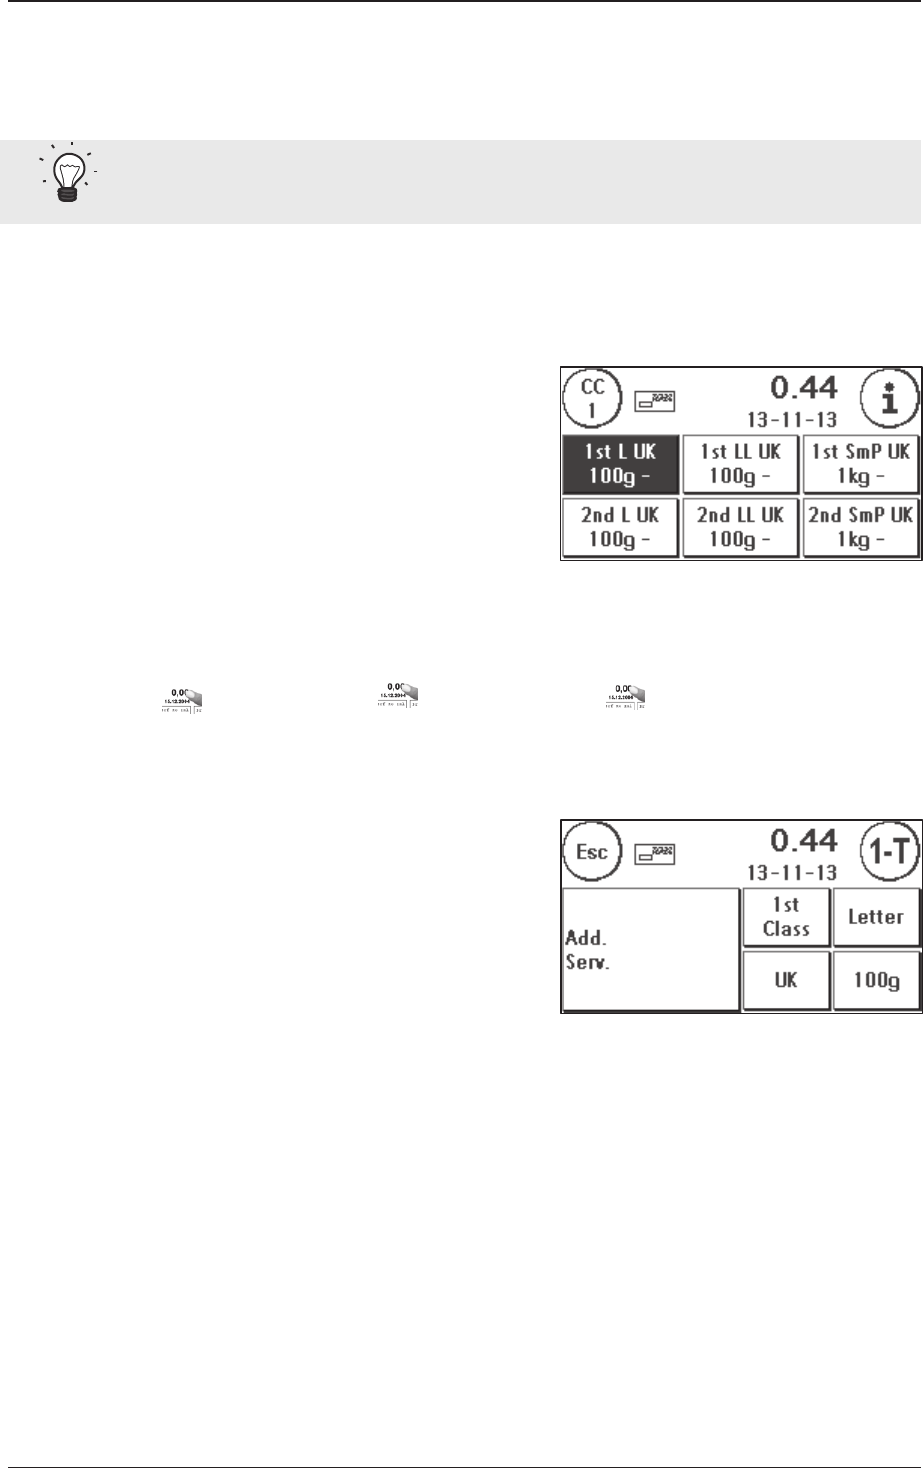
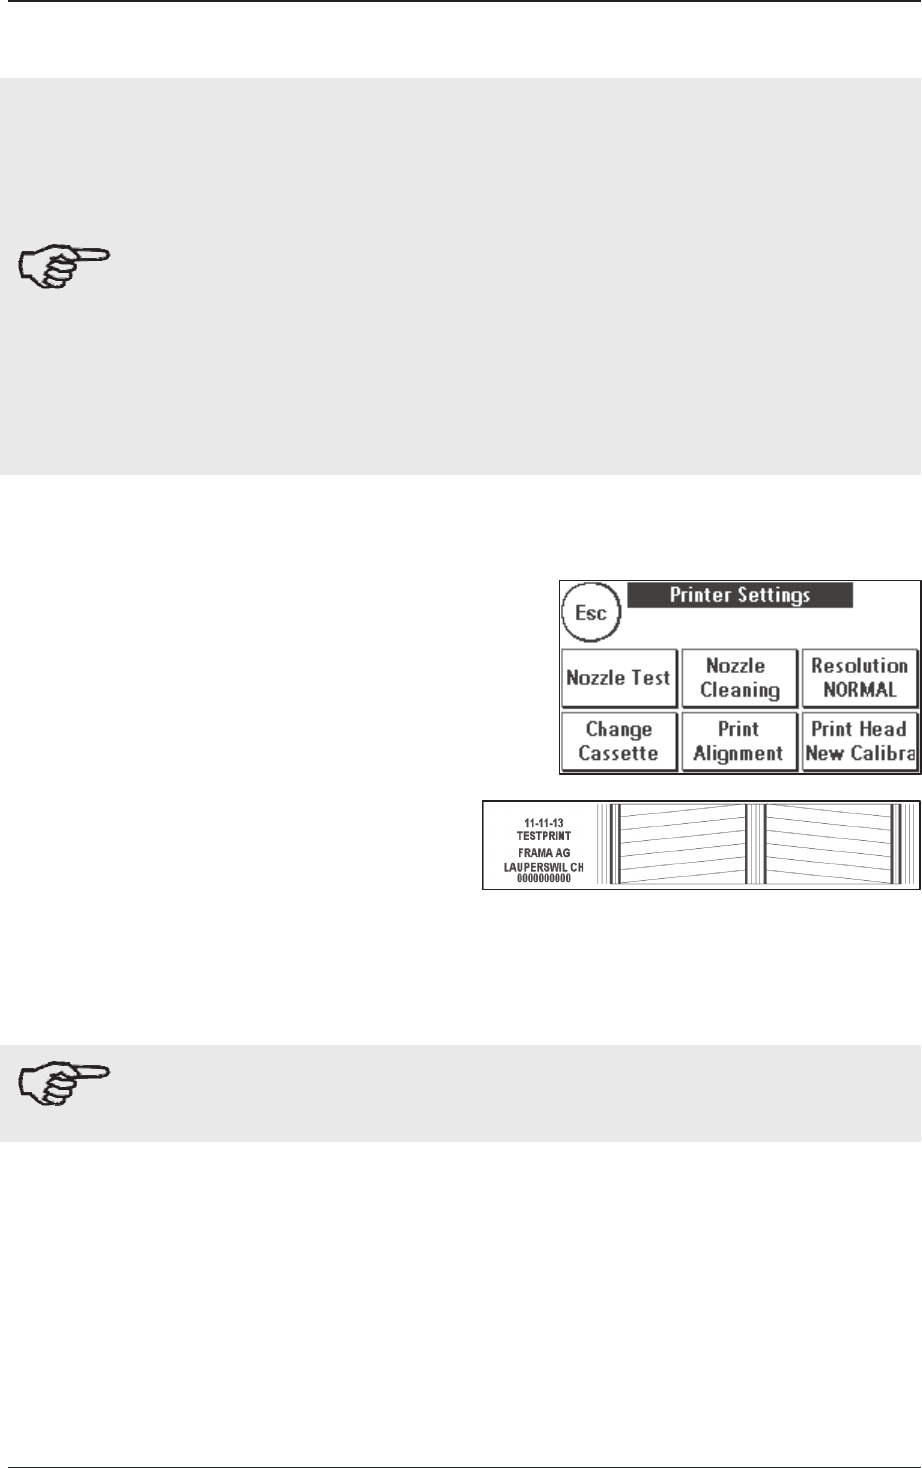
5.5. INFO PRINT ...................................................................................................................................................... 32
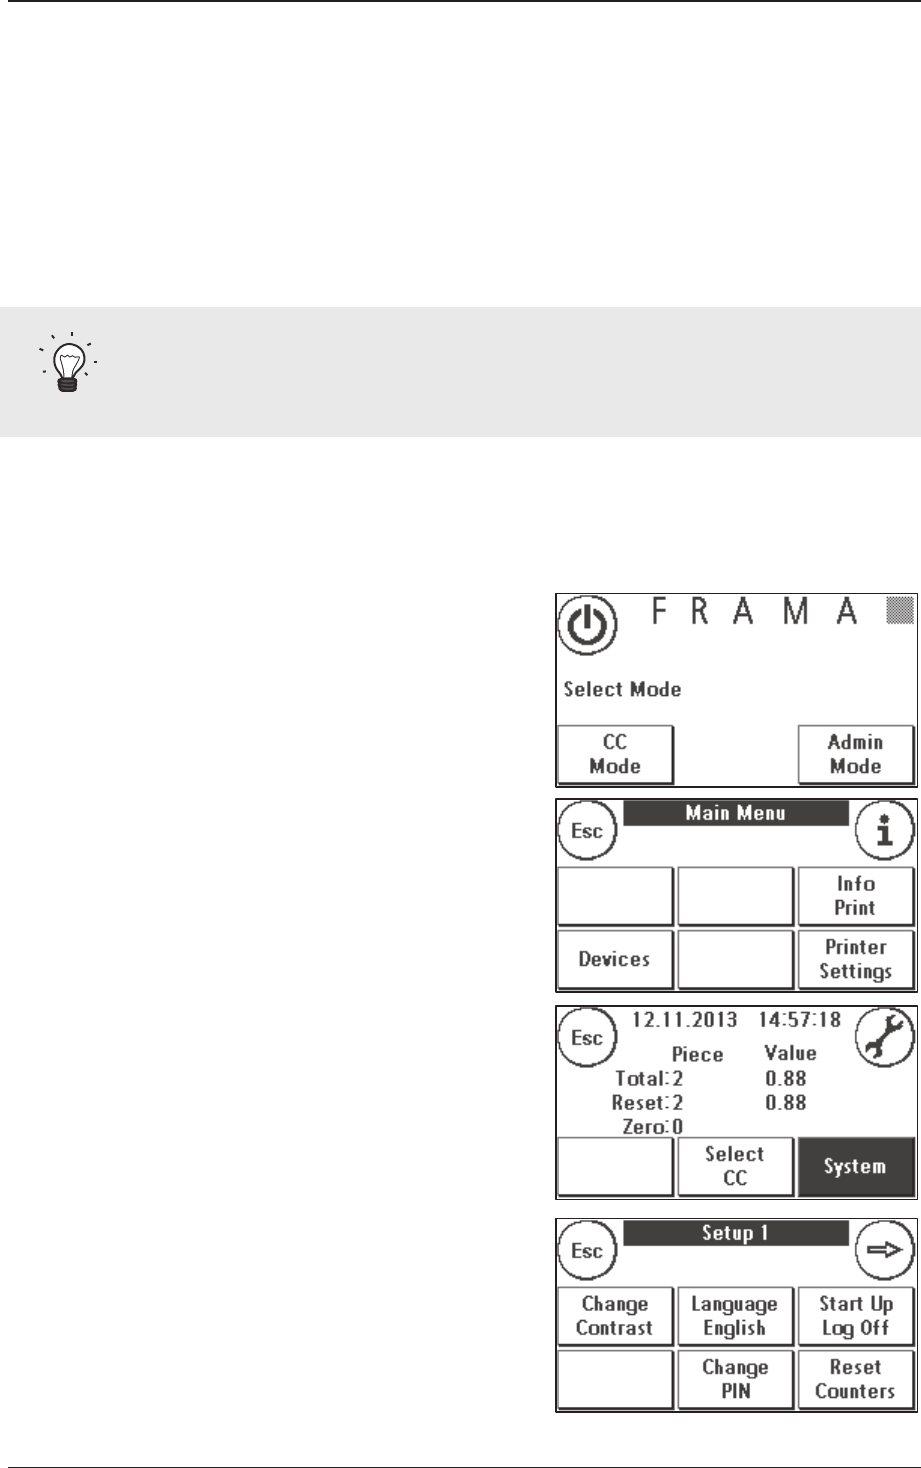
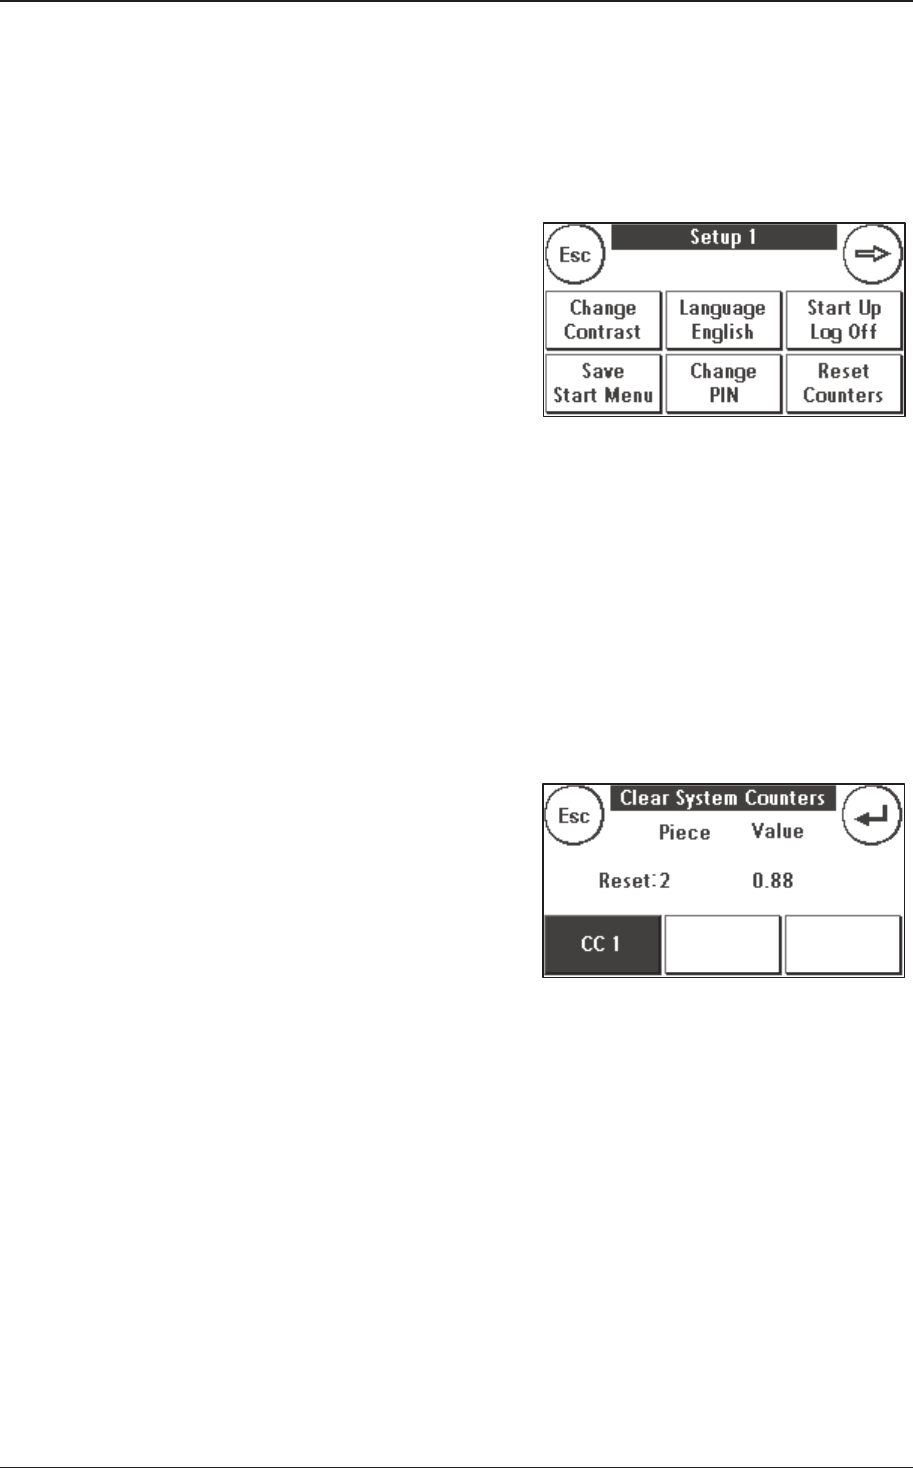
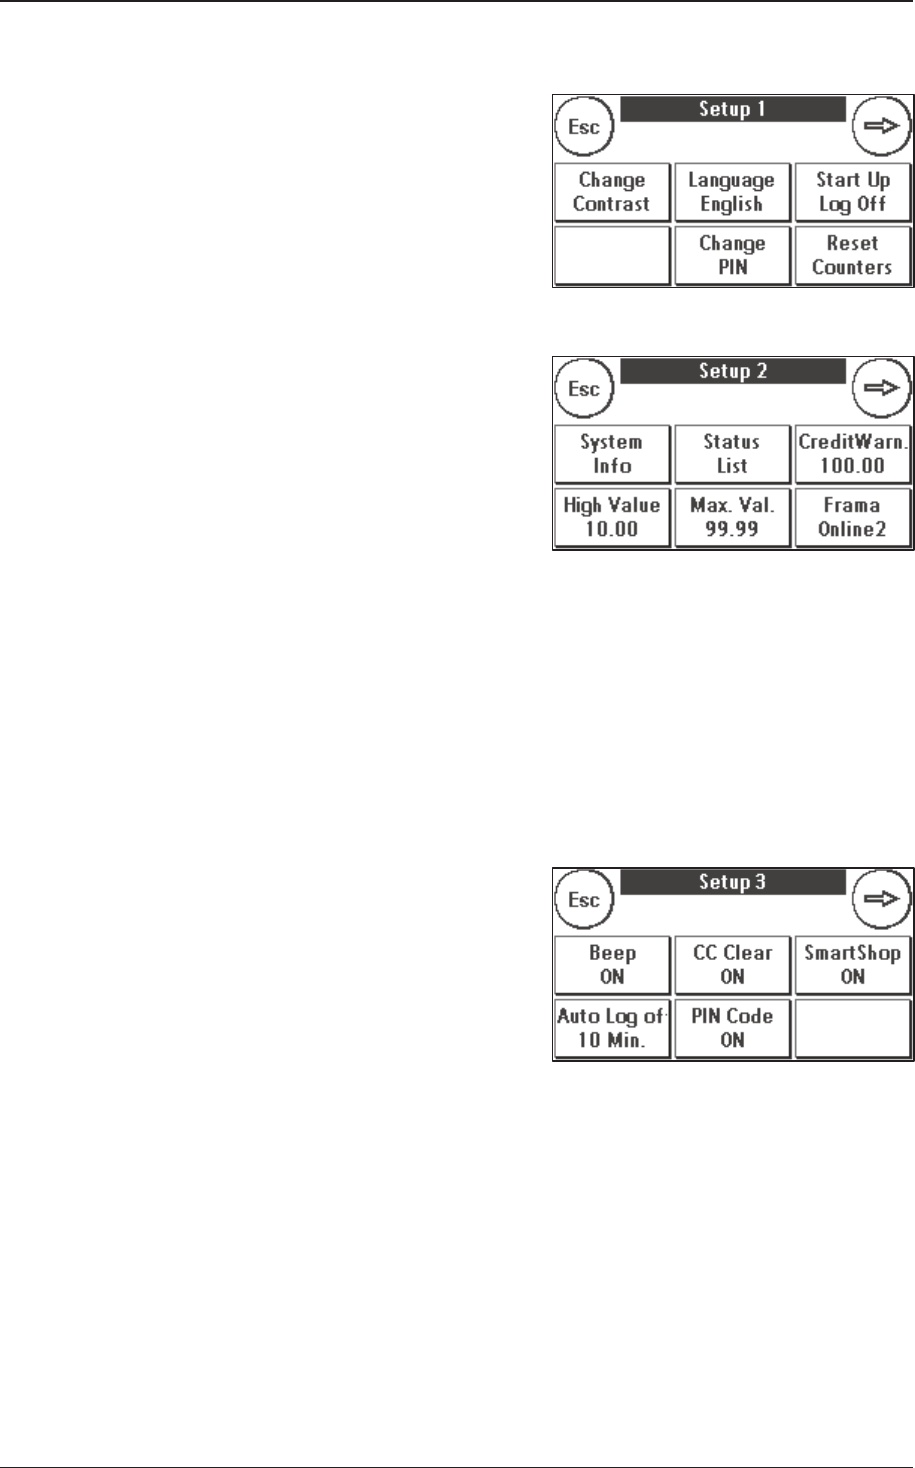
7.1. SETUP 1 MENU (CC AND ADMIN) .................................................................................................................... 35
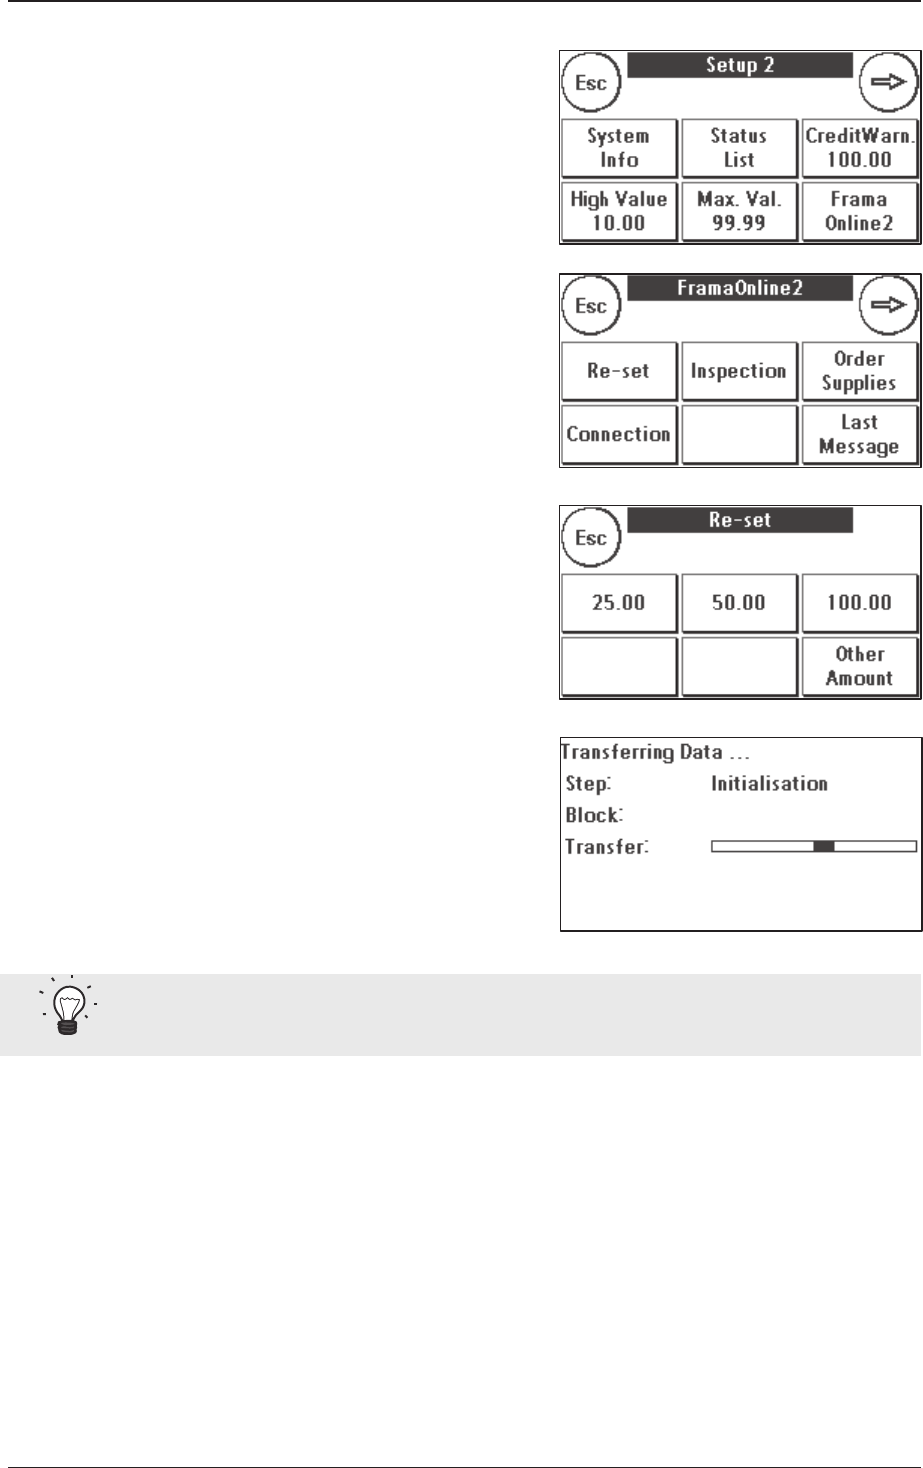
7.2. SETUP 2 MENU ................................................................................................................................................ 36
7.3. SETUP 3 MENU ................................................................................................................................................ 36
7.4. SETUP 4 MENU ................................................................................................................................................ 37
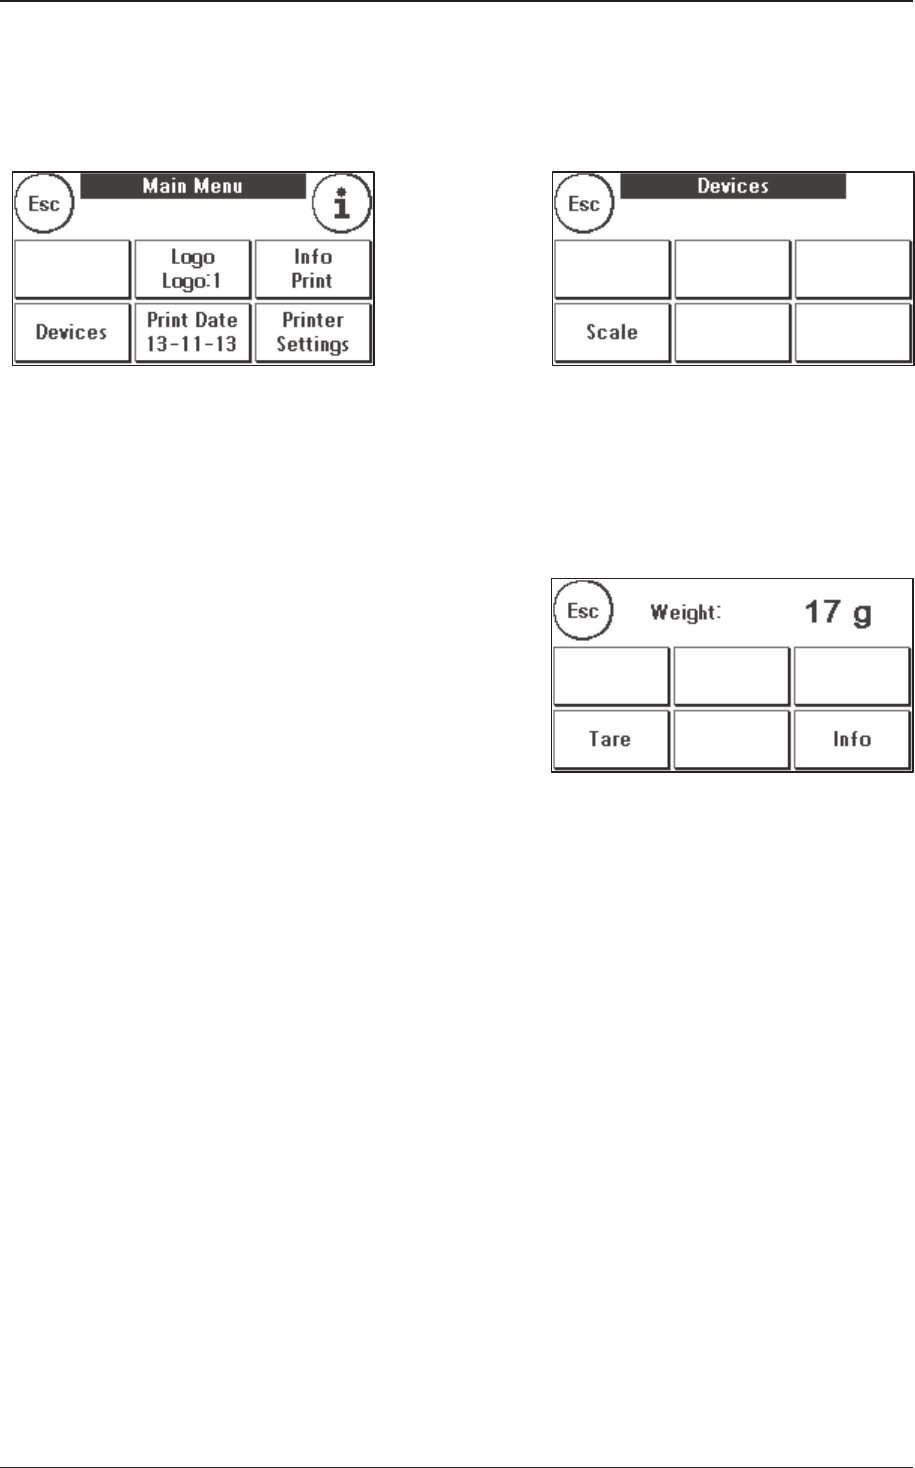
8.1. MAIN MENU .................................................................................................................................................... 38
9.5. LAST REPORT ................................................................................................................................................... 41
11. TECHNICAL DATA ............................................................................................................... 46
11.1. GENERAL ....................................................................................................................................................... 46
Libble takes abuse of its services very seriously. We're committed to dealing with such abuse according to the laws in your country of residence. When you submit a report, we'll investigate it and take the appropriate action. We'll get back to you only if we require additional details or have more information to share.
Product:
Forumrules
To achieve meaningful questions, we apply the following rules:
First, read the manual;
Check if your question has been asked previously;
Try to ask your question as clearly as possible;
Did you already try to solve the problem? Please mention this;
Is your problem solved by a visitor then let him/her know in this forum;
To give a response to a question or answer, do not use this form but click on the button 'reply to this question';
Your question will be posted here and emailed to our subscribers. Therefore, avoid filling in personal details.
Register
Register getting emails for Frama MATRIX F12 at:
new questions and answers
new manuals
You will receive an email to register for one or both of the options.
Get your user manual by e-mail
Enter your email address to receive the manual of Frama MATRIX F12 in the language / languages: English as an attachment in your email.
The manual is 1,96 mb in size.
You will receive the manual in your email within minutes. If you have not received an email, then probably have entered the wrong email address or your mailbox is too full. In addition, it may be that your ISP may have a maximum size for emails to receive.
If you have not received an email with the manual within fifteen minutes, it may be that you have a entered a wrong email address or that your ISP has set a maximum size to receive email that is smaller than the size of the manual.
The email address you have provided is not correct.
Please check the email address and correct it.
Your question is posted on this page
Would you like to receive an email when new answers and questions are posted? Please enter your email address.