Only connect the device to an earthed socket! Before use, check whether the socket is not
damaged and the voltage that you will be using corresponds to the specification plate on the unit.
Damage caused by incorrect voltage is not covered by the guarantee! The socket used and the
electrical installation needs to be secured with a ground-fault circuit interrupter (max. 30 mAmp).
The device is now ready for use.
Warning! Do not use your air conditioning unit until it has been installed according to the
instructions above!
Warning! Ensure that water cannot penetrate the device!
Warning! The length of the discharge pipe corresponds to the technique that is used in this
air conditioning unit. Do not replace or extend it using another pipe as this could have a
negative impact on the effectiveness of the unit. The hose can be stretched but must be kept
as short as possible in order to ensure optimum functioning.
Don’t forget about preventing access to burglars!
OPERATION
You operate the air conditioner with the remote control as standard.
Place 2 AAA penlight batteries in the battery compartment in the back of the remote control
before use.
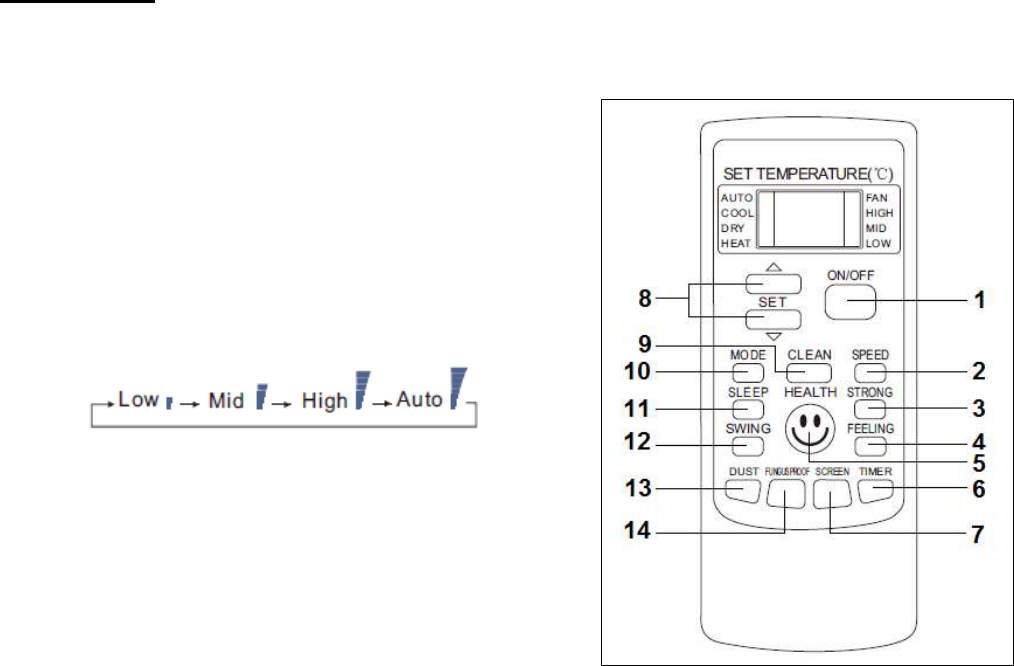
Your remote control has the following buttons:
1. ON/OFF = on/off button
You start or stop the airco by pressing this button.
2. SPEED = ventilator speed selection
You select a ventilator speed with this button. Every
time you press the button it switches from low
(Low) to mid (Mid) to high (High), and then to
automatic (Auto) and then back to low.
3. STRONG = strong operation
You only use this button when cooling. The
ventilator is automatically switched to the ‘High’
setting and you cool with maximum capacity.
4. FEELING = feeling
When you press this button the display shows the
temperature in the room. Pressing the button again
displays the set room temperature. This button does not work when the ventilator is operating.
5. HEALTH = health
When you press this button the device, depending on the ambient temperature, will select a
speed automatically and thereby create a comfortable temperature for you.
6. TIMER = timer
Switching on with the timer:
a. Ensure that the device is switched off. If you press the timer button, ‘TIMER ON’ will appear
in the display, with the set time.
b. Use the ▲and ▼buttons to set a time at which the device will start to work automatically.