Ingebruikname
1. Controleer de kachel op beschadigingen of gebreken. Neem een beschadigde
kachel niet in gebruik maar wend u tot uw leverancier.
2. Zorg voor een onbeschadigde, volle gasfles met propaan of butaan, afgestemd op
het gebruik.
3. Kies een plaats voor de kachel die aan alle veiligheidsinstructies voldoet en zet hem
op een vlakke, stabiele en horizontale ondergrond van onbrandbaar materiaal.
Stekker niet in het stopcontact en stroomschakelaar op O (uit).
4. Monteer de gasslang stevig op de drukregelaar (linkse schroefdraad!)
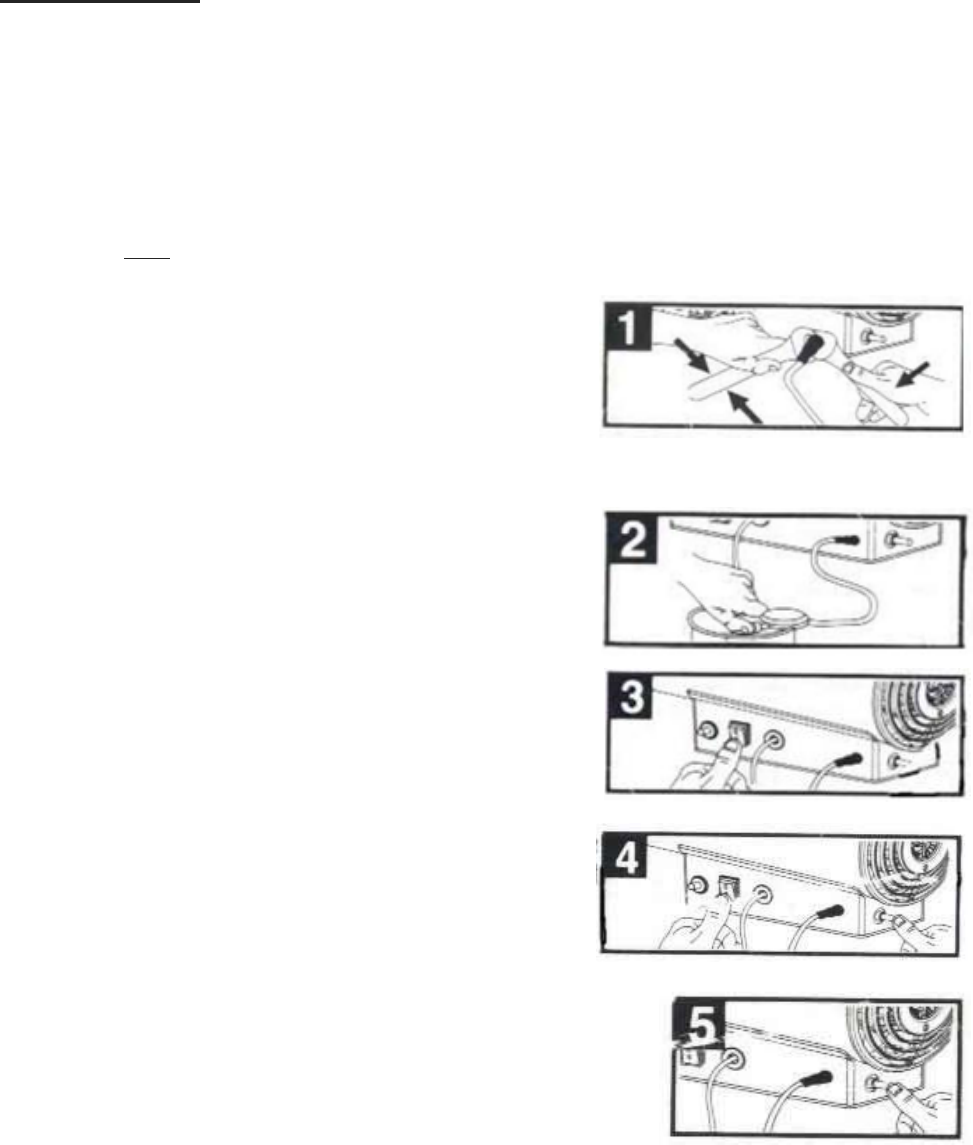
5. Verwijder het beschermdopje en sluit de
gastoevoerslang aan op het apparaat (linkse
schroefdraad!). Draai de moer stevig aan voor een
probleemloze gastoevoer (Afb. 1)
6. Sluit de drukregelaar aan op de gasfles. Draai de
moer stevig dicht zodat er geen gaslekkage kan optreden.
7. Controleer of het apparaat op correcte wijze is
aangesloten op de gasfles en voer een complete
gaslekkagetest uit, zie beschrijving elders in dit
boekje.
8. Als alles in orde is opent u de gaskraan. (Afb. 2)
9. Zet de regelknop op de maximale stand.
10. Steek nu stekker in het stopcontact. Zet vervolgens
de stroomschakelaar op I (aan) (Afb. 3). De
ventilator zal gaan draaien.
11. Wacht tot de ventilator rustig en stabiel draait. Druk
nu met uw rechterhand de aluminium knop van de
gasklep in en houd hem eerst 10 seconden
ingedrukt. Druk vervolgens met uw linkerhand
gelijktijdig enkele malen op de ontstekingsknop om
het apparaat te ontsteken (Afb. 4).
12. Nadat het gas is gaan branden de gasklep nog 15
seconden ingedrukt houden. Daarna kunt u loslaten en
zal het gas continu branden (Afb. 5).
13. Draai de regelknop nu terug tot de gewenste vlamlengte
is bereikt, in overeenstemming met de gewenste
warmteafgifte.
14. Om het apparaat uit te schakelen sluit u de gaskraan van de gasfles en wacht u tot
de vlam is gedoofd. Zet nu de stroomschakelaar op O (uit) en neem de stekker uit
het stopcontact. Koppel tenslotte de gastoevoerslang los van de gasfles.
Pas op! Het apparaat blijft na gebruik nog geruime tijd heet! Neem altijd de stekker
uit het stopcontact als het apparaat niet in werking is!
15. Wanneer u de gasfles moet verwisselen of het apparaat na een periode van opslag
weer wilt gebruiken dient u de hele procedure, incl. de gaslekkagetest, te herhalen.