- Lüften (3 Leistungsniveaus)
- Lüften, Kühlen und Befeuchten (3 Leistungsniveaus)
- Schwenken
Installation und Vorbereitungen
Entfernen Sie die Verpackung und stellen Sie das Gerät auf eine flache, stabile und
ebene Unterlage. Für ausreichend Platz um das Gerät herum sorgen (Luftabfuhr und
Luftansaugung).
Prüfen Sie, ob die Steckdose, die Sie zu nutzen gedenken, dieselbe Spannung abgibt,
wie auf dem Typenschild des Geräts angegeben.
Ziehen Sie den Wassertank rund 7 cm nach hinten und füllen Sie ihn mit sauberem
Wasser. Füllen Sie den Behälter, bis der Wasserstand über dem „MIN“-Niveau aber
unter dem „MAX“-Niveau steht.
Möchten Sie extra kühlen, können Sie gegebenenfalls gefrorene Kühlelemente in den
Wasserbehälter geben (nicht im Lieferumfang inbegriffen).
Wenn Sie die Luft befeuchten möchten, muss genügend Wasser im Tank sein.
Haben Sie das Gerät längere Zeit nicht genutzt, dann empfiehlt es sich, das restliche
Wasser zu ersetzen.
ZIEHEN SIE IMMER DEN STECKER AUS DER STECKDOSE, WENN SIE WASSER IN
DEN BEHÄLTER GEBEN ODER WASSER AUS DEM BEHÄLTER ENTFERNEN
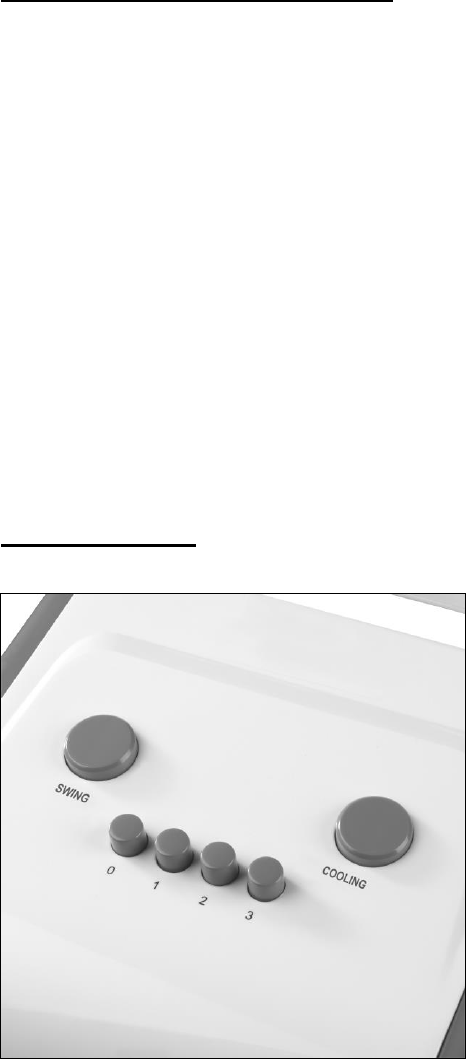
Funktionsweise
Stecken Sie den Stecker in die Steckdose. Das Gerät ist jetzt einsatzbereit.
- Drücken Sie auf den Knopf 1,2 oder 3 um
die Lüftung mit niedriger
beziehungsweise mittlerer oder hoher
Leistung zu starten.
- Anschließend drücken Sie auf den
COOLING-Knopf, um die Kühlfunktion zu
starten. Die Pumpe pumpt Wasser aus
dem Behälter, das über die
Wassergardine zirkuliert, wo es teils
verdampft und die Kühlung gewährleistet.
Wenn Sie erneut auf diesen Knopf
drücken, wird diese Funktion wieder
ausgeschaltet.
- Mit einem Druck auf den Knopf SWING
(Schwenken) wird der ausgeblasene
„Wind“ horizontal von links nach rechts und zurück geschwenkt. Nochmaliges Drücken
des Schwenkknopfes deaktiviert die Funktion. Indem Sie die horizontalen Lamellen
manuell einstellen, passen Sie die vertikale Ausblasrichtung an.
- Drücken Sie auf den 0-Knopf, wird die Lüftungsfunktion ausgeschaltet. Um das Gerät
vollständig auszuschalten, müssen alle 3 Funktionen separat ausgeschaltet werden!
Ziehen Sie anschließend immer den Stecker aus der Steckdose.