59
Dra ut elkabeln helt och sätt i kontakten i ett lämpligt 220–240 V-vägguttag. För
att förhindra överbelastning, kontrollera att inga andra apparater är anslutna i
samma strömkrets.
OBS: värmaren kan användas både vertikalt och horisontellt.
Uppvärmningen fungerar dock optimalt i det vertikala läget.
Användning
Manuell användning
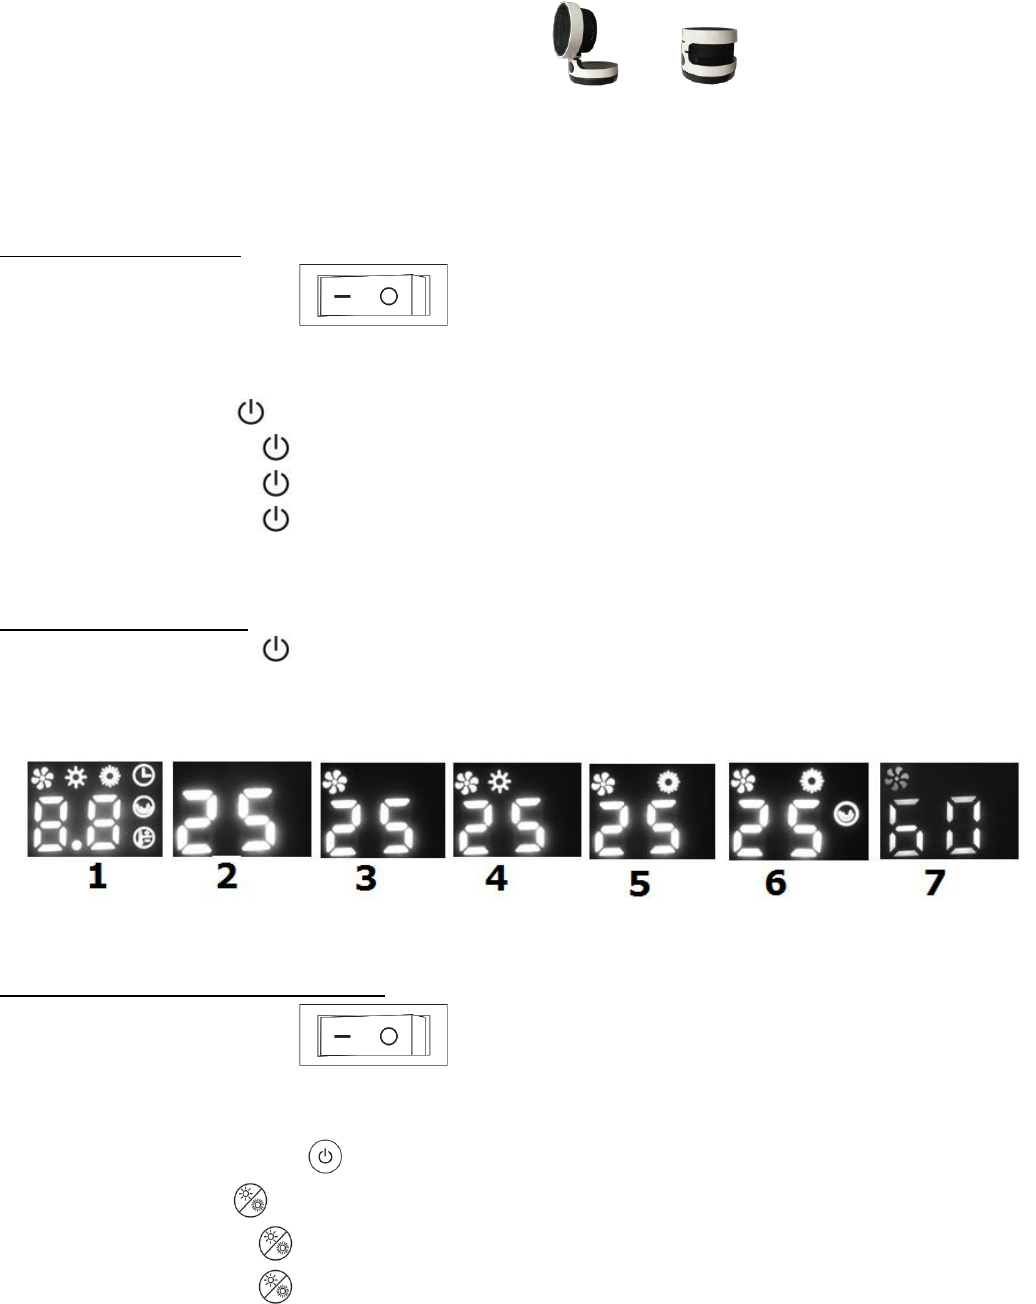
1. Sätt på/-av-knappen på ’-’ = PÅ. På displayen visas
omgivningstemperaturen och kort alla funktionsindikeringar (se bild 1 och 2).
Värmaren är nu i standbyläget.
2. 1x tryckning på : endast ventilation. Se bild 3.
3. 2x tryckningar på : uppvärmning med låg effekt. Se bild 4.
4. 3x tryckningar på : uppvärmning med hög effekt. Se bild 5.
5. 4x tryckningar på : uppvärmning med hög effekt och oscillering (rotation). Se
bild 6.
Manuell avstängning
6. 5x tryckningar på : återgår till standbyläget. Värmarens efterkylning är igång
i 60 sekunder. På displayen räknas sekunderna ned och indikationslampan för
ventilation lyser. Se bild 7.
Användning med fjärrkontrollen
1. Sätt på/-av-knappen på ’-’ = PÅ. På displayen visas
omgivningstemperaturen och kort alla funktionsindikeringar (se bild 1 och 2).
Värmaren är nu i standbyläget.
2. Slå på värmaren med -knappen. Fläkten startas.
3. 1x tryckning på : uppvärmning med låg effekt.
2x tryckningar på : uppvärmning med hög effekt.
3x tryckningar på : endast ventilation. Se bild 3, 4 och 5.