Algemeines
Dieses Gerät darf nur von einem qualifizierten
Gasinstallateur angeschlossen werden.
Achtung:
Dieses Gerät wird nicht an einen Rauchgas-
Abzugsschacht angeschlossen. Achten Sie
also auf ausreichende Entlüftung.
Stromversorgung
230 V - 50 Hz.
Das Gerät erfüllt die in der EG-Richtlinie
89/336/EEG genannten Vorschriften über
elektromagnetische Kompatibilität.
■ Der elektrische Anschluß muß den
nationalen und kommunalen Vorschriften
entsprechen.
■ Steckdose und Stecker müssen immer gut
zugänglich sein.
■ Wenn Sie einen festen Anschluß anbringen
möchten, sorgen Sie bitte dafür, daß in der
Zuführungsleitung ein omnipolarer Schalter
mit einem Kontaktabstand von mindestens
3 mm angebracht wird.
Gasanschluß RC 1/2˝ (ISO 7/1-RC 1/2)
■ Der Gasanschluß muß den nationalen und
kommunalen Vorschriften entsprechen.
Diese besagen u.a., daß:
– ausschließlich zugelassene Materialien
verwendet werden dürfen;
– hinter einem Einbaubackofen und unter
einem Kochfeld darf nur ein
Metallschlauch verwendet werden.
Achtung:
Gasart und Land, wofür sich das Gerät eignet,
sind auf dem Typenschild angegeben.
■ Wir empfehlen, das Kochgerät mit einer
festen Leitung anzuschließen. Erlaubt ist
jedoch auch der Anschluß mit einem
speziell hierfür bestimmten Sicherheits-
schlauch. Auf jeden Fall muß für das Gerät
der Gashahn an einer gut erreichbaren
Stelle angebracht werden, z.B. in einem
Küchenschrank neben dem Herd.
Achtung:
Ein Metall-Sicherheitsschlauch darf nicht
geknickt werden und auch nicht mit
beweglichen Teilen des Küchenmöbels in
Berührung kommen.
■ Vor dem ersten Gebrauch mit einer
Seifenlauge kontrollieren, ob die
Anschlüsse gasdicht sind.
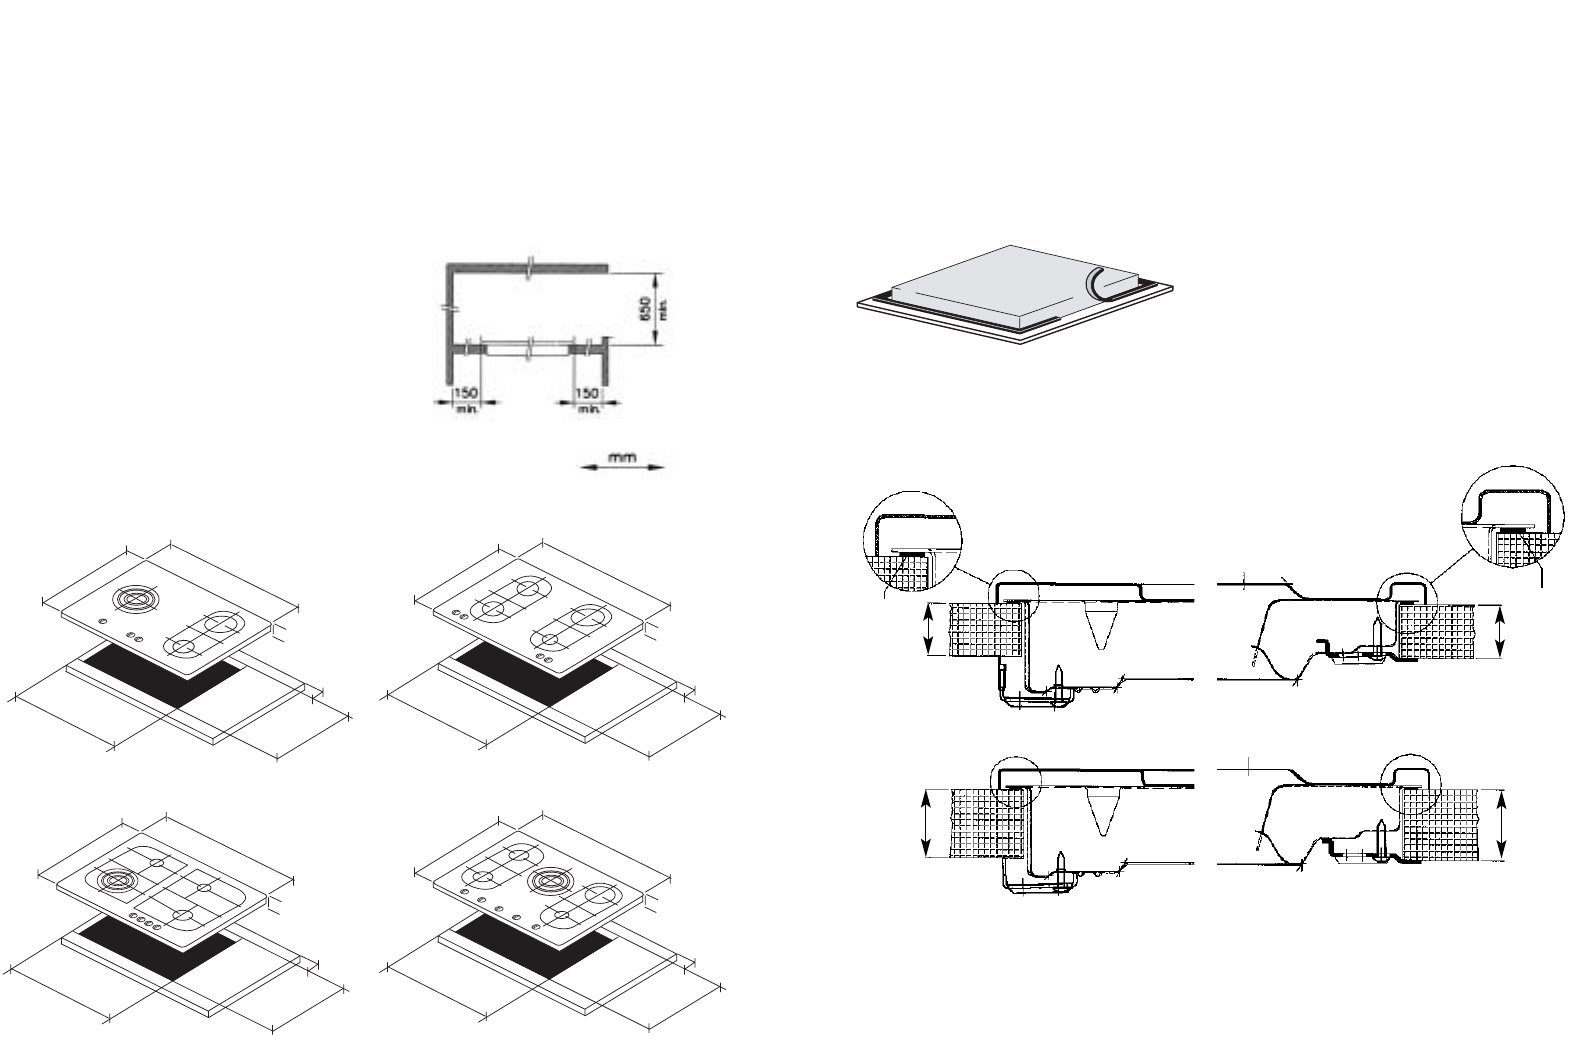
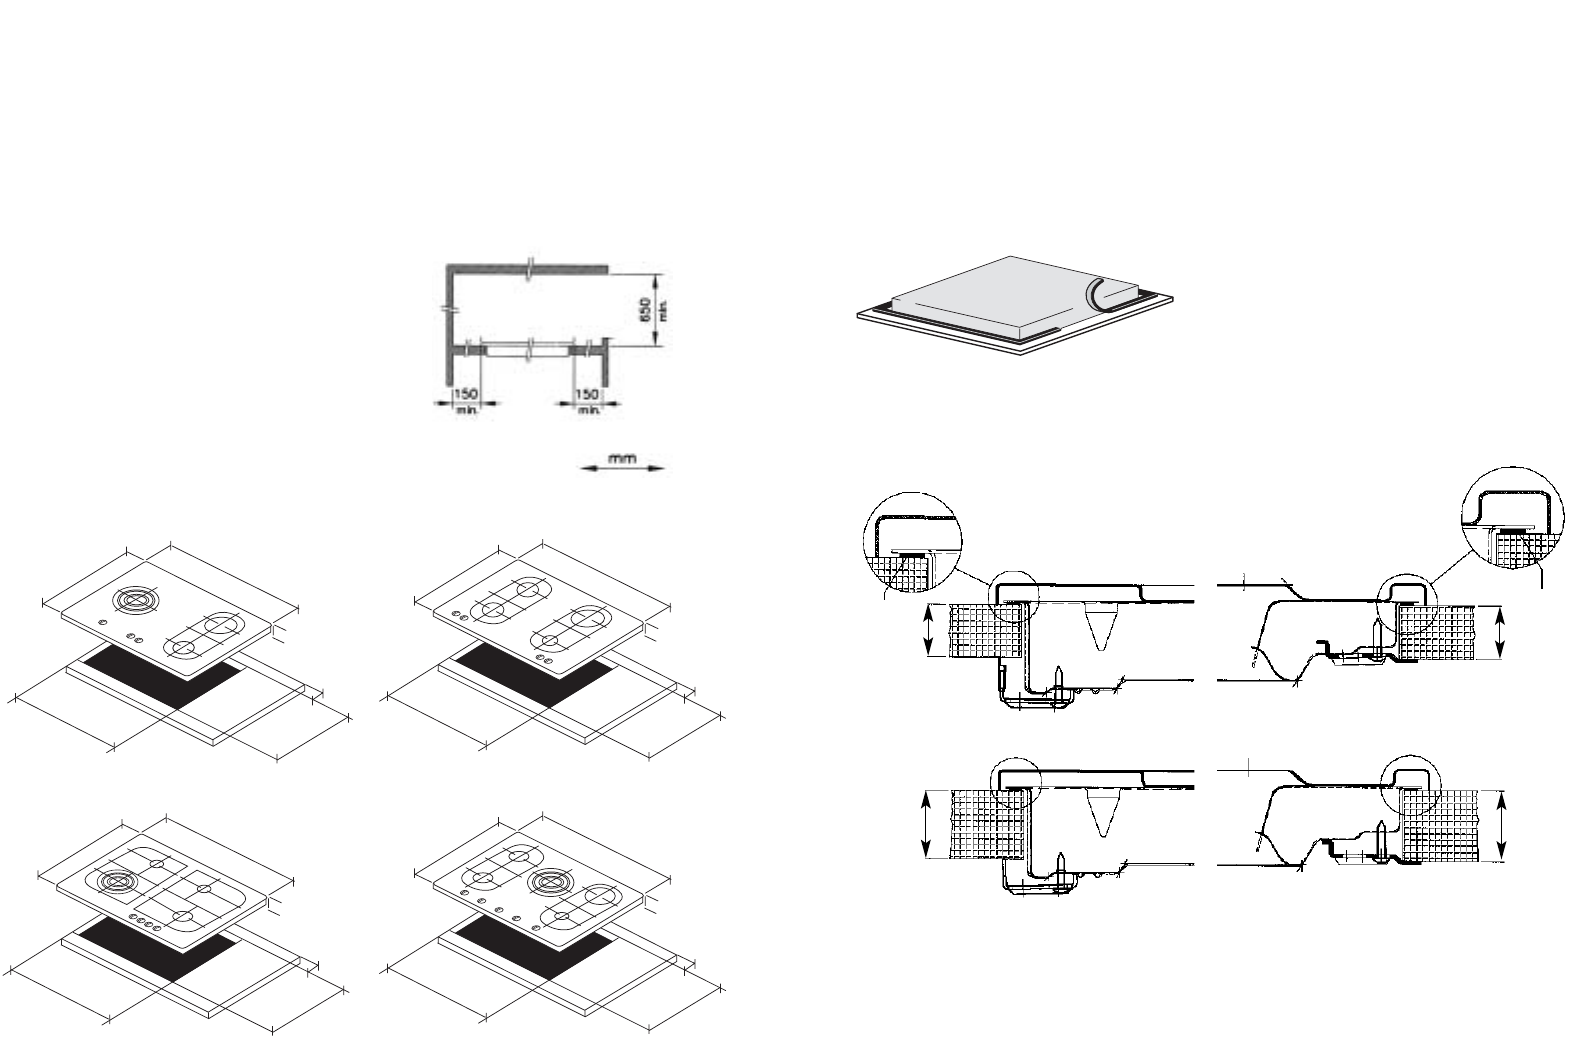
■ Nicht neben einen hohen Schrank oder
einer Wand aus entflammbarem Material
aufstellen. (Wenn nicht anders möglich,
dann einen Mindestabstand von 150 mm
zwischen Außenseite Kochplatte und Wand
berücksichtigen. Der Mindestabstand
zwischen Kochstelle und Unterkante einer
eventuellen Dunstabzugshaube muß
650 mm betragen.)
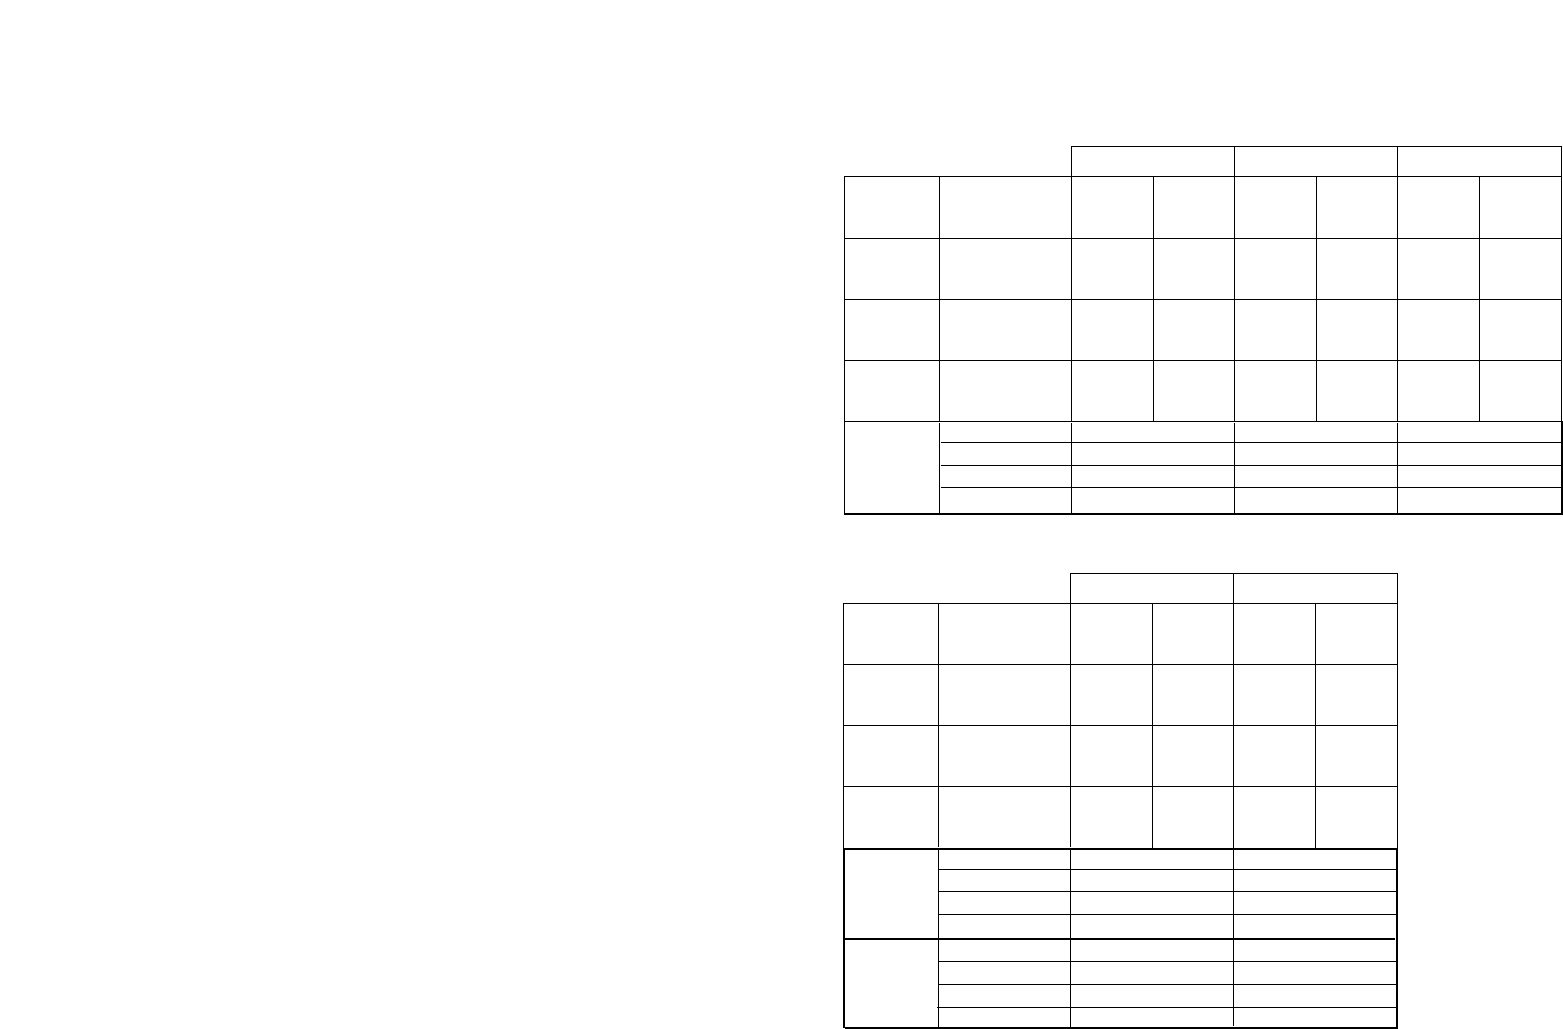
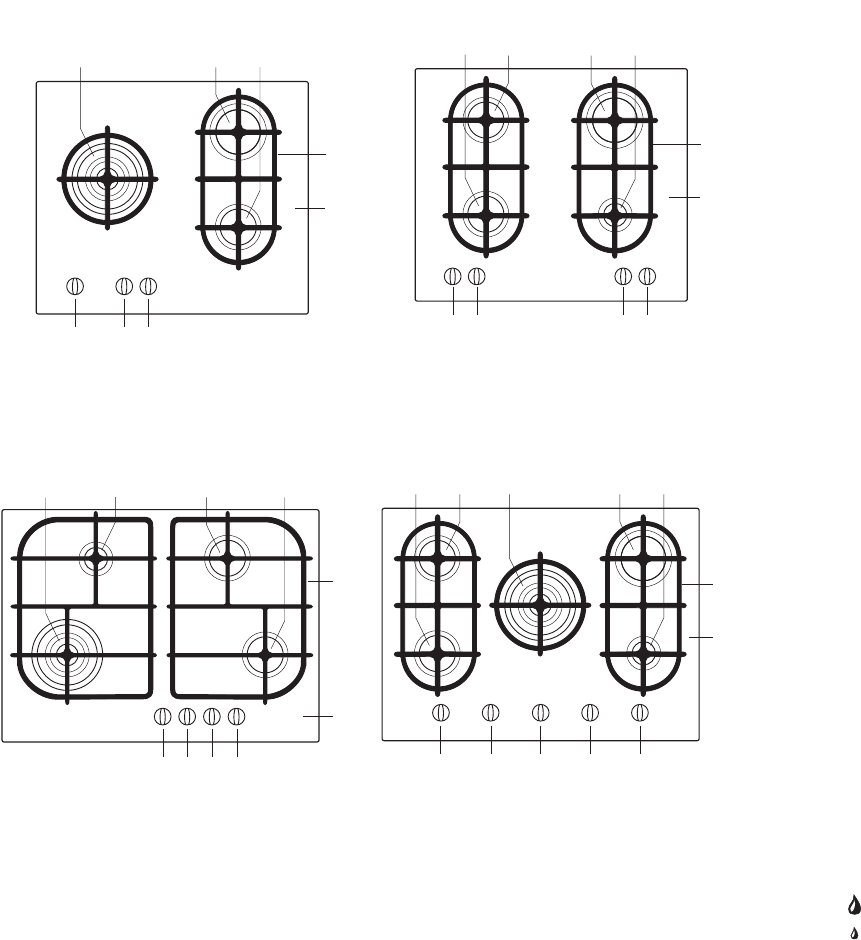
Töpfe
Empfohlene Diameter der Topfböden:
Starkbrenner . . . . . . . . . . . . . mindestens 24 cm.
Normalbrenner . . . . . . . . . . . mindestens 20 cm.
Hilfsbrenner . . . . . . . . . . . . . mindestens 12 cm.
Wokbrenner . . . . . . . . . mindestens 24 - 26 cm.
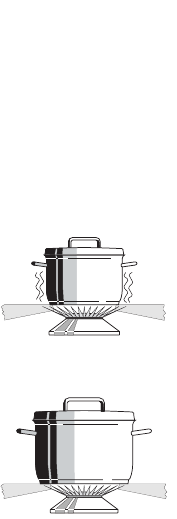
Falsch:
Zuviel Hitze entweicht
am Topf entlang.
Gut:
Die Hitze verteilt sich
gleichmäßig über den
Topfboden.
Tip:
Beim Kochen den Deckel auf dem Topf lassen
und Sie sparen bis zu 50% Energie. Saubere
Töpfe nehmen besser Wärme auf.
Reinigung
Täglich
Reinigen Sie das Kochfeld nach jedem
Gebrauch. Sie können hierzu z.B. eine
Spülmittellauge verwenden. Nicht zu naß
behandeln, um Eindringen von Feuchtigkeit in
die Brenner zu vermeiden.
Übergekochte Essensreste entfernen, wenn
das Glasfeld abgekühlt ist.
Wöchentlich
Säubern Sie das Kochfeld ca. einmal
wöchentlich mit einem speziellen
Reinigungsmittel, wie z. B. Collo Profi oder
Cerafix. Diese Mittel verleihen der Glasfläche
eine Schutzschicht. Behandeln Sie die
Glasplatte auch mit diesen Mitteln, wenn Sie
hartnäckige Flecken entfernt haben.
Hartnäckige Flecken
Angebackene Flecken, Metall- und Kalkflecken
können Sie mit einem spezialen Reinigungs-
mittel wie Collo, Luneta oder Stahlfix entfernen.
Hartnäckige Flecken mit einem Glasschaber
entfernen.
Übergekochte Essensreste
Verschmutzungen durch Zucker, stark
zuckerhaltige Speisen, Kunststoff oder
Aluminiumfolie entfernen Sie noch von dem
heißen Kochfeld mit einem Glasschaber.
Diese Verschmutzungen verursachen sonst
beim Abkühlen der Kochstelle bleibende
Schäden am Glaskeramik-Kochfeld.
Speziale Pflegemittel zur Pflege von Keramik-
kochflächen (z.B. Collo Luneta) sorgen für eine
antistatische Schicht auf der Kochfläche.
Hierdurch wird weniger Staub angezogen.