335183
10
Zoom out
Zoom in
Previous page
1/18
Next page
700 000 104 100_rev. 1_GBA_IVS
Handleiding
Manual
Notice d’utilisation
Anleitung
A822
Nederlands . . . . . . . . . . . . . . . . . . . . . . . . . . . . . . . . . . . . . . . . . . . . . . . . . . . . . . . . . . . . . . . 1 - 7
English . . . . . . . . . . . . . . . . . . . . . . . . . . . . . . . . . . . . . . . . . . . . . . . . . . . . . . . . . . . . . . . . . 8 - 15
Français . . . . . . . . . . . . . . . . . . . . . . . . . . . . . . . . . . . . . . . . . . . . . . . . . . . . . . . . . . . . . . . 16 - 23
Deutsch . . . . . . . . . . . . . . . . . . . . . . . . . . . . . . . . . . . . . . . . . . . . . . . . . . . . . . . . . . . . . . . . 24 - 31
Sudder brander
Simmer burner
Brûleur auxiliair
Hilfsbrenner
G25 - 25mbar
I2L
G20 - 20mbar
I2ELL I2E I2E I2H
Normaal brander
Semi-rapid burner
Brûleur semi-rapide
Normalbrenner
Sterk brander
Rapid burner
Brûleur rapide
Starkbrenner
Belasting totaal
Total heat input
Capacité total
Belastung total
1x
2x
1x
0,67 - 0,85
mm
1,00 - 1,25
mm
1,30 mm
0,90 kW
2,00 kW
2,90 kW
8,70 kW
0,65 - 0,85
mm
1,00 - 1,25
mm
1,30 mm
0,95 kW
2,20 kW
3,20 kW
9,55 kW
G25 - 20mbar
I2ELL
0,65 - 0,85
mm
1,00 - 1,25
mm
1,30 mm
0,80 kW
1,80 kW
2,60 kW
7,80 kW
Sudder brander
Simmer burner
Brûleur auxiliair
Hilfsbrenner
G30 - 29 mbar
I3B/P I3
G30 - 50 mbar
I3B/P I3
Normaal brander
Semi-rapid burner
Brûleur semi-rapide
Normalbrenner
Sterk brander
Rapid burner
Brûleur rapide
Starkbrenner
Belasting totaal
Total heat input
Capacité total
Belastung total
Verbruik
Consumption
Consommation
Verbrauch
1x
2x
1x
0,45 mm
0,65 mm
0,80 mm
0,80 kW
1,70 kW
2,80 kW
8,10 kW
0,42 mm
0,62 mm
0,75 mm
0,90 kW
2,00 kW
3,20 kW
9,30 kW
584 g/h 670 g/h
+
+
+
Spuitstuk diameter en belastingen gemeten op bovenwaarde
Injector diameter and heat input measured on gross C.V.
Diamètre injecteur et capacité mesuré à P.C.S.
Düsendurchmesser und Belastung gemessen auf Ho
INHOUD
1
Introductie
Als u deze gebruiksaanwijzing doorleest, bent
u snel op de hoogte van alle mogelijkheden
die dit toestel u biedt. U vindt informatie voor
uw veiligheid en over het onderhoud van het
toestel. Verder vindt u milieutips en
aanwijzingen om energie te besparen.
Bewaar deze handleiding. Een eventueel
volgende gebruiker van dit toestel kan daar
zijn voordeel mee doen.
Veel kookplezier!
Inhoud
Toestelinformatie . . . . . . . . . . . . . . . . . . . . 1
Veiligheid . . . . . . . . . . . . . . . . . . . . . . . . 2 - 3
Vóór het eerste gebruik . . . . . . . . . . . . . . . 2
Waarop u moet letten . . . . . . . . . . . . . . . . . 3
Bediening . . . . . . . . . . . . . . . . . . . . . . . . . . 3
Ontsteking . . . . . . . . . . . . . . . . . . . . . . . . . . 3
Toepassing . . . . . . . . . . . . . . . . . . . . . . . . . 4
Pannen . . . . . . . . . . . . . . . . . . . . . . . . . . . . . 4
Afvoeren verpakking en toestel . . . . . . . . 4
Onderhoud . . . . . . . . . . . . . . . . . . . . . . . . . . 4
Reinigen . . . . . . . . . . . . . . . . . . . . . . . . . . . .4
Installatie . . . . . . . . . . . . . . . . . . . . . . . . . . 5
Montage . . . . . . . . . . . . . . . . . . . . . . . . . . . . 5
Inbouwen . . . . . . . . . . . . . . . . . . . . . . . . . . . 6
Technische gegevens . . . . . . . . . . . . . . . . 7
2
1
7
3
4
6
51 2 3 4
Toestelinformatie
1 bedieningsknop voor sterkbrander 1
2 bedieningsknop voor sterkbrander 2
3 bedieningsknop voor sudderbrander 3
4 bedieningsknop voor normaalbrander 4
5 vonkontsteking
6 pandrager geëmailleerd
7 lekplaat geëmailleerd of roestvrijstaal
Knopaanduiding:
0 dicht
grote vlam
kleine vlam
3
2
VEILIGHEID
Vóór het eerste gebruik
Dit toestel mag alleen door een erkend gas-
technisch installateur aangesloten worden.
Gebruik het toestel alleen indien het op de
juiste wijze is ingebouwd. Bij een verkeerd
geïnstalleerd toestel vervalt bij schade de
aanspraak op garantie.
Bij reparatie of schoonmaakbeurten moet
het toestel afgesloten worden van stroom
en gas. Neem de stekker uit de
contactdoos of draai de schakelaar in de
meterkast op nul (gaskookplaten met
vonkontsteking). Draai de gaskraan in de
toevoerleiding dicht.
Dit kooktoestel is ontworpen voor
huishoudelijk gebruik. Gebruik het alleen
voor het bereiden van gerechten.
Bij koken en braden wordt de kookplaat
heet. Let op als er kinderen in de buurt zijn.
Vet en olie zijn bij oververhitting
ontvlambaar. Blijf in de buurt tijdens het
bereiden van gerechten.
Gebruik het toestel niet voor het
verwarmen van de keuken. Er ontstaat dan
een vochtige atmosfeer.
Bij het gebruik van gas-kookapparatuur
ontstaat warmte en vocht in de ruimte waar
het toestel is geplaatst. Let op dat de ruimte
voldoende is geventileerd: houd natuurlijke
ventilatie-openingen open. Bij langdurig
gebruik van de kookplaat kan extra
ventilatie noodzakelijk zijn, bijvoorbeeld een
open raam.
De branders mogen niet zonder pannen
worden gebruikt. Nooit aluminium of
kunststof bakjes direct op een brander
leggen.
Wees voorzichtig met snoeren van
elektrische apparaten, zoals van een mixer.
Deze mogen niet terecht komen op hete
branders.
De onderkant van de inbouwkookplaat
wordt heet. Let erop, dat u geen brandbare
of kunststof voorwerpen in de eventueel
onder het toestel aanwezige lade legt.
Controleer voor het installeren van het
toestel of de gassoort en gasdruk van de
gasbron overeenkomt met het typeplaatje.
Waar u op moet letten
Direct schoonmaken
Overgekookte voedselresten direct
verwijderen, met name van rode kool,
appelmoes en rabarber. Wanneer ze lang op
email of roestvrijstaal inwerken kan dit tot
verkleuring leiden.
Inbranden email
De pandrager wordt door de kookbrander
zeer sterk verhit, waardoor na verloop van tijd
het email op de dragerpunt kan inbranden. Dit
is niet te voorkomen en valt dan ook niet
onder de garantie.
Branderdoppen
Controleer regelmatig of de branderdoppen
juist op de branderkelken liggen; onjuiste
positionering kan slechte ontsteking,
ongunstige verbranding of beschadiging van
de doppen tot gevolg hebben.
Ontsteking
Elektrische vonkontsteking
Druk de knop van de te ontsteken brander in,
draai hem linksom en druk gelijktijdig op de knop
van de vonkontsteking. Er springen dan vonken
over op de brander, die nu vanzelf ontsteekt.
Mocht de brander na herhaalde pogingen niet
ontsteken, controleer dan of de branderdop goed
op z’n plaats ligt.
VEILIGHEID/BEDIENING
5
4
INSTALLATIE/MONTAGE
Installatie
Algemeen
Dit toestel mag alleen door een erkend gas-
technisch installateur aangesloten worden.
Let op:
Dit toestel wordt niet aangesloten op een
rookgas-afvoerkanaal. Zorg dus voor
voldoende ventilatie.
Elektrische aansluiting (alleen voor toestellen
met vonkontsteking)
230 V - 50 Hz.
Dit toestel voldoet aan de voorschriften van
de richtlijn 89/336/EEG inzake
elektromagnetische compatibiliteit.
De elektrische aansluiting moet voldoen aan
de nationale en lokale voorschriften. Voor
Nederland is dit onder andere NEN 1010.
Stopcontact en stekker moeten te allen
tijde bereikbaar blijven.
Wilt u een vaste aansluiting maken, zorg er
dan voor dat er een omnipolaire schakelaar
met een contactafstand van minimaal 3 mm
in de toevoerleiding wordt aangebracht.
Gasaansluiting RC 3/8˝ (ISO 7/1-RC 3/8)
De gasaansluiting moet voldoen aan de
nationale en lokale voorschriften. Voor
Nederland zijn dit onder andere de GAVO-
voorschriften (NEN 1078).
Deze bepalen onder andere dat:
– uitsluitend goedgekeurde materialen
gebruikt mogen worden.
– achter een inbouwoven en onder de
kookplaat slechts een volledig metalen
slang gebruikt mag worden.
Let op:
De gassoort en het land waarvoor het toestel is
ingericht staan vermeld op het gegevensplaatje.
Wij adviseren de kookplaat aan te sluiten
met een vaste leiding. Aansluiting door
middel van een speciaal daarvoor bestemde
metalen veiligheidsslang is ook toegestaan.
In alle gevallen moet er voor het toestel een
aansluitkraan geplaatst worden op een
makkelijk bereikbare plaats, bijvoorbeeld in
het naastgelegen keukenkastje.
Let op:
Een metalen veiligheidsslang mag niet worden
geknikt en niet in aanraking komen met
bewegende delen van het keukenmeubel.
Alvorens het toestel in gebruik te nemen de
aansluitingen met zeepsop controleren op
gasdichtheid.
Montage gasinbouwkookplaten
Let op:
Plaats een kookplaat niet naast een hoge kast
of wand van brandbaar materiaal. (Indien niet
anders mogelijk, houdt dan een minimale
afstand van 100 mm tussen buitenkant
kookplaat en deze wand. Houd ook een afstand
van minimaal 650 mm aan tussen de kookplaat
en een eventueel te plaatsen afzuigkap.)
TOEPASSING/ONDERHOUD
Pannen
De aanbevolen panbodemdiameters zijn:
sterkbrander . . . . . . . . . . . . . . minimaal 24 cm.
normaalbrander . . . . . . . . . . . minimaal 20 cm.
sudderbrander . . . . . . . . . . . . minimaal 12 cm.
Fout:
Er ontsnapt veel
warmte langs de pan.
Goed:
De warmte wordt
gelijkmatig over de
panbodem verdeeld.
Tip
Kook met een deksel op de pan en u bespaart
tot 50% energie.
Schone pannen nemen beter warmte op.
Afvoeren verpakking en toestel
De verpakking van het toestel is recyclebaar.
Gebruikt zijn:
karton;
poly-ethyleenfolie (PE);
CFK-vrij polystyreen (PS-hard schuim).
Deze materialen op verantwoorde wijze en
conform de overheidsbepalingen afvoeren.
De overheid kan u ook informatie verschaffen
over het op verantwoorde wijze afvoeren van
afgedankte huishoudelijke apparaten.
Reinigen
Reinig het toestel dagelijks met een sopje
van afwasmiddel of allesreiniger. Gebruik
niet te veel vocht, omdat dit de brander of
ventilatieopeningen binnen kan dringen.
Hardnekkige vlekken op email verwijderen
met een vloeibaar schuurmiddel of
kunststof schuursponsje. Gebruik nooit
schuurpoeders, agressieve reinigings-
middelen en groene schuursponsjes.
Hardnekkige vlekken op roestvrijstaal
verwijderen met een speciaal roestvrijstaal
reinigingsmiddel. Poets altijd met de
structuur van het roestvrijstaal mee.
Hiermee voorkomt u het ontstaan van
glansplekken.
Als vlekken zich niet laten verwijderen de
kookplaat schoonmaken met HG oven &
grillreiniger. Behandel altijd de gehele
lekbak om "kleurverschil" te voorkomen.
Steeds nabehandelen met een glans-/
onderhoudsmiddel voor roestvrijstaal.
Schuursponsjes bevatten schuurmiddelen
die krassen veroorzaken op roestvrijstaal.
Het roestvrijstaal is voorzien van een
structuur. Bij schuren of polijsten ontstaan
(glanzende) vlekken in het oppervlak. Deze
schades vallen niet onder de garantie.
Let op:
Hete branderdoppen nooit onderdompelen in
koud water. Door de sterke afkoeling kan het
email beschadigd raken.
fig. 1
fig. 2
7
6
Technische gegevens (zie ook tabel op omslag)
Kookplaattype A822
Elektrisch:
3-aderig aansluitsnoer op oven
Aansluiting AC 230 V - 50Hz - 0,6 VA
Vonkonsteking
Gas:
Aansluiting G3/8”
Afmeting toestel:
580x67x510 bxhxd in mm
Afmeting nis:
560x490 bxd in mm
TECHNISCHE GEGEVENS
INBOUWEN
Inbouwen
1. Maak de uitsparing in het aanrechtblad. Zorg
ervoor dat u voldoende ruimte vrij laat aan de
zij- en achterkant.
Let op:
De afstand tussen de kookplaat en de
achterwand moet minimaal 40 mm
bedragen.
2. Maak een uitsparing in de zijwand van de
keukenkast voor het doorvoeren van de
gasleiding.
3. Laat de kookplaat in de uitsparing zakken.
4. Zet de kookplaat vast.
5. Maak de gasaansluiting. Controleer de
aansluitingen met zeepsop op gasdichtheid
(zie “gasaansluiting”).
6. Maak de elektrische aansluiting
(zie “elektrische aansluiting”).
7. Controleer de werking van het toestel.
Het inbouwen in combinatie met een inbouw-
oven staat beschreven in het installatie-
voorschrift van de oven.
Pas op:
De onderkant van de inbouwkookplaat
wordt heet. Let erop, dat u geen brandbare
of kunststof voorwerpen in de eventueel
onder het toestel aanwezige lade legt!
fig. 4
560 490
fig. 3
9 TABLE OF CONTENTS
Introduction
When you have read these instructions for
use, you will quickly be aware of all the
facilities the appliance can offer you. You can
read about safety and how you should look
after the appliance. In addition you will find
environmental tips and instructions that can
help to save energy.
Keep the instructions for use and the
installation instructions. Any later user of this
appliance could benefit from them.
Enjoy your cooking!
Table of contents
Appliance information . . . . . . . . . . . . . . . . 9
Safety . . . . . . . . . . . . . . . . . . . . . . . . . 10 - 11
Before using the appliance . . . . . . . . . . . 10
Things to watch for . . . . . . . . . . . . . . . . . . 11
Operating the appliance . . . . . . . . . . . . . 11
Lighting the burners . . . . . . . . . . . . . . . . . 11
Use . . . . . . . . . . . . . . . . . . . . . . . . . . . . . . . 12
Saucepans . . . . . . . . . . . . . . . . . . . . . . . . . 12
Disposal of packaging and appliance . . 12
Maintenance . . . . . . . . . . . . . . . . . . . . . . .12
Cleaning the appliance . . . . . . . . . . . . . . . 12
Installation . . . . . . . . . . . . . . . . . . . . . . . . 13
Assembly . . . . . . . . . . . . . . . . . . . . . . . . . . 13
Building-in . . . . . . . . . . . . . . . . . . . . . . . . . 14
Technical specifications . . . . . . . . . . . . . 15
Appliance information
1 control knob for rapid burner 1
2 control knob for rapid burner 2
3 control knob for simmer burner 3
4 control knob for semi-rapid burner 4
5 spark switch
6 enamelled saucepan supports
7 enamelled or stainless steel drip tray
Control knob symbols:
0 off
high
low
8
2
1
7
3
4
6
51 2 3 4
11
10
Before using the appliance
The fitting of the appliance should only be
carried out by a registered Corgi gas fitter.
Only use the appliance if it has been built in
correctly. Damage to an incorrectly installed
appliance is excluded from the guarantee.
During repair and cleaning the appliance
needs to be disconnected from the power
supply (electricity and gas). Remove the
plug from the wall socket or turn the switch
in the metre cupboard to zero (for gas hobs
with a spark switch). Turn off the gas tap in
the feeder pipe.
This cooking appliance is designed for
household use. It should only be used for
preparing meals.
When boiling and frying the hob gets hot.
Please pay close attention to small children.
Grease and oil are flammable when over-
heated. Stay near the appliance when
preparing dishes.
Do not use the appliance to heat the
kitchen. This will produce a damp
atmosphere.
When a gas cooking appliance is being used
heat and moisture is produced in the area
where the appliance is situated. Make sure
that the area is sufficiently ventilated; open
natural ventilation openings. When the hob
is used for longer periods extra ventilation
may be needed, such as an open window.
The burners should not be used without
pans. Never place aluminium or plastic
trays directly onto a burner.
Be careful with the cables of electrical
equipment, such as a mixer. These should
not be allowed to touch hot burners.
The underside of the built-in hob becomes
hot. Take care that you do not place any
flammable or plastic objects in any drawer
under the appliance.
Before installing the appliance, check that
the gas sort and gas pressure of the gas
source are in accordance with what is
specified on the model data plate.
SAFETY
Things to watch for
Clean immediately
Any spillage should be removed immedia-
tely, particularly red cabbage, apple sauce
and rhubarb. These can leave permanent
spots on the enamel or on stainless steel.
Burning in of the enamel
The burners cause the saucepan supports
to get extremely hot. Over time the enamel
on the support points can burn in. This
cannot be prevented and is not covered by
the guarantee.
Burner caps
Check regularly to ensure that the caps of
the burners are properly in position on the
burner depressions; improper positioning
can make it difficult to light the burners,
give rise to an irregular gas flame, or
damage the burner caps.
Lighting the burners
Using the electrical spark switch
While keeping the knob of the burner in, turn
the knob to the left while simultaneously
pressing the spark switch. The spark switch
will generate sparks and the burner will light
automatically. If the burner fails to light after
repeated attempts, check to ensure that the
burner cap is properly positioned.
SAFETY/OPERATING
13
12
Installation
General
The fitting of the appliance should only be
carried out by a registered Corgi gas fitter.
Please note:
This appliance is not connected to a flue duct.
Take care to ensure that there is sufficient
ventilation.
Electrical connection (solely for appliances
with a spark switch)
230 V - 50 Hz.
This appliance complies the regulations
concerning electromagnetic compatibility in
directive 89/336/EEC.
The electrical connection must comply
with national and local regulations.
Wall socket and plug must be accessible at
all times.
If you want to make a fixed connection,
ensure that a multi-pole switch with a
distance between contacts of 3 mm is
installed in the supply cable.
Gasconnection RC 3/8˝ (ISO 7/1-RC 3/8)
The gas connection must comply with
national and local regulations.
Amongst other things these regulations
instruct that:
– only approved materials are to be used;
only a completely metal hose may be used
behind a built-in oven and beneath the hob.
Please note:
The type of gas and the country for which the
appliance has been designed are indicated on
the data badge.
We recommend that the hob be connected
by means of a fixed pipe. Connection using
a specially designed safety hose is also
permitted. In all cases the connection tap
for the appliance must be positioned such
that it is easily accessible, in an adjacent
kitchen cupboard, for example.
Please note:
A metal safety hose must not get kinks in it or
get trapped and must not come into contact
with moving parts of the kitchen furniture.
Before using the appliance for the first time
check the connections using water and
washing-up liquid to ensure that there are
no gas leaks.
Assembly of built-in gas hob
Please note:
Do not install a hob next to a high cupboard or
wall made of flammable material. (If there is
no alternative, ensure that there is a minimal
distance of 100 mm between the outer edge of
the hob and the wall in question. Also ensure
that there is a minimum distance of 650 mm
between the hob and any overhead extractor
fan which may be installed.)
INSTALLATION/ASSEMBLY
USE/MAINTENANCE
Saucepans
The recommended saucepan diameters are:
rapid burner . . . . . . . . . . . . . . minimum 24 cm.
semi-rapid burner . . . . . . . . . . minimum 20 cm.
simmer burner . . . . . . . . . . . . . minimum 12 cm.
Wrong:
A great deal of heat is
lost along the sides of
the saucepan.
Right:
The heat is evenly
distributed over the
base of the saucepan.
Tip
Cooking with a lid on the pan saves up to 50%
on energy.
Clean saucepans absorb heat more efficiently.
Packaging and appliances
The packaging of the appliance is recyclable.
It is made up off:
cardboard;
polyethylene;
CFK free polystyrene (PS rigid foam).
Please dispose of these materials in a
responsible way in accordance with the
regulations of your local authority.
Your local authority will also be able to give
you information about disposing disused
household appliances in a responsible way.
Cleaning the appliance
Clean the appliance daily with water and a
detergent or all purpose cleaner. Avoid
using too much water to prevent it entering
the burner or ventilation openings.
Remove stubborn stains on enamel with a
non-abrasive cream or a soft sponge.
Never use scouring powders, aggressive
cleaning agents, green scours.
Remove stubborn stains on stainless steel
with a special stainless-steel cleaning
agent. Always polish in the direction of the
surface structure of the stainless steel. In
this way, you will prevent shiny patches
occurring.
If stains cannot be removed, clean the hob
with the proprietary HG oven & grill
cleaner. Always treat the whole drip-tray,
to prevent "colour differences". Always
treat with a stainless-steel polish / care
product afterwards.
Scourers contain abrasives that cause
scratches on stainless steel. The stainless
steel has a surface structure. Scouring or
polishing will cause (shiny) patches on the
surface. This damage is excluded from the
guarantee.
Please note:
Do not drop hot burner caps in cold water.
Because of the strong cooling they might get
damaged.
fig. 1
fig. 2
15
14
Technical specifications (also see table on cover)
TECHNICAL SPECIFICATIONS
Type of hob A822
Electric:
3-core connection lead to oven
Connection AC 230 V - 50Hz - 0.6 VA
Spark switch
Gas:
Connection G3/8”
Dimensions (appliance):
580x67x510 wxhxd in mm
Dimensions (recess):
560x490 wxd in mm
BUILDING-IN
Building-in
1. Make the cut-out in the work surface. Ensure
that there is sufficient space allowed at the
sides and at the back.
Please note:
The distance between the hob and the rear
wall must be at least 40 mm.
2. Make a hole in the side of the kitchen cabinet
to enable the gas pipe to be passed through.
3. Place the appliance in the cut-out.
4. Secure the appliance in position.
5. Make the gas connection. Check the gas
connections with a soap/water mixture
(see "Gas Connection").
6. Put the plug in the socket
(see "Electrical Connection").
7. Test to check the appliance is operational.
The building in of the hob in combination with a
built-in oven is described in the installation guide
for the oven.
Attention!
The underside of this built-in hob becomes
hot. Take care that you do not place any
flammable or plastic objects in any drawer
under the appliance.
fig.4
560 490
fig. 3
17
TABLE DES MATIÈRES
Introduction
Ce manuel est un aperçu des possibilités
offertes par cet appareil. Il vous fournira des
renseignements précieux sur le plan de la
sécurité et de l'entretien ainsi que des
conseils en matière d'environnement et
d'économie d'énergie.
Conservez le mode d'emploi et les directives
d'installation. Ainsi, un éventuel prochain
usager de l'appareil pourra en profiter.
Bon cuisson !
Table des matières
Description de l’appareil . . . . . . . . . . . . . 17
Sécurité . . . . . . . . . . . . . . . . . . . . . . . 18 - 19
Avant la première utilisation . . . . . . . . . . 18
Précautions particulières . . . . . . . . . . . . . 19
Fonctionnement . . . . . . . . . . . . . . . . . . . . 19
Allumage . . . . . . . . . . . . . . . . . . . . . . . . . . 19
Application . . . . . . . . . . . . . . . . . . . . . . . . 20
Casseroles . . . . . . . . . . . . . . . . . . . . . . . . . 20
Enlèvement de l'emballage . . . . . . . . . . . 20
Entretien . . . . . . . . . . . . . . . . . . . . . . . . . . 20
Nettoyage . . . . . . . . . . . . . . . . . . . . . . . . . 20
Installation . . . . . . . . . . . . . . . . . . . . . . . . 21
Montage . . . . . . . . . . . . . . . . . . . . . . . . . . . 21
Encastrement . . . . . . . . . . . . . . . . . . . . . . 22
Spécifications techniques . . . . . . . . . . . 23
Description de l’appareil
1 bouton de commande pour brûleur rapide 1
2 bouton de commande pour brûleur rapide 2
3 bouton de commande pour brûleur
auxiliair 3
4 bouton de commande pour brûleur
semi-rapide 4
5 allumeur
6 supports pour casseroles émaillés
7 plaque d'égouttement émaillée ou en acier
inoxydable
Symboles des boutons:
0 fermé
grande flamme
petite flamme
16
2
1
7
3
4
6
51 2 3 4
19
18
SECURITE
Avant la première utilisation
Cet appareil ne peut être installé que par
un technicien gazier agréé.
Utilisez seulement l'appareil en cas
d'encastrement correct. En cas de
mauvaise installation, la garantie ne couvre
pas les dommages causés à l'appareil.
Lors d'une réparation ou d'un nettoyage,
l'alimentation électrique et en gaz de
l'appareil doivent être coupées. Otez la
fiche de la prise ou placez le commutateur
du compteur électrique dans la position
zéro (plaques de cuisson au gaz avec
allumage électrique). Fermez le robinet de
gaz de la conduite d'alimentation.
Cet appareil de cuisson a été conçu pour
un usage ménager. Ne l’utiliser que pour la
cuisson des aliments.
Lors de la cuisson, la plaque devient
chaude. Eloignez les enfants de l'appareil.
Les graisses et les huiles sont
inflammables si la température de cuisson
est trop élevée. Restez toujours sur place
pendant la préparation de vos plats.
Ne pas utiliser l’appareil pour chauffer la
cuisine. L’atmosphère deviendra humide.
Lors de leur utilisation, les appareils à gaz
produisent de la chaleur et de l’humidité
dans la pièce où ils sont installés.
S’assurer que la pièce est suffisamment
ventilée : maintenir ouverts les orifices
naturels de ventilation. En cas d’utilisation
prolongée de la table de cuisson, une
ventilation supplémentaire peut s’avérer
nécessaire : ouvrir par exemple une
fenêtre.
Il est interdit d'utiliser les brûleurs sans
casseroles. Ne déposez jamais de bacs en
aluminium ou en plastique sur les brûleurs.
Soyez prudent avec les cordons des
appareils électriques (mixeur, par ex.).
Ceux-ci ne doivent pas entrer en contact
avec les brûleurs chauds.
La partie inférieure de plaque de cuisson à
encastrer chauffe. Veillez à ne pas mettre
d’objets en plastique ou risquant de
prendre feu dans le tiroir qui se trouve
éventuellement sous l’appareil.
Avant d'installer l'appareil, contrôlez si le
type de gaz et la pression du gaz sont les
mêmes que ceux qui se trouvent indiqués
sur la plaque du modèle.
Précautions particulières
Nettoyage immédiat
Eliminer immédiatement les restes
d’aliments comme le chou rouge, la
compote de pomme et la rhubarbe. En
restant sur l’émail ou l’acier inoxydable, ils
risquent de les décolorer.
Email brûlé
Le support pour casseroles est fortement
chauffé par les brûleurs à gaz. Après un
certain temps, l'émail du support peut
brûler. Cela est impossible à éviter et n'est
donc pas couvert par la garantie.
Capuchons de brûleur
Contrôlez régulièrement la position exacte
des capuchons de brûleur sur les
réceptacles des brûleurs : une position
incorrecte peut engendrer un mauvais
allumage, une combustion nuisible ou des
dégâts aux capuchons.
Allumage
Allumage électrique
Poussez et tournez vers la gauche le bouton
de commande et pressez simultanément le
bouton de l'allumage électrique. Des étincel-
les sont produites au dessus du brûleur qui
s'allume automatiquement. Si le brûleur ne
s'allume pas après plusieurs tentatives,
contrôlez si le capuchon du brûleur est placé
correctement.
SECURITE/FONCTIONNEMENT
21
20
INSTALLATION/MONTAGE
Installation
Généralités
Cet appareil ne peut être installé que par un
technicien gazier agréé.
Attention :
Cet appareil n'est pas relié à une hotte. Veillez
donc à assurer une ventilation suffisante.
Branchement électrique (uniquement pour les
appareils avec allumage électrique)
230 V - 50 Hz.
Cet appareil est conformé aux prescriptions
de la directive 89/336/CEE en matière de
compatibilité électromagnétique.
Le branchement électrique doit satisfaire aux
prescriptions nationales et locales.
La fiche et la prise de courant doivent
toujours être accessibles.
Pour le branchement fixe, veillez à ce que le
câble d’alimentation soit muni d’un
interrupteur omnipolaire avec une distance
de contact d’au moins 3 mm.
Raccordement du gaz RC 3/8˝ (ISO 7/1-RC 3/8)
Le branchement au gaz doit satisfaire aux
prescriptions nationales et locales.
Elles stipulent notamment que :
– seuls les appareils agréés peuvent être
utilisés ;
– seule l'utilisation d'un tuyau entièrement en
métal est autorisée à l'arrière d'un four à
encastrer et sous la plaque de cuisson.
Attention :
Le type de gaz et le pays auxquels l'appareil est
destiné sont mentionnés sur la plaque
d'identification.
Nous recommandons de brancher la plaque
de cuisson au moyen d'un tuyau fixe. Le
branchement au moyen d’une manche à gaz
de sécurité destinée à cet effet est également
autorisé. Dans tous les cas, il convient de
placer un robinet de raccordement dans un
endroit facilement accessible, par exemple
dans une armoire de cuisine placée à
proximité.
Attention :
Un tuyau de sécurité en métal ne doit pas être
coupé, ni entrer en contact avec des éléments
mobiles du meuble de cuisine.
Avant d'utiliser l'appareil, contrôlez
l'étanchéité des raccordements avec du
savon.
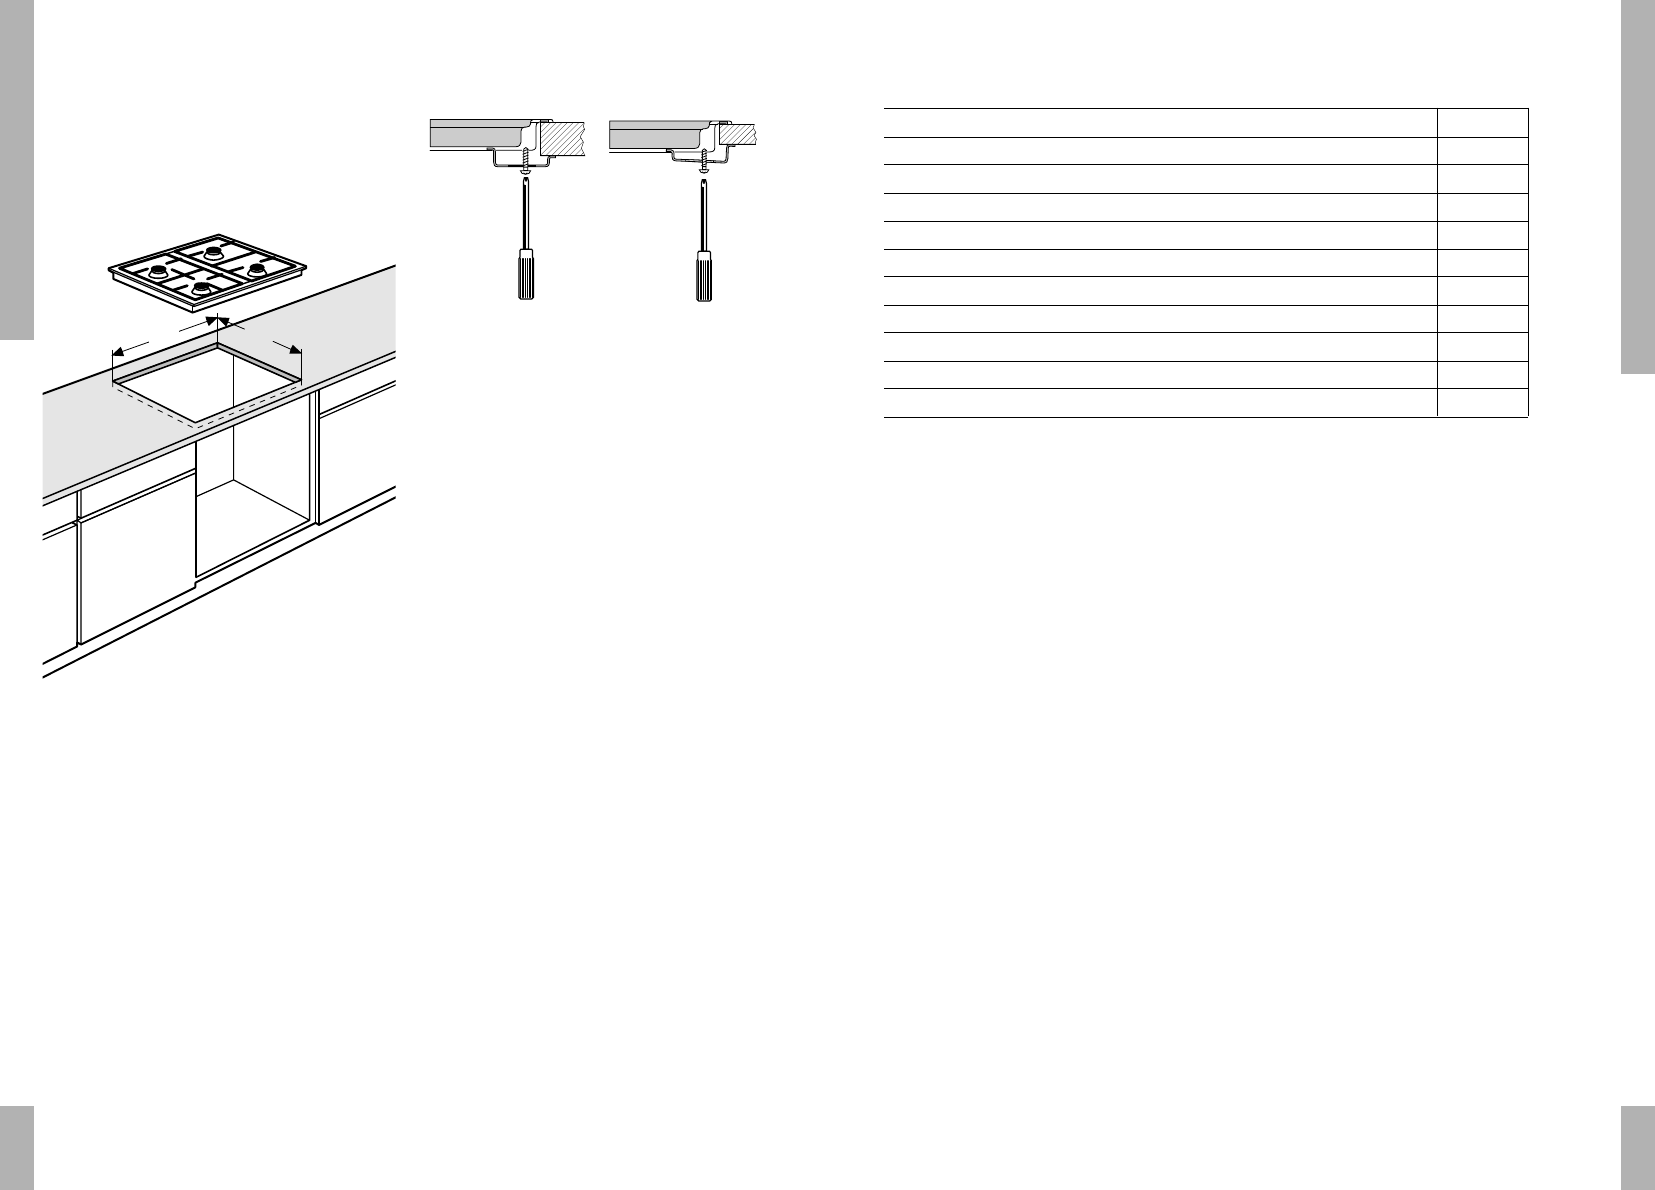
Montage des plaques de cuisson
au gaz encastrables
Attention :
Ne placez pas une plaque de cuisson à
proximité d'une armoire suspendue et d'une
paroi en matériaux inflammables (s'il n'y a pas
d'autre solution possible, maintenez une
distance minimale de 100 mm entre le côté
extérieur de la plaque de cuisson et cette
paroi. Maintenez également une distance
minimale de 650 mm entre la plaque de
cuisson et une hotte éventuelle.)
APPLICATION/ENTRETIEN
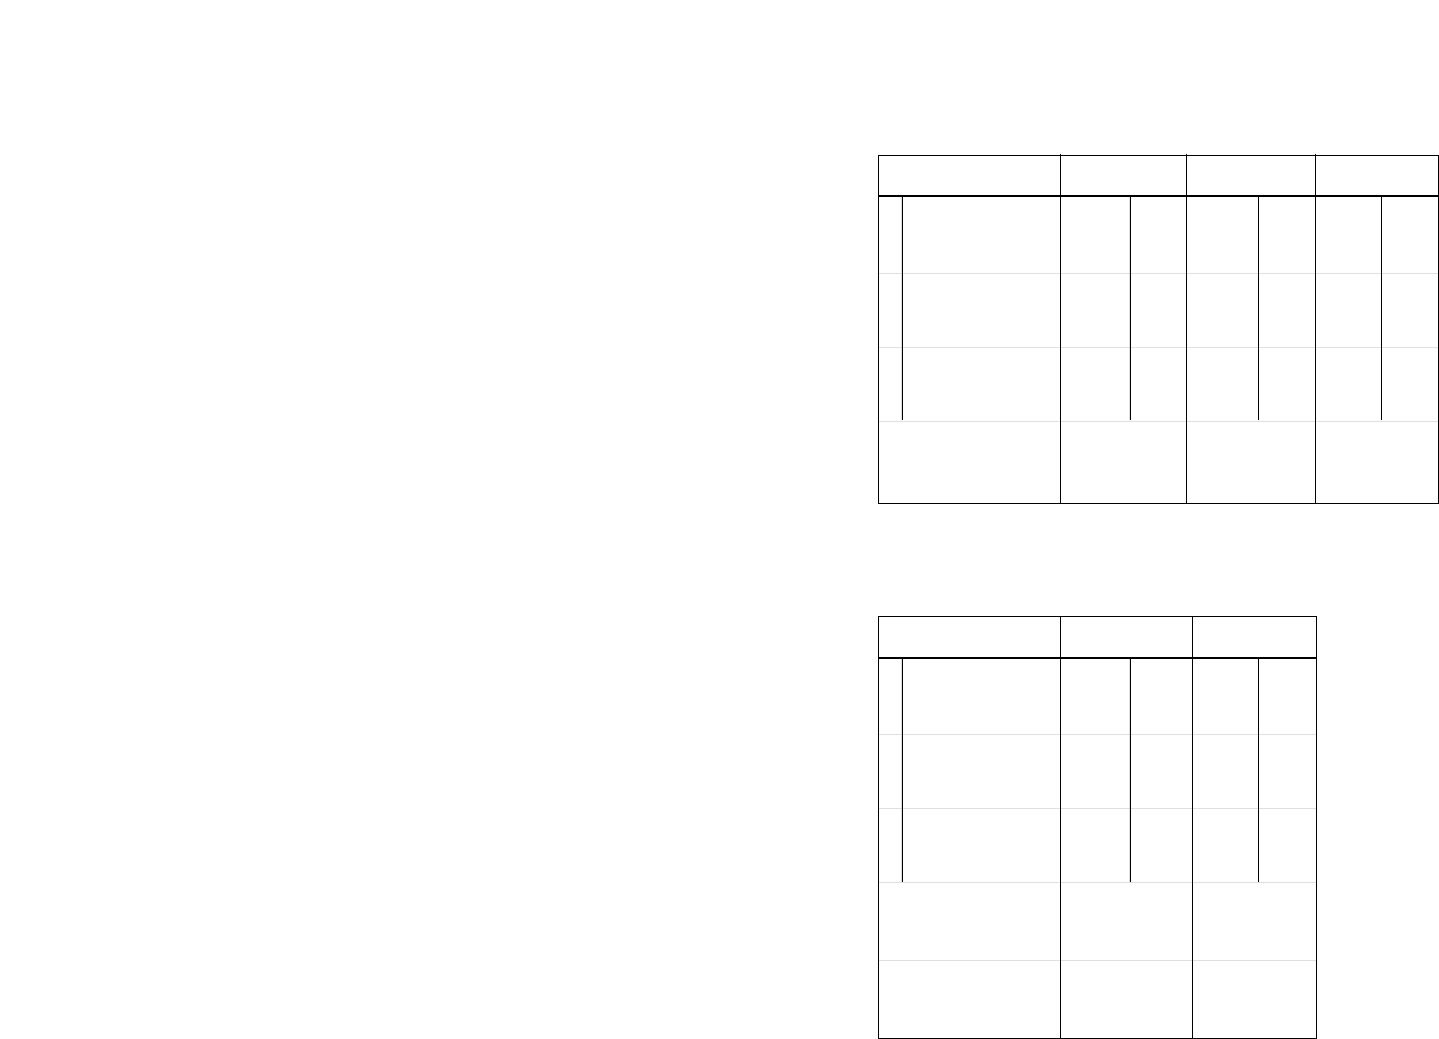
Casseroles
Le diamètre de casserole recommandé sont :
brûleur rapide . . . . . . . . . . . . . . . . au moins 24 cm.
brûleur semi-rapide . . . . . . . . . . . au moins 20 cm.
auxiliair . . . . . . . . . . . . . . . . . . . . . au moins 12 cm.
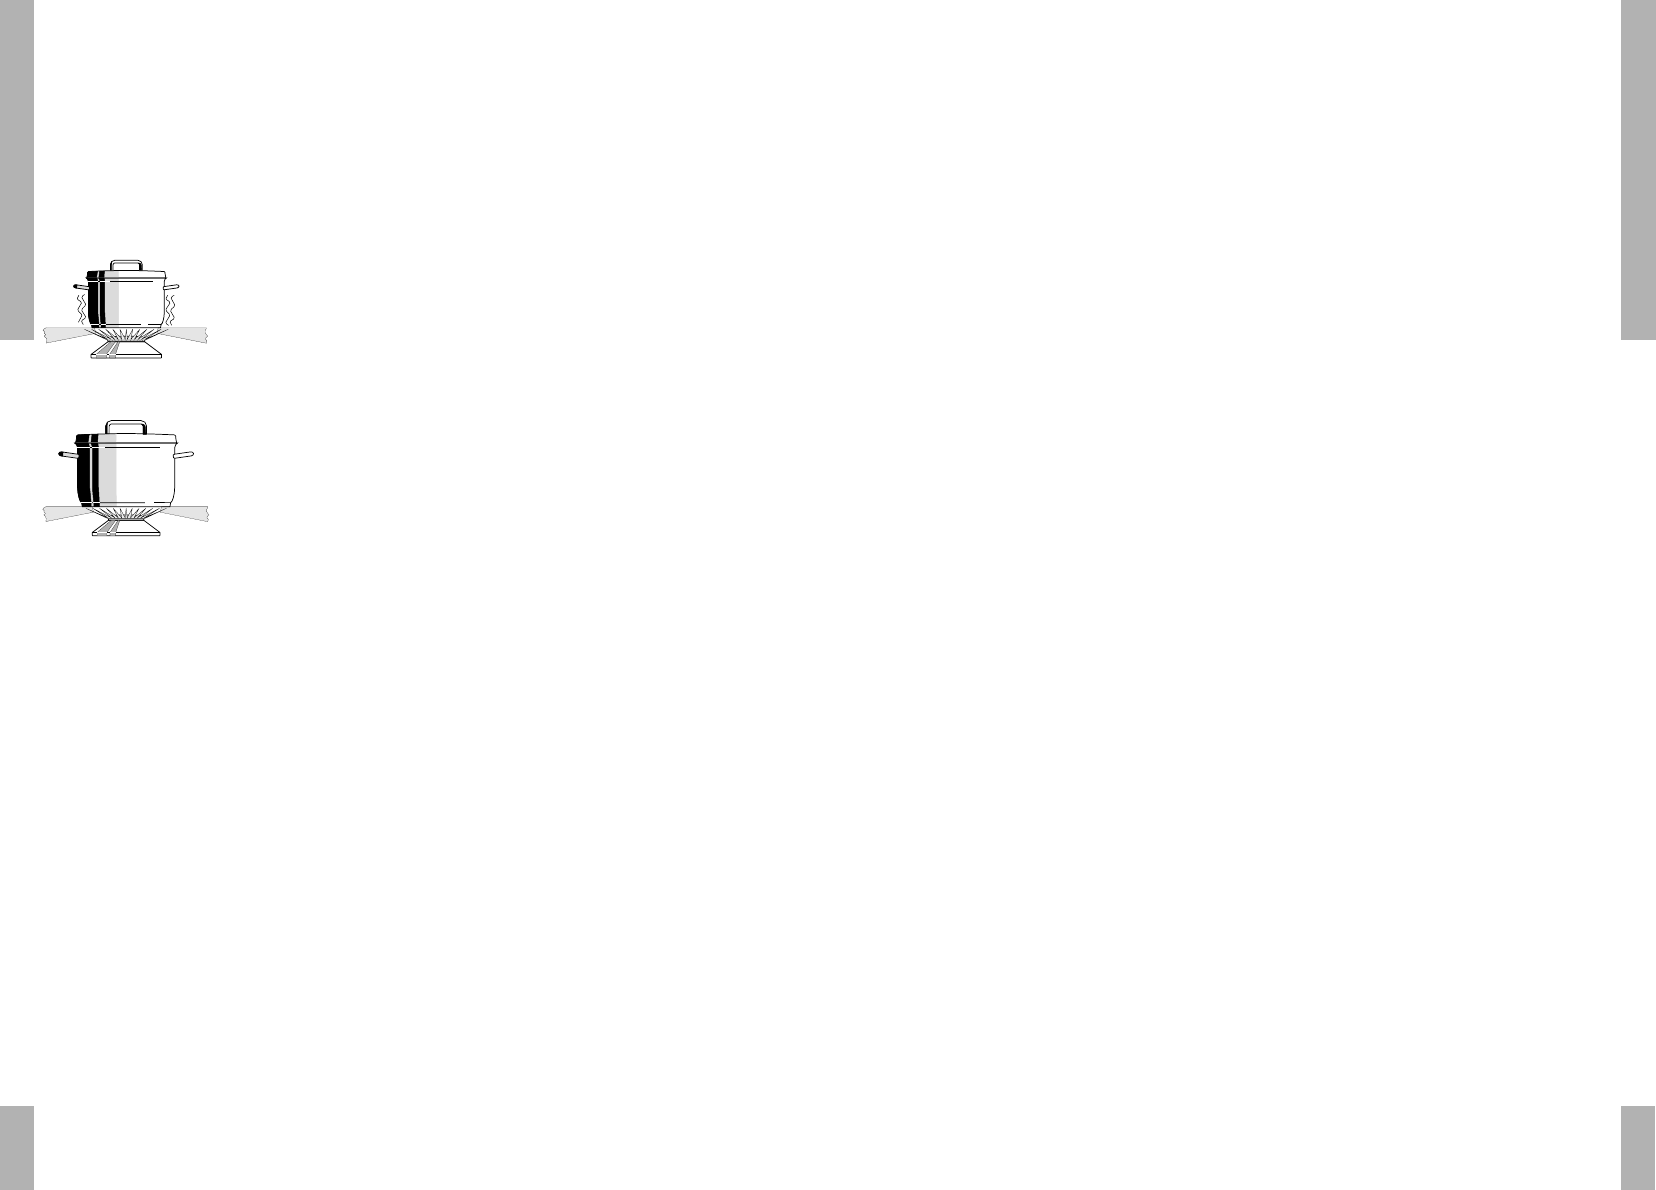
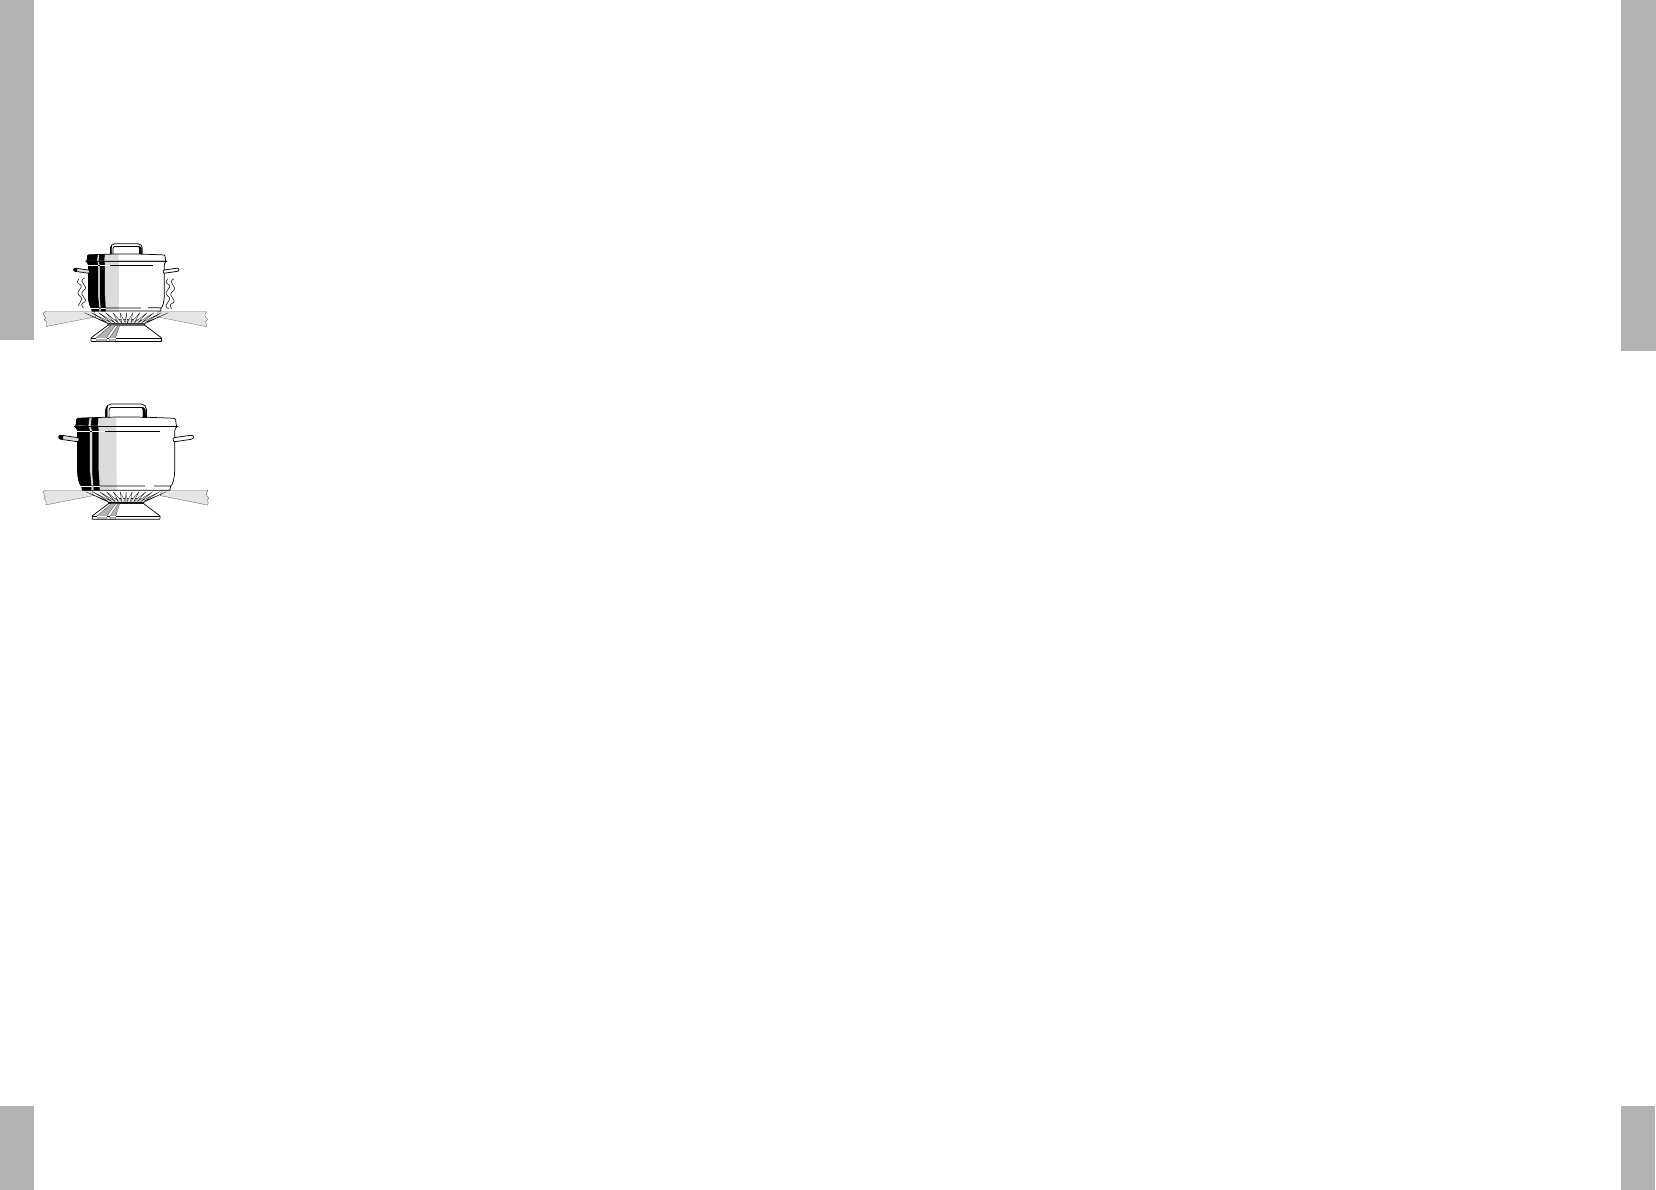
Incorrect :
Une grande quantité de
chaleur se dégage le
long de la casserole.
Correct :
La chaleur est répartie
de manière régulière
sur la surface inférieure
de la casserole.
Conseil
Mettez le couvercle sur la casserole et vous
économiserez ainsi jusqu’à 50% d’énergie.
Les casseroles propres diffusent mieux la
chaleur.
L’emballage et l’appareil
L’emballage de l’appareil est recyclable.
Il contient :
– du carton ;
– une feuille de polyéthylène (PE) ;
– du polystyrène exempt de CFC (mousse dure
de PS).
Eliminer ces matériaux de façon adéquate et
conformément à la réglementation en vigueur
dans votre commune.
L’administration communale vous informera des
moyens adéquats de vous débarrasser de vos
anciens appareils ménagers.
Nettoyage
Journalier : Nettoyer l’appareil avec de l’eau
additionnée de produit à vaisselle ou avec un
nettoyant universel. Ne pas utiliser trop d’eau ;
elle risque de pénétrer dans le brûleur ou
l’orifice de ventilation.
Taches rebelles sur l’émail s’enlèvent avec un
abrasif liquide ou une éponge-grattoir
synthétique. N’utilisez jamais de poudre
abrasive ou de détergents agressifs et
d’éponges abrasives vertes.
Eliminez les tâches tenaces sur l'acier
inoxydable à l'aide d'un produit d'entretien
spécial pour l'acier inoxydable. Nettoyez
toujours en respectant la structure de l'acier
inoxydable. De cette manière, vous évitez la
création de points brillants. Si les tâches ne
s'éliminent pas, nettoyez la plaque de cuisson
avec le produit d'entretien HG pour gril & four.
Nettoyez toujours entièrement le bac collecteur
pour éviter "tout écart de couleur". Terminez
toujours l'entretien en utilisant un produit
d'entretien/d'apprêt pour l'acier inoxydable.
Les éponges à récurer contiennent des
abrasifs qui peuvent griffer l'acier inoxydable.
L'acier inoxydable est pourvu d'une structure.
En cas récurage ou de polissage, des tâches
(brillantes) peuvent se présenter sur la
surface. Ces dommages ne sont pas couverts
par la garantie.
Attention
Ne jamais plonger les chapeaux brûlants dans
l’eau froide. La baisse brutale de température
risque d’abîmer l’email.
fig. 1
fig. 2
23
22
Type de plaque de cuisson A822
Alimentation électrique :
Cordon de branchement à 3 conducteurs au four
Branchement AC 230 V - 50Hz - 0,6 VA
Allumage électrique
Gaz :
Raccordement G3/8”
Dimensions de l'appareil :
580x67x510 mm (lxhxp)
Dimensions du renfoncement :
560x490 mm (lxp)
Spécifications techniques (aussi voir table au couverture)
SPECIFICATIONS TECHNIQUES
ENCASTREMENT
Encastrement
1. Pratiquer la découpe dans le plan de travail.
Veiller à laisser suffisamment d'espace sur
le(s) côté(s) et à l'arrière.
Attention :
La distance entre la plaque de cuisson et
la paroi arrière doit être au minimum de
40 mm.
2. Ménager un évidement dans la paroi latérale
de l'élément pour la conduite de gaz.
3. Insérer la table de cuisson dans la découpe.
4. Fixer la table de cuisson.
5. La raccorder au gaz. Contrôler une fuite
éventuelle du gaz avec de l’eau savonneuse
(voir "Raccordement du gaz").
6. Effectuer le branchement électrique (voir
"Branchement électrique").
7. Vérifier le bon fonctionnement de l'appareil.
L'encastrement combiné à un four à encastrer
se trouve décrit dans la consigne d'installation
du four.
Attention :
La partie inférieure de plaque de cuisson à
encastrer chauffe. Veillez à ne pas mettre
d’objets en plastique ou risquant de
prendre feu dans le tiroir qui se trouve
éventuellement sous l’appareil.
fig. 4
560 490
fig. 3
25 INHALT
Einleitung
Wenn Sie diese Gebrauchsanleitung lesen,
sind Sie rasch über alle Möglichkeiten
informiert, die dieses Gerät Ihnen bieten kann.
Sie können sich über Sicherheit und Pflege
des Gerätes informieren. Außerdem finden Sie
Umwelt- und Energiespartips.
Bewahren Sie diese Gebrauchsanweisung
und die Installationsanweisungen sorgfältig -
einem eventuell folgenden Benutzer des
Gerätes kann dies von Nutzen sein.
Viel Spaß beim Kochen!
Inhalt
Gerätebeschreibung . . . . . . . . . . . . . . . . . 25
Sicherheit . . . . . . . . . . . . . . . . . . . . . . 26 - 27
Vor dem ersten Gebrauch . . . . . . . . . . . . 26
Worauf Sie achten müssen . . . . . . . . . . . 27
Bedienung . . . . . . . . . . . . . . . . . . . . . . . . . 27
Anzündung . . . . . . . . . . . . . . . . . . . . . . . . . 27
Anwendung . . . . . . . . . . . . . . . . . . . . . . . . 28
Töpfe . . . . . . . . . . . . . . . . . . . . . . . . . . . . . 28
Beseitigung von Verpackung und Gerät .28
Pflege . . . . . . . . . . . . . . . . . . . . . . . . . . . . . 28
Reinigung . . . . . . . . . . . . . . . . . . . . . . . . . . 28
Installation . . . . . . . . . . . . . . . . . . . . . . . . 29
Montage . . . . . . . . . . . . . . . . . . . . . . . . . . . 29
Einbauen . . . . . . . . . . . . . . . . . . . . . . . . . . 30
Technische Daten . . . . . . . . . . . . . . . . . . . 31
Gerätebeschreibung
1 Bedienungsknopf für Starkbrenner 1
2 Bedienungsknopf für Starkbrenner 2
3 Bedienungsknopf für Hilfsbrenner 3
4 Bedienungsknopf für Normalbrenner 4
5 elektrische Zündung
6 emaillierte Rippenplatte als Tragefläche
für Töpfe
7 Kochmulde emailliert oder aus Edelstahl
Erklärung der Symbole:
0zu
große Flamme
kleine Flamme
24
2
1
7
3
4
6
51 2 3 4
27
26
Vor dem ersten Gebrauch
Dieses Gerät darf nur von einem qualifizier-
ten Gasinstallateur angeschlossen werden.
Benutzen Sie das Gerät nur, wenn es
vorschriftsmäßig eingebaut ist. Bei einem
falsch installierten Gerät entfällt der
Garantieanspruch.
Bei Reparatur oder Reinigung muß der Herd
vom Strom oder Gas abgesperrt werden.
Ziehen Sie den Stecker aus der Steckdose
oder im Zählerkasten auf Null schalten
(Gaskochmulde mit elektrischer Zündung).
Den Gashahn der Gasleitung zudrehen.
Dieses Kochgerät ist für die Benutzung im
Haushalt entworfen. Verwenden Sie es nur
zur Bereitung von Mahlzeiten.
Während des Kochens und Bratens erhitzt
sich die Kochplatte. Vorsicht wenn Kinder in
der Nähe sind.
Fette und Öle sind bei Überhitzung leicht
entflammbar. Beobachten Sie die Speisen
während der Zubereitung.
Benutzen Sie das Gerät nicht zum Beheizen
der Küche. Dabei würde sich Feuchtigkeit
im Raum bilden.
Bei der Benutzung des Gas-Kochgeräts
entstehen Wärme und Feuchtigkeit im
Einbauplatz des Geräts. Achten Sie auf
ausreichende Belüftung des Platzes; halten
Sie natürliche Ventilationslöcher offen. Bei
langem Gebrauch der Kochmulde kan
zusätzliche Belüftung erforderlich werden,
z.B. ein offenes Fenster.
Die Brenner dürfen nicht ohne Töpfe
benutzt werden. Keine Aluminium- oder
Kunststoffbehälter auf einen Brenner
legen.
Seien Sie vorsichtig mit Zuleitungen von
elektrischen Geräten, beispielsweise von
einem Mixer. Sie dürfen nicht auf heiße
Brenner geraten.
Die Unterseite des Einbaukochfeldes wird
heiß. Achten Sie darauf, keine brennbaren
oder Kunststoff-Gegenstände in die
eventuell unter dem Gerät vorhandene
Schublade zu legen.
Überprüfen Sie vor der Installation des
Gerätes, ob die Gasart und der Gasdruck
der Gasquelle mit den Angaben auf dem
Typenschild übereinstimmen.
SICHERHEIT
Worauf Sie achten müssen
Sofort reinigen
Übergekochte Essensreste sofort beseitigen,
insbesondere Rotkohl, Apfelmus und
Rhabarber. Wenn diese lange auf Email oder
Rostfreistahl einwirken, kan des Verfärbungen
zur Folge haben.
Einbrennen Email
Die Rippenplatte wird durch die Flammen stark
erhitzt, wodurch nach einiger Zeit das Email
einbrennen kann. Das ist nicht zu vermeiden
und fällt darum nicht unter die Garantie.
Brenner
Kontrollieren Sie regelmäßig ob die
Brennerdeckel noch gut auf den Brennkörpern
liegen; eine falsche Lage kann schlechte
Zündung, ungünstige Verbrennung oder
Schäden an den Brennern zur Folge haben.
Anzündung
Elektrische Anzündung
Den Bedienungsknopf eindrücken, nach links
drehen und auf den Knopf der elektrischen
Zündung drücken. Die Funken springen dann
auf den Gasbrenner über, der jetzt von selbst
entflammt. Sollte das nach wiederholtem
Versuch nicht gelingen, prüfen Sie dann, ob
der Brennerdeckel richtig aufliegt.
SICHERHEIT/BEDIENUNG
29
28
Installation
Algemeines
Dieses Gerät darf nur von einem qualifizierten
Gasinstallateur angeschlossen werden.
Achtung:
Dieses Gerät wird nicht an einen Rauchgas-
Abzugsschacht angeschlossen. Achten Sie
also auf ausreichende Entlüftung.
Stromversorgung (nur für Geräte mit
elektrischer Zündung)
230 V - 50 Hz.
Das Gerät erfüllt die in der EG-Richtlinie
89/336/EEG genannten Vorschriften über
elektromagnetische Kompatibilität.
Der elektrische Anschluß muß den
nationalen und kommunalen Vorschriften
entsprechen.
Steckdose und Stecker müssen immer gut
zugänglich sein.
Wenn Sie einen festen Anschluß anbringen
möchten, sorgen Sie bitte dafür, daß in der
Zuführungsleitung ein omnipolarer Schalter
mit einem Kontaktabstand von mindestens
3 mm angebracht wird.
Gasanschluß RC 3/8˝ (ISO 7/1-RC 3/8)
Der Gasanschluß muß den nationalen und
kommunalen Vorschriften entsprechen.
Diese besagen u.a., daß:
– ausschließlich zugelassene Materialien
verwendet werden dürfen;
hinter einem Einbaubackofen und unter
einem Kochfeld darf nur ein Metallschlauch
verwendet werden.
Achtung:
Gasart und Land, wofür sich das Gerät eignet,
sind auf dem Typenschild angegeben.
Wir empfehlen, das Kochgerät mit einer
festen Leitung anzuschließen. Erlaubt ist
jedoch auch der Anschluß mit einem
speziell hierfür bestimmten Sicherheits-
schlauch. Auf jeden Fall muß für das Gerät
der Gashahn an einer gut erreichbaren
Stelle angebracht werden, z.B. in einem
Küchenschrank neben dem Herd.
Achtung:
Ein Metall-Sicherheitsschlauch darf nicht
geknickt werden und auch nicht mit
beweglichen Teilen des Küchenmöbels in
Berührung kommen.
Vor dem ersten Gebrauch mit einer
Seifenlauge kontrollieren, ob die
Anschlüsse gasdicht sind.
Montage Einbau-Gaskochmulde
Achtung:
Nicht neben einen hohen Schrank oder einer
Wand aus entflammbarem Material aufstellen.
(Wenn nicht anders möglich, dann einen
Mindestabstand von 100 mm zwischen
Außenseite Kochplatte und Wand
berücksichtigen. Der Mindestabstand
zwischen Kochstelle und Unterkante einer
eventuellen Dunstabzugshaube muß 650 mm
betragen.)
INSTALLATION/MONTAGE
ANWENDUNG/PFLEGE
Töpfe
Empfohlene Diameter der Topfböden:
Starkbrenner . . . . . . . . . . . . mindestens 24 cm.
Normalbrenner . . . . . . . . . . mindestens 20 cm.
Hilfsbrenner . . . . . . . . . . . . mindestens 12 cm.
Falsch:
Zuviel Hitze entweicht
am Topf entlang.
Gut:
Die Hitze verteilt sich
gleichmäßig über den
Topfboden.
Tip:
Beim Kochen den Deckel auf dem Topf lassen
und Sie sparen bis zu 50% Energie. Saubere
Töpfe nehmen besser Wärme auf.
Beseitigung von Verpackung und
Gerät
Die Verpackung des Geräts ist recycelbar. Als
Verpackungsmaterial werden gebraucht:
– Karton;
– Polyethylenfolie (PE);
FCKW-freies Polystyrol (PS-Hartschaum).
Diese Materialien sind auf umweltgerechte
und den jeweiligen kommunalen Vorschrif-ten
entsprechende Weise zu beseitigen.
Die Gemeinde kann Sie auch über die
umweltgerechte Beseitigung on ausrangierten
Haushaltsgeräten beraten.
Reinigung
Das Gerät täglich mit einer Lösung von
Spülmittel oder Allesreiniger reinigen.
Nicht zu naß behandeln, um Eindringen von
Feuchtigkeit in die Brenner oder
Ventilationslöcher zu vermeiden.
Hartnäckige Flecken auf Email mit flüssigem
Scheuerpulver oder Scheuerschwamm aus
Kunststoff entfernen.
Verwenden Sie unter keinen Umständen
Scheuerpulver, aggressive Reinigungs-
mittel oder grüne Scheuerschwämmchen.
Hartnäckige Flecken auf Edelstahl mit einem
Edelstahl-Spezialreiniger entfernen. Stets in
Edelstahlstrukturrichtung polieren. Damit
werden Glanzflecke vermieden. Wenn sich
Flecken nicht entfernen lassen, ist das
Kochfeld mit HG-Backofen- & Grillreiniger zu
reinigen. Behandeln Sie stets die ganze
Mulde, um Farbunterschiede zu vermeiden.
Stets mit einem Glanz-/Pflegemittel für
Edelstahl behandeln.
Reinigungsschwämme enthalten
Scheuermittel, die auf Edelstahl Kratzer
verursachen. Der Edelstahl ist mit einer
Struktur versehen. Beim Scheuern oder
Polieren entstehen auf der Oberfläche
(glänzende) Flecken. Diese Beschädigungen
fallen nicht unter die Garantieleistungen.
Achtung:
Heiße Brenneraufsätze nie in kaltes Wasser
tauchen. Durch die starke Abkühlung kann das
Email beschädigt werden.
Abb. 1
Abb. 2
31
30
Technische Daten (siehe auch Tabelle auf Umschlag)
TECHNISCHE DATEN
Kochplattentyp A822
Elektrizität:
Dreifachschnur zum Herd
Stromversorgung AC 230 V - 50Hz - 0,6 VA
elektrische Zündung
Gas:
Anschluß G3/8"
Abmessung des Geräts:
580x67x510 BxHxT in mm
Abmessung der Nische:
560x490 BxT in mm
EINBAUEN
Einbauen
1. Aussparung in die Anrichte sägen.
Seitlich und an der Rückseite für ausreichen-
den Spielraum sorgen.
Achtung:
Der Abstand zwischen dem Kochfeld und
der Rückwand muss mindestens 40 mm
betragen.
2. Aussparung in der Seitenwand des
Küchenschranks zum Durchführen der
Gasleitung aussägen.
3. Lassen Sie die Kochmulde in die Aussparung
ein.
4. Befestigen Sie die Kochmulde.
5. Stellen Sie den Gasanschluß her. Kontrollieren
Sie die Anschlüsse mit Seifenwasser auf
Gasdichtheit (siehe "Gasanschluß").
6. Stellen Sie den elektrischen Anschluß her
(siehe "Elektrischer Anschluß").
7. Kontrollieren Sie, ob das Gerät funktioniert.
Der Einbau in Kombination mit einem Einbau-
Backofen ist in den Installationsanweisungen
des Backofens beschrieben.
Achtung:
Die Unterseite des Einbaukochfeldes wird
heiß. Achten Sie darauf, keine brennbaren
oder Kunststoff-Gegenstände in die
eventuell unter dem Gerät vorhandene
Schublade zu legen.
Abb. 4
560 490
Abb. 3
10


Need help? Post your question in this forum.

Forumrules


Report abuse

Libble takes abuse of its services very seriously. We're committed to dealing with such abuse according to the laws in your country of residence. When you submit a report, we'll investigate it and take the appropriate action. We'll get back to you only if we require additional details or have more information to share.

Product:

For example, Anti-Semitic content, racist content, or material that could result in a violent physical act.

For example, a credit card number, a personal identification number, or an unlisted home address. Note that email addresses and full names are not considered private information.

Forumrules

To achieve meaningful questions, we apply the following rules:

Register

Register getting emails for Etna a 822 v inox at:


You will receive an email to register for one or both of the options.


Get your user manual by e-mail

Enter your email address to receive the manual of Etna a 822 v inox in the language / languages: English, German, Dutch, French as an attachment in your email.

The manual is 0,13 mb in size.


You will receive the manual in your email within minutes. If you have not received an email, then probably have entered the wrong email address or your mailbox is too full. In addition, it may be that your ISP may have a maximum size for emails to receive.

The manual is sent by email. Check your email

If you have not received an email with the manual within fifteen minutes, it may be that you have a entered a wrong email address or that your ISP has set a maximum size to receive email that is smaller than the size of the manual.

The email address you have provided is not correct.

Please check the email address and correct it.

Your question is posted on this page

Would you like to receive an email when new answers and questions are posted? Please enter your email address.


Info