English
BEFORE STARTING
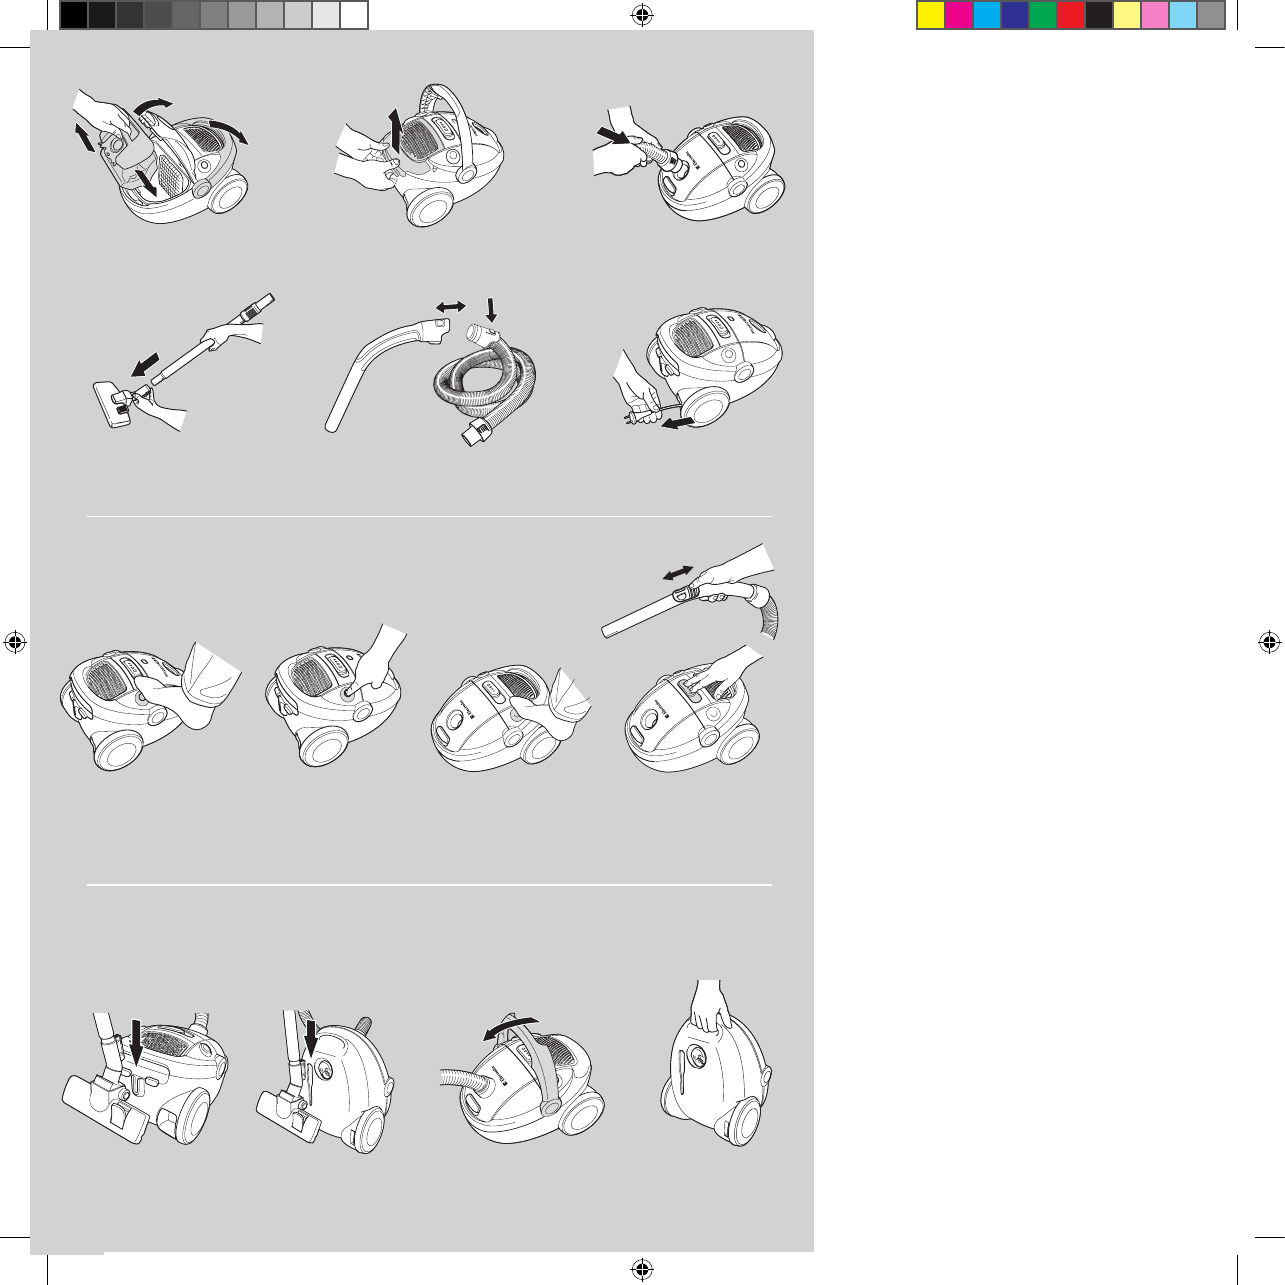
1 a Ensure that the machine’s carrying handle is folded
down. Then open the front cover on the machine and
check that the dust bag, s-bag™, and the motor filter
are in place.
1 b Fold up the carrying handle until it clicks into place.
Then open the back lid on the machine and check that
the exhaust filter is in place.
2 Insert the hose until the catches click to engage (press
the catches to release the hose).
3 Attach the extension tubes or telescopic tube (certain
models only) to the hose handle and hard floor nozzle
by pushing and twisting together. (Twist and pull apart
to dismantle.)
4 Insert the hose into the hose handle until the
catches
click to engage (press the catches to release the
hose).
5 Extend the electric cable and connect it to the mains.
The vacuum cleaner is fitted with a cable winder.
6a Press the foot pedal to rewind the cable (take hold of
the plug to prevent it striking you).
6b Press the small button on the pedal to activate Autore
-
verse (on certain models only). The length of the cable
will now be continually adjusted to requirements. Press
the whole pedal to de-activate Autoreverse. The cable
is now fixed, as on a normal cable winder.
7 Press the On/Off button with the foot to start the
vacuum cleaner.
8 Adjust suction power using the suction control on the
vacuum cleaner or the suction control on the hose
handle.
9 A practical parking position (and at the same time a
backsaving feature) when you pause during cleaning.
10 A parking position which makes it easy to carry and
store the vacuum cleaner.
11 a When you want to carry the vacuum cleaner, lift the
carrying handle until it clicks into place.
11b You can also carry the vacuum cleaner using the handle
on the lower front edge of the machine.