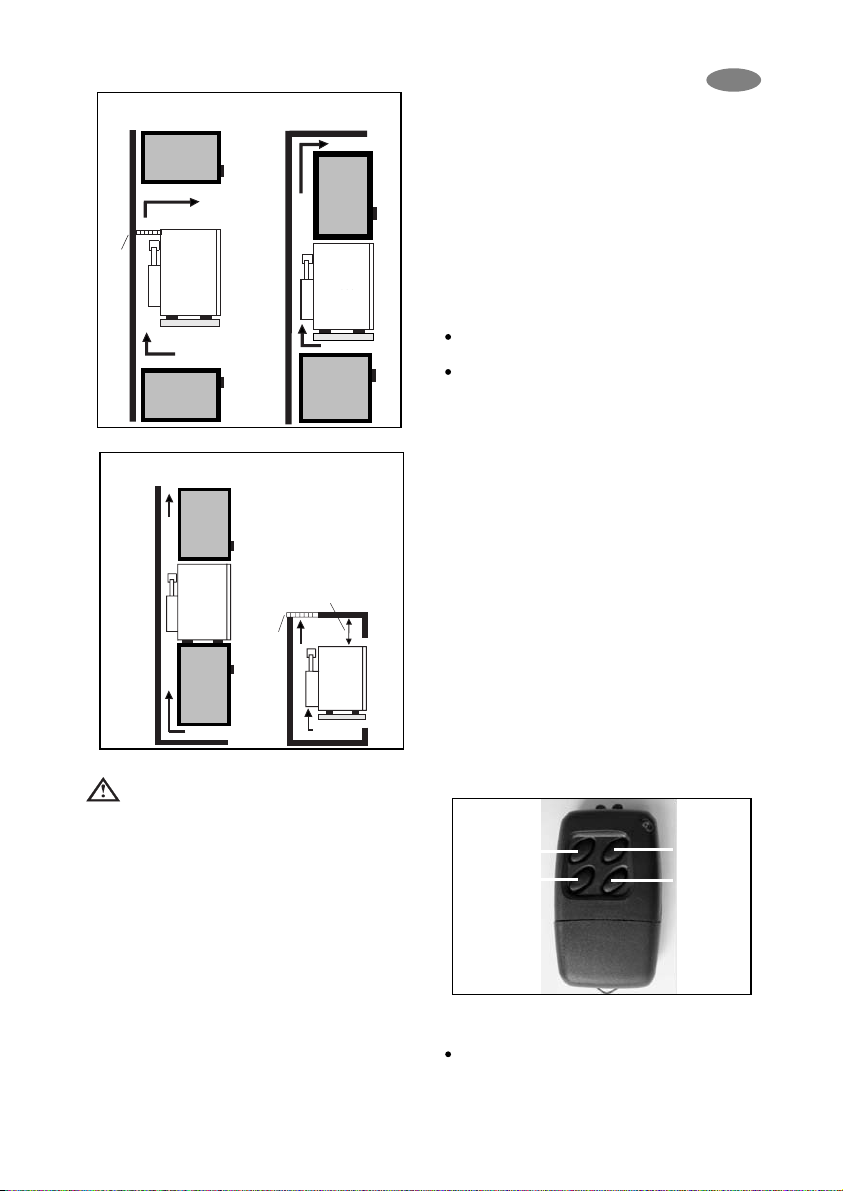
511876
31
Zoom out
Zoom in
Previous page
1/64
Next page
Figura 3.
Figura 4.
Durante l'installazione assicurarsi che la
spina di corrente sia accessibile in
qualsiasi momento.
4.1.2. Versione normale
Per questa versione si presume un'utilizzazione
non incorporata. Il rivestimento dell'apparecchio
protegge l'utente dalle parti calde del gruppo
refrigerante. L'altezza adeguata delle ruote
assicura la ventilazione dell'apparecchio per
questo è proibito usare questa versione senza
ruote.
Non usare il frigorifero senza ruote perchè la
ventilazione non sarà adeguata.
5. Funcionamento
dell'apparecchio
Prima della prima messa in funzione, bisogna
verificare che la tensione indicata sul quadro di
dati sia concorde alla tensione della rete.
Per la messa in funzione del frigorifero
collegare la spina di alimentazione alla presa
elettrica. Con una temperatura ambiente
normale, al frigorifero vuoto occorrono ca. 6-7
ore per raggiungere la corretta temperatura di
funzionamento all'interno del frigo stesso.
5.1. Messa in funzione
Il frigorifero deve essere connesso a una
presa elettrica debitamente collegata a terra.
Il miniBar si accende automaticamente
effettuando un test di autoverifica. Se il
controllo elettronico non rileva alcun errore,
dopo circa 10 secondi il LED di segnalazione
per l'illuminazione interna del frigo si
accende per 2 secondi. Se non rileva nessún
errore, l'illuminazione dello scompartimento
raffreddato è continua quando la porta è
aperta. Quando invece viene rilevato un
errore il LED continua a lampeggiare.
Contattare in questo caso il vostro Centro di
assistenza autorizzato.
5.2. Regolazione della
temperatura
L'apparecchio è provvisto di un sistema
elettronico di regolamento di temperatura
automatico. Si può regolare la temperature
interna dell'apparecchio con un telecomando di
4 bottoni. Si può scegliere 4 temperature
preregolate: 3°C, 5°C, 7°C e12°C. Due
bottoni del telecomando servono per regolare
la temperatura:
- Bottone giallo: 3°C e 7°C.
- Bottone azzurro: 5°C e 12°C.
Per esempio per regolare il valore 7°C,
bisogna fare le istruzioni seguenti:
Aprire la porta dell'apparecchio
31
IT
miniCool
min. 60 mm
miniCool
C
D
griglia di ventilazione
aria in uscita
aria in uscita
aria in entrata aria in entrata
miniBar
miniBar
miniCool
aria in entrata
aria in uscita
griglia di ventilazione
miniCool
A
B
aria in uscita
aria in entrata
miniBar
miniBar
Bottone
giallo:
3°C/7°C
Bottone
nero:
Ristabilim
ento
dell'unità
di
raffreddam
ento
Bottone
azzurro:
5°C/12°C
Bottone
rosso:
Ristabili
mento
del punto
rosso
31


Need help? Post your question in this forum.

Forumrules


Report abuse

Libble takes abuse of its services very seriously. We're committed to dealing with such abuse according to the laws in your country of residence. When you submit a report, we'll investigate it and take the appropriate action. We'll get back to you only if we require additional details or have more information to share.

Product:

For example, Anti-Semitic content, racist content, or material that could result in a violent physical act.

For example, a credit card number, a personal identification number, or an unlisted home address. Note that email addresses and full names are not considered private information.

Forumrules

To achieve meaningful questions, we apply the following rules:

Register

Register getting emails for Electrolux RH456LD at:


You will receive an email to register for one or both of the options.


Get your user manual by e-mail

Enter your email address to receive the manual of Electrolux RH456LD in the language / languages: English, German, Dutch, French, Italian, Portuguese, Spanish as an attachment in your email.

The manual is 1,43 mb in size.


You will receive the manual in your email within minutes. If you have not received an email, then probably have entered the wrong email address or your mailbox is too full. In addition, it may be that your ISP may have a maximum size for emails to receive.

Others manual(s) of Electrolux RH456LD

Electrolux RH456LD User Manual - Dutch - 15 pages


The manual is sent by email. Check your email

If you have not received an email with the manual within fifteen minutes, it may be that you have a entered a wrong email address or that your ISP has set a maximum size to receive email that is smaller than the size of the manual.

The email address you have provided is not correct.

Please check the email address and correct it.

Your question is posted on this page

Would you like to receive an email when new answers and questions are posted? Please enter your email address.


Info