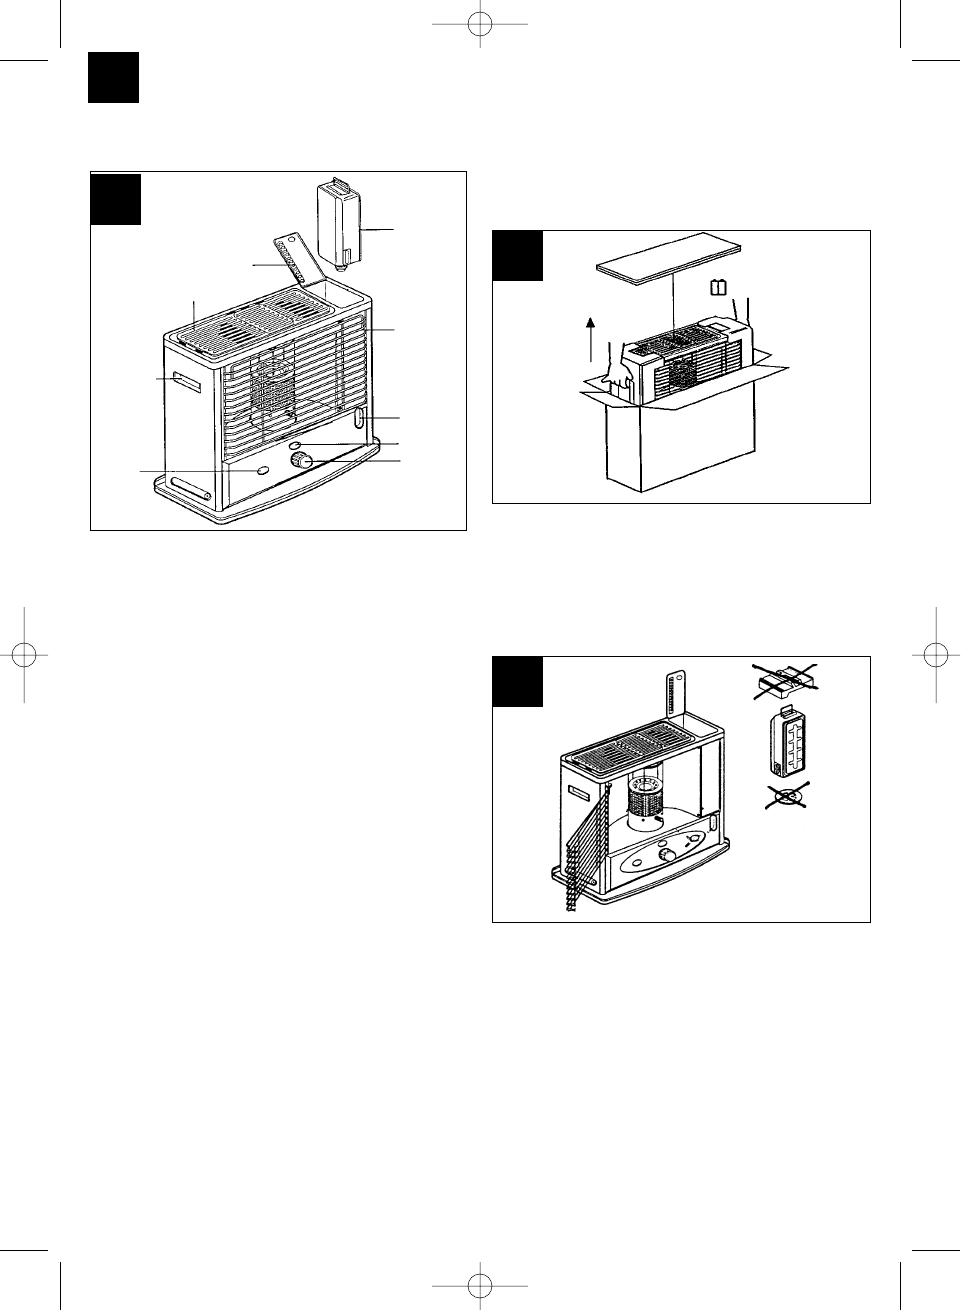
3. BESCHRIJVING VAN DE
OLIEKACHEL
4. BRANDSTOF
Ȝ Gebruik uitsluitend vloeibare brandstof voor
oliekachels die volgens de in uw land geldende
normen voor vloeibare brandstoffen toelaatbaar
zijn.
Ȝ De brandstof nooit opslaan in een gesloten ruimte
maar op een goed geluchte plaats.
Ȝ Nooit brandstoffen zoals benzine, benzol, alcohol,
campinggas, oplosmiddelen of andere stoffen
gebruiken. Dit zijn vloeibare stoffen die
ontploffingen of vlamvorming kunnen
veroorzaken. Bij de inwerkingstelling of bij het
uitschakelen van het verwarmingstoestel ruikt het
naar brandstof. Dit verschijnsel is helemaal
normaal.
Ȝ Als de kachel in werking is en de binnen-
temperatuur (na ca. 5 tot 10 minuten naargelang
van de grootte van de ruimte) bereikt is kan
tijdelijk een lichte brandstofgeur ontstaan.
Ȝ De brandstof nooit naast een warmtebron of op
een zonnige plaats bewaren
Ȝ De brandstof niet langer dan één jaar bewaren
omdat hij mettertijd in kwaliteit vermindert. Oude
brandstof leidt tot onzuivere verbranding in de
kachel.
Ȝ Het gebruik van minderwaardige brandstof kan tot
volgende verschijnsels leiden: rook- en geuront-
wikkeling, kleine vlammen, moeilijke ontsteking,
moeilijk doven, uitgaan van de vlam, bovenmatige
vlamvorming aan de pit, verminderde levensduur
van de pit, verzinken van de pit en koolstof-
afzetting op de pit. Als er zich een van deze
problemen voordoet dient u de brandstof te
controleren en de gespecialiseerde handelaar te
verwittigen.
5. UITPAKKEN EN MONTAGE VAN DE
OLIEKACHEL
a) De oliekachel en de verpakte onderdelen uit het
karton nemen (fig. 2).
Aanwijzing: Karton en verpakkingsmateriaal
bewaren voor een latere opslag.
b) Het rooster aan de rechterkant openen (optillen
en naar voren trekken). De brander uit de
beschermende verpakkingen nemen (fig. 3).
c) Het deksel van het brandstoftankvak aan de
bovenkant van het toestel open zetten en de
beschermende schuimstof aan de bovenkant
alsook het beschermend karton aan de
onderkant verwijderen (fig. 3).
d) Het verpakkingsmateriaal in het origineel karton
bewaren.
e) Voor het sluiten het rooster eerst in de bovenste
en dan in de onderste spleten plaatsen. Het
toestel nooit in werking stellen als het rooster niet
naar behoren vergrendeld en gesloten is.
f) Installeren van de batterijen aan de achterkant
(zie fig. 4).
NL
32
Handvat
Uitschake-
laar
Afdekplaat
Brandstof-
tank
Bescherm
end
frontroost
er
Pitregelaar
Brandstof-
peilglas
Ontstekings-
knop
1
2
3
Anleitung Comfort-Heizgeräte 31.10.2001 14:25 Uhr Seite 32