amount of fuel and repeat the above procedure.
When you are finished with the cleaning, fill the
tank and wait another 30 minutes before turning
the heater back on.
We recommend you to clean the heater one week
after starting it pu for the first time.
Thereafter you should repeat this cleaning
procedure on a regular basis to prevent the wick
from getting hard again and to avoid new carbon
deposits.
During the winter heating season, the wick should
be cleaned at least once a week, if possible.
Be sure to inspect the wick frequently in order not
to miss an essential cleaning interval.
10. CHECKING THE AUTOMATIC
IGNITION SYSTEM
Observe the following instructions to ensure
proper operation:
Ȝ R 20 batteries: The battery compartment is
located on the rear side of the heater. Replace
the batteries.
Ȝ Flame spark plug: Should the automatic ignition
still not work, even after the batteries have been
replaced, take out the flame spark plug.
If the wire is fractured or bent, or if it does not
ignite while the ignition button is being pushed,
the spark plug needs to be replaced.
IMPORTANT: Be sure to use a 2.5 V DC, 1 A
spark plug.
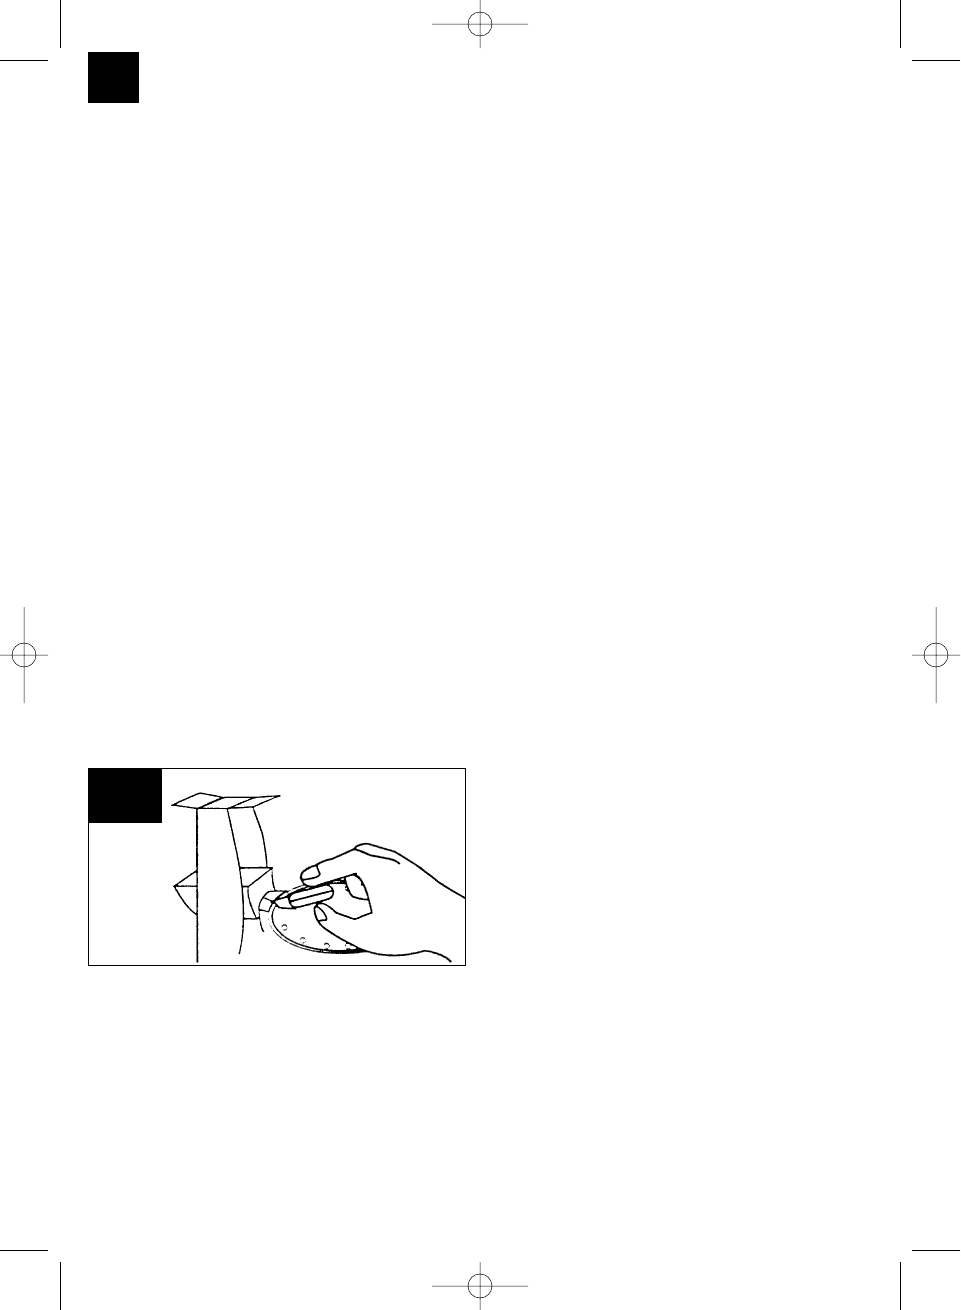
Replacing the flame spark plug (Figure 10)
Ȝ Remove the batteries.
Ȝ Open the safety grille and take out the burner.
Ȝ Press the ignition button in order to raise the
flame spark plug.
Ȝ Press the flame spark plug and turn it in
counterclockwise direction.
Ȝ Insert a new spark plug (2.5 V DC, 1 A only) and
turn it in clockwise direction.
Ȝ Reinsert the burner, close the saftey grille, and
replace the batteries.
Lowering the wick by hand
Pressing the OFF button while holding the wick
control knob and then releasing it slowly will
decrease the combustion speed of the wick.
This way, fuel smells can be avoided if the OFF
button of the oil heater was pushed inadvertently.
11. CHECKING THE AUTOMATIC
CUT-OUT
During the oil heater’s main season in use, the
automatic cut-out must be checked at least once a
week. After turning off the heater, use the wick
controller to turn the wick all the way to the top. Take
the heater by the safety grille and shake it vigorously.
If the automatic cut-out is working correctly, you will
hear a loud sound as the clamping device unsnaps
and the tension spring lowers the wick into the
housing. To make sure that the wick is fully lowered,
turn the wick controller in clockwise direction. If the
system is working properly, the wick must be fully
lowered. If it is not possible to lower the wick any
further with the wick controller, you need to have it
replaced by your specialist dealer.
12. STORING THE OIL HEATER FOR
EXTENDED PERIODS OF TIME
If you follow the following instructions exactly, your
oil heater will continue to work just as efficiently and
reliably during the next heating season (Figure 11 /
Figure 12).
Ȝ Swill a small amount of fuel around in the tank
and rinse it out. Never mix any water with the fuel
as this will cause the tank to rust on the inside.
Remove the last traces of fuel from the heater (by
burning away the fuel).
Ȝ Once the tank is empty, re-light the heater. Turn
the wick all the way to the top and allow it to burn
down completely (this takes about 1 hour). This
procedure must be done outdoors.
Ȝ Take out the batteries. Allow the fuel tank to dry
well on the inside. Remove any traces of carbon
or soot which may have accumulated on the wick
controller, the wick guide or the burner with a
screwdriver and/or a small brush.
Ȝ To avoid corrosion, remove the batteries before
putting the oil heater away for storage.
Ȝ Before putting the heater away for storage, make
sure that the wick is in the lowest possible
position and that the automatic cut-out is
unlocked.
GB
18
10
Anleitung Comfort-Heizgeräte 31.10.2001 14:25 Uhr Seite 18