Unscrew the recessed head screw and remove
the battery compartment lid.
– Insert the two R 20 batteries (supplied with the
heater) in the battery compartment located on
the rear side of the appliance. Watch out for the
(+) and (-) polarities of the batteries.
– Whenever the heater is not in use, or when its
operation is interrupted for an extended period
of time, be sure to take out the batteries.
g) Burner position (Figure 5)
- Position the burner on top of the wick controller.
- To make sure that the burner is in the right
place, turn the burner knob back and forth three
or four times until the burner settles properly on
the wick controller.
h) Check the automatic cut-out
- Using the wick controller, turn the wick all the
way to the top.
- Press the OFF button. The wick must now
move all the way to the bottom.
- To check if the wick has really gone all the way
down, test whether the wick can be lowered
any further with the wick controller. The
automatic cut-out is working correctly if it is
impossible to move the wick down any further.
Never start up the heater if this safety system is
not working properly.
6. FILLING THE HEATER WITH FUEL
CAUTION: Never lift out the fuel tank or fill it
while the heater is in operation or still hot.
Never fill the fuel tank in your living quarters. This
should be done strictly out of doors. To fill the oil
heater with fuel, first take the removable tank, the
fuel, and the manual pump outdoors.
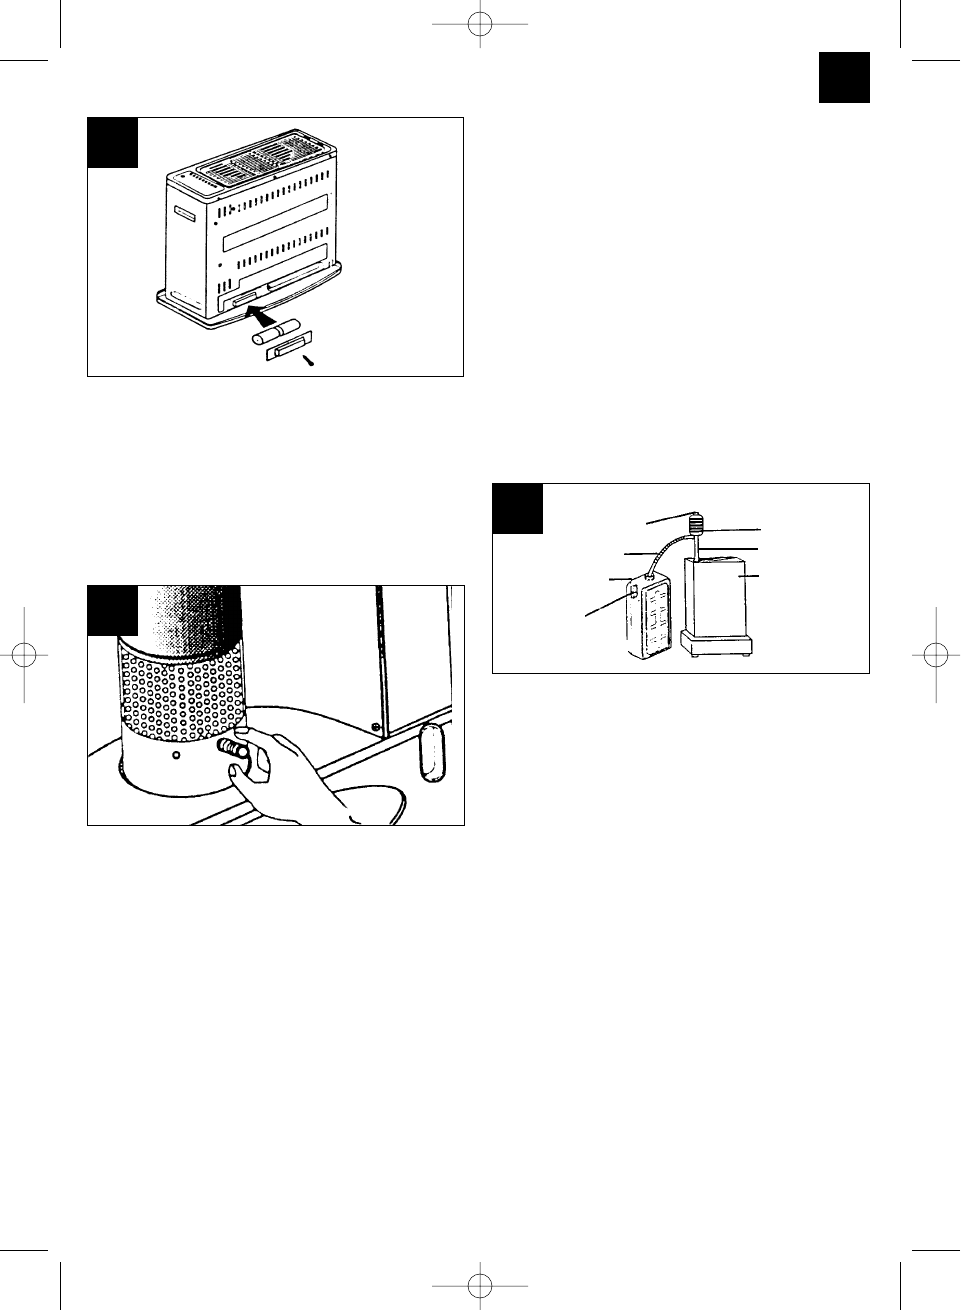
How to use the manual pump: Insert the rigid tube in
the fuel storage canister and the flexible tube in the
tank opening (Figure 6). Squeezing the bellows of
the manual pump will transport the fuel from the
canister into the tank. During the filling operation,
always keep an eye on the fuel gauge to check the
fuel level. When the tank is full, unscrew the cap
on the siphon pump. This will interrupt the fuel flow.
Then re-close.
Ȝ Do not allow the fuel tank to overflow. The manual
pump must be completely drained before pulling
the pipes out of the tank and fuel canister. Make
sure that the screw caps of the tank and fuel
storage canister are properly closed.
Insert the tank into the fuel compartment. The fuel
gauge must be visible at the front side of the
heater. (If the tank is not inserted correctly, the
tank compartment lid will not close. Figure 7)
N.B.: Do not wait until the tank is completely
empty before refilling it. Do not take the tank out
for refilling if the heater is still in operation or while
it is still hot.
GB
15
4
6
fuel storage
container
manual pump
pump tube
pump valve
fuel tank
pump valve
flexible pump tube
5
Anleitung Comfort-Heizgeräte 31.10.2001 14:24 Uhr Seite 15