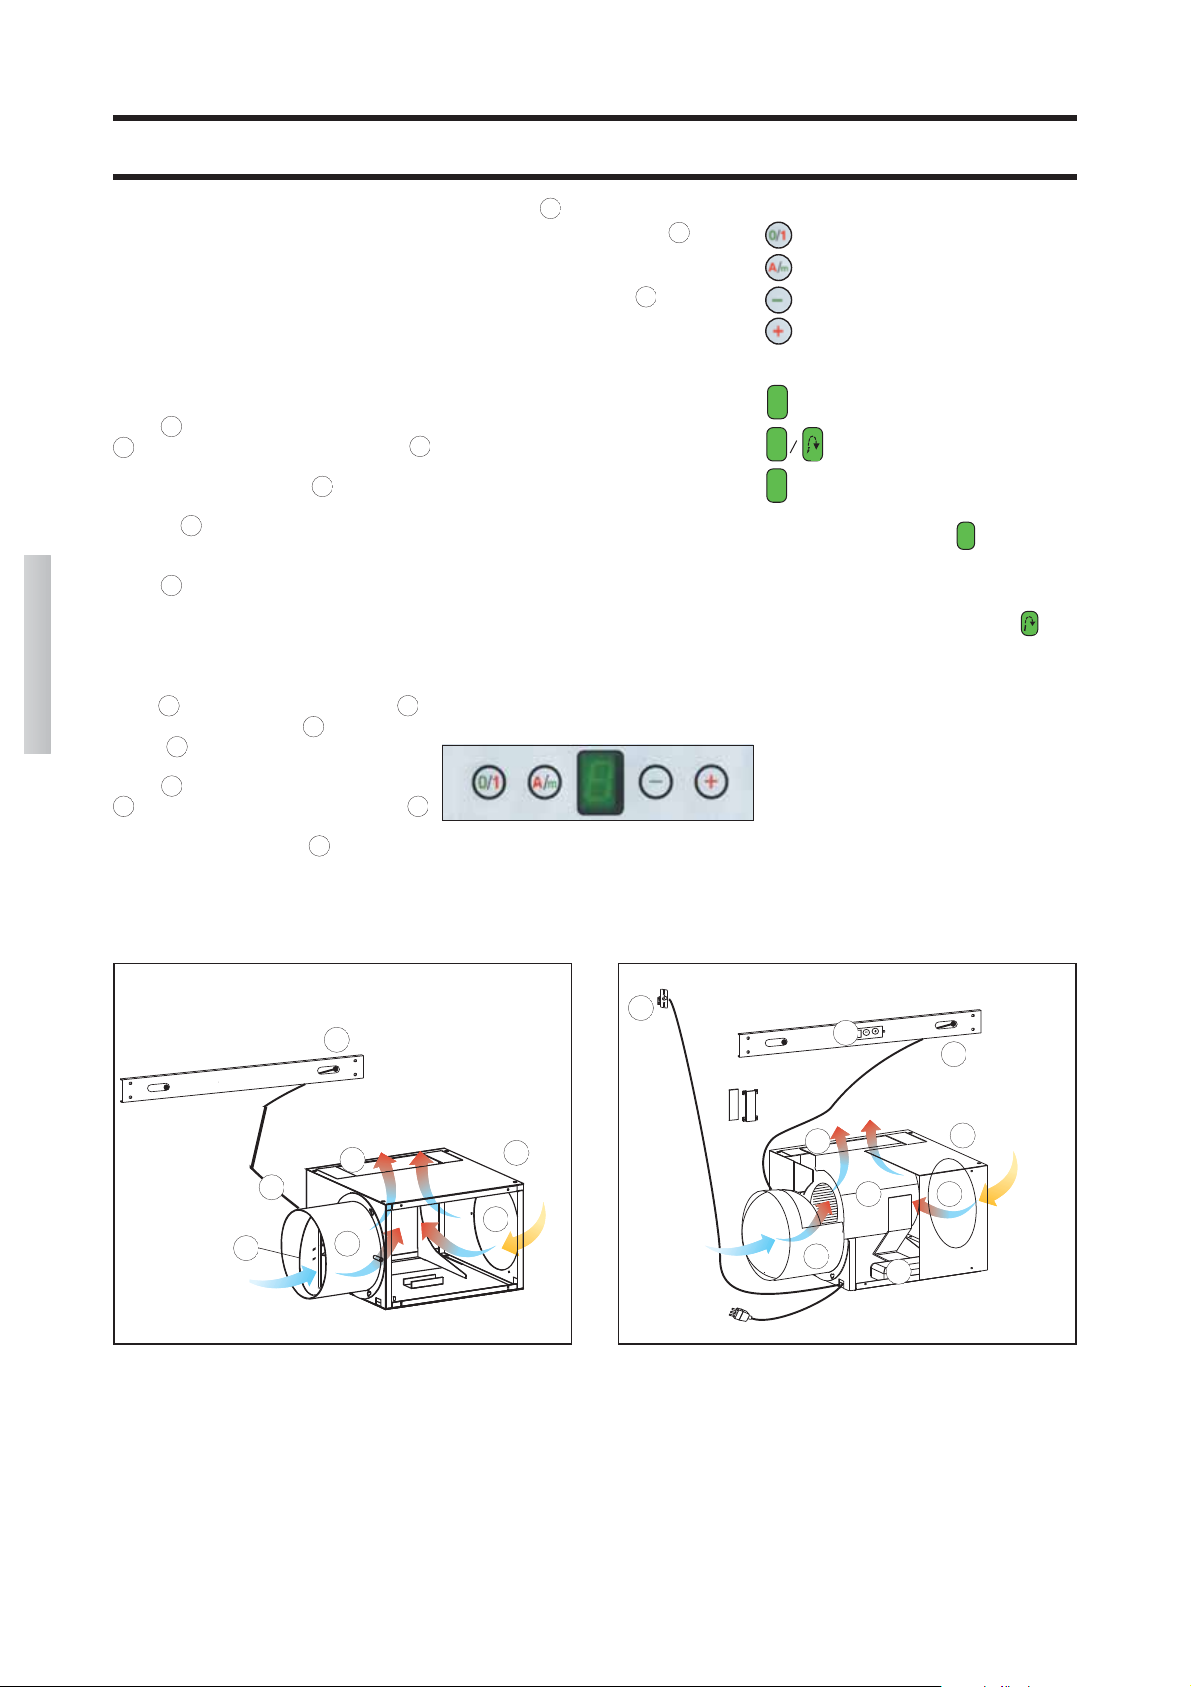
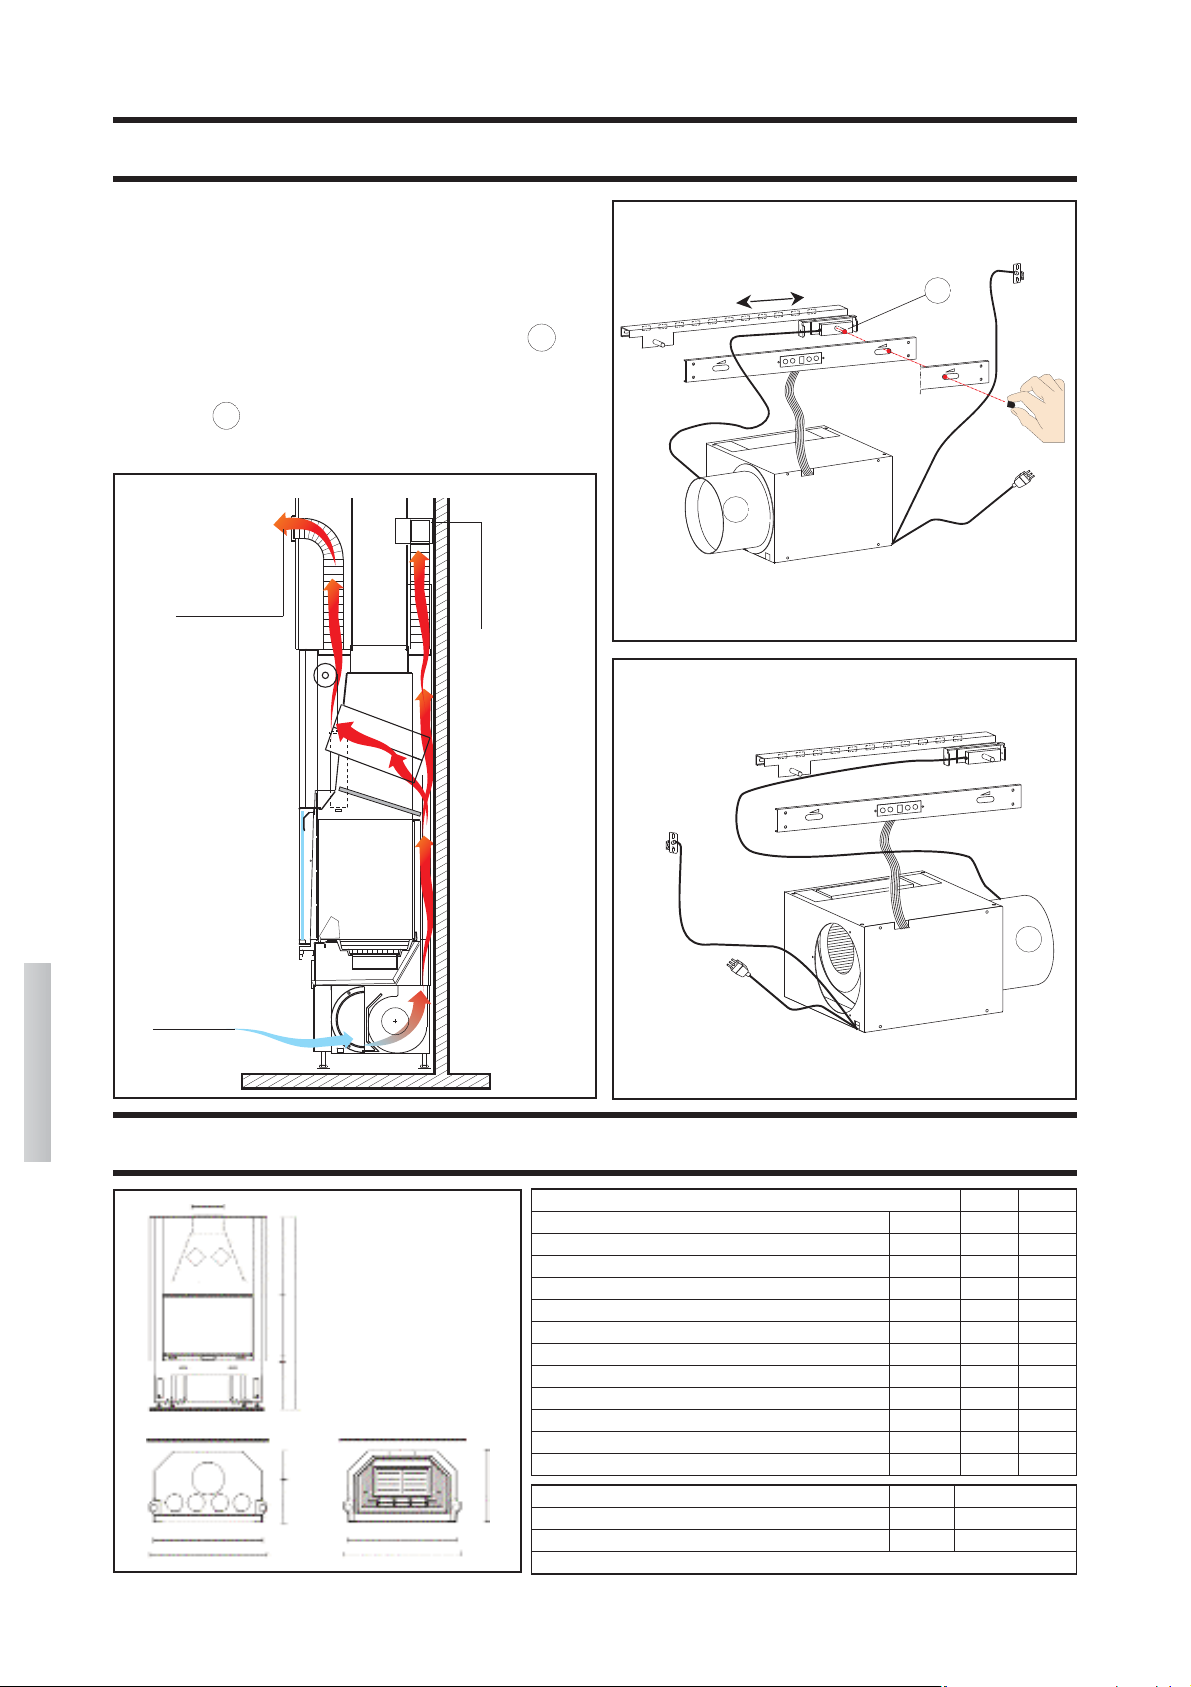
51
Λειτουργία κατά τις ζεστές εποχές
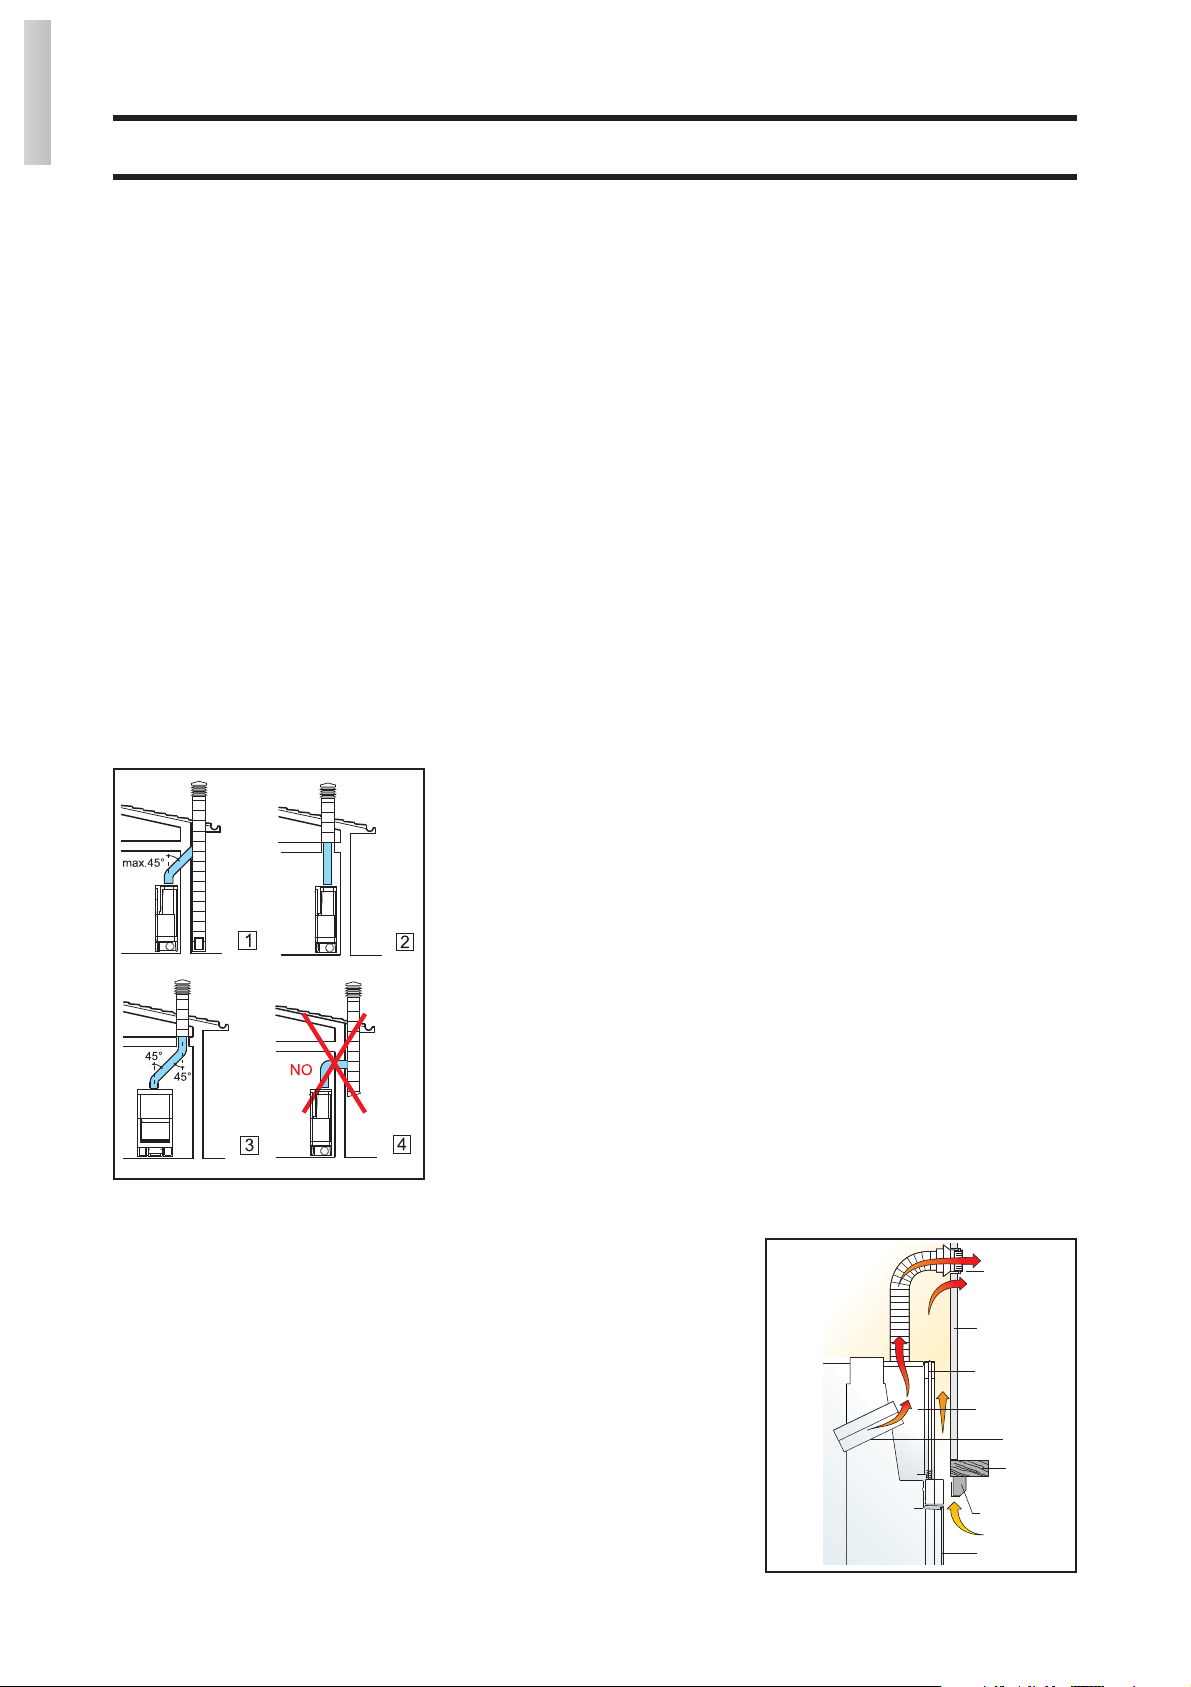
Για να τραβά τον αέρα που χρειάζεται για
την καύση και για να αποβάλλει τα καπνα-
έρια, ο θάλαμος καύσης FORTE PLUS
χρειάζεται το τζάκι/η καπνοδόχος να
τραβά καλά. Όταν αυξάνει η θερμοκρασία
στον εξωτερικό χώρο, το τράβηγμα μειώ-
νεται συνεχώς. Σε περίπτωση που η εξωτε-
ρική θερμοκρασία είναι άνω των 10°C,
ελέγξτε πόσο τραβάει το ενεργειακό τζάκι
πριν ανάψετε τη φωτιά. Εάν δεν τραβάει
πολύ, ανάψτε αρχικά μια ''πρώτη φωτιά
για να πάρει'' με υλικό προσανάμματος
μικρού μεγέθους. Εφόσον το τζάκι αρχίσει
και πάλι να τραβάει καλά, μπορείτε να
προσθέσετε το καύσιμο.
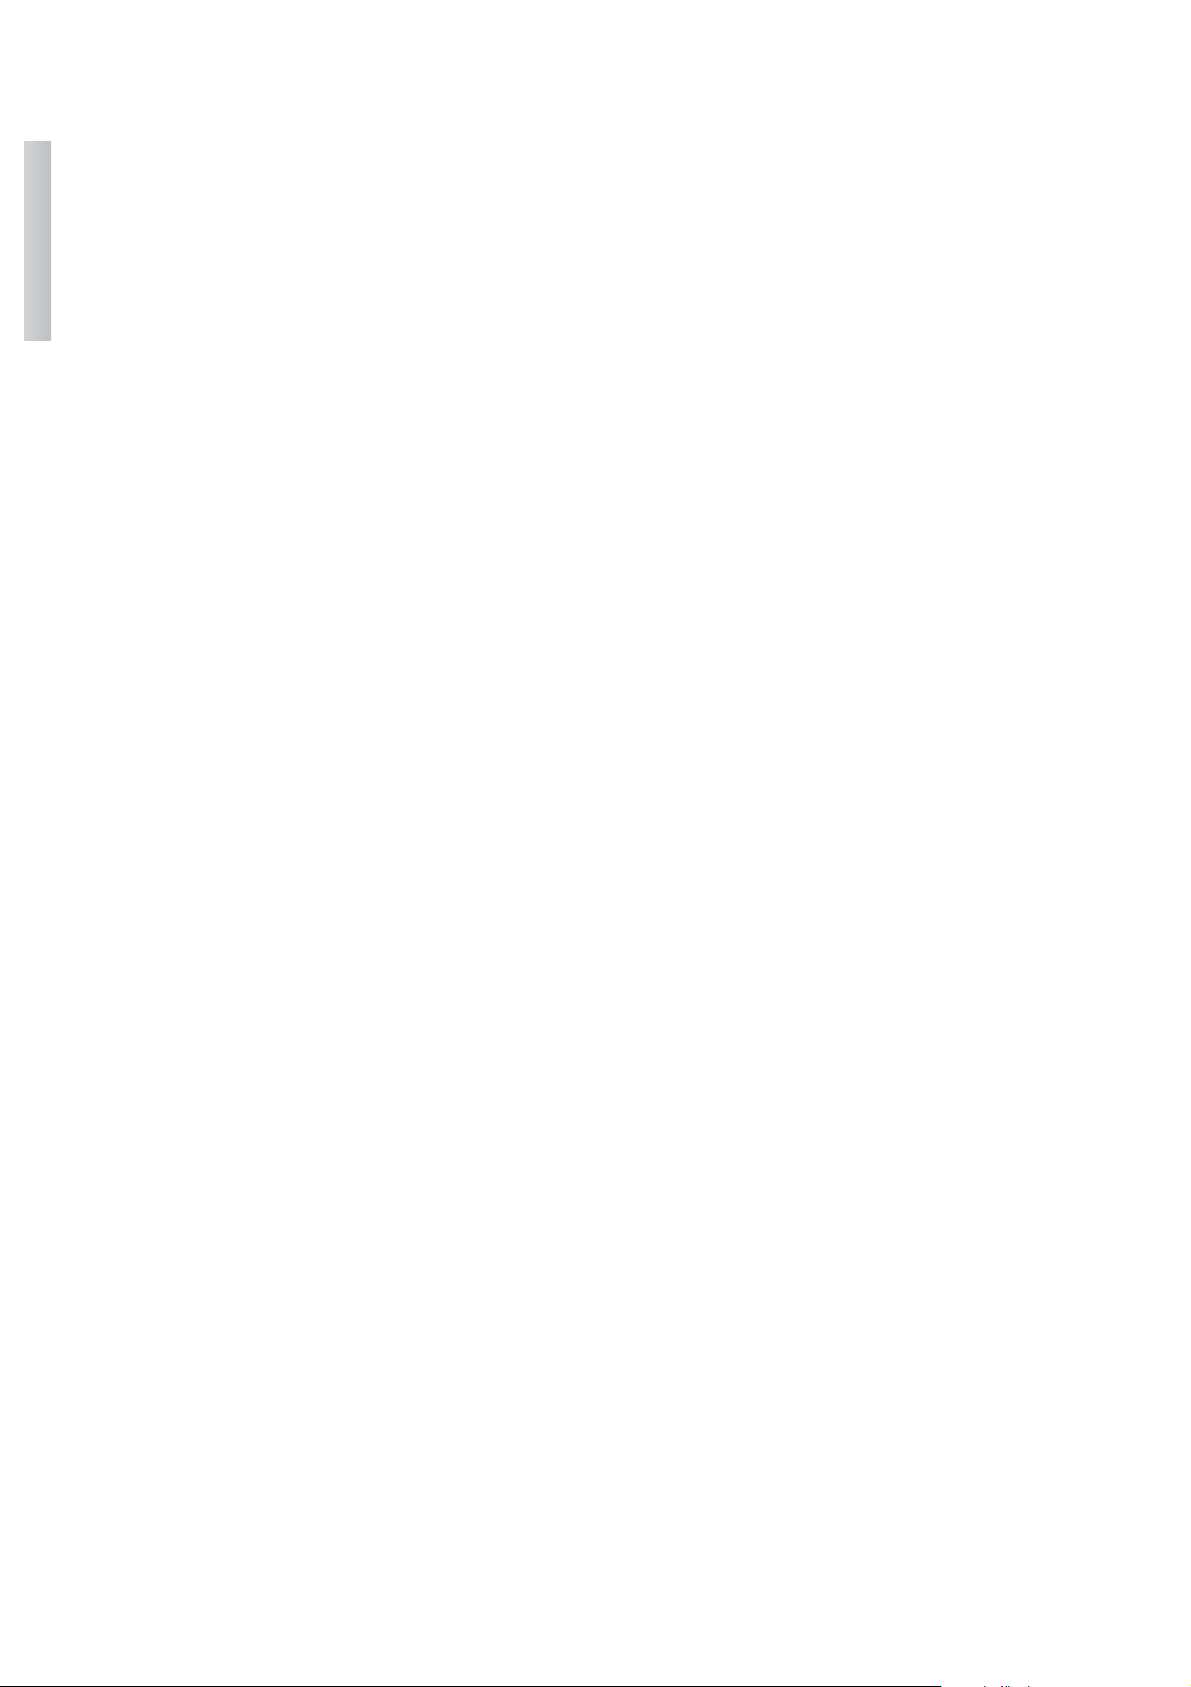
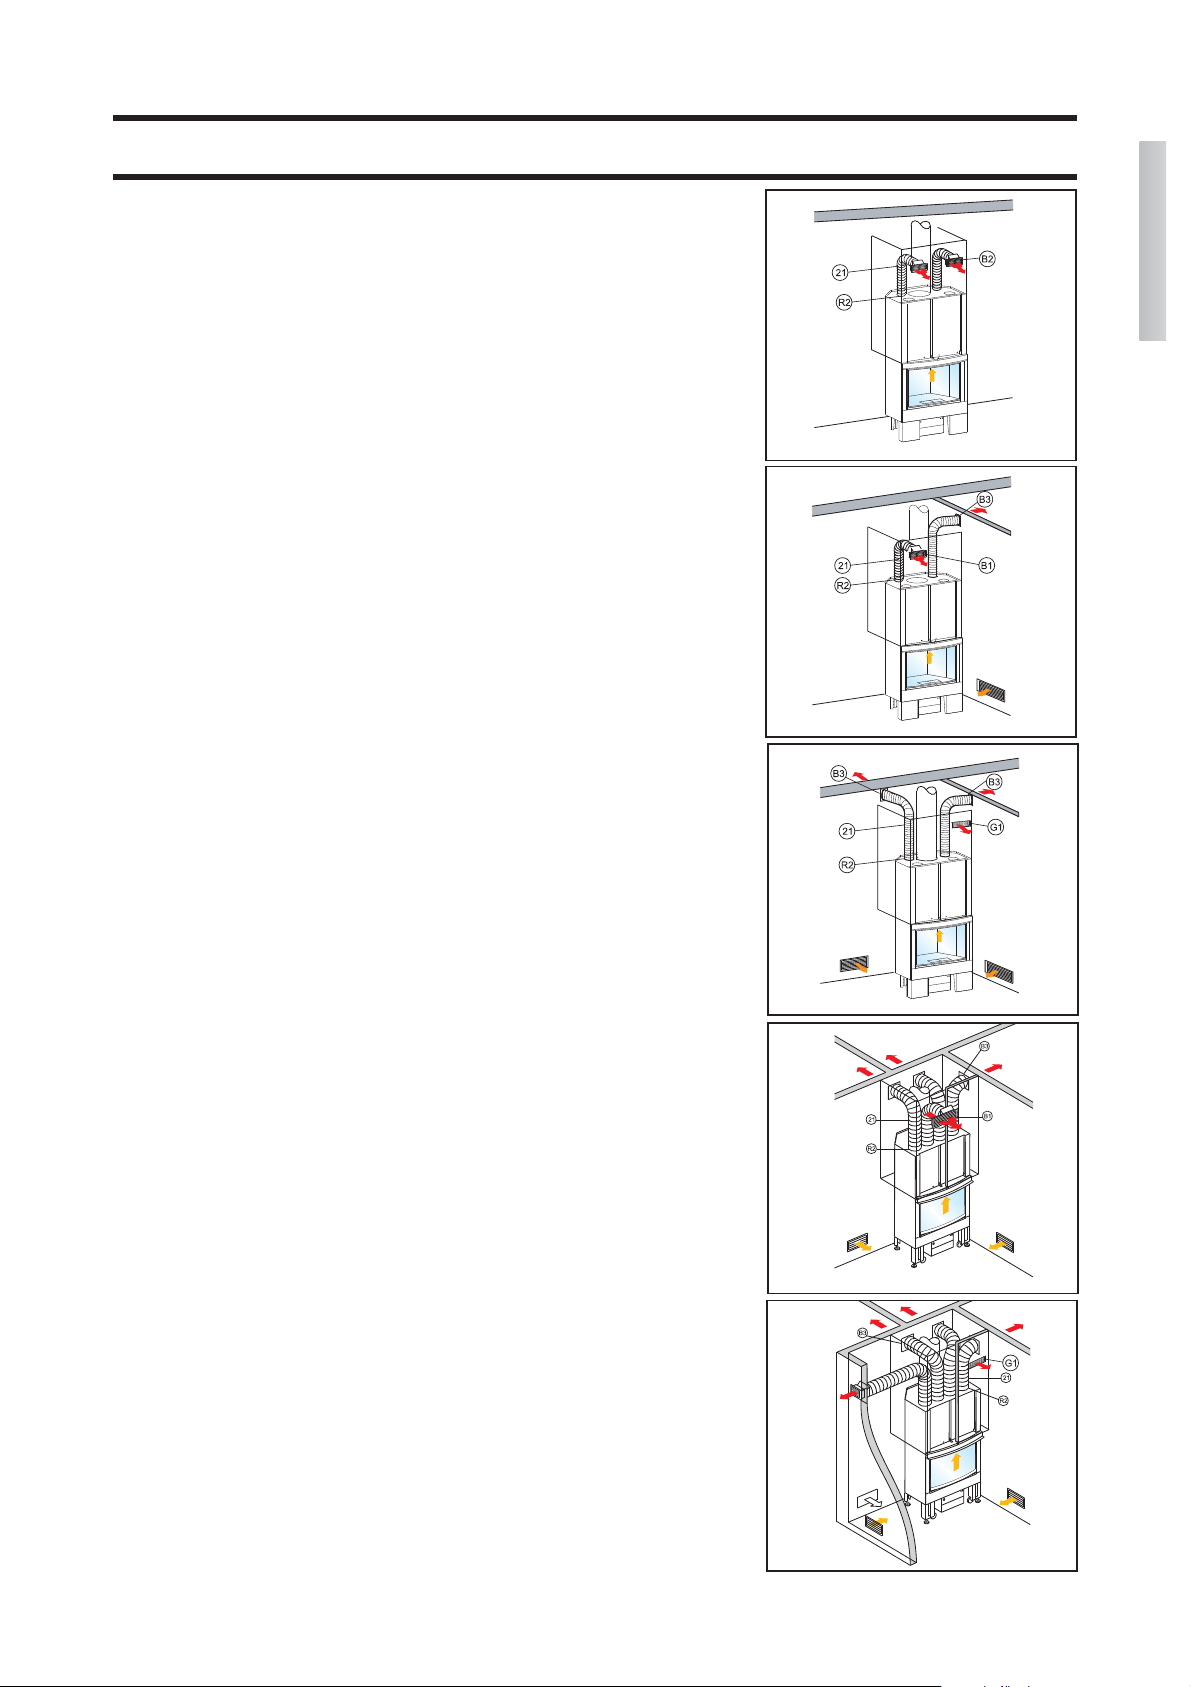
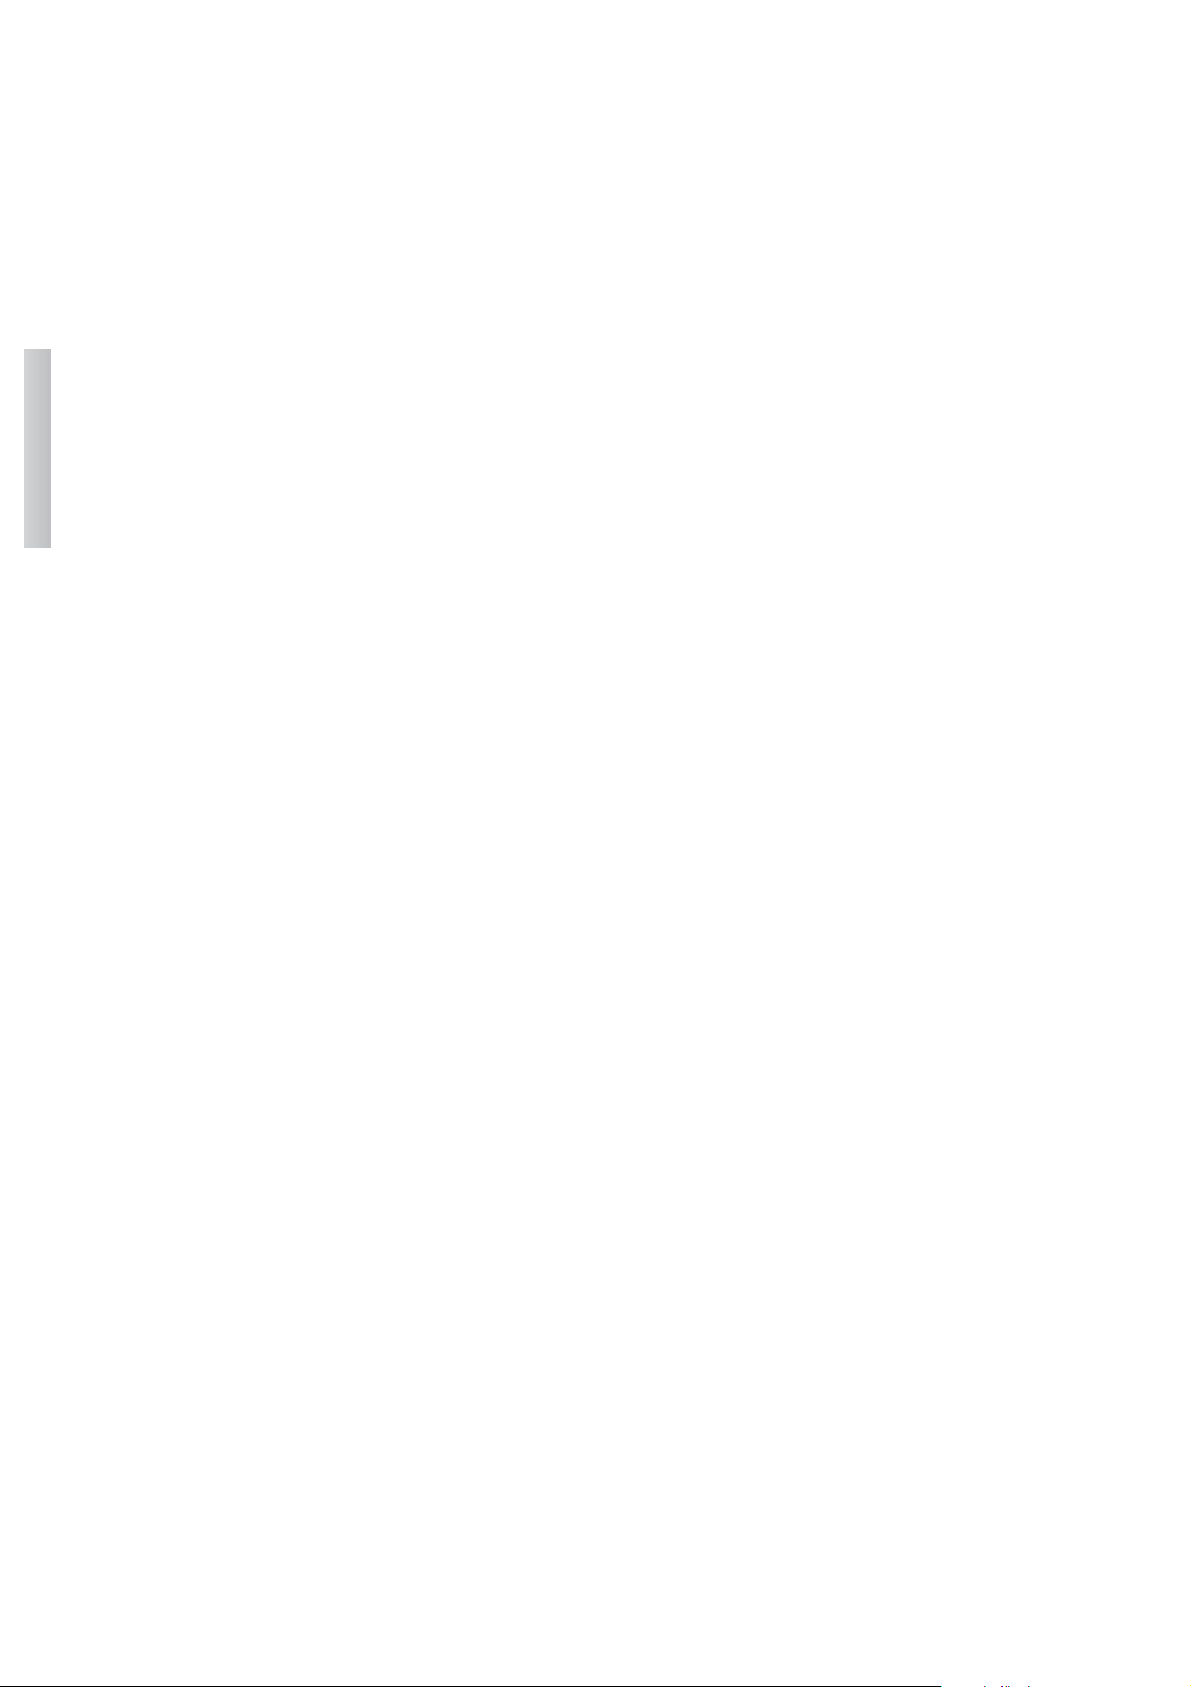
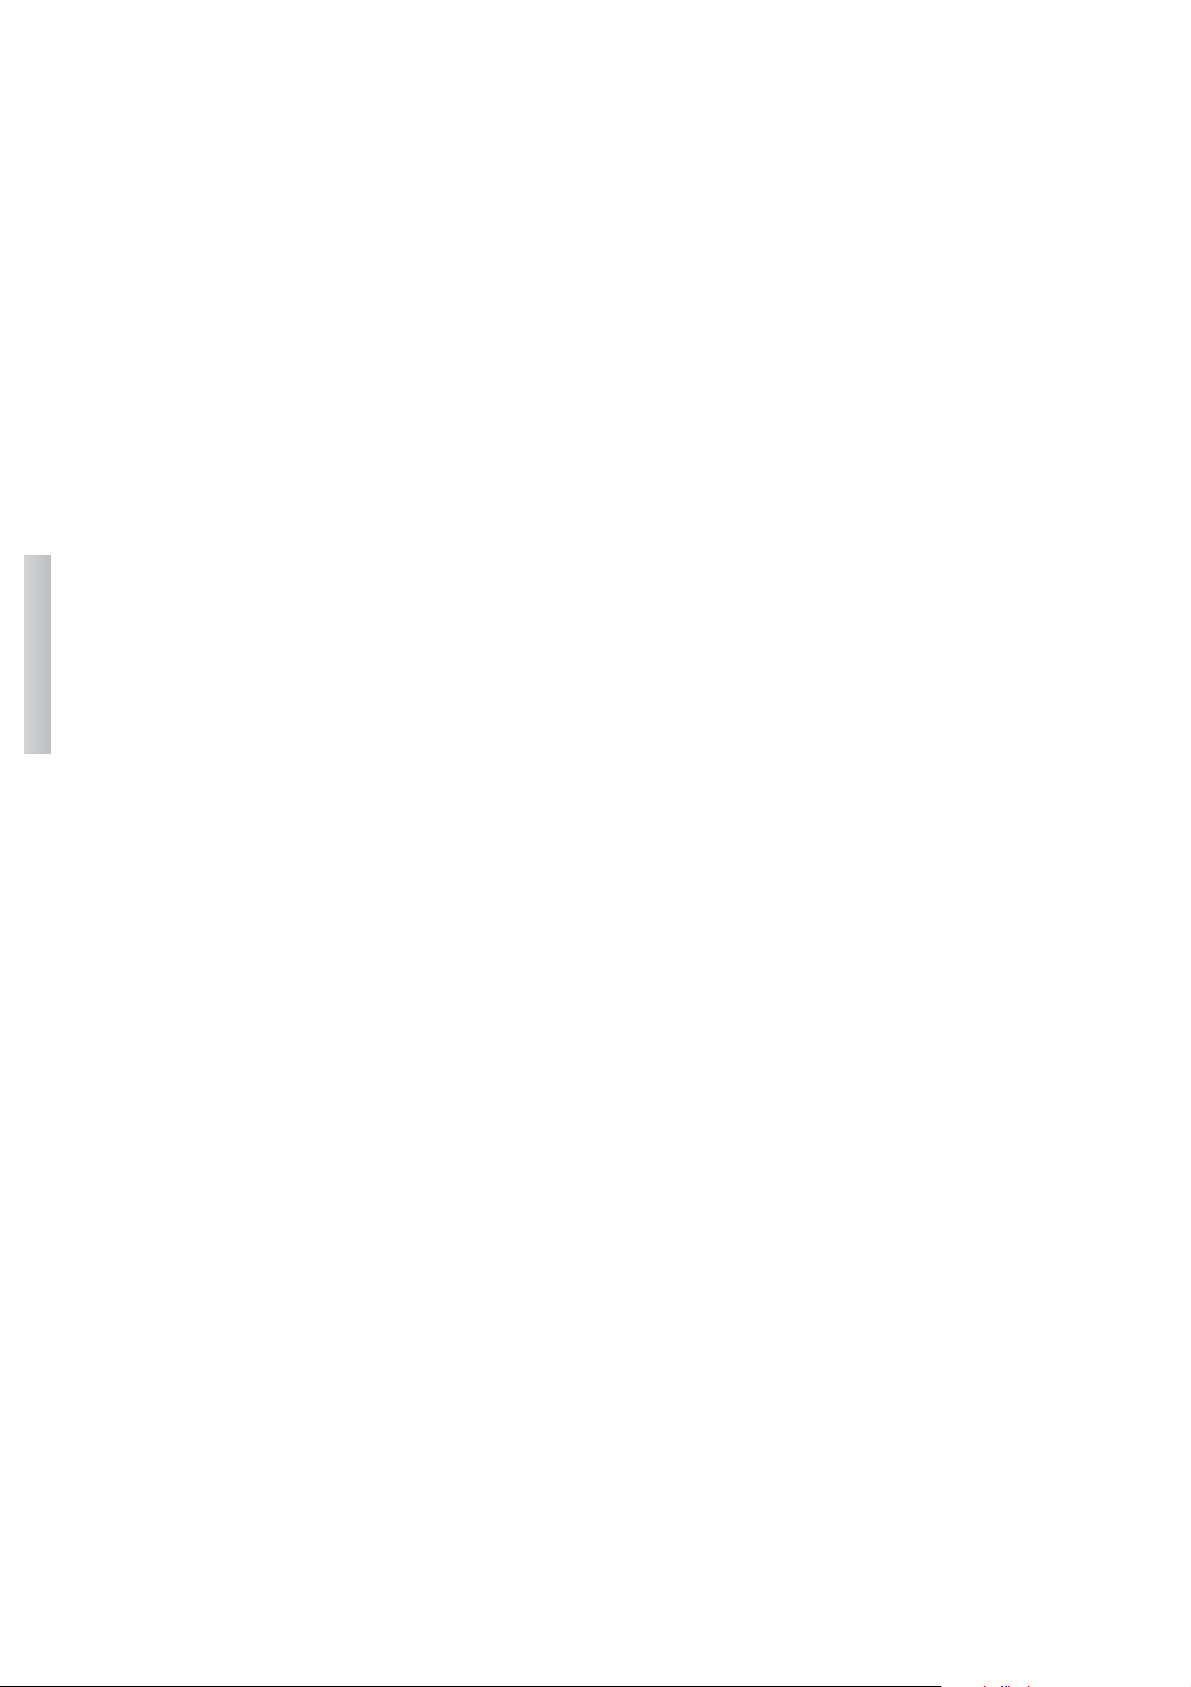
Εισροή αέρα στο χώρο όπου έχει εγκα-
τασταθεί ο θάλαμος καύσης
Ο θάλαμος καύσης FORTE PLUS μπορεί
να λειτουργεί κανονικά μόνον εφόσον στο
χώρο όπου έχει εγκατασταθεί εισέρχεται
αρκετός αέρας για την καύση. Πριν ανά-
ψετε το ενεργειακό τζάκι, φροντίστε να
μπαίνει αρκετός αέρας στο χώρο. Εφόσον
η εγκατάσταση διαθέτει βαλβίδα παροχής
εξωτερικού αέρα, ανοίξτε την και αφήστε
την ανοιχτή όσο το τζάκι είναι σε λειτουρ-
γία. Οι μηχανισμοί τροφοδοσίας με αέρα
καύσης δεν θα πρέπει να τροποποιηθούν.
Σε περίπτωση που ο όγκος του αέρα δεν
επαρκεί και το κτίριο όπου έχει εγκατα-
σταθεί το ενεργειακό τζάκι είναι αεροστε-
γές, θα χρειαστεί πάντως να εγκαταστήσε-
τε μια επιπλέον παροχή αέρα 150 cm² .
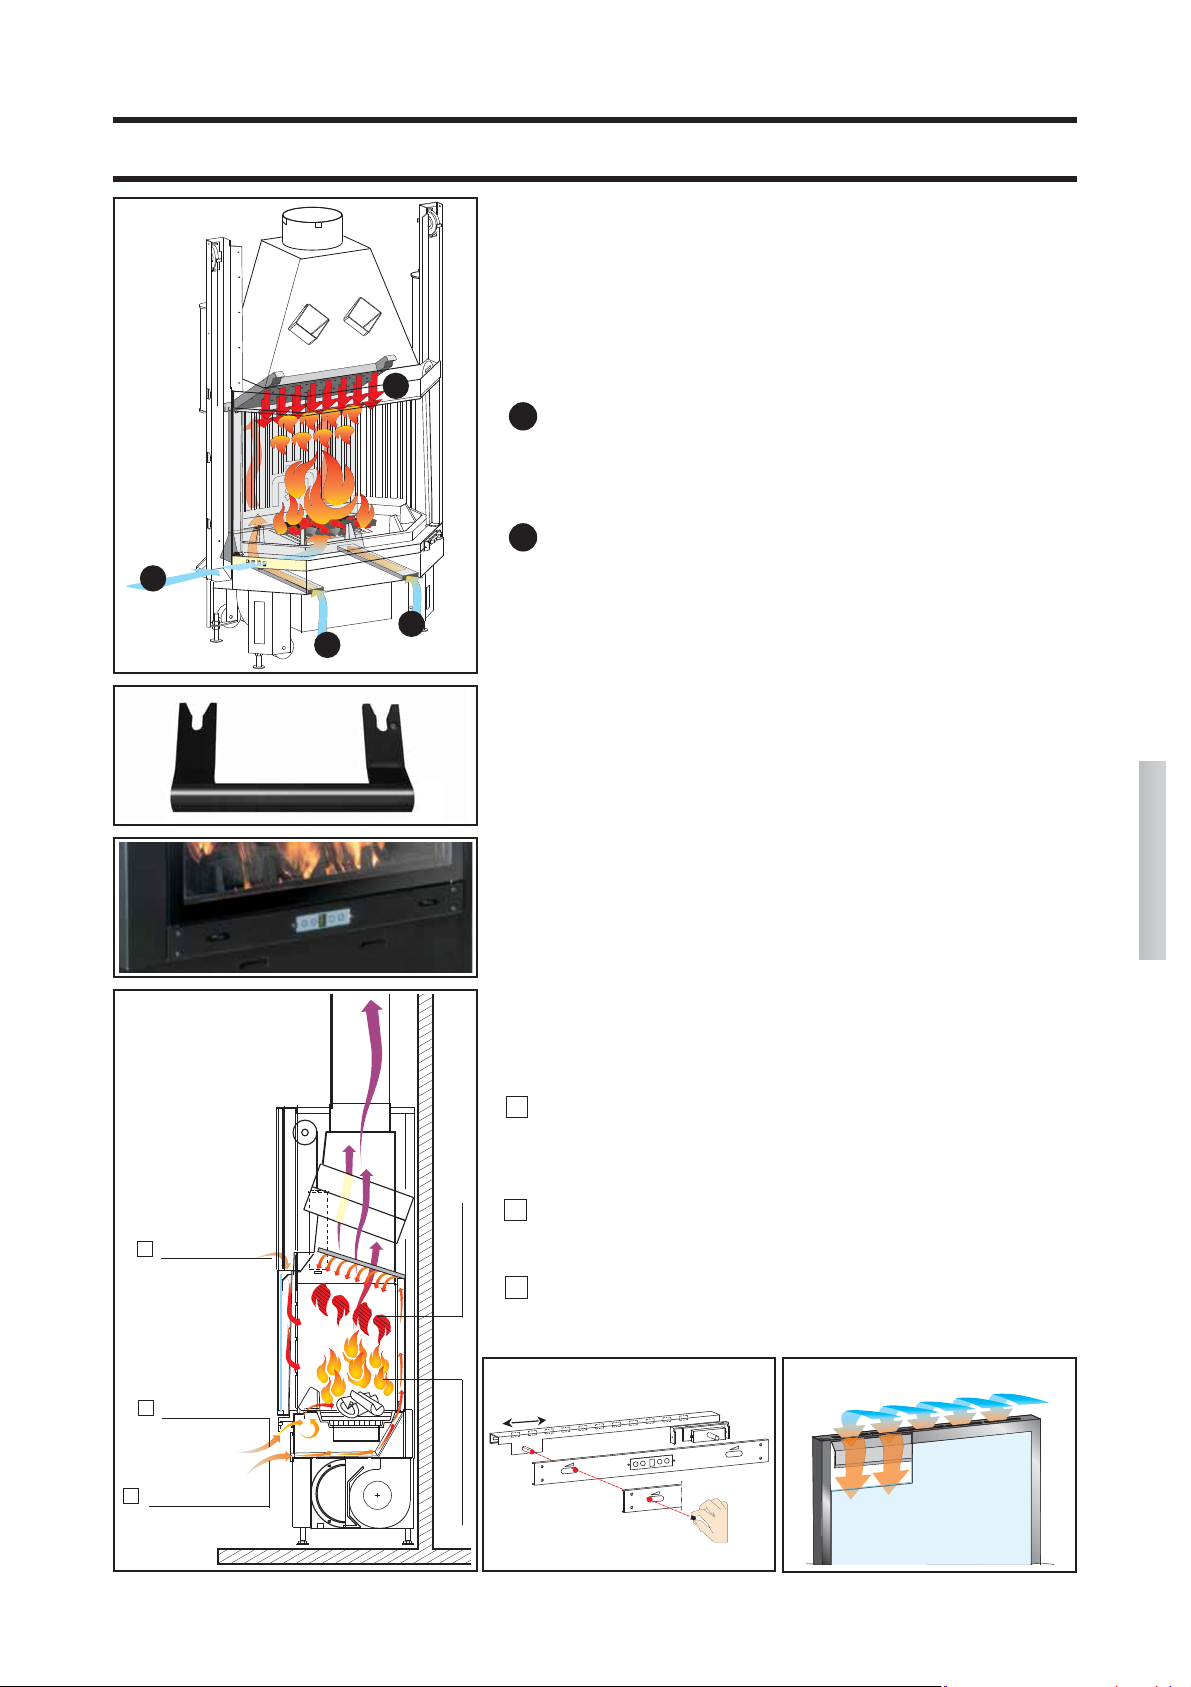
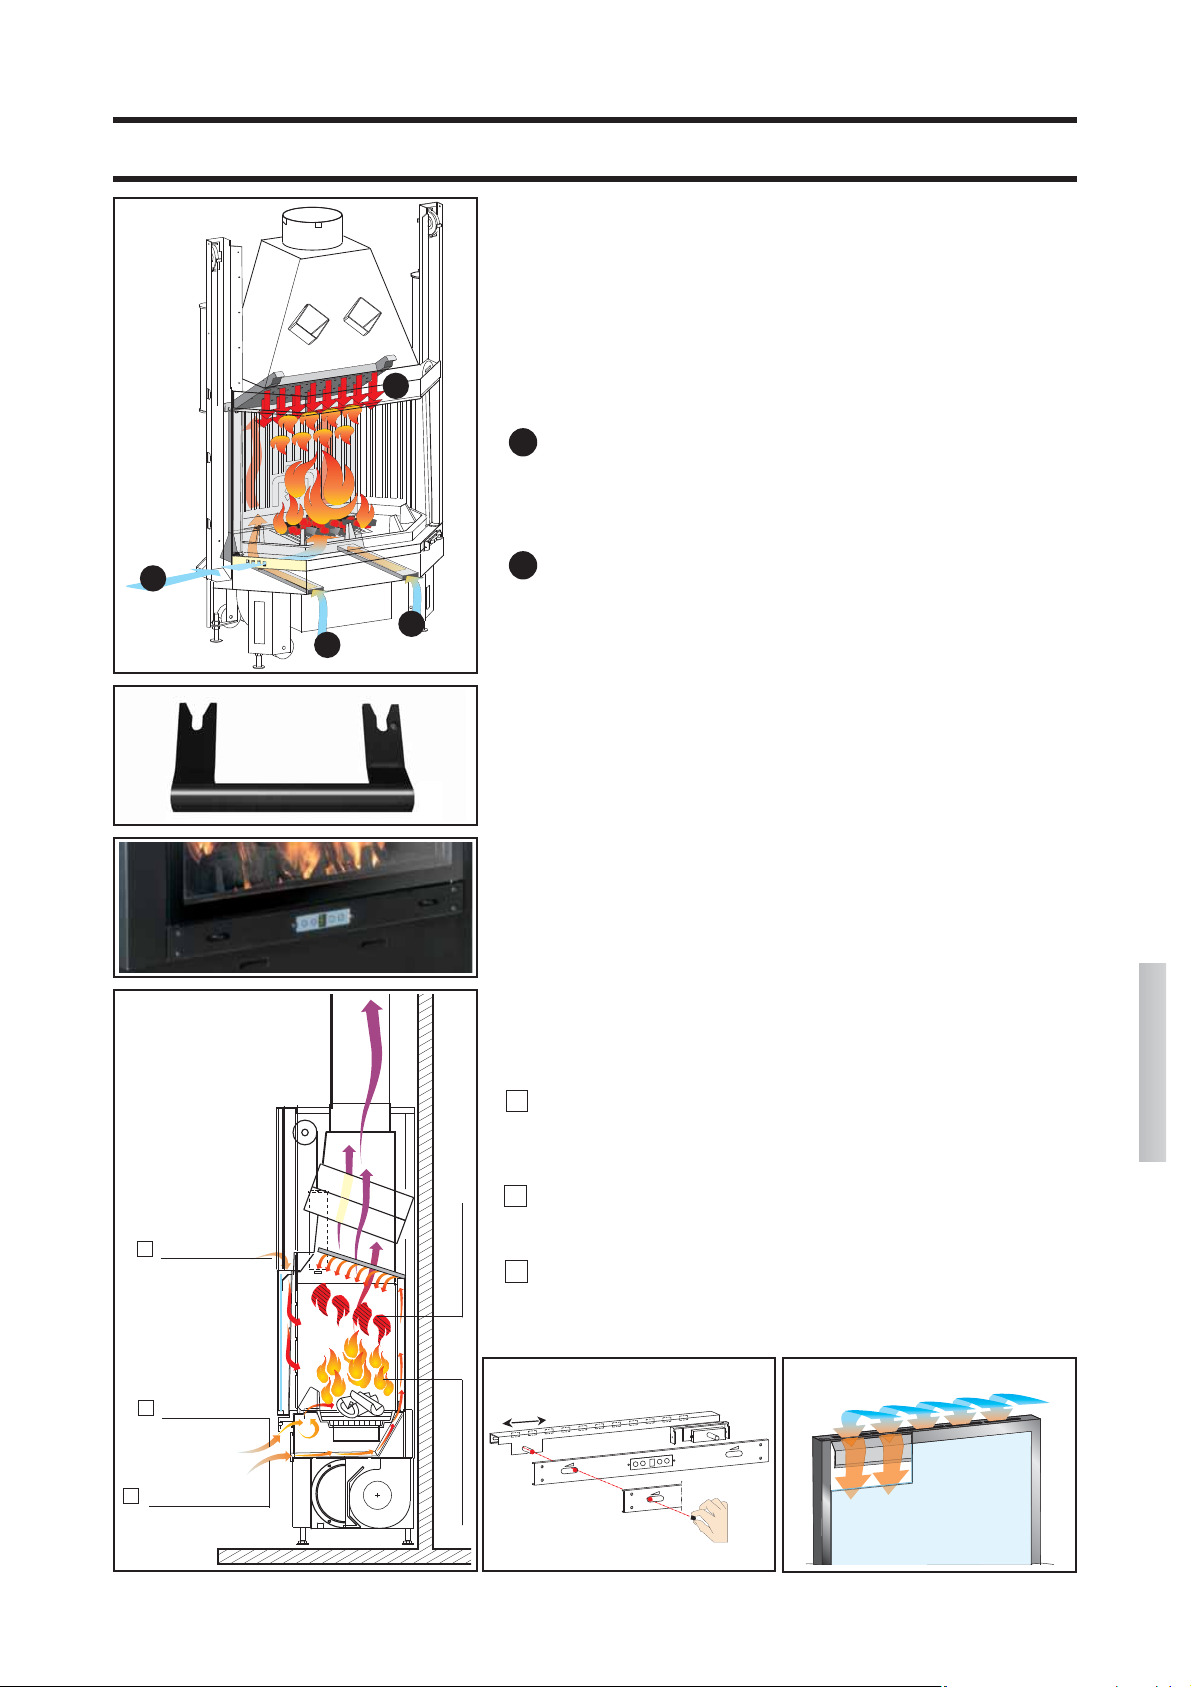
Άναμμα με κρύο θάλαμο καύσης
1.Βεβαιωθείτε ότι το στρώμα στάχτης δεν
είναι πολύ παχύ. Μέγιστο πάχος: 5 εκ.
κάτω από την άκρη της πόρτας. Εάν το
στρώμα της στάχτης είναι πολύ παχύ,
υπάρχει κίνδυνος, όταν ανοίξετε την
πόρτα του θαλάμου για να προσθέσετε
ξύλα, να ξεπηδήσουν κομμάτια πυρακτω-
μένου κάρβουνου από το θάλαμο.
2. Τοποθετήστε το μοχλό ρύθμισης της
βαλβίδας αέρας στη θέση ''άναμμα''. Ο
αέρας για την καύση θα εισέλθει επάνω
στα ξύλα μέσα στο θάλαμο για να ξεκινή-
σει γρήγορα η διαδικασία της καλής καύ-
σης.
3.Τα ξύλα μέσα στο θάλαμο δεν πρέπει να
είναι πολύ στριμωγμένα. Τοποθετήστε
ανάμεσα στα κούτσουρα ένα προσάναμμα
και ανάψτε τη φωτιά. Τα προσανάμματα
χρησιμεύουν για να αρχίσει η καύση. Προ-
σοχή: τα κούτσουρα μεγάλου μεγέθους
ανάβουν με άσχημο τρόπο μέσα στο θάλα-
μο και απελευθερώνουν βλαβερά αέρια.
Μην χρησιμοποιείτε ποτέ υλικά όπως
βενζίνη, οινόπνευμα και παρόμοια για να
ανάψετε τη φωτιά!
4. Στη συνέχεια, κλείστε την πόρτα του
θαλάμου και ελέγξτε ότι λειτουργεί καλά για
μερικά λεπτά. Εάν η φωτιά σβήσει, ανοίξτε
αργά την πόρτα του θαλάμου, προσθέστε ένα
ακόμα προσάναμμα ανάμεσα στα κούτσουρα
και ξανανάψτε τη φωτιά.
5. Εάν πλέον δεν χρειάζεται να προσθέσετε
άλλα ξύλα, όταν η φωτιά θα σβήνει, τοποθε-
τήστε το μοχλό ρύθμισης της βαλβίδας αέρα
στη θέση ''διατήρηση ανθρακιάς''. Μην προ-
χωρήσετε σε αυτή τη ρύθμιση κατά τη διάρ-
κεια της καύσης γιατί, όταν ο μοχλός βρίσκε
Καύσιμο και θερμική ισχύς
Η καύση έχει σχεδιαστεί για να δίνει βέλτι-
στα αποτελέσματα από τεχνικής άποψης,
όσον αφορά τόσο τη χρησιμότητα του θαλά-
μου καύσης και της σχετικής τροφοδοσίας με
αέρα όσο και τις εκπομπές αερίων. Σας
καλούμε να μας υποστηρίξετε στην προσπά-
θειά μας να κρατήσουμε ένα καθαρό περι-
βάλλον τηρώντας τις παρακάτω οδηγίες σχε-
τικά με τη χρήση καύσιμων υλικών που δεν
περιέχουν και δεν παράγουν βλαβερές
ουσίες. Όσον αφορά το καύσιμο, να χρησιμο-
ποιείτε αποκλειστικά φυσικό και ξερό ξύλο ή
μπρικέτα ξύλου. Το νωπό ξύλο, που έχει
κοπεί πρόσφατα ή που έχει αποθηκευτεί σε
ακατάλληλο χώρο, περιέχει υψηλό ποσοστό
νερού και για το λόγο αυτό δεν καίγεται
καλά, βγάζει καπνό ενώ δεν βγάζει πολλή
θερμότητα. Να χρησιμοποιείτε μόνο καυσό-
ξυλα ξερά τουλάχιστον δύο χρόνων που είναι
αποθηκευμένο σε ευάερο και ξηρό μέρος. Σε
αυτήν την περίπτωση, το ξύλο περιέχει νερό
σε ποσοστό μικρότερο του 20% του βάρους
του. Με αυτόν τον τρόπο δεν θα σπαταλάτε
καύσιμη ύλη καθώς τα ξερά ξύλα έχουν ανώ-
τερη θερμική ισχύ. Μην χρησιμοποιείτε ποτέ
εύφλεκτα υγρά όπως βενζίνη, οινόπνευμα
και παρόμοια. Μην καίτε τα απορρίμματα.
Πεδίο ακτινοβολίας
Μέσα στο πεδίο ακτινοβολίας της πόρτας
από γυαλί μην τοποθετείτε εύφλεκτα αντι-
κείμενα.
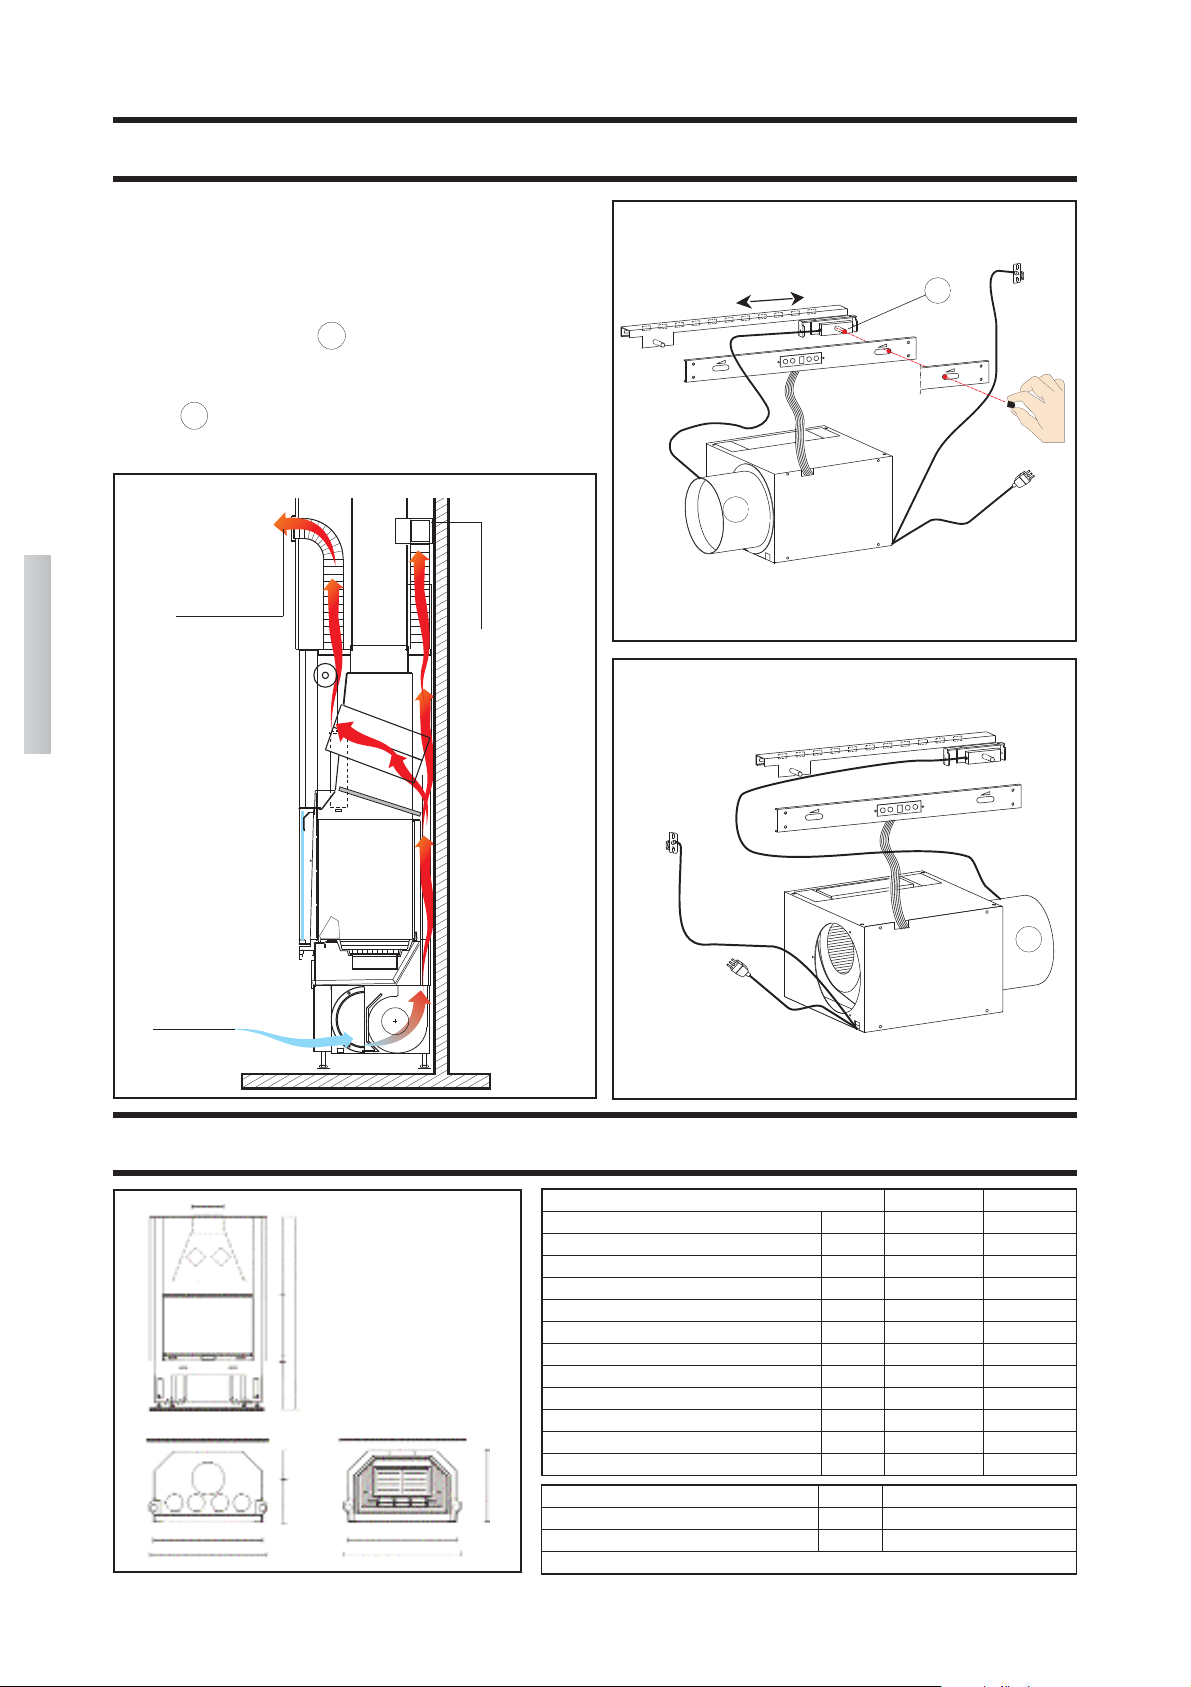
Αρχική θέση σε λειτουργία
Το χρώμα με το οποίο είναι βαμμένος ο
θάλαμος καύσης έχει υποβληθεί στη λεγό-
μενη διαδικασία ωρίμανσης ωσότου φτά-
σει για πρώτη φορά τη θερμοκρασία χρή-
σης. Αυτό μπορεί να προκαλέσει ενοχλητι-
κές μυρωδιές. Σε αυτήν την περίπτωση θα
πρέπει να αερίσετε επαρκώς το χώρο όπου
θα εγκατασταθεί ο θάλαμος καύσης. Το
φαινόμενο αυτό θα εκλείψει τελείως έπει-
τα από τις πρώτες χρήσεις του.
Κίνδυνος εγκαυμάτων
Οι εξωτερικές επιφάνειες του ενεργειακού
τζακιού FORTE PLUS, ιδιαίτερα η πόρτα
από γυαλί και κεραμικό, θερμαίνονται.
Μην αγγίζετε - κίνδυνος εγκαύματος!
Προειδοποιήστε ιδιαίτερα τα παιδιά. Τα
παιδιά πρέπει σε κάθε περίπτωση να
μένουν μακριά από το ενεργειακό τζάκι
όταν είναι αναμμένο.
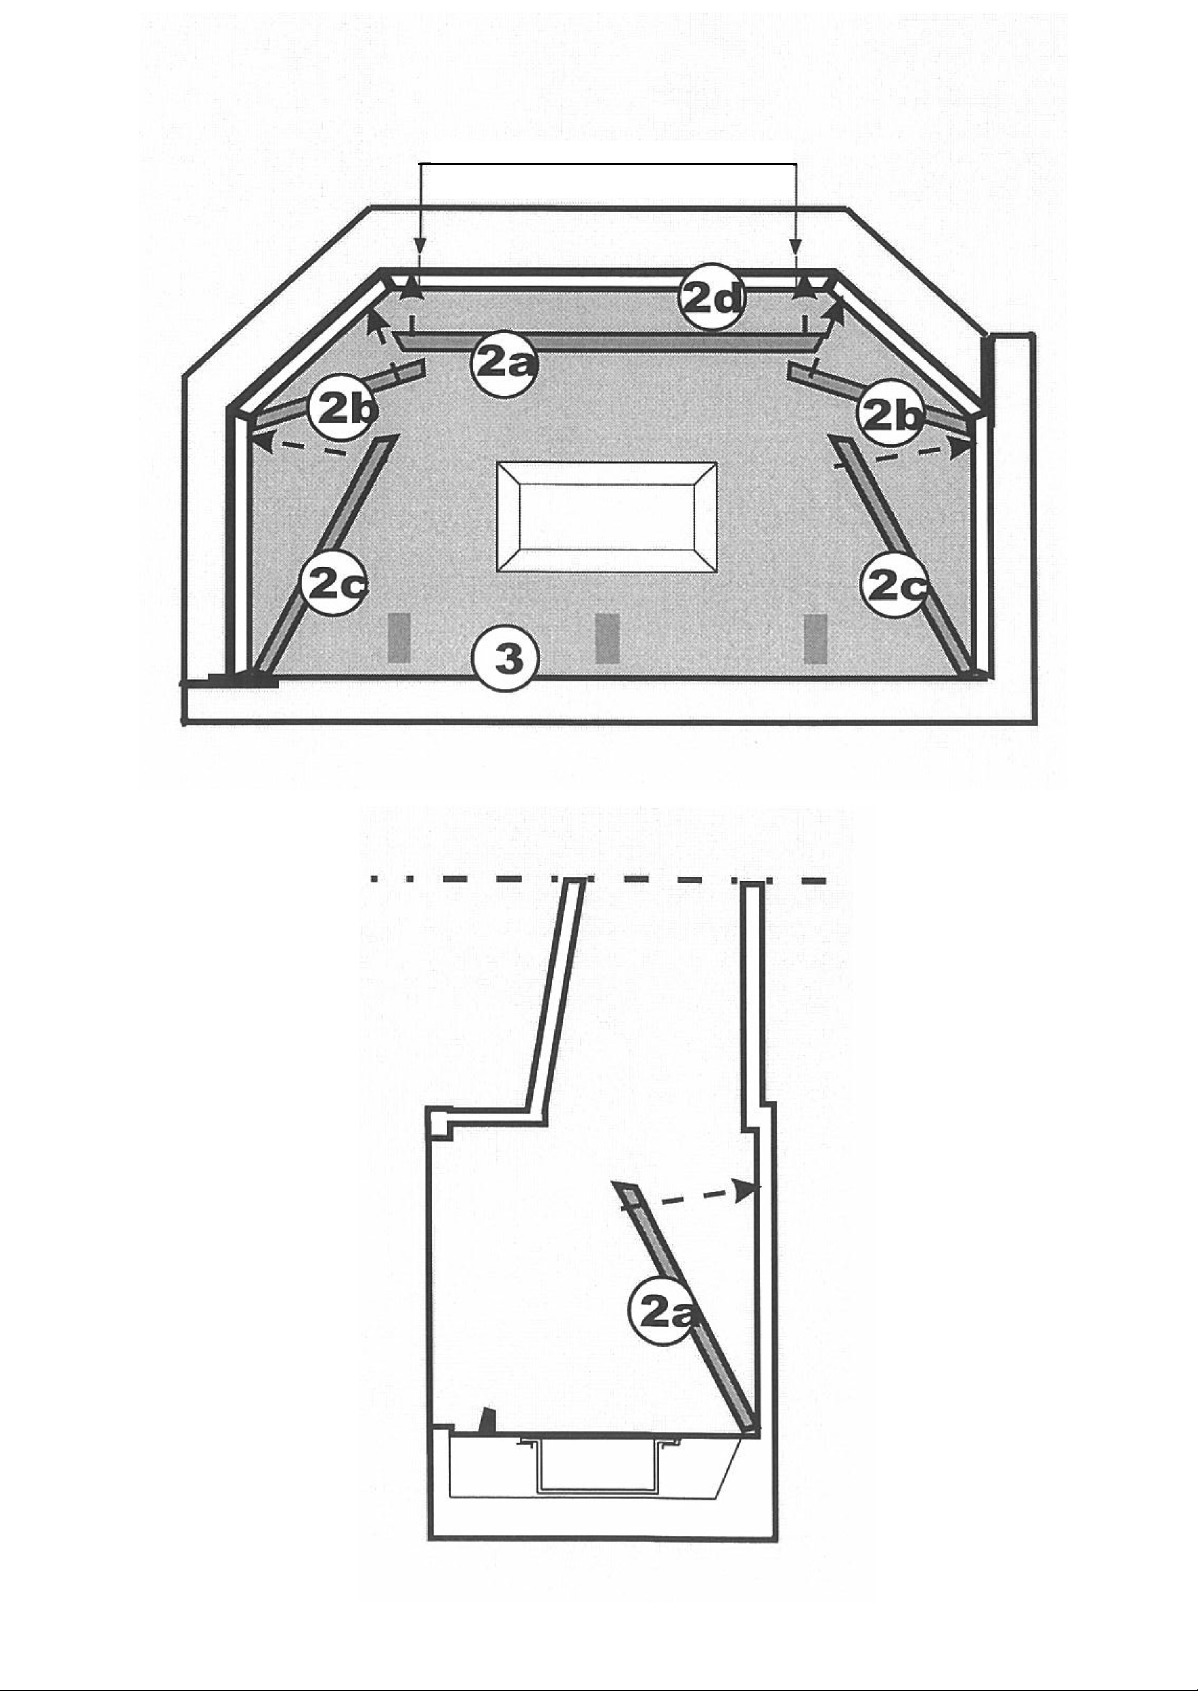
Αεραγωγοί
Φροντίστε να μην κλείνετε ή να μην παρε-
μποδίζετε τις εξόδους του θερμού αέρα.
Υπάρχει κίνδυνος υπερθέρμανσης στο
εσωτερικό της διακόσμησης.
Λειτουργία του θαλάμου καύσης με
ανοιχτή πόρτα
Σε περίπτωση που ο θάλαμος καύσης λει-
τουργεί όταν η πόρτα είναι ανοιχτή, θα
πρέπει να είναι υπό συνεχή έλεγχο. Από το
θάλαμο καύσης μπορούν να εξέλθουν κομ-
μάτια πυρακτωμένων κάρβουνων.
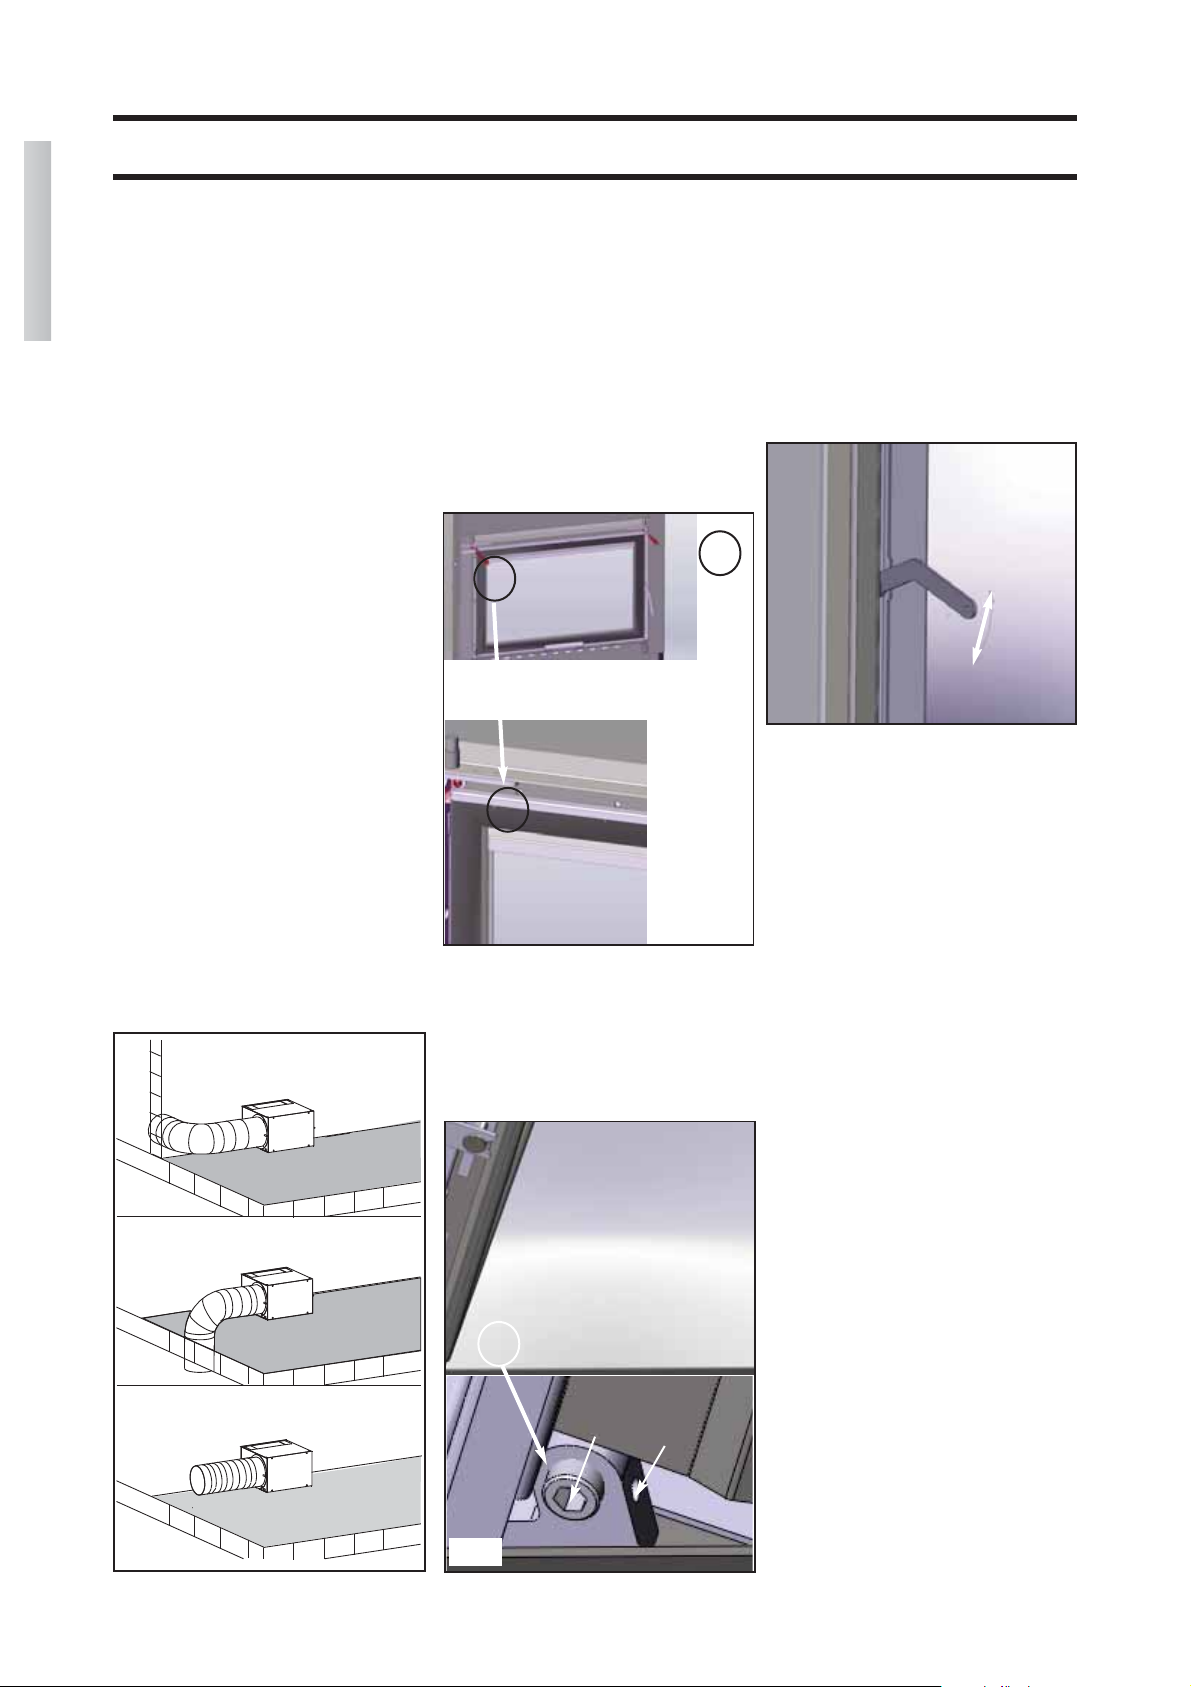
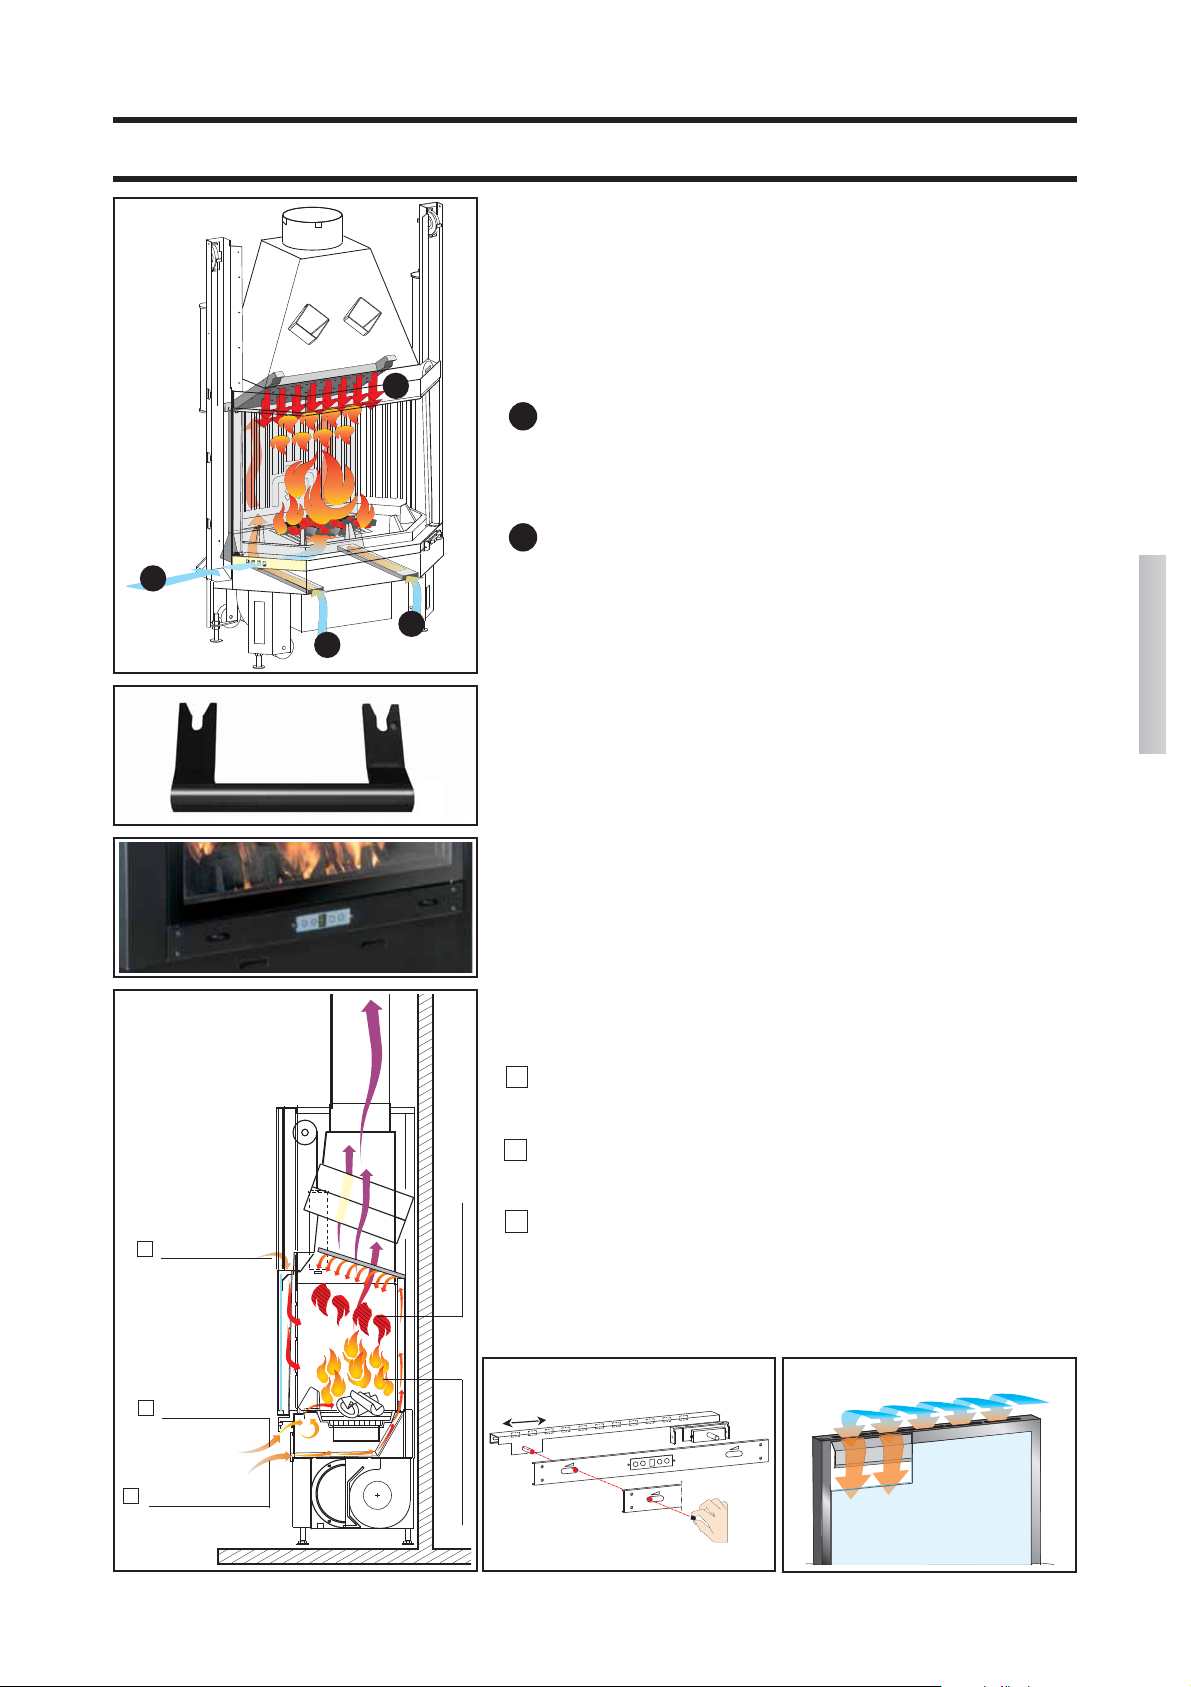
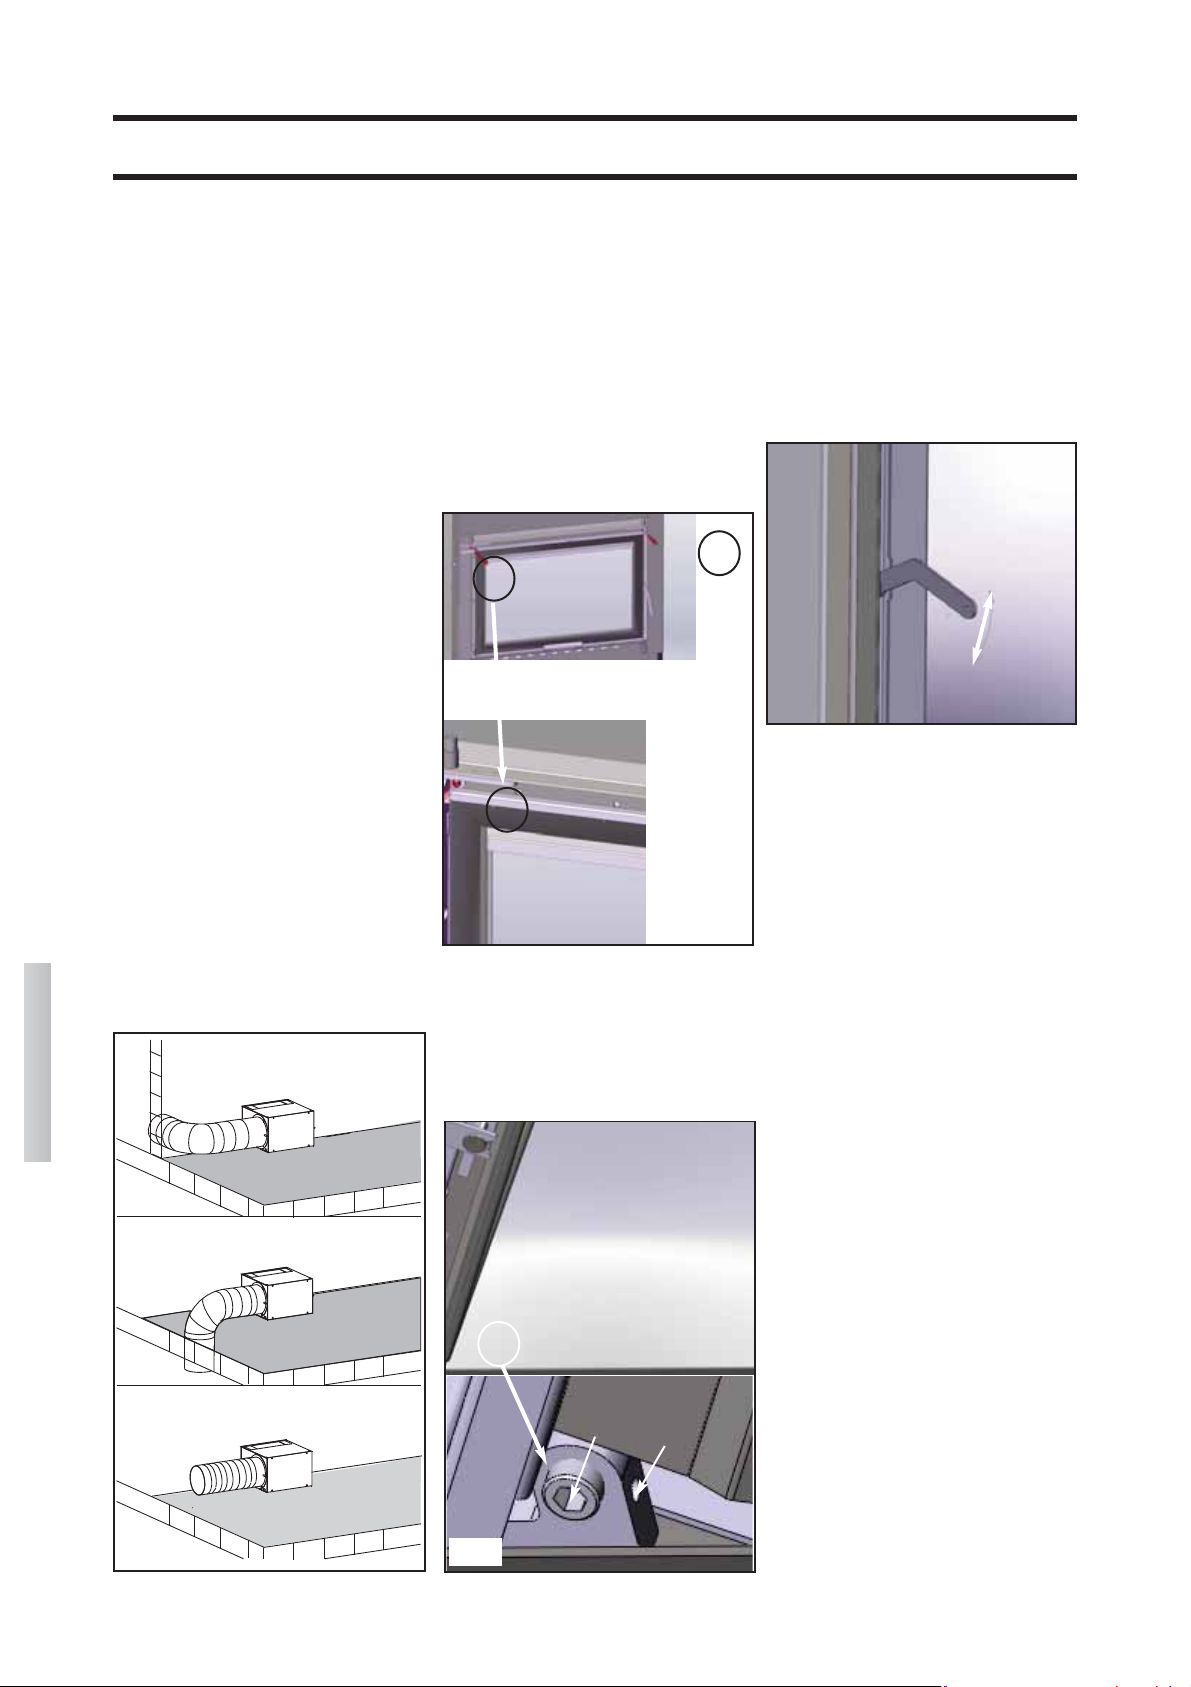
Προσθήκη καυσίμου
Για να "προσθέσετε ξύλα" συνιστούμε να
χρησιμοποιήσετε ένα γάντι προστασίας
καθώς σε περίπτωση παρατεταμένης χρή-
σης του τζακιού, η χειρολαβή ενδέχεται να
έχει ζεσταθεί. Ανοίξτε αργά την πόρτα.
Έτσι αποφεύγεται η δημιουργία μικρών
στροβίλων που θα μπορούσαν να προκα-
λέσουν την έξοδο καπναερίων στο χώρο.
Πότε πρέπει να προσθέσω ξύλα; Όταν το
καύσιμο έχει καταναλωθεί και έχει γίνει
κάρβουνο.
ται στη θέση της διατήρησης ανθρακιάς, η
ροή αέρα καύσης δεν μπορεί να τροποποιη-
θεί με κανέναν τρόπο. Σε περίπτωση απρό-
σμενης εισροής οξυγόνου (π.χ. επειδή άνοιξε
η πόρτα του θαλάμου καύσης) τα ''αέρια που
βρίσκονται ακόμα'' μέσα στο θάλαμο και στις
επιφάνειες ανάκτησης θερμότητας μπορεί να
κάνουν κακή αντίδραση με το ατμοσφαιρικό
οξυγόνο που εισέρχεται.
Τροφοδοσία με ζεστό θάλαμο καύσης
Με το γάντι που σας παρέχεται, ανασηκώ-
στε αργά την πόρτα του θαλάμου και προ-
σθέστε όσα ξύλα επιθυμείτε ανάμεσα στην
ανθρακιά μέσα στο θάλαμο (ανάλογα με
τα όρια ποσότητας του καυσίμου που ανα-
φέρονται στο τεχνικό έντυπο).. Με αυτόν
τον τρόπο τα ξύλα θα θερμανθούν και θα
απελευθερώσουν υπό μορφή ατμού την
υγρασία που περιέχουν. Έτσι μειώνεται
και η θερμοκρασία στο εσωτερικό του
θαλάμου καύσης. Οι πτητικές ουσίες που
σε αυτό το σημείο απελευθερώνονται από
το καύσιμο υλικό χρειάζονται αρκετό αέρα
ώστε,η κρίσιμη αυτή φάση, από τεχνικής
άποψης για τις εκπομπές, να ολοκληρωθεί
γρήγορα και η θερμοκρασία να φτάσει στο
επίπεδο που χρειάζεται για μια καλή
καύση.
Μια τελευταία συμβουλή:
Για να ανάψετε σε πρώτη φάση τη φωτιά,
να χρησιμοποιείτε πάντα μικρά κούτσου-
ρα. Τα μικρά κούτσουρα καίγονται γρηγο-
ρότερα και έτσι η θερμοκρασία στο θάλα-
μο καύσης φτάνει στο κατάλληλο επίπεδο
σε λιγότερο χρόνο. Να χρησιμοποιείτε
μεγαλύτερα κούτσουρα για να τροφοδοτεί-
τε τη φωτιά. Ορισμένα είδη μπρικέτας
ξύλου φουσκώνουν όταν μπουν στο θάλα-
μο καύσης, δηλαδή διαστέλλονται με τη
θερμότητα και αυξάνει ο όγκος τους. Να
τοποθετείτε τα ξύλα πάντα στο βάθος στο
θάλαμο καύσης, σχεδόν να ακουμπάνε στο
πίσω τοίχωμα του θαλάμου ώστε ακόμα
και αν γλιστρήσουν, να μην έρθουν σε
επαφή με την πόρτα του θαλάμου.
Αφαίρεση της στάχτης (μόνο σε περί-
πτωση που ο θάλαμος είναι σβηστός και
κρύος).
Μπορείτε να αφαιρέσετε τη στάχτη με ένα
φτυαράκι ή με ηλεκτρική σκούπα τζακιού.
Τοποθετήστε τη στάχτη αποκλειστικά και
μόνο μέσα σε μη εύφλεκτα δοχεία, μην
ξεχνάτε ότι η στάχτη μπορεί να επαναφλεγεί
ακόμα και έπειτα από 24 ώρες μετά την
τελευταία καύση.
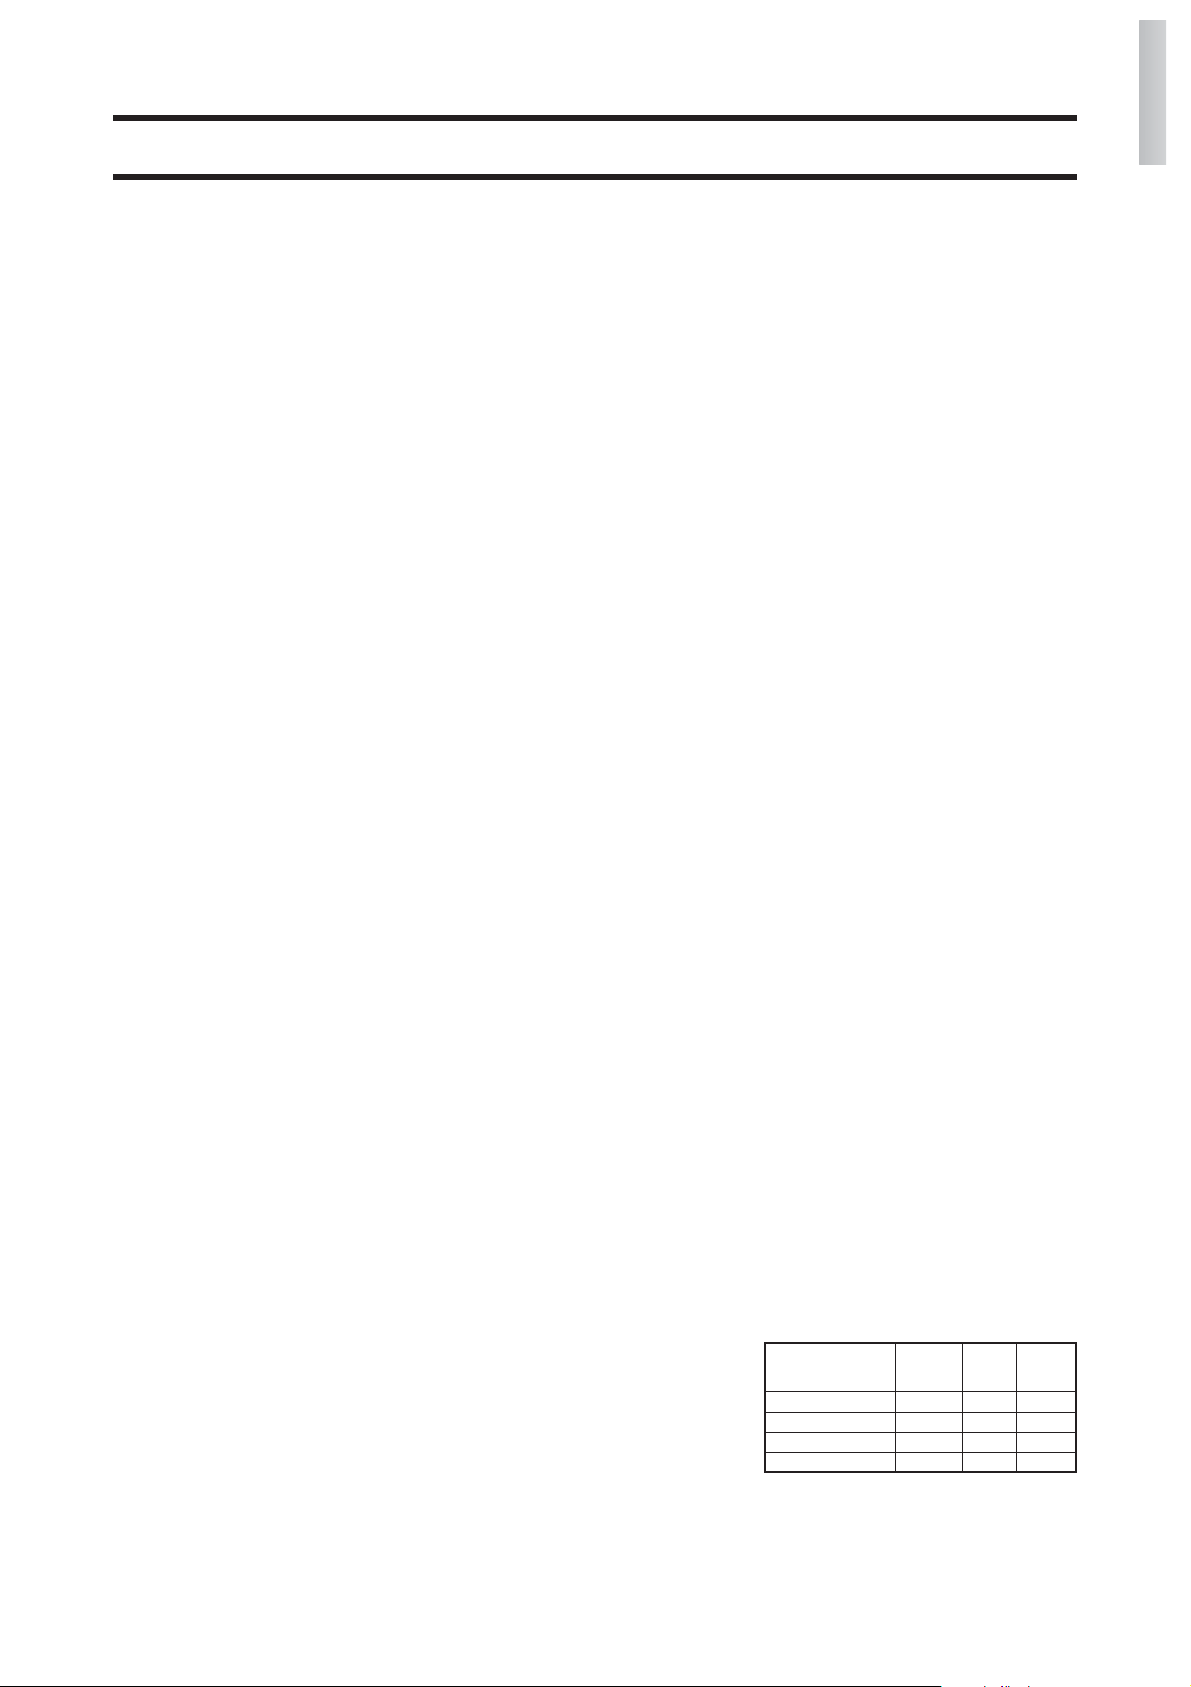
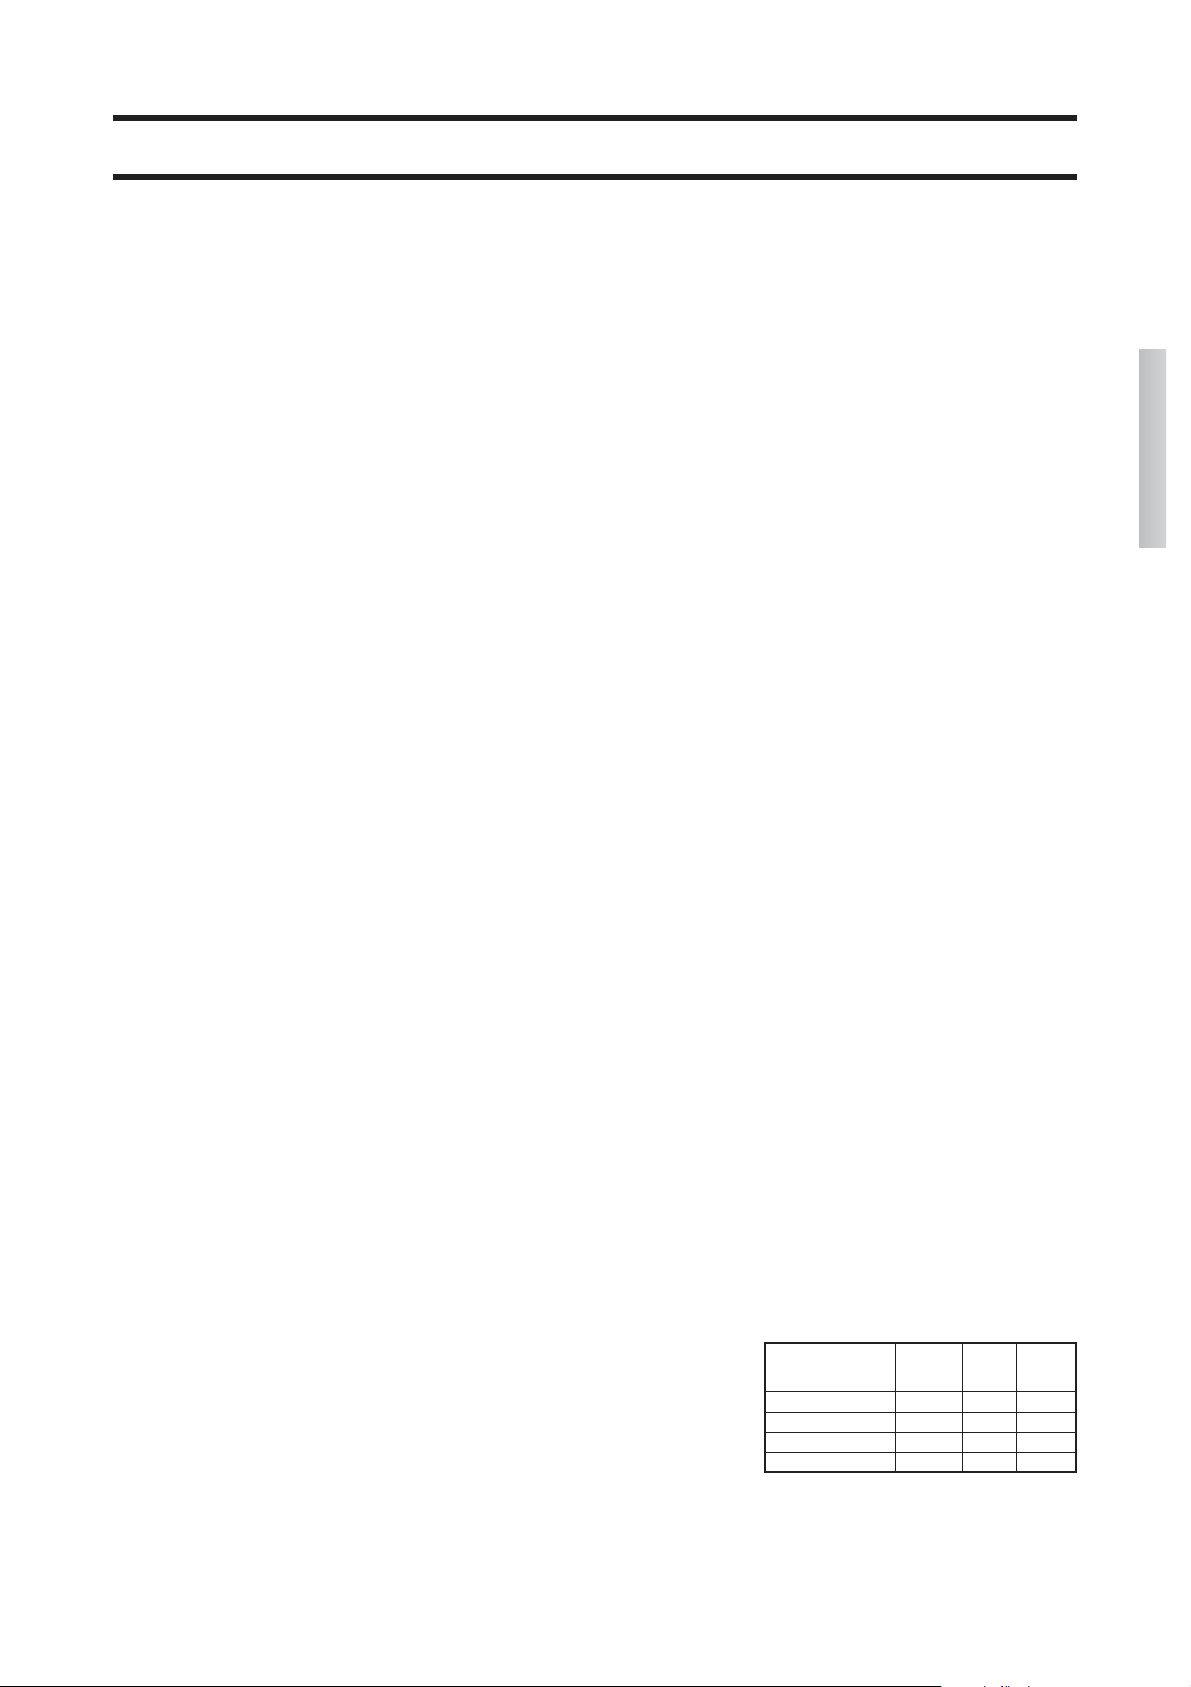
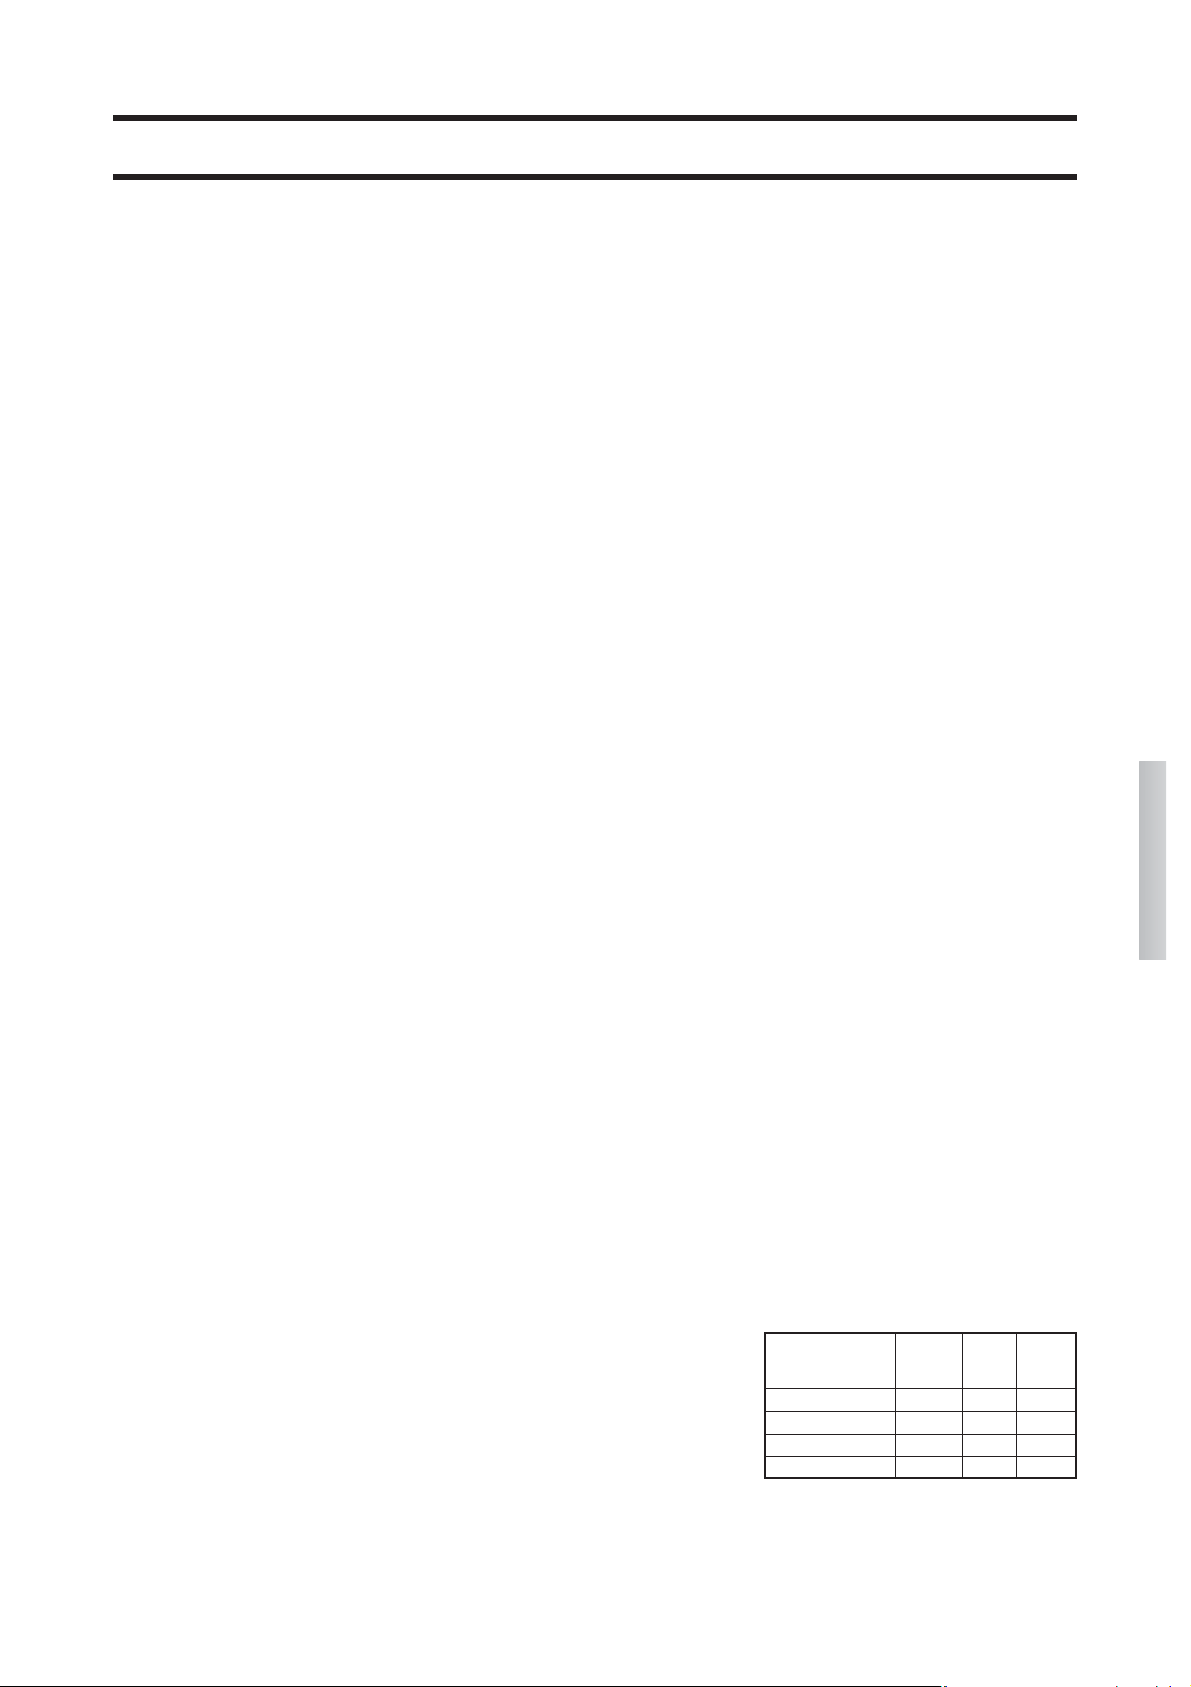
ΣΗΜΕΙΩΣΗ Το ξερό ξύλο έχει θερμική
ισχύ περίπου 4 kWh/κιλό, ενώ το νωπό
ξύλο έχει θερμική ισχύ μόλις 2 kWh/κιλό.
Συνεπώς, για να έχετε μεγάλη θερμική
ισχύ θα χρειαστείτε τη διπλή ποσότητα
καύσιμου υλικούcombustibile.
ΟΔΗΓΙΕΣ ΓΙΑ ΤΗ ΧΡΗΣΗ
Περιεχόμε-
νο σε νερό
γρ./κιλό
ξύλου
Θερμική
ισχύς
kWh/κιλό
ύς Wh/κιλό
Μεγαλύτε-
ρη κατανά-
λωση
ξύλου %
Πολύ ξερό
100 4,5 0
Ξερό 2 χρόνια
200 4 15
Ξερό 1 χρόνο
350
3 71
Φρεσκοκομμένο ξύλο
500 2,1 153
ΠΡΟΣΟΧΗ: Εάν ο θάλαμος καύσης τρο-
φοδοτείται με υπερβολική ποσότητα καυ-
σίμου ή με κάποιο ακατάλληλο καύσιμο,
υπάρχει κίνδυνος υπερθέρμανσης του
θαλάμου και βλάβης του προϊόντος.
≈ÀÀ«Õ…¡