18
ESPAÑOL
ESPAÑOL
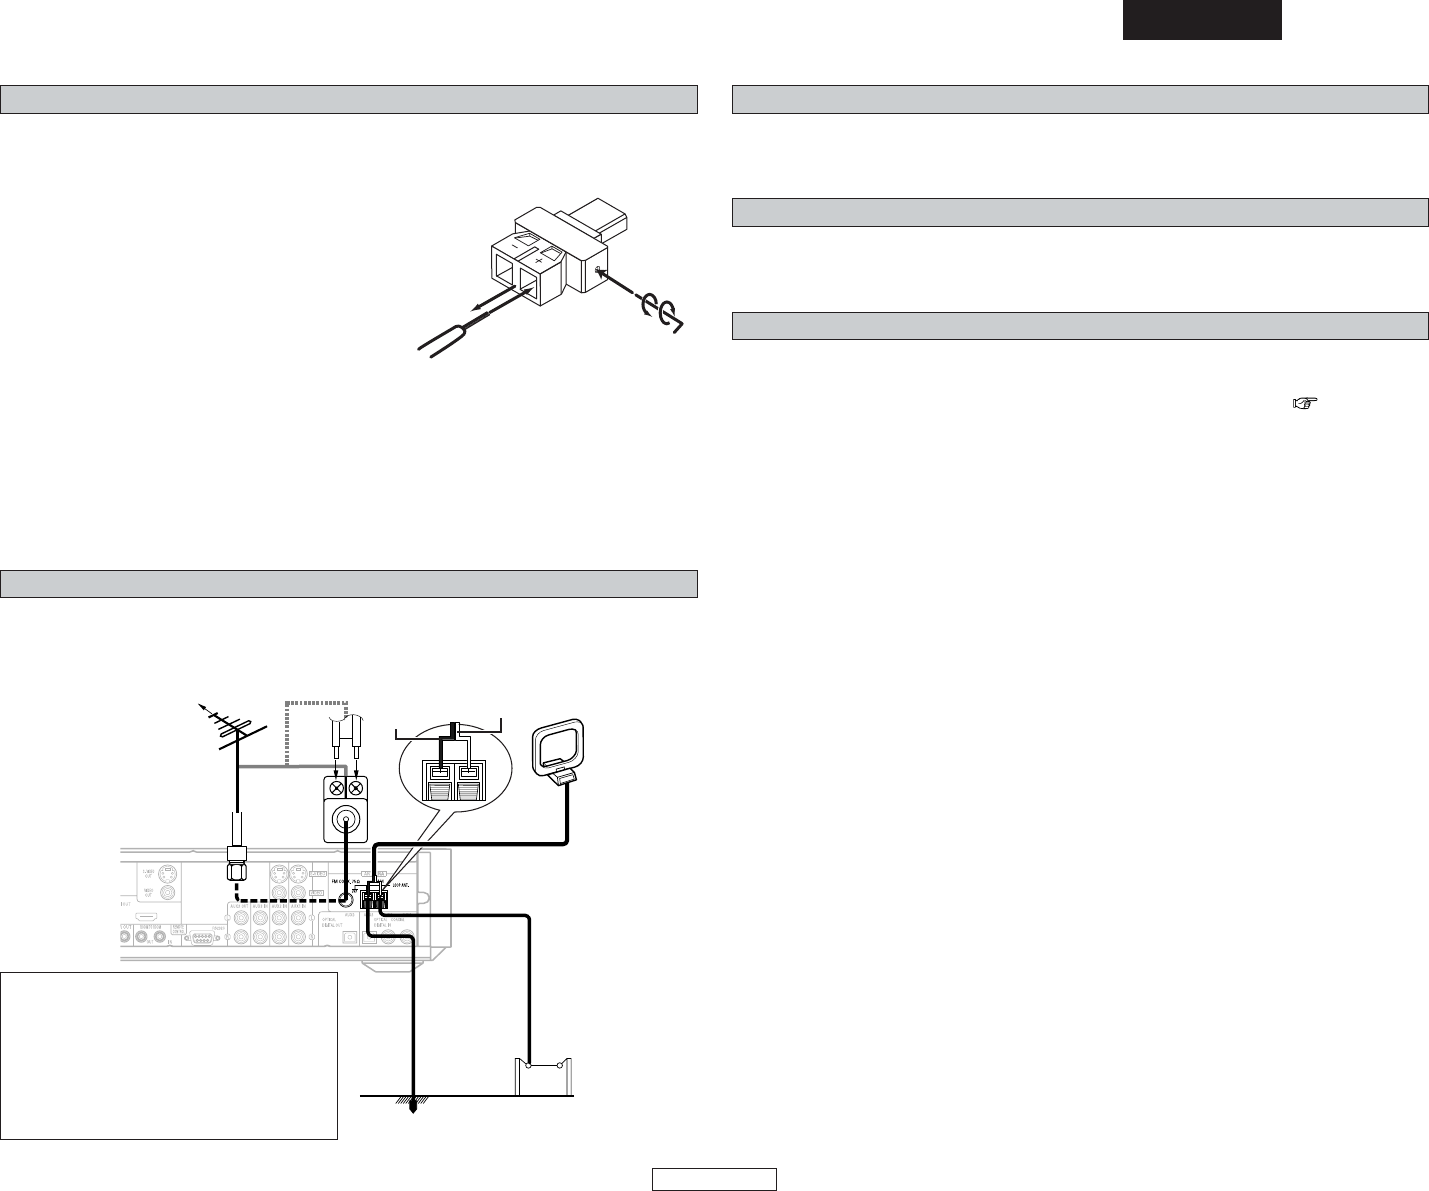
q Inserte la llave hexagonal incluida en el orificio
situado en el lateral del lado “+” del conector.
(flecha A)
w Gire la llave hexagonal en el sentido de la flecha B
para aflojar el cable.
e Tire del cable antiguo. Procure no dejar ninguna
parte del cable roto en el interior del conector.
(flecha C)
r Retire la cubierta del cable e inserte el cable nuevo
con núcleo de cobre retorcido dentro del conector.
(flecha D)
t Gire la llave hexagonal en el sentido de la flecha E y apriete fuerte, de modo que el cable no
pueda escaparse.Asegúrese de conectar ambos lados del cable a los conectores con las
polaridades correctas.
Si las polaridades están invertidas, la fase puede estar desactivada y el sonido de los tonos graves
puede desaparecer, provocando un sonido extraño.
Para cambiar el cable de los altavoces
Conexión de los terminales de antena
• La clavija de un cable de antena de FM tipo PAL puede conectarse directamente.
• Si la clavija del cable de antena de FM no es del tipo PAL, conectar utilizando el adaptador de
antena tipo PAL (Opcional).
Direcclón de la estaclón
emlsora
Cable coaxial de
75 Ω/ohms
Antena exterior de FM
Antena AM de cuadro
(incluida)
Antena exterior
de AM
Tierra
Adaptador
de antena
de FM
(Opcional)
C
D
Consulte el siguiente procedimiento si desea cambiar a un cable de altavoz diferente.
Este ejemplo describe cómo montar el cable del lado “+” al conector. Monte el cable del lado “–“
del mismo modo.
A
B
NOTA:
• No conecte dos antenas de FM
simultáneamente.
• Aunque se use una antena exterior de AM,
no desconecte la antena AM de cuadro.
• Asegúrese de que los terminales de la
antena AM de cuadro no toquen las partes
metálicas del panel.
Negro
Blanco
E
Conectar otras fuentes Conectar otras fuentes
Conexión de los terminales ROOM TO ROOM IN/OUT
Estos son los conectores de entrada/salida para el mando a distancia alámbrico.
Consulte a su distribuidor DENON si desea usar este conector.
Conexión de los terminales RS-232C
Este terminal se utiliza para un controlador externo. Consulte a su distribuidor DENON si desea
usar este conector.
Conexión de los terminales TRIGGER OUT
• El S-301 está equipado con 1 sistemas de conexiones TRIGGER OUT de 12V. Es posible activar
una salida dependiendo de la selección de las entradas DVD o AUX1 o AUX2 asignadas.
• Active y desactive el voltaje de 12 V de CC para las funciones individuales. (( página 57)