43
ENGLISH
Advanced Operation Advanced Operation
ENGLISH
(Fig. 1)
4
-3
When “IMAGE QUALITY ADJUSTMENT 2”
is selected:
Press the CURSOR 0 or 1 button to select the
picture quality item, then press the CURSOR
•
or
ª
button to set the adjustment value, and
press the ENTER button.
• All the adjustments are stored in the memory.
WHITE LEVEL (–5 ~ +5) (Factory default: 0):
This adjusts the white level.
CHROMA LEVEL (–6 ~ +6) (Factory default: 0)
This adjusts the density of the color.
CHROMA DELAY (–2 ~ +2) (Factory default: 0):
This adjusts the shift of the brightness signal and the color
signal of the image. (Only effective for progressive images.)
DNR (Digital Noise Reduction) (0 ~ +6) (Factory default: 0):
This reduces video noise.
4
-4
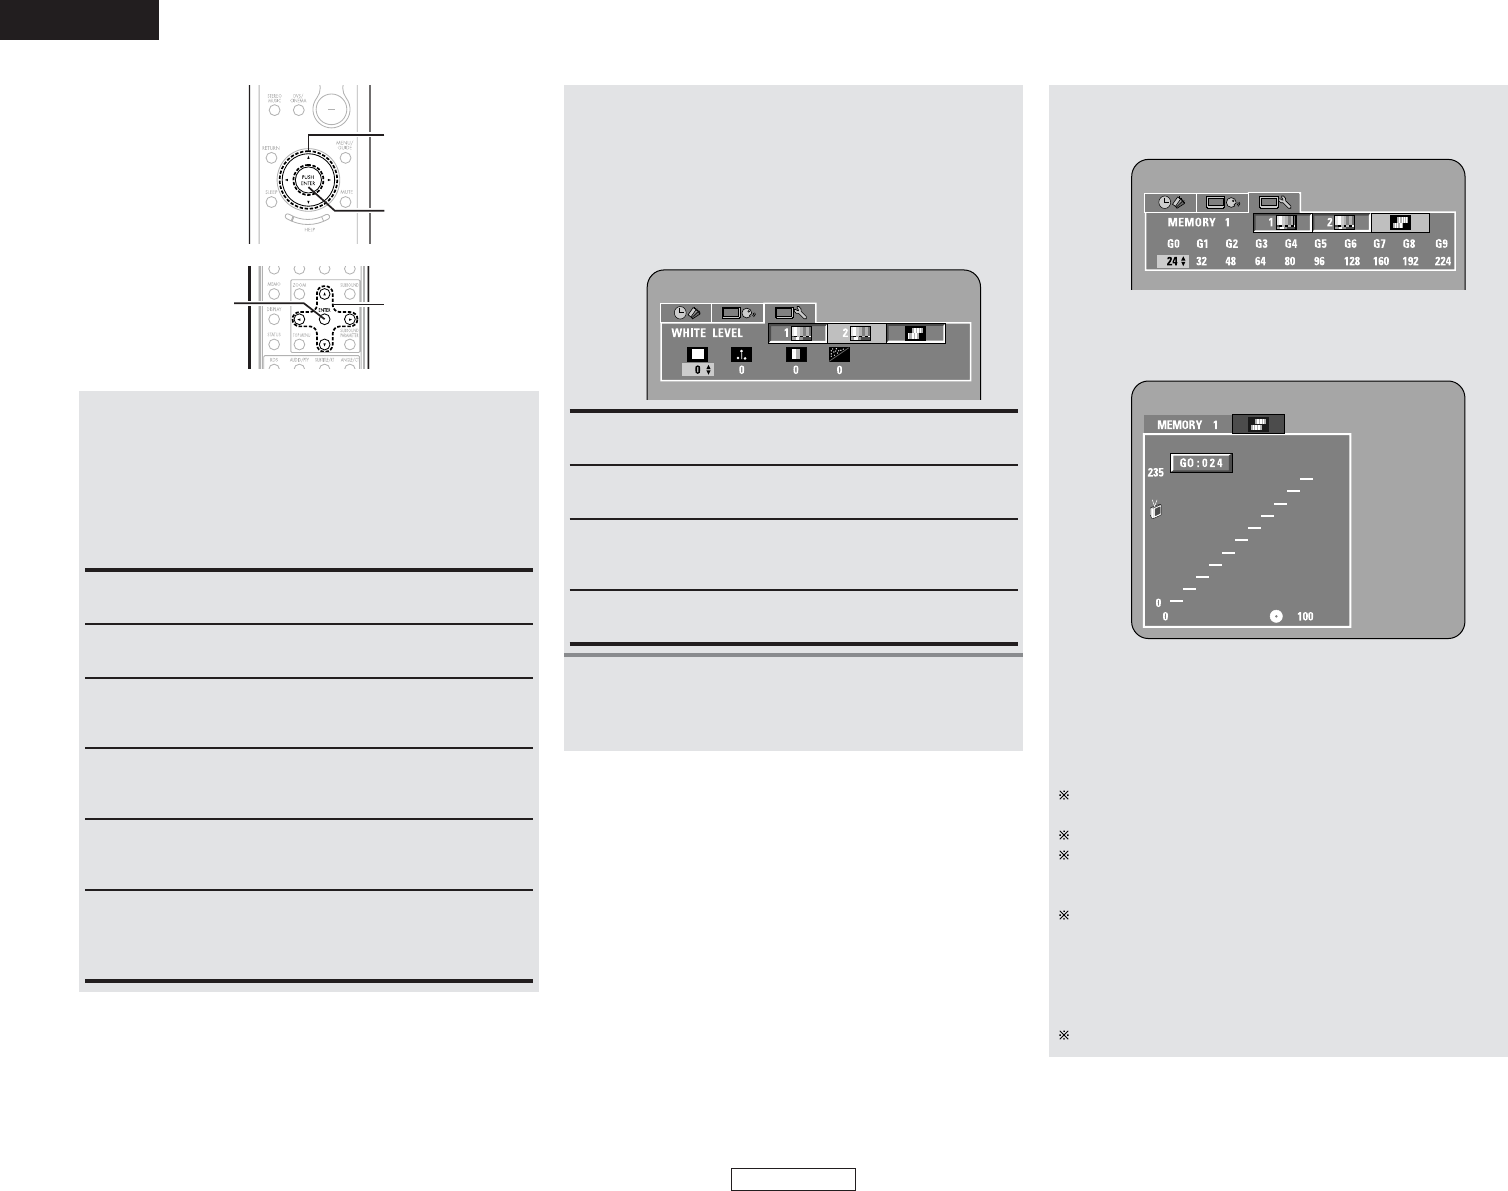
When “GAMMA CORRECTION” is selected:
Two kinds of displays are prepared for
adjustment of gamma correction.
ww
Press the ENTER button to use the graph of
gamma correction. (Fig. 2)
(Fig. 2)
Press the CURSOR 0 or 1 button to select the
adjust point. Press the CURSOR
•
or
ª
button
to set the adjustment brightness level, then
press the ENTER button.
If the DISPLAY button is pressed before pressing the ENTER
button, an adjustment level is not stored.
The brightness level can be adjusted in range of 16 to 235.
Pressing the CURSOR
•
button raises the level (and the
image becomes brighter), and pressing the CURSOR
ª
button lowers the level (and the image becomes darker).
A press of the CLEAR button returns all of the setting points
to the standard level.
• The level of the selected point cannot exceed the level of
the points above and below that point.
(A dark portion cannot be set to exceed a portion that is
brighter than it.)
All the adjustments are stored in the memory.
qq
Press the CURSOR
ª
button to use the
numerical table of gamma correction. (Fig. 1)
4
-2
When “IMAGE QUALITY ADJUSTMENT 1”
is selected:
Press the CURSOR 0 or 1 button to select the
picture quality item, then press the CURSOR
•
or
ª
button to set the adjustment value, and
press the ENTER button.
• All the adjustments are stored in the memory.
CONTRAST (–6 ~ 6) (Factory default: 0):
This adjusts the light/dark difference of the image.
BRIGHTNESS (0 ~ +12) (Factory default: 0):
This adjusts the brightness of the image.
SHARPNESS (MID) (–6 ~ +6) (Factory default: 0):
This adjusts the sharpness of the image for the intermediate
frequencies.
SHARPNESS (HI) (–6 ~ +6) (Factory default: 0):
This adjusts the sharpness of the image for the high
frequencies. (Only effective for progressive images.)
HUE (–6 ~ +6) (Factory default: 0):
This adjusts the balance between green and red. (Not
effective for progressive scan output nor component output.)
CCS (0 ~ +3) (Factory default: 0):
This performs removal of the color signal component for
images in which the color signal component is mixed with the
brightness signal. (Only effective with progressive images.)