11
ENGLISH
6
REMOTE CONTROL UNIT
2 The DVD-770SD can be controlled from a distance using the included remote control unit (RC-963).
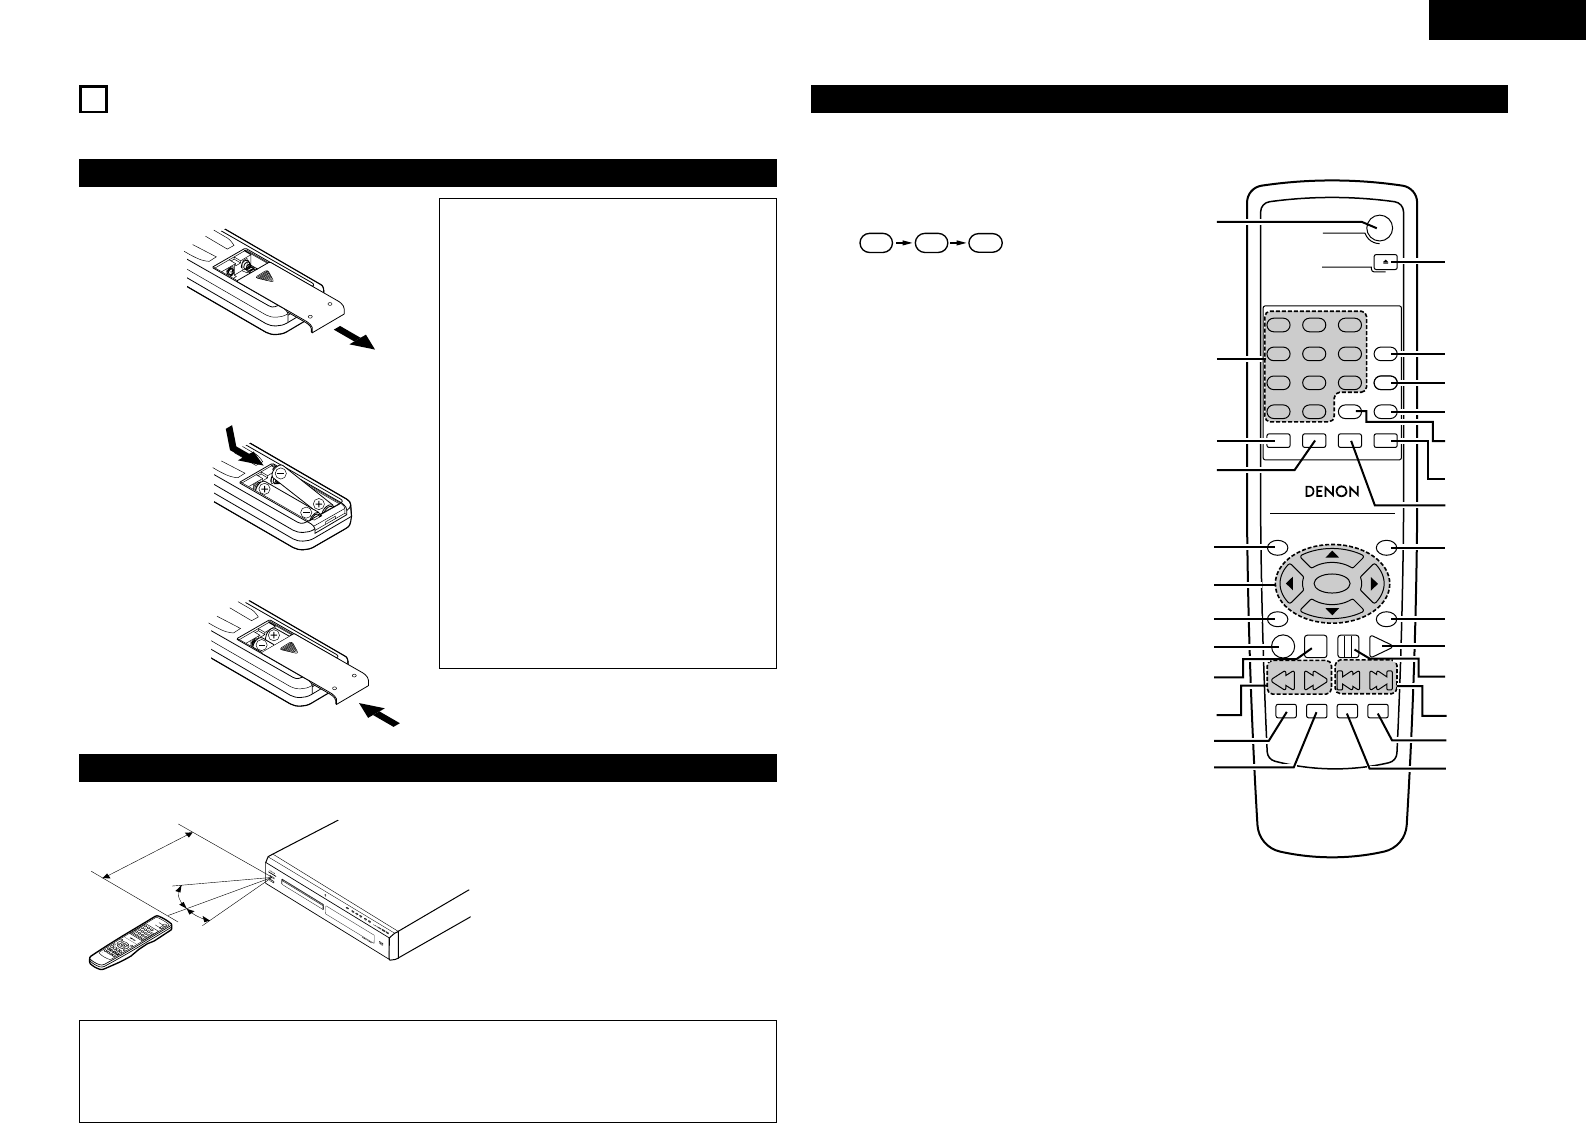
(1) Inserting Batteries
q Remove the remote control unit’s rear cover.
w Place two R03/AAA batteries in the battery
compartment in the direction indicated by the
marks.
e Close the rear cover.
Cautions On Batteries
• Use R03/AAA batteries in this remote control
unit.
• Replace the batteries with new ones
approximately once a year, though this depends
on the frequency with which the remote control
unit is used.
• If the remote control unit does not operate from
close to the main unit, replace the batteries with
new ones, even if less than a year has passed.
• The included battery is only for verifying
operation.
Replace it with a new battery as soon as
possible.
• When inserting the batteries, be careful to do so
in the proper direction, following the < and >
marks in the remote control unit’s battery
compartment.
• To prevent damage or battery fluid leakage:
• Do not use a new battery with an old one.
• Do not use two different types of batteries.
• Do not short-circuit, disassemble, heat or
dispose of batteries in flames.
• Remove the batteries when not planning to use
the remote control unit for a long period of time.
• If the batteries should leak, carefully wipe off the
fluid from the inside of the battery compartment,
then insert new batteries.
(2) Using the Remote Control Unit
Approx. 7 meters
• When operating the remote control unit,
point it at the remote control sensor as
shown on the diagram.
• The remote control unit can be used from a
direct distance of approximately 7 meters.
This distance will be shorter, however, if
there are obstacles in the way or if the
remote control unit is not pointed directly at
the remote control sensor.
• The remote control unit can be operated at
a horizontal angle of up to 30° with respect
to the remote control sensor.
NOTES:
• It may be difficult to operate the remote control unit if the remote control sensor is exposed to direct
sunlight or strong artificial light.
• Do not press buttons on the main unit and on the remote control unit at the same time. Doing so will
result in malfunction.
(3) Names and Functions of Remote Control Unit Buttons
q
POWER ON buttons
Press this to switch the power between on and standby.
w
Number buttons
Use these to input numbers.
Use the +10 button to input numbers of 10 or over.
Example: To input 25
e
SUBTITLE button
Press this to switch the DVD’s subtitle language.
r
AUDIO button
For DVDs, press this to switch the audio language. For
video CDs, press this to switch the channel between
“LR”, “L” and “R”.
t
TOP MENU button
The top menu stored on the disc is displayed.
y
Cursor buttons/ENTER button
Use the • and ª buttons to select in the vertical direction.
Use the
0
and
1
buttons to select in the horizontal
direction.
Press the ENTER button to select the item selected with
the cursor buttons.
u
ANGLE button
Press this to switch the angle.
i
DISPLAY button
Press this to display the ON-SCREEN.
o
STOP button (2)
!0
SLOW/SEARCH buttons
!1
SETUP button
Press this to display the default setting screen.
!2
NTSC/PAL button
Use this to switch the set’s video output format
(NTSC/PAL).
!3
OPEN/CLOSE button
!4
PROGRAM/DIRECT button (PROG/DIR)
Press this to switch between the normal play,
programmed play.
!5
CALL button
Press this to check the program contents.
!6
RANDOM button
Press this to play the tracks on the video or music CD in
random order.
!7
CLEAR button
Press this to clear numbers that you have input.
!8
A-B repeat button (A-B)
Use this to repeat sections between two specific points.
!9
REPEAT button
Press this to play tracks repeatedly.
@0
MENU button
The DVD menu stored on the disc is displayed.
@1
RETURN button
Press this to return to the previous menu screen.
@2
PLAY button (1)
@3
STILL/PAUSE button (3)
@4
SKIP buttons
@5 SLIDE SHOW button
The way of switching to the next image during
continuous JPEG image playback (SLIDE SHOW) can be
selected.
@6
ZOOM button
Press this to enlarge the image.