Color component output connectors (PR
/CR, PB/CB and Y)
The red (P
R
/CR), blue (PB/CB) and brightness (Y) signals are output independently,
achieving more faithful reproduction of the colors.
• The color component input connectors may be marked differently on some TVs or
monitors (P
R, P
B and Y/R-Y, B-Y and Y/CR, CB and Y, etc.). For details, refer to the
TV’s operating instructions.
• If your TV is compatible with progressive scan, press the “PROGRESSIVE SCAN”
button on the front panel so that “P.SCAN” lights on the display. This results in a
high quality picture with little flickering.
(No signals are output from the composite output, S-Video output (S terminal) or
SCART terminal (AV1) output when “P.SCAN” is lit.)
• Select “COMPONENT OUTPUT” for the video output setting at the setup screen.
(When “COMPONENT” is selected, no video signals are output from the S-Video
output (S terminal) and RGB of SCART terminal (AVI).
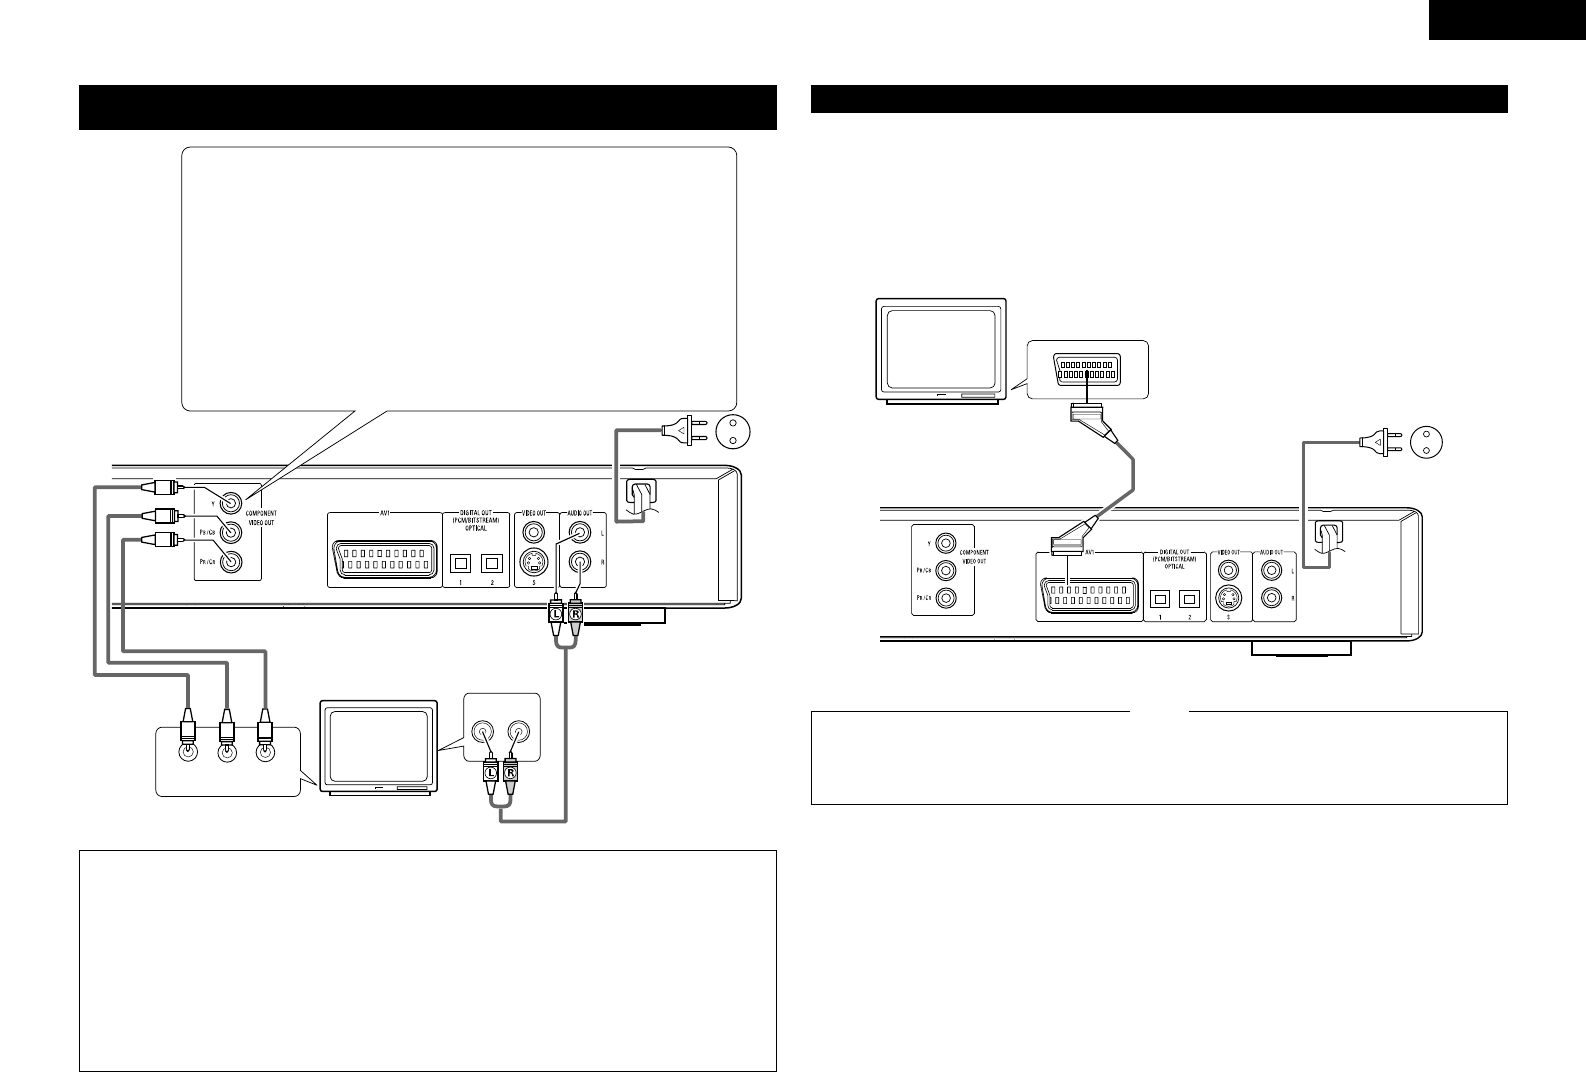
DVD-770SD
To power outlet
NOTES:
•
Use the three commercially available video cords to connect the DVD-770SD’s color component output
connectors to the TV or monitor.
• Set the “TV TYPE“ in “VIDEO SETUP“ in “SETUP“ to comply with your TV's video format. When the TV
is PAL formated, set to PAL. (See page 14.)
• Set the “VIDEO OUT” in “VIDEO SETUP” in “SETUP” to comply with Progressive TV. (NTSC formated
only)
•
To use with 2-channel audio output, set “STEREO” in “DOWNMIX” in “AUDIO SETUP” in “SETUP” at
the initial settings. (See page 15)
•
Set the “TV ASPECT” in “VIDEO SETUP” in “SETUP” to comply with your TV’s aspect. (See page 14)
•
No audio signals are output from the DVD-770SD’s “AUDIO OUT” connector when discs recorded in DTS
are played.
TV
7
(3) Connecting to a TV with 21-pin SCART Terminal (For only European model)
• Use the commercially 21-pin SCART cable to connect the TV’s 21-pin SCART terminal to the DVD-770SD’s 21-
pin SCART terminal (AV1).
• Check that “P.SCAN” on the front panel display is off.If “P.SCAN” is lit, press the “PROGRESSIVE SCAN”
button on the front panel so that “P.SCAN” turns off. Pictures are not output properly if “P.SCAN” is lit.
• Select “RGB” for the video output setting at the setup screen video setup.
• CVBS and RGB signal are output from the SCART terminal (AV1).
When “RGB” is selected, no video signals are output from the S-Video output (S terminal) or component
output.
When “RGB” is selected, CVBS and RGB are output.
DVD-770SD
To power outlet
TV
21-pin SCART terminal
• Set the “TV TYPE“ in “VIDEO SETUP“ in
“SETUP“ to comply with your TV's video format.
When the TV is PAL formated, set to PAL. (See
page 14.)
NOTES:
•
Some discs contain copy prohibit signals. If such
discs are played via a VCR, the copy prohibit
system may cause disturbance in the picture.