19
CONEXIÓN ELÉCTRICA
- Antes de enchufar el aparato a la corriente, compruebe meticulosamente que el voltaje de
su red doméstica corresponda al valor indicado en V en el aparato y que el enchufe de
corriente y la línea de alimentación estén dimensionados para la carga requerida.
- ESTE APARATO ES CONFORME A LA DIRECTIVA 2004/108/CE SOBRE LA SUPRESIÓN
DE LAS RADIOINTERFERENCIAS.
INSTALACIÓN
Puede utilizar el aparato sobre cualquier superficie de apoyo siempre y cuando ésta sea horizontal.
No sobrecargue el circuito eléctrico evitando utilizar el mismo enchufe para otros aparatos.
FUNCIONAMIENTO Y USO
1. Enchufe el aparato a la corriente.
2. Presione el interruptor (L) situado en la base. El aparato emitirá un “beep” y se encenderá
el piloto luminoso (H) que permanecerá encendido mientras que el aparato siga alimenta-
do.
3. El aparato se pone en stand-by y se ve "--" en la pantalla.
4. Presione el botón (A) para encender el aparato. Empezará a calentar con las programa-
ciones predefinidas.
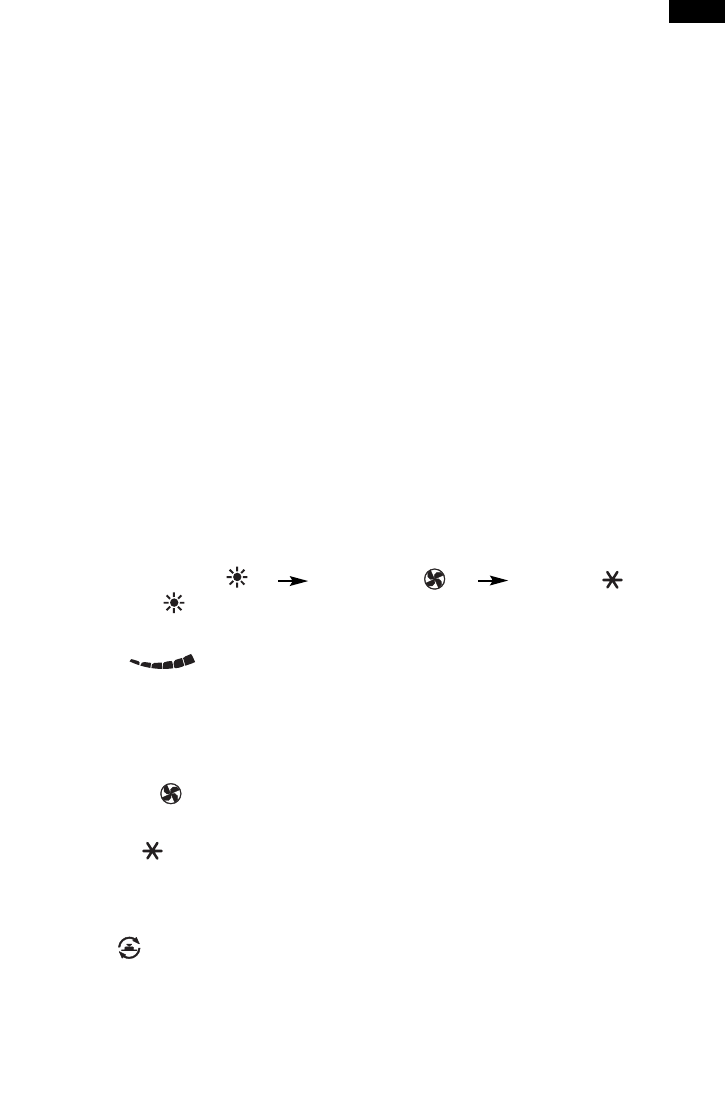
5. Presione el botón MODE (E) para seleccionar una de las siguientes funciones disponibles:
Calefacción ( ), Ventilación ( ), Antihielo ( ).
5.1 Calefacción ( )
En este modo de funcionamiento, presione los botones + y – (B) para programar la
temperatura y seleccione uno de los niveles de potencia: MÍN., MÁX. y AUTO con el
botón D ( ).
Nivel de potencia MÍN.: el aparato funciona a la mínima potencia, reduce el consumo
de energía al mínimo.
Nivel de potencia MÁX.: el aparato funciona a la máxima potencia por lo que calienta
rápidamente el ambiente.
Nivel de potencia AUTO: el aparato determina automáticamente la potencia de funcio-
namiento en base a las condiciones ambientales.
5.2 Ventilación ( )
Solamente el ventilador está activado en este modo de funcionamiento. Por consiguien-
te, el aparato no calentará.
5.3 Antihielo ( )
En este modo de funcionamiento, el aparato mantiene la temperatura ambiente a 7º C
para evitar fenómenos de congelación.
6. Para que el aparato difunda el flujo de aire en un área más grande, pulse el botón de osci-
lación (C) ( ). El aparato oscilará a derechas y a izquierdas. Para detener la oscilación
en la posición elegida, pulse de nuevo el botón C.
7. Presione el botón A para apagar el aparato y, a continuación, el interruptor (L) situado en
la base.
NOTA: La temperatura se ve en ºC y en ºF en la pantalla. Para seleccionar la unidad de medi-
da, mantenga pulsado el botón + al menos 5 segundos y suéltelo.
DESCRIPCIÓN DEL APARATO
A Botón ON/STAND-BY
B Botones de ajuste +/-
C Botón de oscilación
D Botón de selección de la potencia
E Botón MODE (selección del modo de fun-
cionamiento)
F Botón Timer
G Receptor del mando a distancia
H Piloto luminoso
I Dispositivo antivuelco
J Rejilla
K Filtro
L Interruptor general
ES