731355
12
Zoom out
Zoom in
Previous page
1/40
Next page
11
Preparation Before Operation
Read First
1
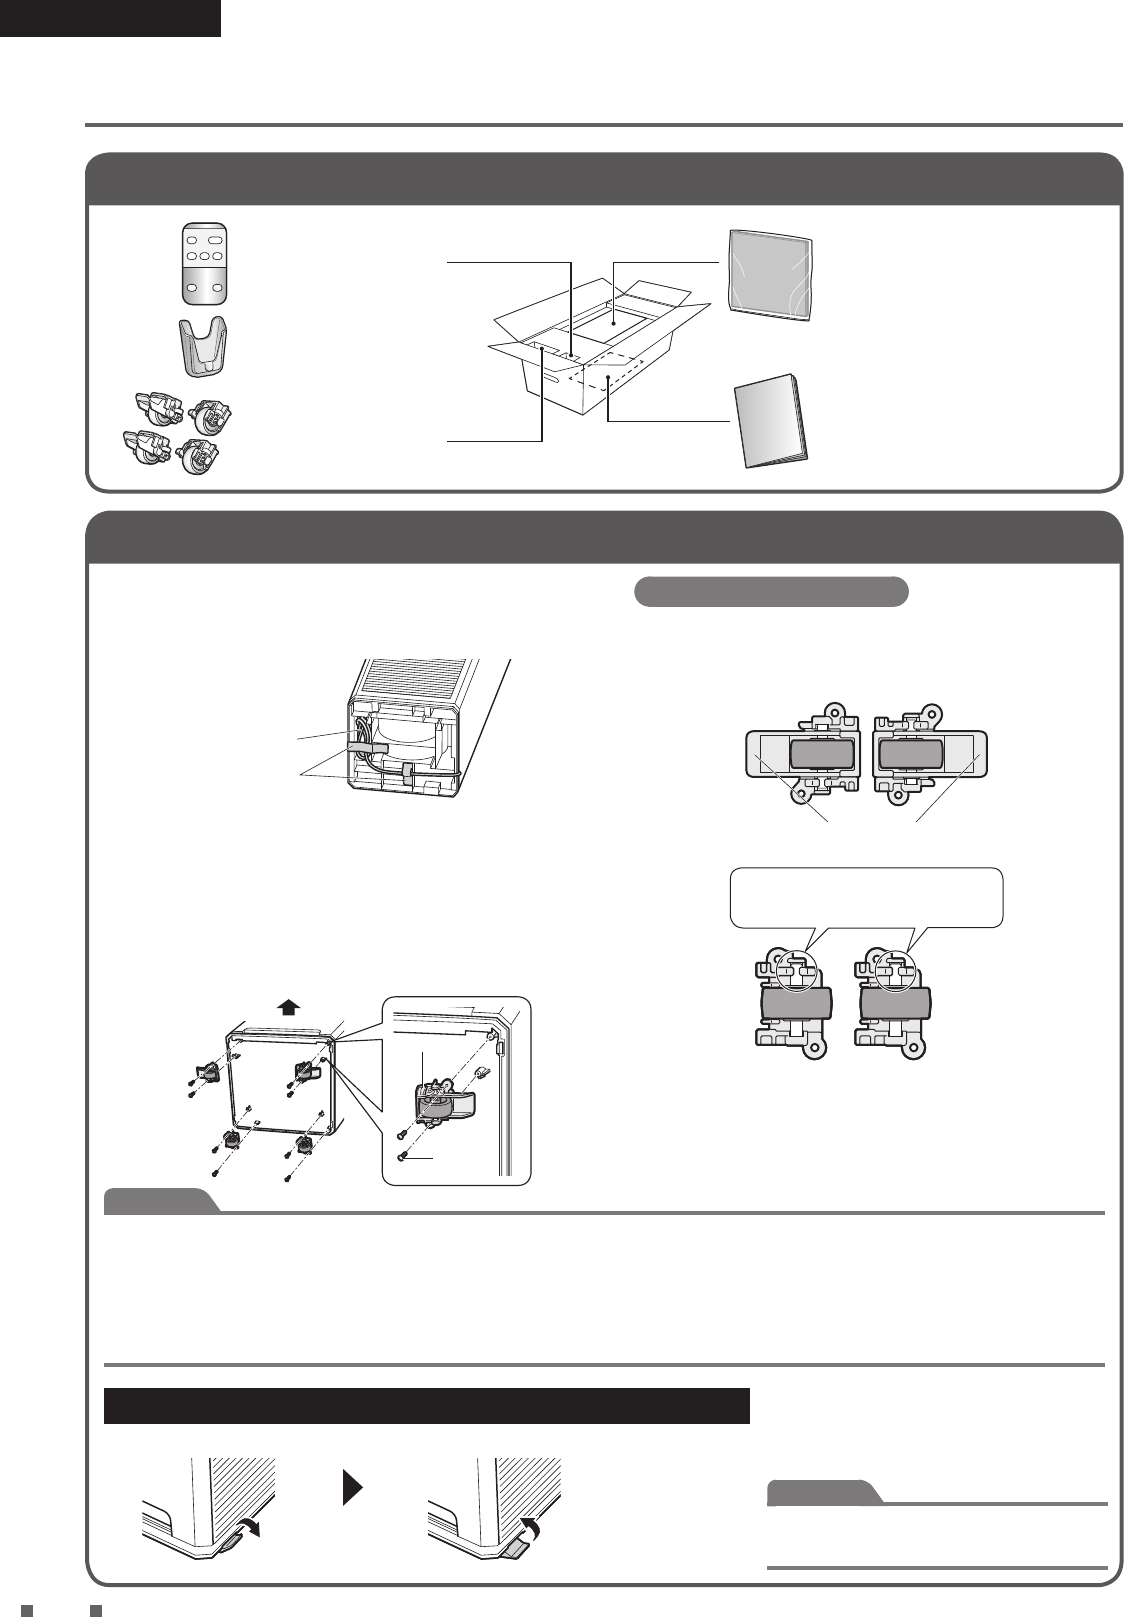
Checking accessories
Remote controller .... 1
Remote controller
holder ....................... 1
Casters .................... 4
Deodorising lter ................ 1
Attach to the unit before
operation.
Operation manual ...............1
In the bottom of the packing
case.
2
Attaching the casters
1.
Before setting up, remove the xing tape on
the bottom which is securing the power supply
cord, then take out the power supply cord.
Power supply cord
Fixing tape (blue)
2. Reposition the unit so that the front of the
unit faces upward.
The front may be scratched if faced downward.
Be careful not to scratch the back of the unit with
the blades of the power supply plug.
3. Tighten securely using the included screws
to prevent rattling.
Front (Unit)
Caster
Screw
Attachment orientation
Attach the casters with locks to the corners at the front
of the unit.
Casters with locks
Lock lever
Casters without locks
Attach so that this side faces
toward the front of the unit
(Viewed from below)
Attention
Do not use the lock levers while attaching the casters, as it may cause the wheels to detach.
When moving the unit with the casters, be sure to move it slowly as oor surfaces may be scratched depending on the
ooring material.
The unit should only be moved left or right as the casters are in a xed position. Slow/gradual turning is also possible. Sharp
turns or moving the unit forward/backward on the casters should be avoided. In case such movement is necessary, rst lift
the unit slightly up.
How to use
There are 2 lock levers at left and right side.
Lock Unlock
Raise the lock
lever to unlock
Lower the lock
lever to lock
Attention
Please use your hands to operate the lock
levers.
01_EN_3P595628-1B.indd 11 2020/04/17 15:49:00
12


Need help? Post your question in this forum.

Forumrules


Report abuse

Libble takes abuse of its services very seriously. We're committed to dealing with such abuse according to the laws in your country of residence. When you submit a report, we'll investigate it and take the appropriate action. We'll get back to you only if we require additional details or have more information to share.

Product:

For example, Anti-Semitic content, racist content, or material that could result in a violent physical act.

For example, a credit card number, a personal identification number, or an unlisted home address. Note that email addresses and full names are not considered private information.

Forumrules

To achieve meaningful questions, we apply the following rules:

Register

Register getting emails for Daikin MCK55WVM at:


You will receive an email to register for one or both of the options.


Get your user manual by e-mail

Enter your email address to receive the manual of Daikin MCK55WVM in the language / languages: English as an attachment in your email.

The manual is 8,61 mb in size.


You will receive the manual in your email within minutes. If you have not received an email, then probably have entered the wrong email address or your mailbox is too full. In addition, it may be that your ISP may have a maximum size for emails to receive.

Others manual(s) of Daikin MCK55WVM

Daikin MCK55WVM User Manual - German - 40 pages

Daikin MCK55WVM User Manual - Dutch - 40 pages


The manual is sent by email. Check your email

If you have not received an email with the manual within fifteen minutes, it may be that you have a entered a wrong email address or that your ISP has set a maximum size to receive email that is smaller than the size of the manual.

The email address you have provided is not correct.

Please check the email address and correct it.

Your question is posted on this page

Would you like to receive an email when new answers and questions are posted? Please enter your email address.


Info