136653
23
Zoom out
Zoom in
Previous page
1/52
Next page
24
Powering on the unit
Only after all connections are complete, connect the power cord and power on
the unit.
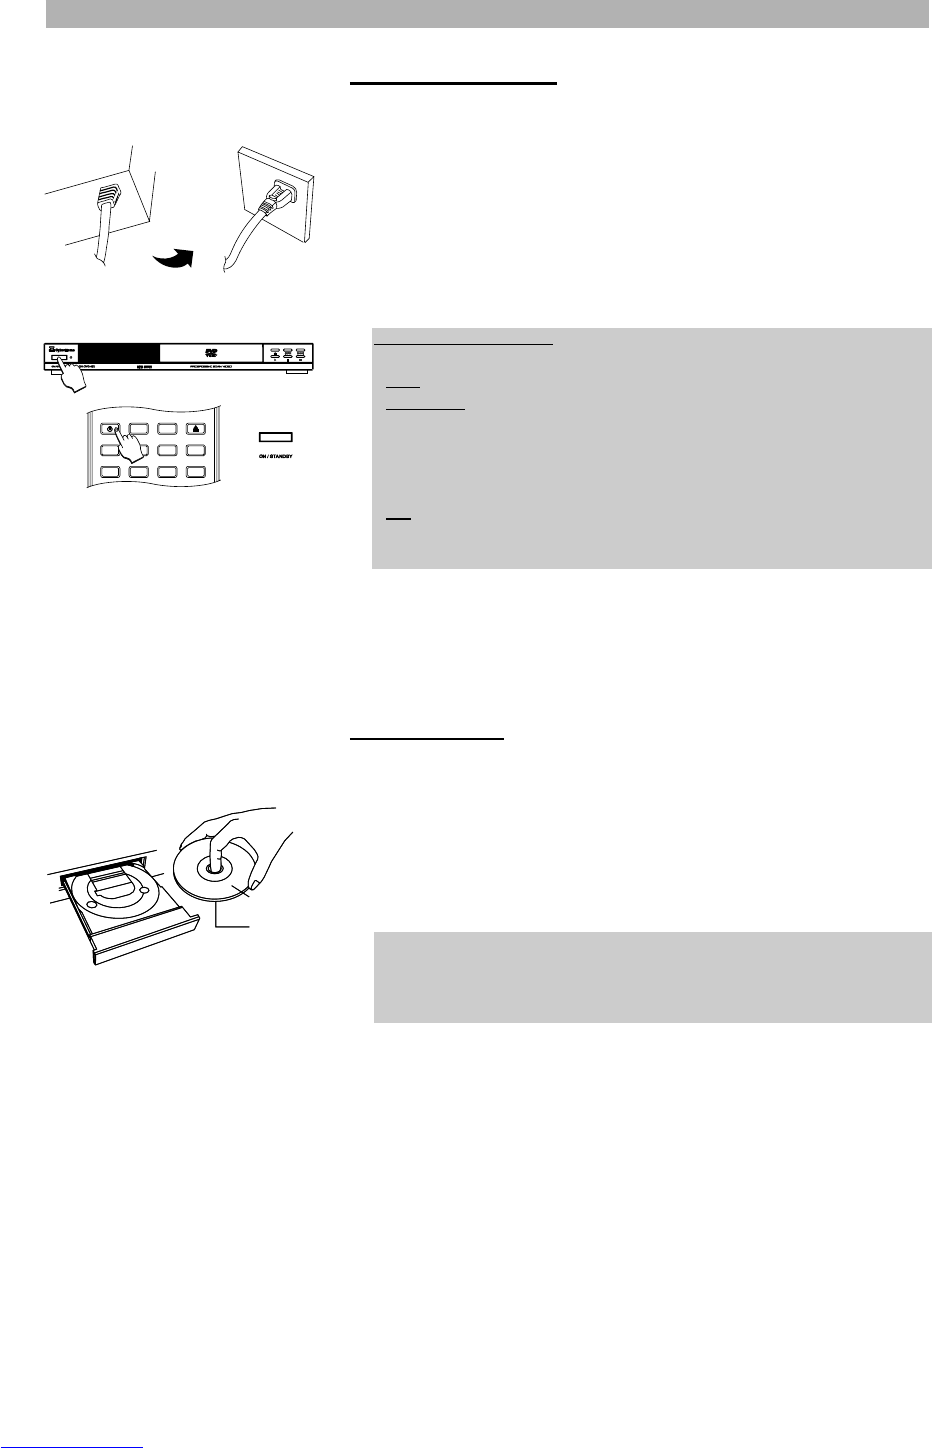
1. Plug the standard electrical plug into a wall socket or power strip.
2. The unit is now in Standby mode. Press the button “ON/STANDBY” on the
front panel or the button “POWER” on your remote control to power the
device on. Once the unit has been turned on, the unit will always be either
ON or in standby mode.
3. When the screen display indicates “Loading”, the disc is read.
4. If no disc is inserted, the screen display will indicate “No disc”.
Inserting a disc
1. Press the Open/Close button Kon the front panel or on the remote con-
trol to open the tray. The screen display will indicate “Open”.
2. Carefully place the disc in the tray with the label facing up. Be careful not to
touch the playing surface. Hold the disc by the sides and with your fore fin-
ger through the hold in the middle and insert gently into the tray. Carefully
place the disc in the tray
3. Press the button A or K on the front of the device or on the remote
control to close the tray. The screen display shows “Close” and then
“Loading”. The information on the disc is read.
4. The inserted disc type is indicated on the screen. If the disc supports the
Auto Play function, playback will begin automatically.
GETTING STARTED
Notes on power states
There are three power states for this unit:
OFF - The unit is not plugged into a wall outlet. The unit draws no power.
STANDBY - The unit is plugged into a wall outlet. The unit has not been
taken out of standby by pressing either the button “ON/STANDBY” on the
front panel or the button “POWER” on the remote control. The unit draws
a slight amount of power to enable the remote control receiving circuit. The
standby LED is glowing red.
ON - The unit is plugged into wall outlet and either the button “ON/STAND-
BY” on the front panel or the button “POWER” on the remote control has
been pressed. The unit is ready to use.
POWER
PBC
DISPLAY
GOTO
MUTE
AUDIO
SUBTITLE
ANGLE
PROGRAM
MENU
TITLE
OPEN/CLOSE
SETUP
1.
2.
How to insert a double-sided DVD?
Double-sided discs do not have labelling over the whole surface. The
labelling for both side is in the centre of the disc. To play a side its label must
be facing up.
Labeling Side
Surface
Downloaded from www.Manualslib.com manuals search engine
23


Need help? Post your question in this forum.

Forumrules


Report abuse

Libble takes abuse of its services very seriously. We're committed to dealing with such abuse according to the laws in your country of residence. When you submit a report, we'll investigate it and take the appropriate action. We'll get back to you only if we require additional details or have more information to share.

Product:

For example, Anti-Semitic content, racist content, or material that could result in a violent physical act.

For example, a credit card number, a personal identification number, or an unlisted home address. Note that email addresses and full names are not considered private information.

Forumrules

To achieve meaningful questions, we apply the following rules:

Register

Register getting emails for Cyberhome dvd 452 at:


You will receive an email to register for one or both of the options.


Get your user manual by e-mail

Enter your email address to receive the manual of Cyberhome dvd 452 in the language / languages: English as an attachment in your email.

The manual is 2,05 mb in size.


You will receive the manual in your email within minutes. If you have not received an email, then probably have entered the wrong email address or your mailbox is too full. In addition, it may be that your ISP may have a maximum size for emails to receive.

The manual is sent by email. Check your email

If you have not received an email with the manual within fifteen minutes, it may be that you have a entered a wrong email address or that your ISP has set a maximum size to receive email that is smaller than the size of the manual.

The email address you have provided is not correct.

Please check the email address and correct it.

Your question is posted on this page

Would you like to receive an email when new answers and questions are posted? Please enter your email address.


Info