28
2. Drawbar
2.1 Safety Recommendation:
The Croozer aluminium drawbar has been tested for safety by the manufacturer. These tests include functional tests as well
as load and fatigue tests.
Because it is difficult to determine the exact life time of a bicycle trailer and to know the actual loads to which the drawbars
will be subjected during this time, there does remain a risk in theory – and this cannot be excluded with absolute certainty –
that even a drawbar which has undergone testing could fail, if it is put under extreme load for several years.
To rule out this theoretical risk, we have limited the period of use for all drawbars to a maximum of 3 years.
Please replace your drawbar after 3 years at the most and draw attention to this safety recommendation should you sell the
trailer.
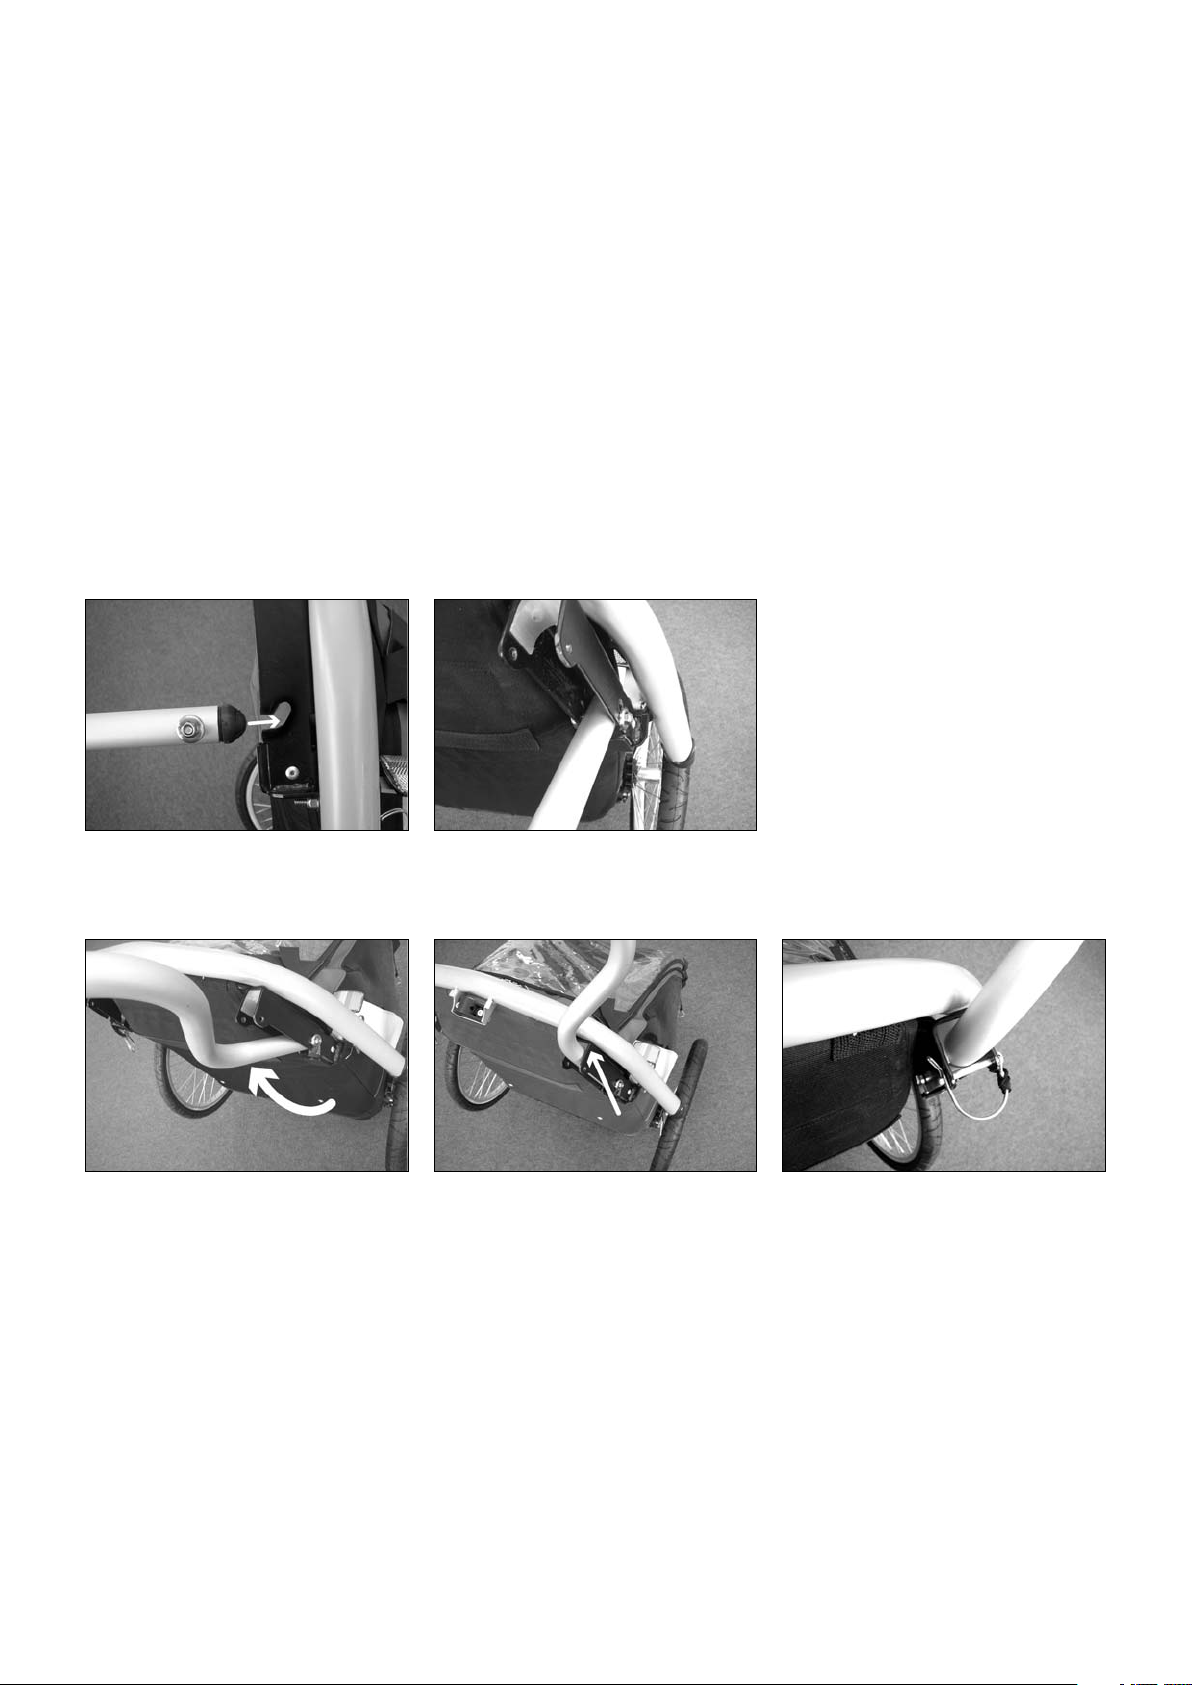
2.2. Fixing the Drawbar on the Transporter
When you first fit the drawbar we recommend that you tip the Croozer backwards on an even and clean surface so that you
have a better view and can more easily familiarise yourself with the attachment system. For subsequent fitting, all you need to
do is lift the front of the trailer up.
From below, insert the drawbar rear end into the rear end of the receiving unit so
that the protruding bolts on the sides engage in the slots of the receiving unit. With
its bolts engaged in the slots, push the drawbar upwards until it will go no further.
Bring the front end of the drawbar up until the drawbar lies up against the
front stop of the receiving unit.
From outside, insert the spring clip bolt
in the hole provided and secure it with
the spring clip loop. Ensure that you
pull the spring clip loop over the end of
the bolt so that the end of the bolt is
completely surrounded by the clip
opening.
Please note:
Always use the spring clip bolt! A drawbar which has not been secured properly can come loose during travel. This is extre-
mely dangerous and can lead to severe injury and even death of the occupants.
To remove the drawbar, release the spring clip loop and remove the safety bolt. Then you can pull the drawbar out in reverse.