15
of childr en.
• Do not use the pr oduct if an y parts ar e
br ok en, torn or missing.
• This pr oduct must onl y be assembled b y an
adult .
• This pr oduct must onl y be used b y an adult .
• Ensur e that all persons using the str oller
know how to use it safel y and how it works.
• Do not attempt to open or close the str oller
with a child on boar d.
• When adjusting the str oller , mak e sur e that
no mo ving parts come into contact with
y our child.
• Nev er leav e the str oller on a sloping surface
with a child inside, ev en with the brak es
applied.
• Nev er use the str oller on stair cases or
escalators: y ou could suddenl y lose contr ol
of it .
• Al ways pay attention when going up and
down steps or pav ements.
• Al ways appl y the brak es whenev er the
str oller is stationary .
• T o av oid all risks of strangulation, nev er
giv e childr en objects with cor ds or strings
attached, or leav e them within their r each.
• If the str oller is left exposed to dir ect sun
light for a long time, allow it to cool down
befor e placing y our child inside. Pr olonged
exposur e to dir ect sun light may cause the
colour of the materials and fabric to fade.
• Do not allow childr en to play unsupervised
near the str oller , and mak e sur e they do not
climb onto it .
• The full-co v er rain hood cannot be used on a
str oller which has no canop y or sun-hood as
it could suffocate the child.
• Pr ev ent the str oller fr om coming into
contact with salt water . It may cause the
formation of rust .
• Do not use the str oller on the beach.
• When it is not being used, the str oller should
be k ept out of childr en’ s r each.
CLEANING
The co v er cannot be r emo v ed. Clean all fabric parts with a damp
sponge and neutral deter gent . Please r efer to the car e labels
for instructions on how to clean the fabric parts. Below ar e the
cleaning symbols and their meanings:
W ash b y hand in cold water
Do not bleach
Do not tumble
Do not iron
Do not dry clean
Periodically
dry the
come into contact with water
Certain models include
the instructions on its care label
MAINTENANCE
Lubricate
of a silicone based lubricant. Regularly the condition
wheels and,
may prevent the
movable plastic parts placed
along
in a dry place.
LIST OF COMPONENTS
Check that you hav all the parts requir for this model before
assembling
Chicco Customer Care Service. No
product.
1 stroller
1 hood
1 rain cover
1 stroller carry bag (79255.XXX.930)
1 carry-all basket (79255.XXX.930 / 79259)
1 shoulder carry strap (79254)
1 seat pad (79254)
OPENING INSTRUCTIONS
1. Release
2. Open
3.
(diag
rear wheels (see
open correctly
4.
the
frame (diag. 4B)
WARNING: ensure that the sun hood is securely on the r
support
RECLINING THE
5.
the
the seat (diag. 5 B).
WARNING:
in the
your child in the seat.
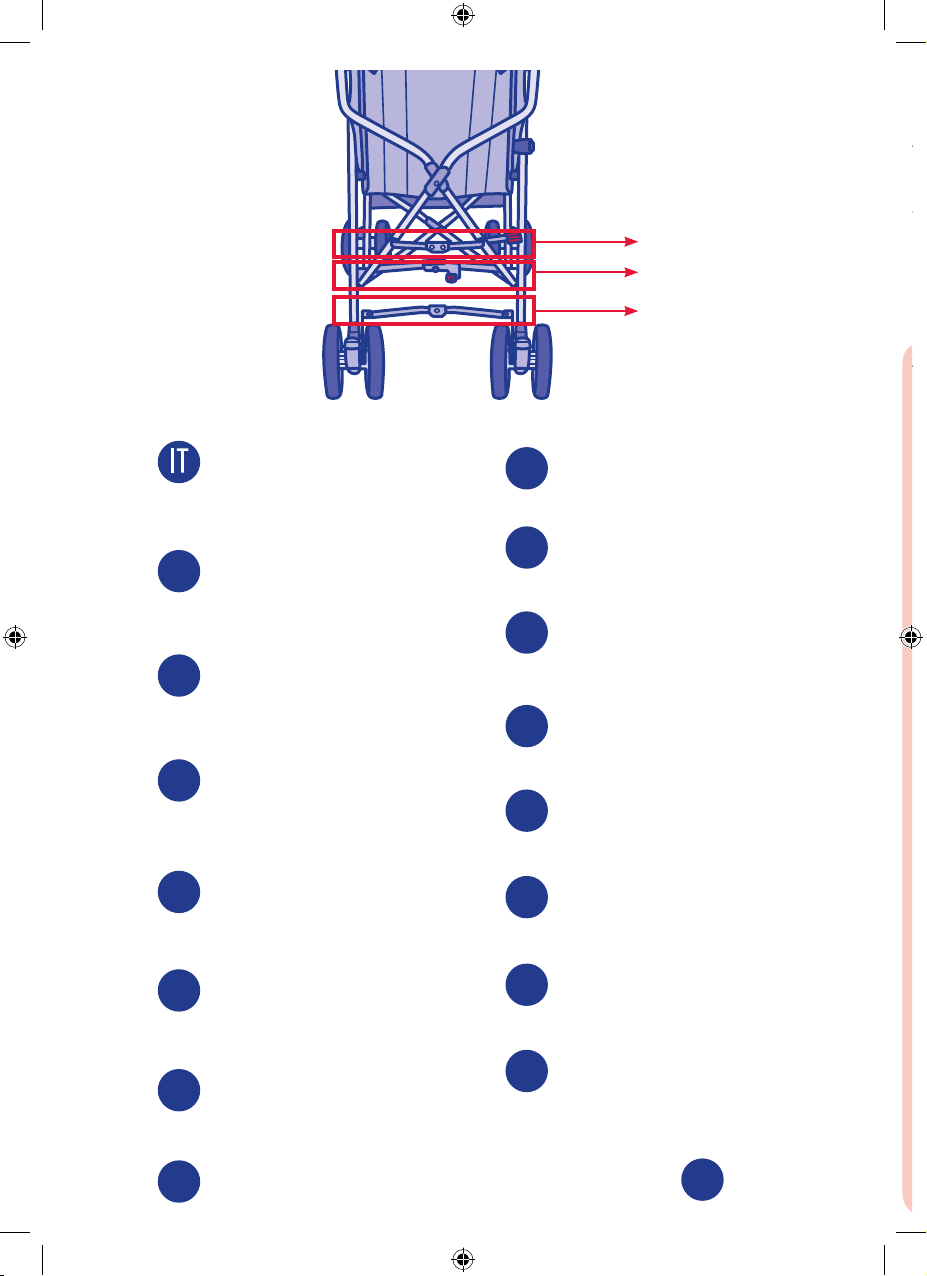
BRAKES
6.
(diagram brakes and are applied
together.
When the brak
THE BRAKES MA
STEEP SLOPES.
WARNING: Always apply the brakes whenever the stroller is
stationary. Never
inside, even with
WARNING: after
locked in place
FRONT SWIVEL WHEELS
The stroller has
7
wheels (diag. 7).
wheels, pull
WARNING:
it
on
roads etc.)
WARNING:
SAFETY HARNESS
8.
the
the safety
the
must always
For extra
to t
The
seen in points
Snappy Deluxe:
in line with
both in the harness buckle (C). Press the centre button (D) to release
the safety harness straps.
CLOSING THE STROLLER
WARNING: when closing the stroller ensure that your child and
all other childr ar at a safe distance. Ensure that during these
operations the moving parts of
with your child.
9. To close the str pull the sun hood back, release the lock
system 1 (see
direction; it
(diag. 9
WARNING:
SYSTEM TO
CLOSE THE STROLLER WITHOUT
LOCKING
T
in the
10. Push the
it is completely closed (diag. 10).
11.
stroller
wheels can
rested against a
ACCESSORIES:
WARNING: The accessories described below are not necessarily
available on some versions of the product. Please read the
instructions
you purchased carefull
RAIN COVER
12.
the
stroller
using the
WARNING: pay particular attention
WARNING: The rain cover used has no
canopy
is
the child inside, as
CARR
13. The stroller
or
inside, as seen in diagram 13 B.
CARR
14.
in use
carry bag.
FITTING THE
Fasten the mattress to the stroller seat using the ap on the back, as
seen in
beforehand).
Thread
Now fasten the mattress to the str backr using velcro
straps on
W
frame and the harness straps are all