600899
21
Zoom out
Zoom in
Previous page
1/72
Next page
21
INSTALLATION STEP 12
Connect Door Arm to Trolley
Follow instructions which apply to your door type as
illustrated below and on the following page.
SECTIONAL DOORS ONLY
Make sure garage door is fully closed. Pull the
emergency release handle to disconnect the outer
trolley from the inner trolley. Slide the outer trolley
back (away from the door) about 2" (5 cm) as
shown in Figures 1, 2 and 3.
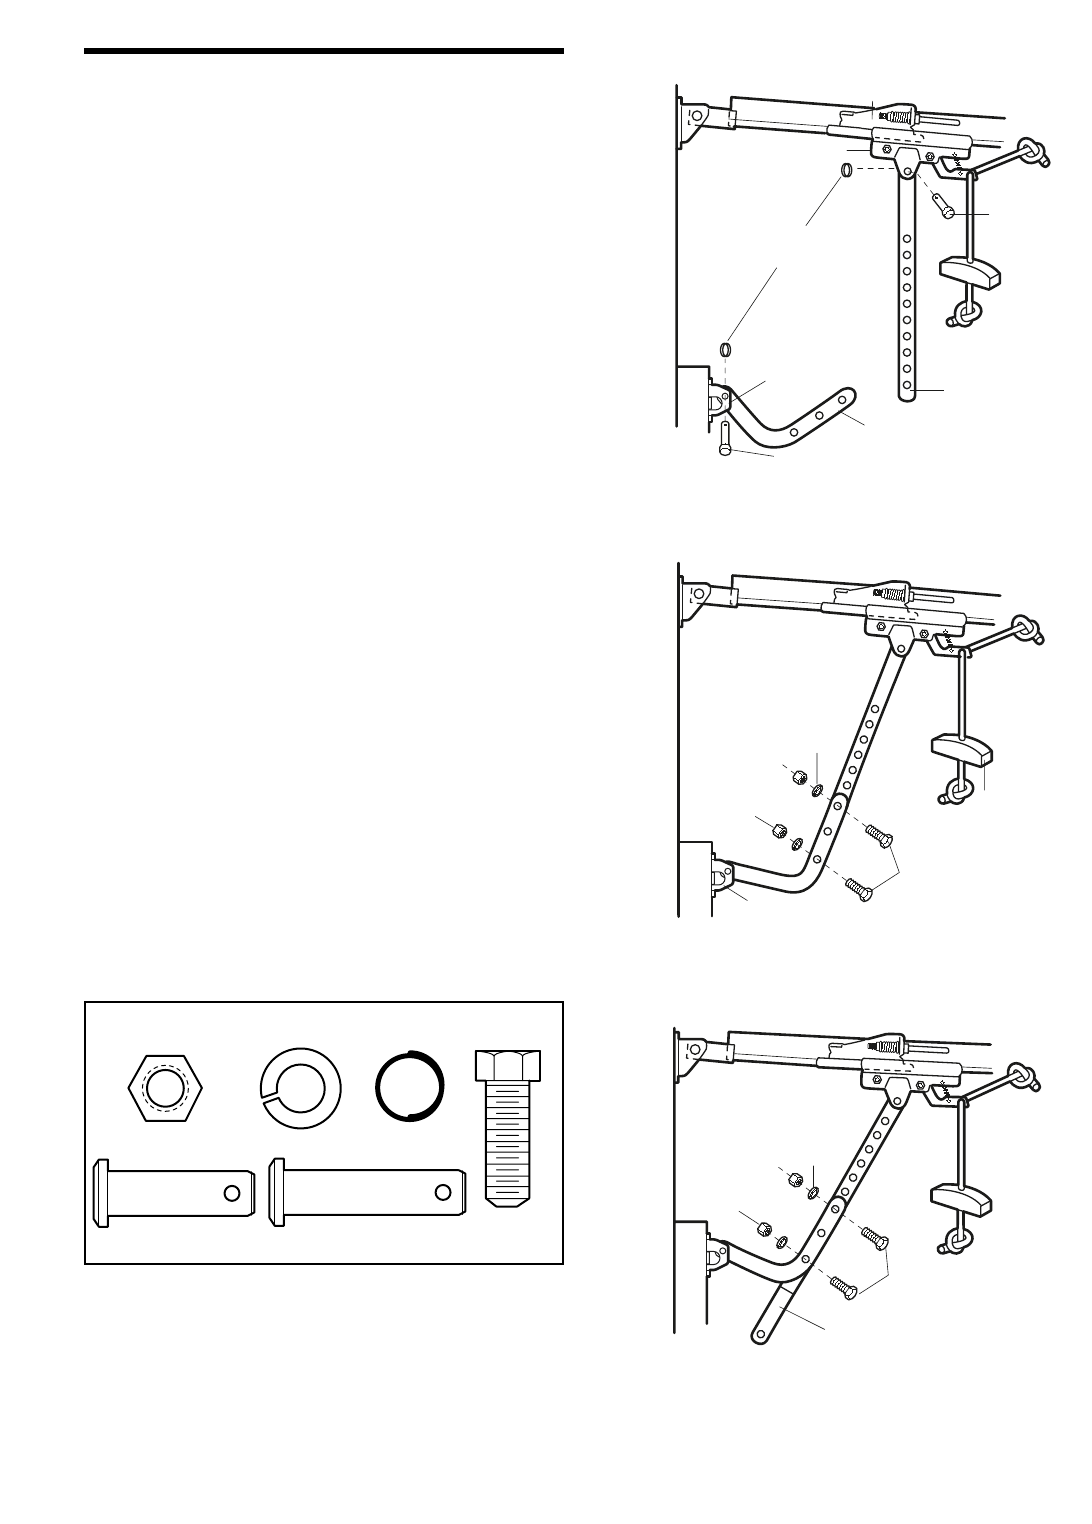
Figure 1:
Fasten straight door arm section to outer trolley
with the 5/16"x1" clevis pin. Secure the
connection with a ring fastener.
Fasten curved section to the door bracket in the
same way, using the 5/16"x1-1/4" clevis pin.
Figure 2:
Bring arm sections together. Find two pairs of
holes that line up and join sections. Select holes
as far apart as possible to increase door arm
rigidity.
Figure 3, Hole alignment alternative:
If holes in curved arm are above holes in straight
arm, disconnect straight arm. Cut about 6"
(15 cm) from the solid end. Reconnect to trolley
with cut end down as shown.
Bring arm sections together.
Find two pairs of holes that line up and join with
bolts, lock washers and nuts.
Pull the emergency release handle toward the
opener at a 45° angle so that the trolley release
arm is horizontal. Proceed to Adjustment Step 1,
page 23. Trolley will re-engage automatically when
opener is operated.
Ring
Fastener
Door
Bracket
Clevis Pin
5/16"x1-1/4"
Curved
Door Arm
Straight
Door Arm
Clevis Pin
5/16"x1"
Inner Trolley
Outer Trolley
Lock
Washers
5/16"
Nuts
5/16"-18
Door Bracket
Bolts
5/16"-18x7/8"
Emergency
Release
Handle
Lock
Washers
5/16"
Nuts
5/16"-18
Bolts
5/16"-18x7/8"
Cut This End
Figure 1
Figure 2
Figure 3
Lock Washer 5/16"
Nut 5/16"-18
Ring Fastener
Hex Bolt
5/16"-18x7/8"
Clevis Pin
5/16"x1" (Trolley)
Clevis Pin
5/16"x1-1/4" (Door Bracket)
HARDWARE SHOWN ACTUAL SIZE
21


Need help? Post your question in this forum.

Forumrules


Report abuse

Libble takes abuse of its services very seriously. We're committed to dealing with such abuse according to the laws in your country of residence. When you submit a report, we'll investigate it and take the appropriate action. We'll get back to you only if we require additional details or have more information to share.

Product:

For example, Anti-Semitic content, racist content, or material that could result in a violent physical act.

For example, a credit card number, a personal identification number, or an unlisted home address. Note that email addresses and full names are not considered private information.

Forumrules

To achieve meaningful questions, we apply the following rules:

Register

Register getting emails for Chamberlain Liftmaster 2280-267C at:


You will receive an email to register for one or both of the options.


Get your user manual by e-mail

Enter your email address to receive the manual of Chamberlain Liftmaster 2280-267C in the language / languages: English as an attachment in your email.

The manual is 5,09 mb in size.


You will receive the manual in your email within minutes. If you have not received an email, then probably have entered the wrong email address or your mailbox is too full. In addition, it may be that your ISP may have a maximum size for emails to receive.

The manual is sent by email. Check your email

If you have not received an email with the manual within fifteen minutes, it may be that you have a entered a wrong email address or that your ISP has set a maximum size to receive email that is smaller than the size of the manual.

The email address you have provided is not correct.

Please check the email address and correct it.

Your question is posted on this page

Would you like to receive an email when new answers and questions are posted? Please enter your email address.


Info