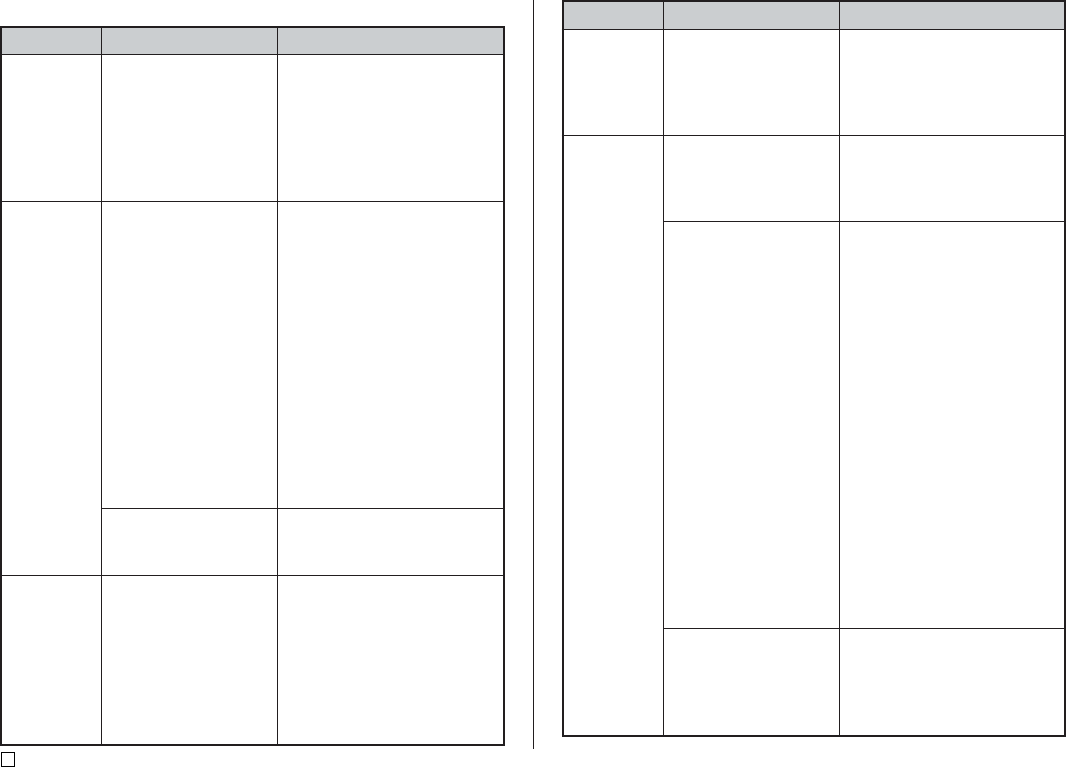
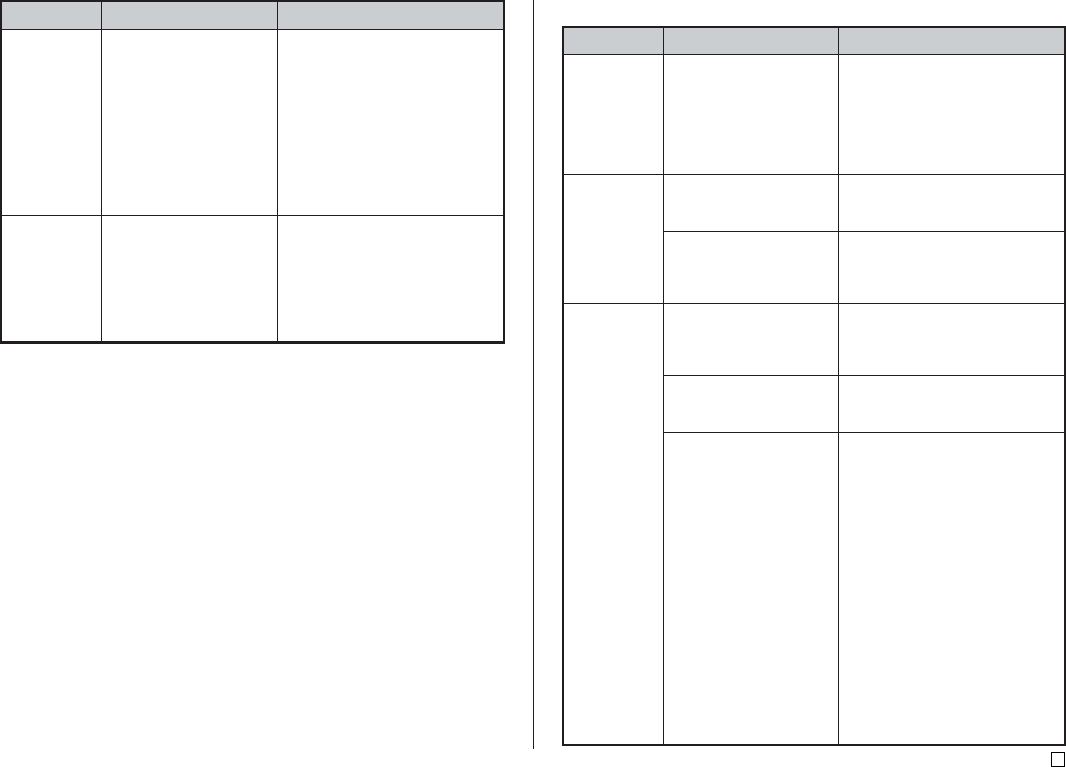
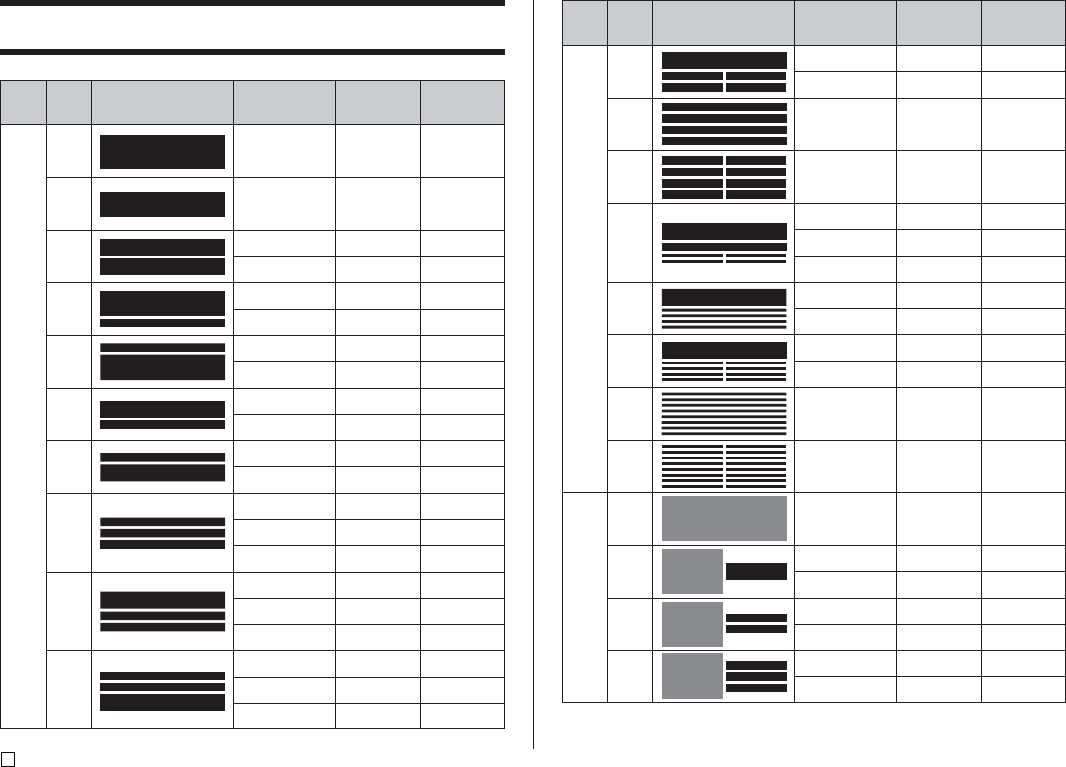
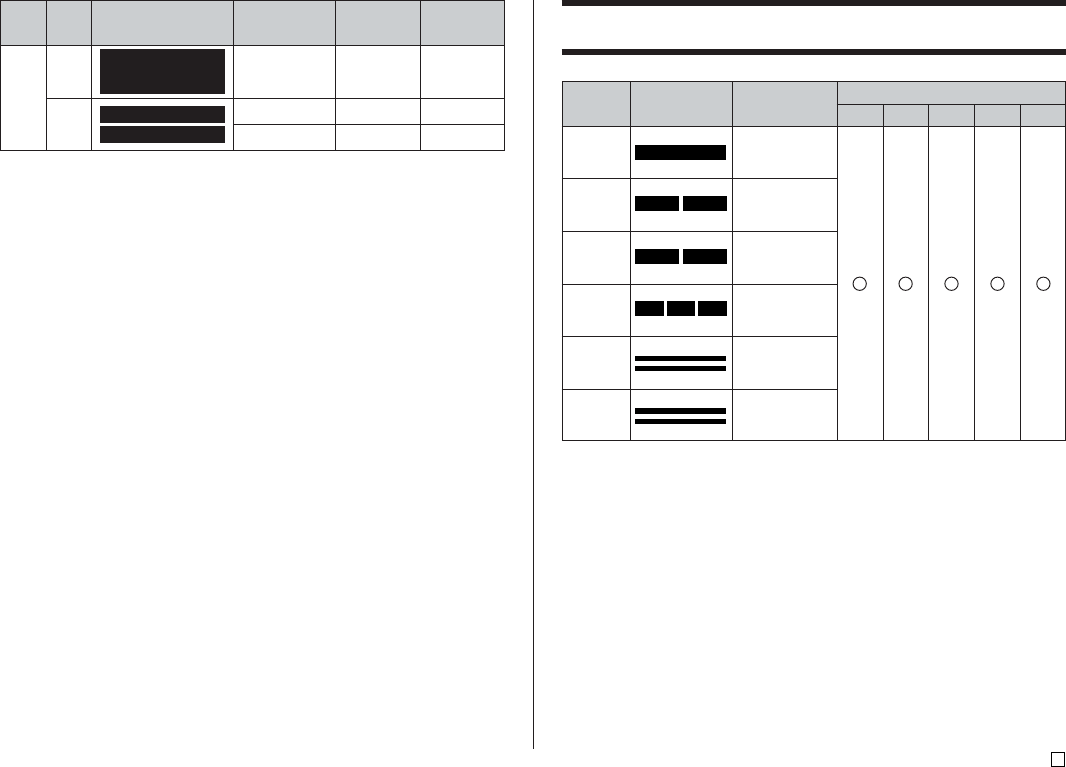
La tabella sottostante mostra in che modo il tipo di taglio del nastro (intero o a metà) e la lunghezza dei margini vengono influenzati dalle impostazioni di modo di
taglio del nastro e di margine.
41
I
Part 2 - TAPE Mode
Spostamento del cursore
Usare i tasti del cursore per spostare il cursore sul display e posizionarlo per
cancellare e modificare i caratteri.
■ Per spostare il cursore
Introduzione di base di caratteri alfanumerici
La seguente operazione costituisce il procedimento di base per l’introduzione
di lettere e numeri. Notare che essa presuppone che una schermata di
introduzione testo sia già visualizzata sul display.
Per introdurre caratteri alfanumerici
Esempio: ABXYZ 1234567890
1. Introdurre i caratteri digitandoli sulla tastiera della stampante.
•Per introdurre le lettere maiuscole, è possibile usare SHIFT o CAPS.
Con SHIFT è necessario commutare la tastiera per ciascun carattere.
Con CAPS la tastiera conserva la sua impostazione di introduzione di
lettere maiuscole/lettere minuscole finché non si preme di nuovo CAPS.
•Premere SPACE per introdurre gli spazi.
•Se si introduce un carattere sbagliato, premere BS o DEL per cancellarlo
ed introdurre il carattere corretto.
2. Quando si giunge alla fine di una riga di testo, premere SET.
Parte 3 - Introduzione e modifica del
testo dell’etichetta
Questa sezione spiega come introdurre e modificare il testo alfanumerico
nelle etichette.
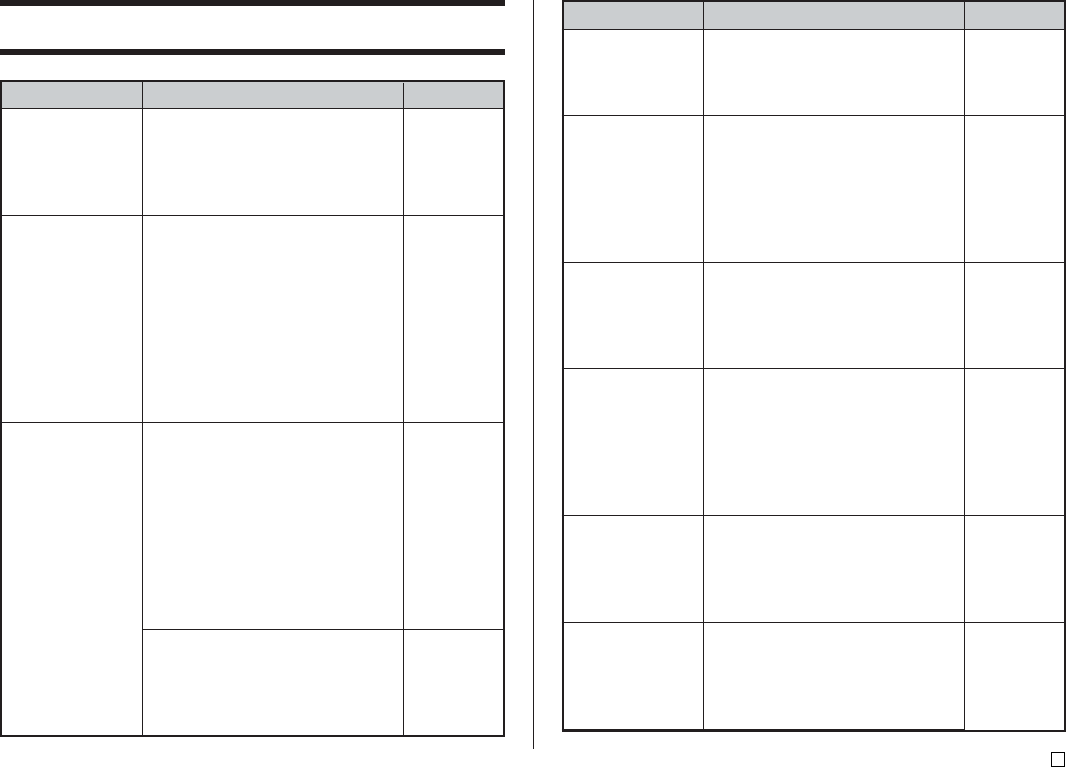
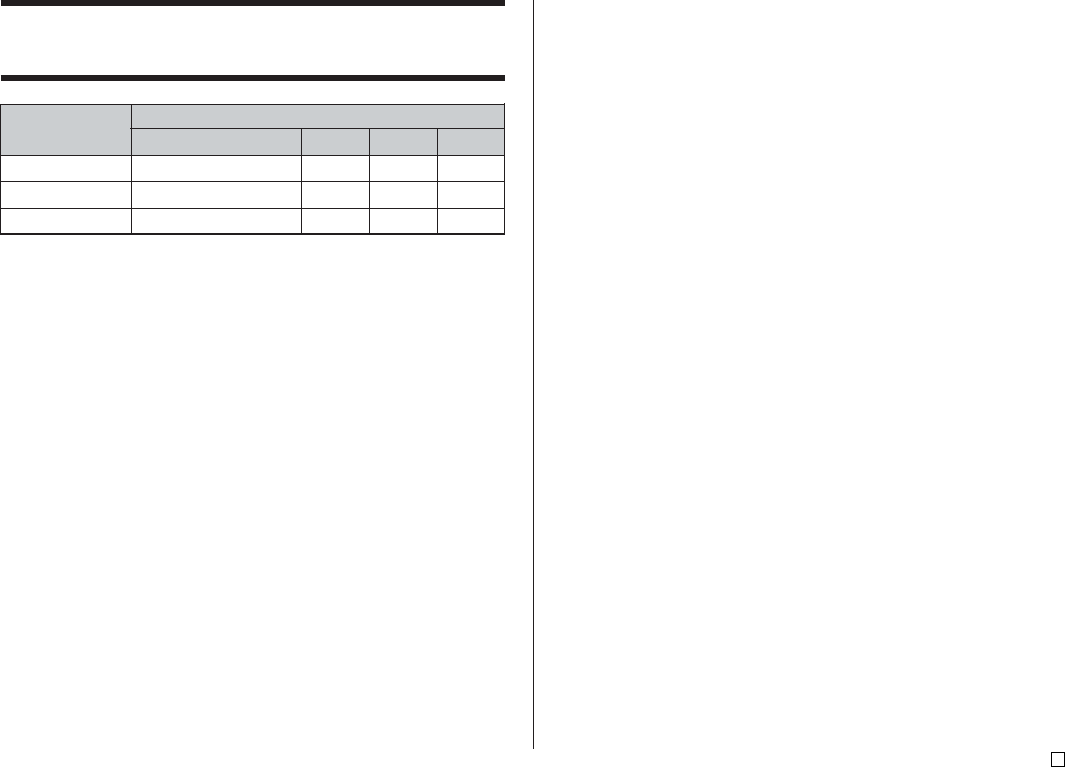
Per eseguire questa operazione:
Spostare il cursore verso sinistra
Spostare il cursore verso destra
Spostare il cursore verso l'alto
Spostare il cursore verso il basso
Spostare il cursore all'inizio della riga
attuale del testo
Spostare il cursore alla fine della riga
attuale del testo
Premere questo tasto
(questi tasti):
FUNCTION
FUNCTION
I
42
Tasto CODE
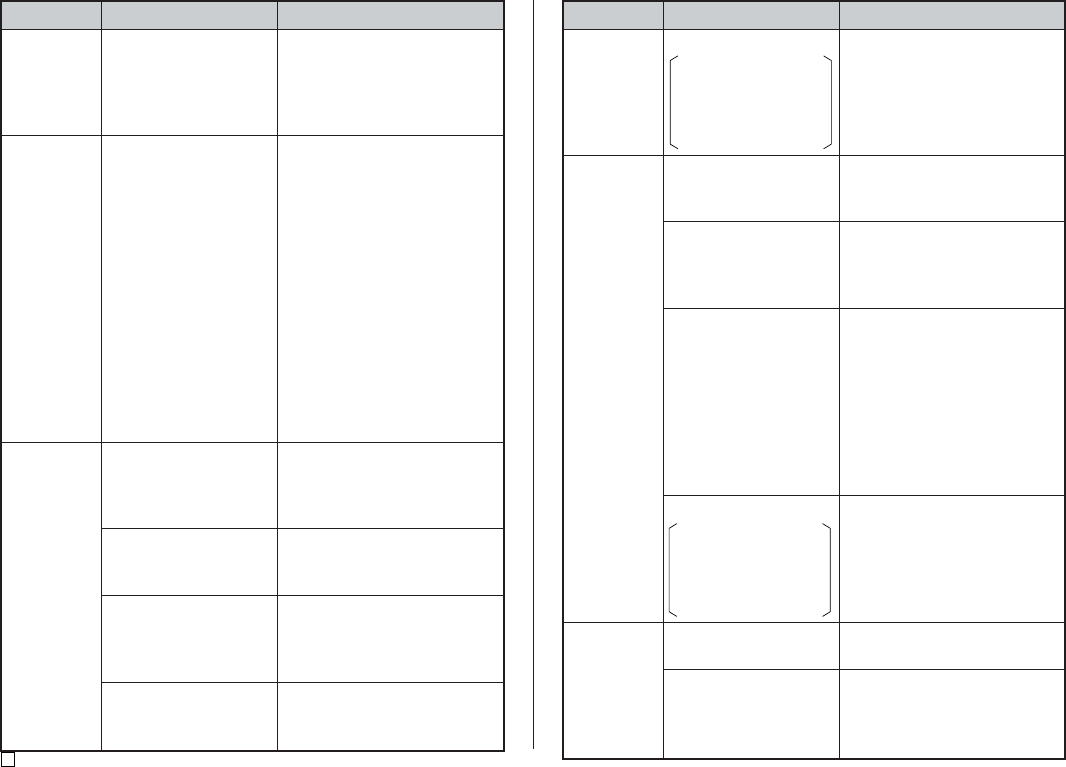
Il tasto CODE consente di introdurre i segni d’interpunzione necessari per
varie lingue. Quanto segue indica le operazioni di tasto da usare per ottenere
ciascuno dei caratteri formati usando il tasto CODE.
■ Introduzione di lettere maiuscole (CAPS) attivata
■ Introduzione di lettere maiuscole (CAPS) disattivata
Esempio: Per introdurre áCODE1 (´) A
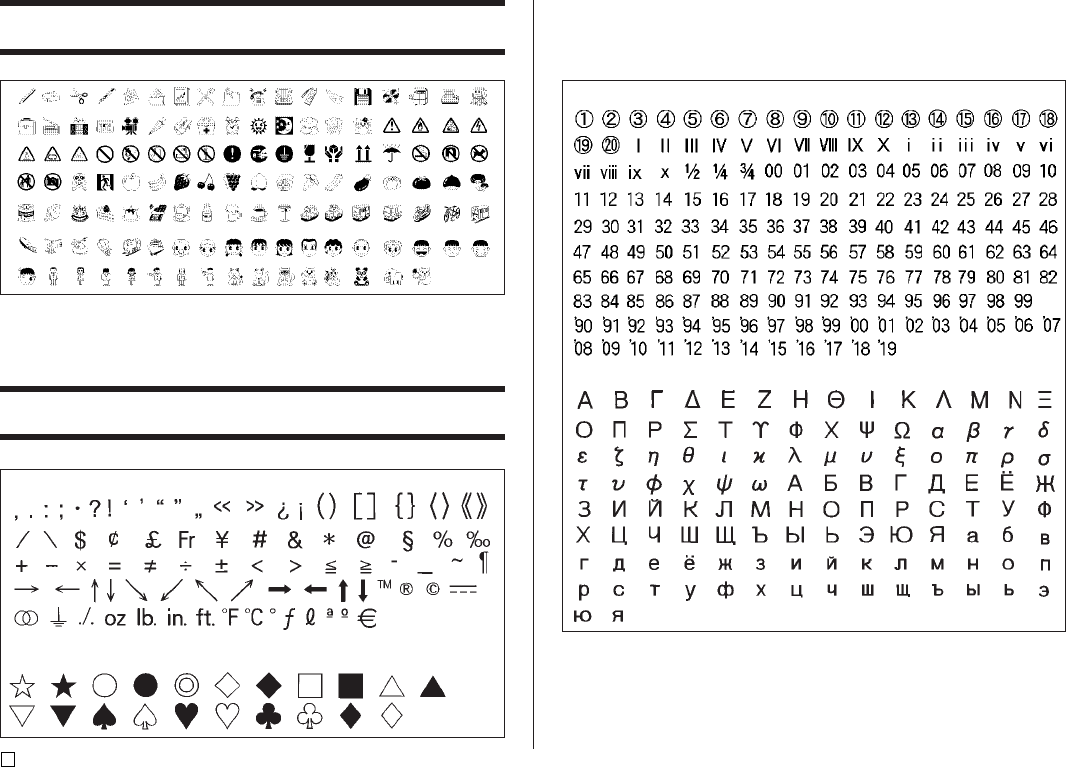
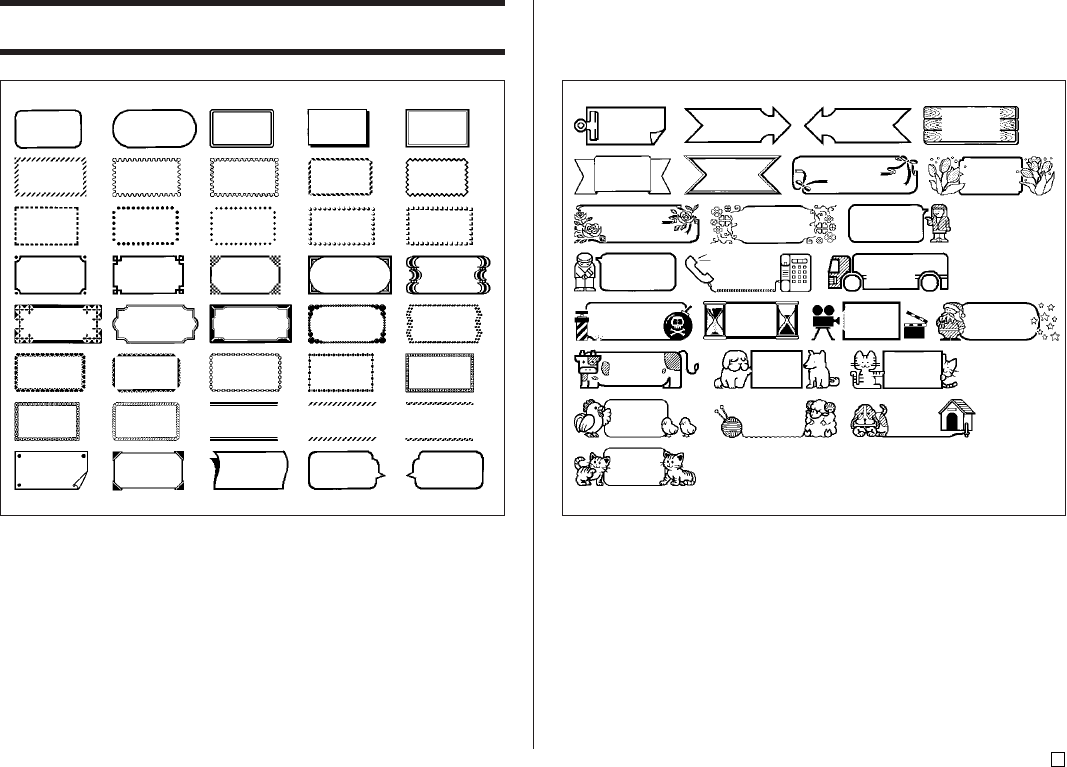
Introduzione di simboli e caratteri speciali
Il menu SYMBOL consente di scegliere simboli, dingbat (segni decorativi) e
formati numerici speciali, oltre alle lettere degli alfabeti greco e cirillico.
Per usare il menu SYMBOL
1. Con il cursore nel punto in cui si desidera introdurre un simbolo, un dingbat,
un numero, un carattere greco o un carattere cirillico, premere SYMBOL
per visualizzare il menu SYMBOL.
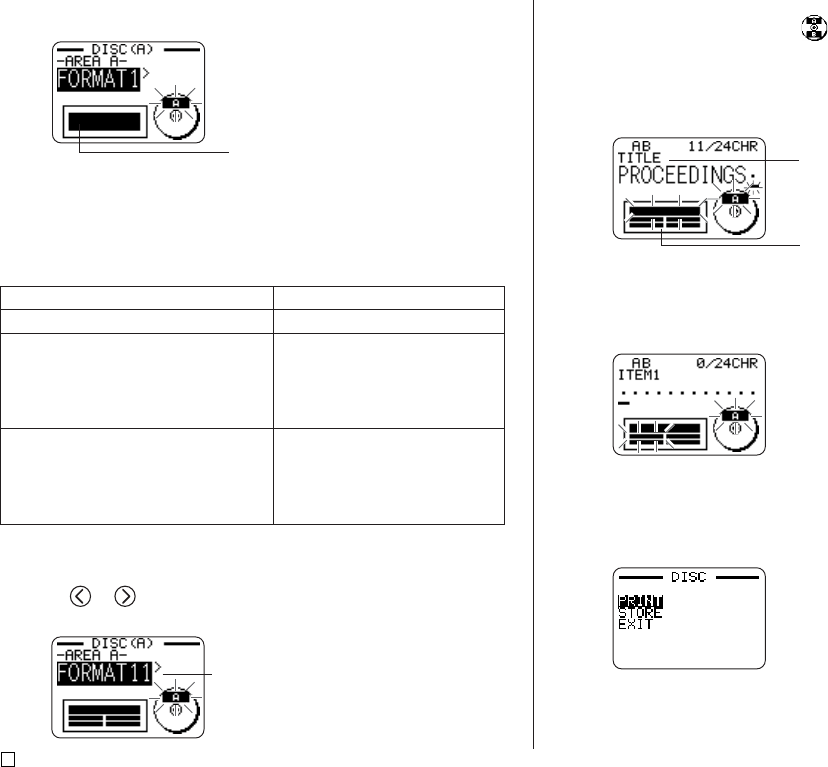
2. Usare oper selezionare il tipo di carattere desiderato, e quindi
premere SET.
•La pressione di SETfa apparire un menu di simboli, dingbat, formati
numerici, caratteri greci o caratteri cirillici.
•Per far scomparire il menu SYMBOL senza selezionare nulla, premere
ESC.
3. Usare i tasti del cursore per selezionare il carattere che si desidera
introdurre, e quindi premere SET.
•La pressione di SET riporta la visualizzazione alla schermata di
introduzione, con il simbolo, il dingbat, il numero, il carattere greco o il
carattere cirillico scelto introdotto nel punto in cui si trovava il cursore
quando è stato visualizzato il menu SYMBOL.
•Fare riferimento a pagina 68 per la lista completa dei simboli, dei dingbat,
dei formati numerici, dei caratteri greci e dei caratteri cirillici disponibili
Libble takes abuse of its services very seriously. We're committed to dealing with such abuse according to the laws in your country of residence. When you submit a report, we'll investigate it and take the appropriate action. We'll get back to you only if we require additional details or have more information to share.
Product:
Forumrules
To achieve meaningful questions, we apply the following rules:
First, read the manual;
Check if your question has been asked previously;
Try to ask your question as clearly as possible;
Did you already try to solve the problem? Please mention this;
Is your problem solved by a visitor then let him/her know in this forum;
To give a response to a question or answer, do not use this form but click on the button 'reply to this question';
Your question will be posted here and emailed to our subscribers. Therefore, avoid filling in personal details.
Register
Register getting emails for Casio CWL300 at:
new questions and answers
new manuals
You will receive an email to register for one or both of the options.
Get your user manual by e-mail
Enter your email address to receive the manual of Casio CWL300 in the language / languages: Italian as an attachment in your email.
The manual is 0,57 mb in size.
You will receive the manual in your email within minutes. If you have not received an email, then probably have entered the wrong email address or your mailbox is too full. In addition, it may be that your ISP may have a maximum size for emails to receive.
If you have not received an email with the manual within fifteen minutes, it may be that you have a entered a wrong email address or that your ISP has set a maximum size to receive email that is smaller than the size of the manual.
The email address you have provided is not correct.
Please check the email address and correct it.
Your question is posted on this page
Would you like to receive an email when new answers and questions are posted? Please enter your email address.