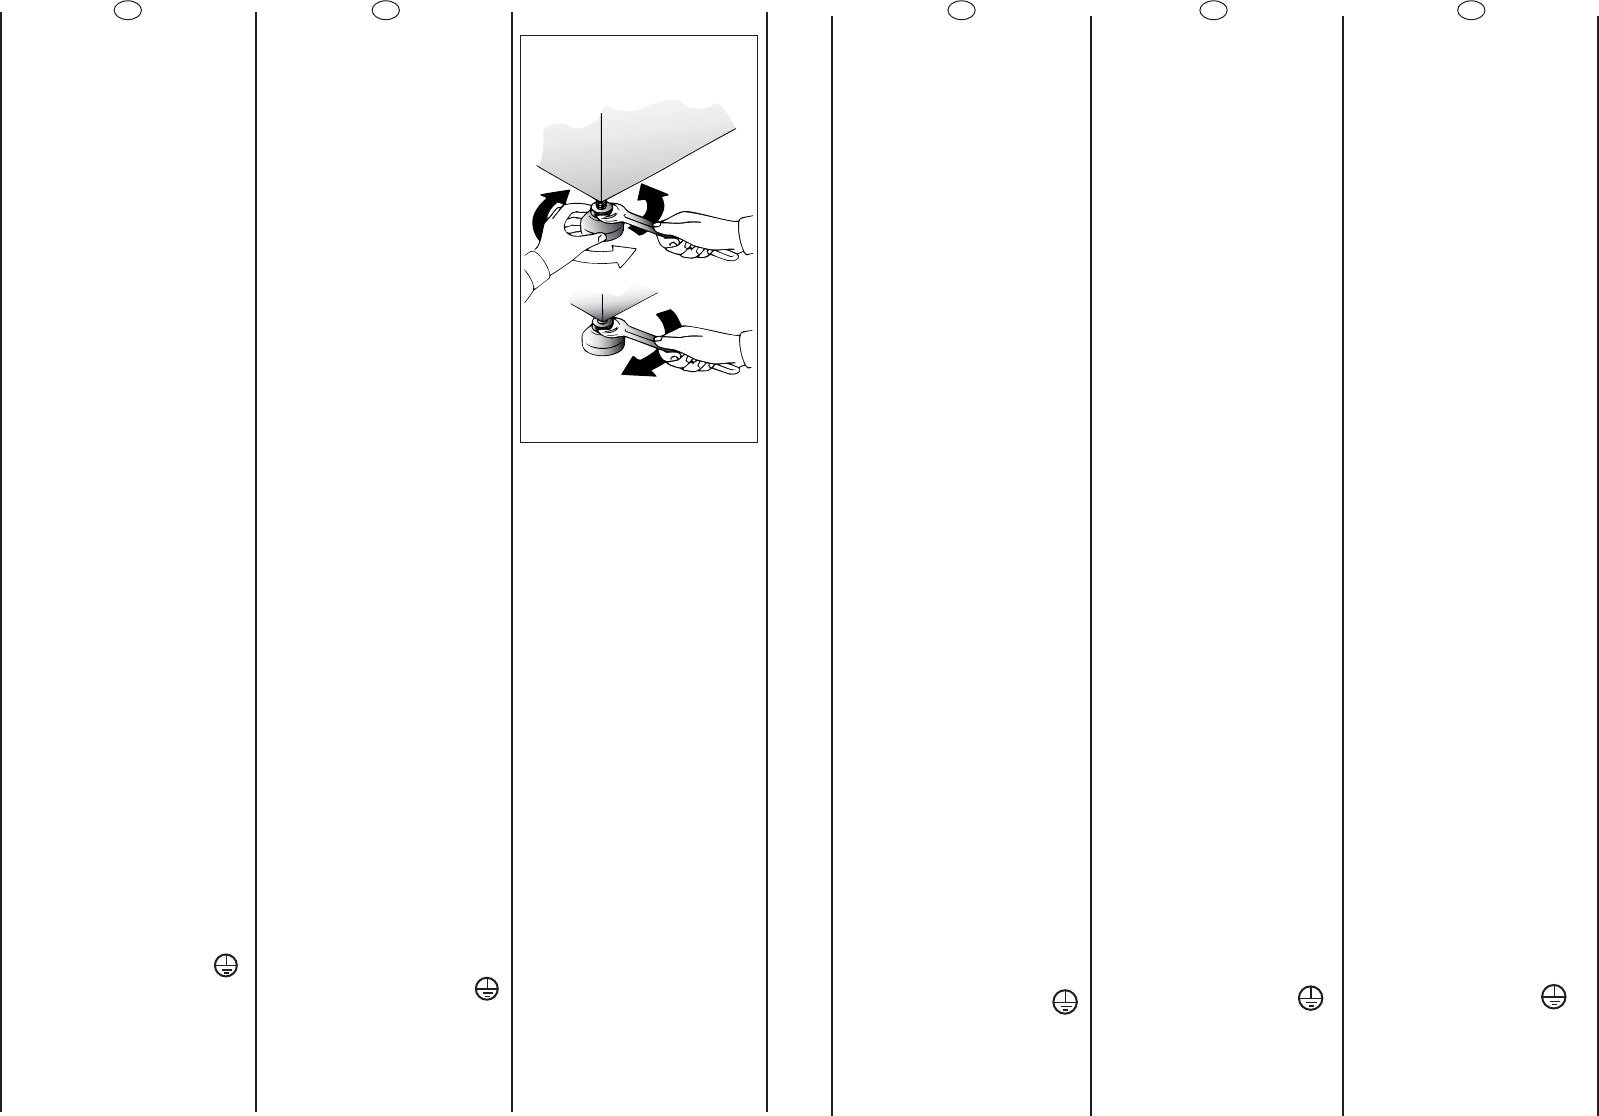
Umístûte praãku do roviny
pomocí 4 nastaviteln˘ch
noÏiãek:
aa))
Otáöejte maticí äroubu po
smëru hod. ruöiöek a pak
måïete püizpåsobit vÿäku
noïiöky.
bb))
Otáöením sniïujte nebo
zdvihejte noïiöku, dokud
perfektnë nepüilne k podlaze.
cc))
Upevnëte polohu noïiöky
otoöením matice äroubu proti
smëru hod. ruöiöek.
Zkontrolujte, Ïe voliã
programÛ je v poloze OFF a
dvífika praãky jsou zavfiená.
Zapojte záströku do sítë.
UPOZORNùNÍ:
V pfiípadû potfieby v˘mûny
pfiívodního kabelu pfiipojujte
vodiãe v souladu s
následujícím barvami/kódy:
MODR¯ - NEUTRÁLNÍ (N)
HNùD¯ - ÎIV¯ (L)
ÎLUTO-ZELEN¯ - UZEMNùNÍ ( )
Po instalaci spotüebiöe se
ujistëte, ïe spotüebiö je
umístën tak, aby byla snadno
püístupná zásuvka.
CZ
Koristite 4 noÏice kako bi
poravnali perilicu.
a) Maticu kojom je priãvr‰çena
nogica oslobodite tako da je
odgovarajuçim kljuãem
odvijete u smjeru kretanja
kazaljki na satu.
b) Nogicu okretanjem
povisujete ili snizujete tako
dugo dok sasvim ne prijanja uz
pod.
c) Nakon ‰to ste zavr‰ili
poravnavanje, nogicu
ponovno priãvrstite tako da je
odgovarajuçim kljuãem
priteÏete u smjeru suprotnom
kretanju kazaljki na satu dok
sasvim ne prilegne na dno
perilice.
Provjerite da su svi gumbi na
poloÏaju "OFF" odnosno
iskljuãeni i da su vrata perilice
zatvorena.
Utaknite utikaã u zidnu
utiãnicu.
UPOZORENJE:
Ako je neophodno zamijeniti
glavni elektriãni kabel, spojite
Ïice prema niÏe navedenim
bojama/oznakama:
PLAVO - NEUTRALNO (N)
SMEDJE - FAZA (L)
ÎUTO/ZELENO - UZEMLJENJE ( )
Nakon namje‰tanja, perilica
mora biti smje‰tena tako da je
utikaã uvijek dostupan.
HR
HU
A gép vízszintbe állításához
használja a 4 lábat.
a) Fordítsa el az anyát az
óramutató járásával megegyezŒ
irányban (jobbra),
hogy szabaddá váljon
lábszabályozó csavar.
b) A készülék megemeléséhez
vagy lesüllyesztéséhez forgassa
el a lábat, amíg az stabilan meg
nem áll a padlón.
c) Rögzítse a lábat a megfelelŒ
helyzetben az anya óramutató
járásával ellentétes irányban
(balra) csavarásával, amíg az neki
nem feszül a gép aljának.
Ügyeljen arra, hogy a gomb a „KI”
helyzetben legyen, és az ajtó
legyen becsukva.
Dugja be a csatlakozódugót.
FIGYELEM!
Ha szükségessé válik a tápkábel
cseréje, akkor a vezetéket az
alábbi színek/kódok szerint kell
csatlakoztatni:
KÉK: - NULLAVEZETÉK (N)
BARNA: - FESZÜLTSÉG
ALATTI VEZETÉK (L)
SÁRGA-ZÖLD: - FÖLDVEZETÉK ( )
Atelepítés után a készüléket úgy
kell beállítani, hogy a
csatlakozódugó hozzáférhetŒ
legyen.
SL
Uporabite vse 4 nogice,
zravnate pralni stroj z tlemi
a) Matico, s katero je pritrjena
nogica sprostite tako, da jo
odvijete z
ustreznim kljuãem.
b) Nogico z obraãanjem
zvi‰ujte ali zniÏujte toliko ãasa,
dokler se ne bo povsem
prilegala tlom.
c) Po konãanem izravnavanju
nogico ponovno pritrdite tako,
da jo z ustreznim kljuãem
privijate v smeri nasprotni od
gibanja urinih kazalcev dokler
se povsem ne prileÏe dnu
stroja.
Prepriãajte se, da je gumb
programatorja v izklopljenem
poloÏaju in da so vrata stroja
zaprta.
Vtaknite vtiã v vtiãnico.
POZOR:
ãe je treba zamenjati prikljuãni
elektriãni kabel, prikljuãite Ïice
skladno s spodaj navedenimi
barvami/kodami:
MODRA - NULA (N)
RJAVA - FAZA (L)
RUMENA-ZELENA - OZEMLJITEV ( )
Stroj mora biti name‰ãen tako,
da lahko vtiãnico doseÏete v
vsakem trenutku.