16
CONTENTS
MACHINE
KNOWLEDGE
EMBROIDERING MAINTENANCE
ERROR
MESSAGE
TROUBLESHOOTING
PATTERNS
EMBROIDERING
USING A SMALL
FRAME
(OPTIONAL)
EMBROIDERING
USING A
EXTRA-SMALL
FRAME (OPTIONAL)
EMBROIDERING
USING A LARGE
FRAME
(OPTIONAL)
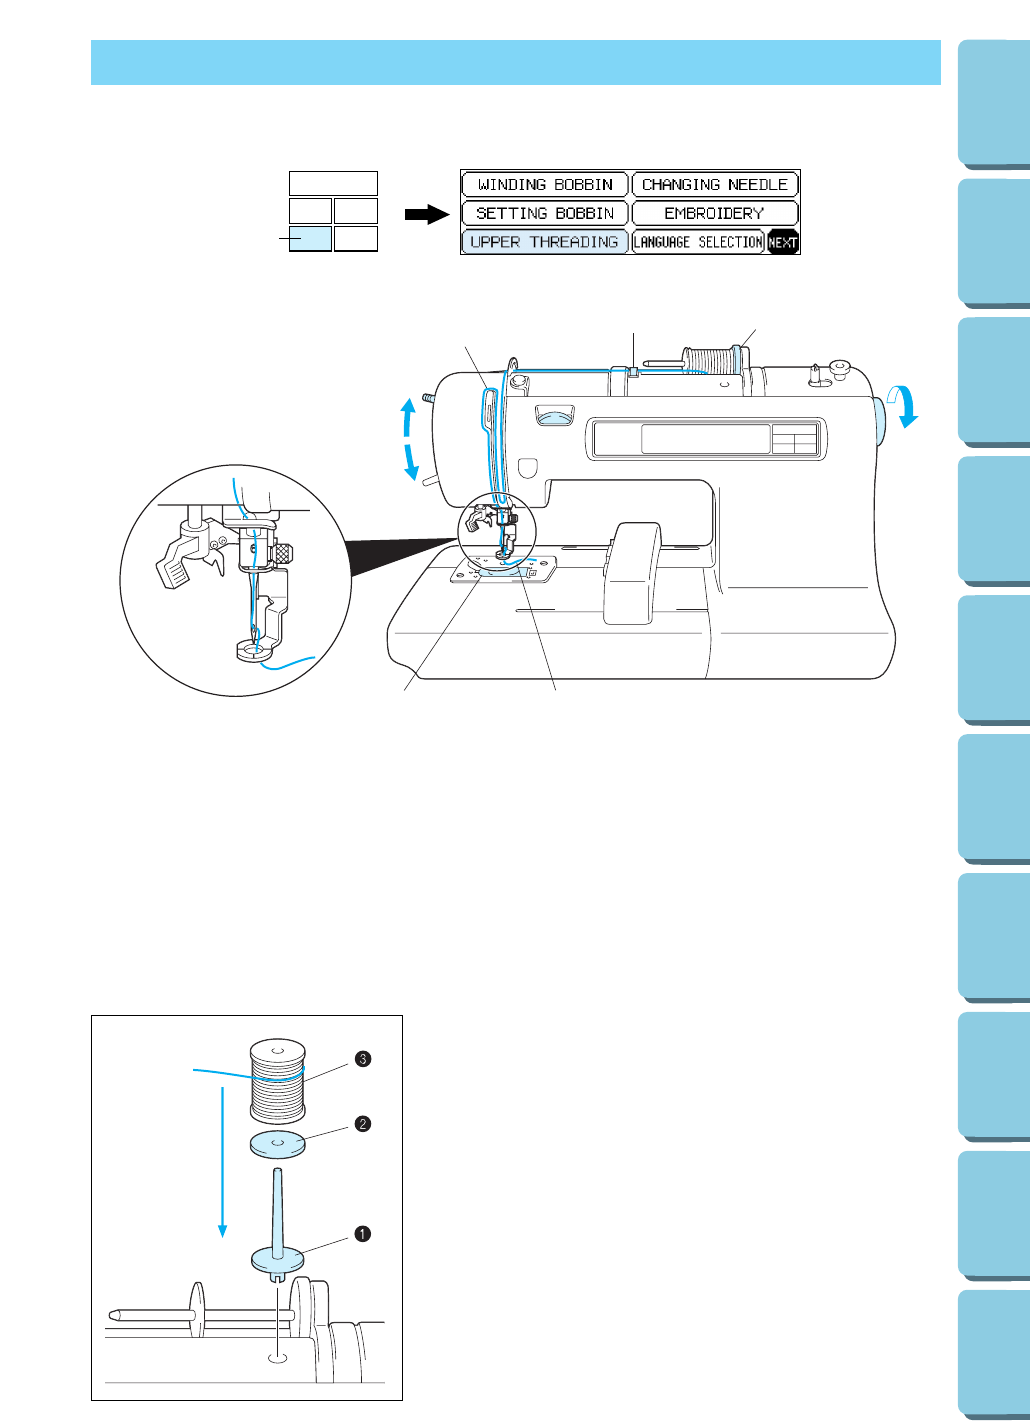
UPPER THREADING
Thread according to the number and arrow marks on the machine.
1.
Raise the presser foot lever (If the presser foot is
not raised, the upper thread cannot be threaded.)
2. Turn the balance wheel to raise the needle to
its highest position.
3.
Guide the thread as illustrated with the solid line
on the machine following the number sequence.
4. Lower the presser foot.
5. Thread the needle using the auto needle
threading device (See page 17) or manually.
* Be sure the spool felt is behind the spool.
(shown above *)
** You do not need to pull the lower thread up
before you start embroidering.
CAUTION
Always be sure to raise the presser foot
before removing the upper thread to prevent
damage to the thread tension system.
USING THE EXTRA SPOOL PIN AND NET
Extra spool pin
Use when embroidering with metallic thread.
1.
Insert the extra spool pin into the hole on the top of the machine.
2. Install the spool felt and the thread spool in that order, and
then thread the upper thread.
* Do not thread the thread onto bracket (A).
* When sewing using the metallic thread, set thread tension
control dial (B) to the “0” position.
* When setting the thread spool, set it so that the thread
winds off from the front of the spool.
* If using metallic thread, we recommend that you use a 90/14
home sewing machine needle.
1 Insert the extra spool pin into the hole on the top of the
machine
2 Spool felt
3 Thread spool
NOTE
This method keeps the thread from twisting as it comes off the
spool pin.