INDEX
160
MY CUSTOM
designing
........
enter
........... 128
key functions
..
N
needle
changing the position
... 56
fabric
. 35
replacing
........ 33
setting
........ 17
twin ne
........... 30
nee
.., 28, 30
needle clam
...... 10
needle mode select
.... 30, 31
needle plate
..... 10
needle plat
........ 10, 138
needle position
... 56
needle position button
.. 11
needle th
.. 9, 29
O
open toe ........ 73, 80
operation buttons
....... 9, 11
options
.. 14
overcasting
........., 64, 65
P
patchwork ... 63
pattern explanation key
..
piecing
.. 71
pin tucks
...... 61
pivoting
... 20, 45
point delete key
..
power co
..
presser foot
..
pressure
....... 20, 46
replacing
........ 32
presser foot code
..
presser foot holder
.. 10, 32
presser foot lever
.. 9, 41
presser foot lifter bu
..
presser foot/needle excha
.., 32, 33
pretension disk
... 24, 25
Q
qui .. 69
free-m
..
R
reinfor ..... 40, 43
retrieving
char
.. 122, 135
computer
........ 123, 135
reverse st
......, 43, 54
reverse/reinforce
.. 11, 40
S
satin stitching ....... 74
saving
char
..
computer
........ 121, 134
machine’s m
. 119
util
..........
scalloping
.. 81
screen
adjustin
.. 140
locking
........ 47
seam guide
......... 57
securing stitching
......
set key
.........
setting
automatic rev
........
automatic thre
.......
LCD density
......., 140
stit
.......
threa
........
zigzag w
......
sewing speed control
.. 9, 11, 38
sewi
.......
shell tuck stit
.
side cutter
........
single/repeat sewing
.......
single/triple stitching key
.........
size key
..........
smocking
.......
spe
.......
spool cap
.....
Spool net
.......
spool pin
..........
start/stop button
., 38
step patterns
.........
stitch guide foot
.
stit
.......
stit
........
stitching d
.......
straight stitch
..........
straight stitch foot
.....
straight stitch n
........., 57
supplemental spool pin
. 9, 23, 30
T
thread
fabric
.......
thre
........, 29
thread cut
........ 11, 39, 44
thre
........., 24, 25, 30
thread g
...... 9, 25, 28
thread t
......... 9, 28, 29
thread te
........
top cover
.......
topstitching
........, 82
touch pen
........, 141
holder
........
U
upgrading ....
upper threa
.......
twin ne
......
USB connector
.....
USB port
for comput
........, 134
util
. 22, 52
key functions
..........
saving
........
selecting a
..........
sewing
.....
sewi
..........
stit
..
V
vertical mi ......
W
walking .......
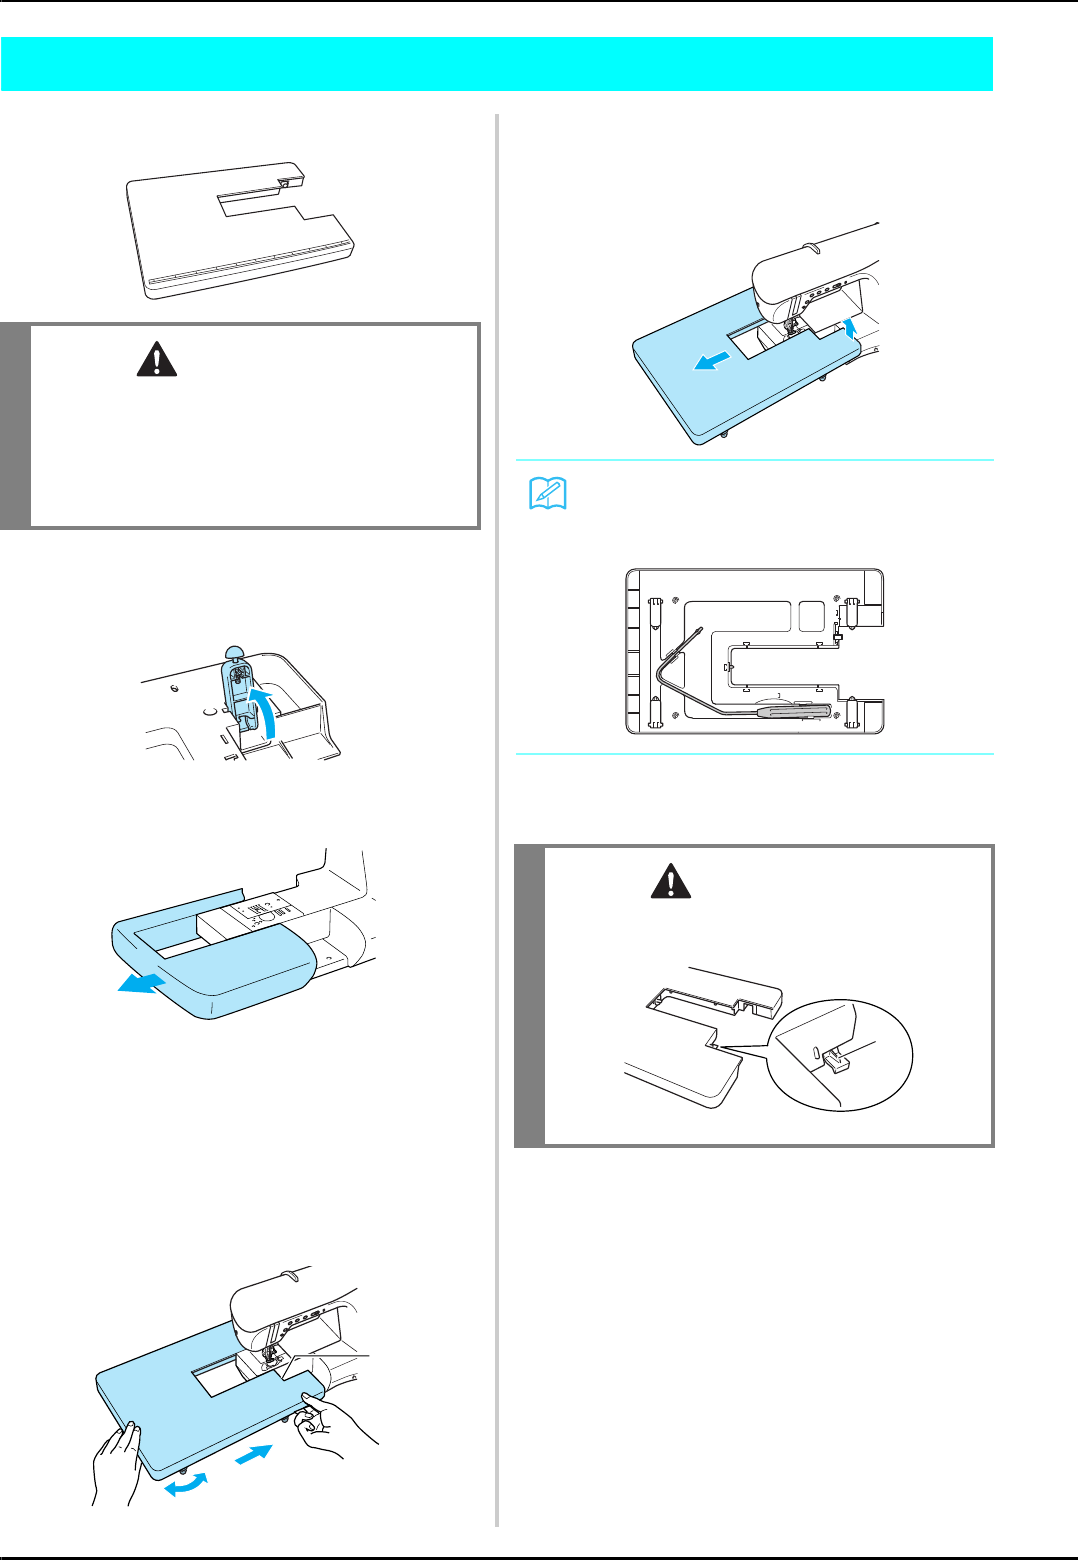
wide table
..
Z
zigzag stitch .
stit
........
zipper insert
..