Before You Use Your Brother Machine...............................................................................................1
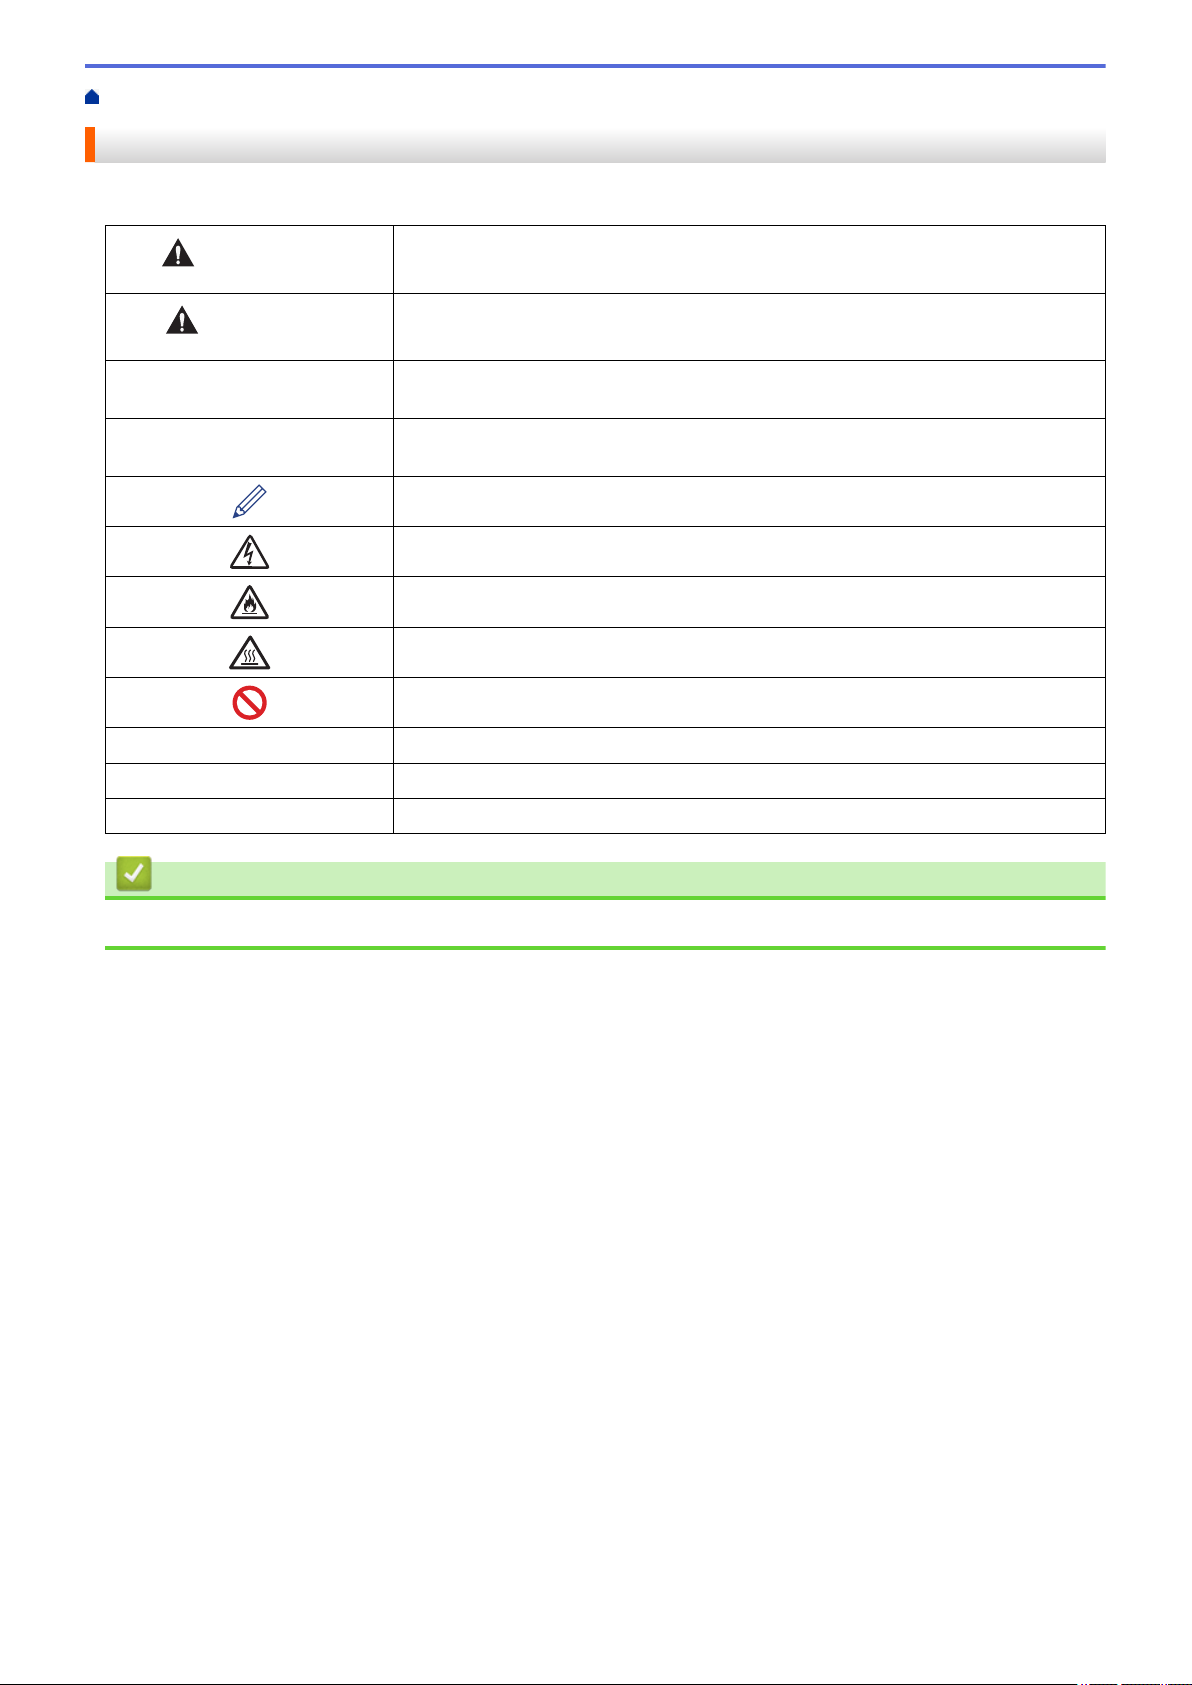
Definitions of Notes........................................................................................................................................2
Important Note...............................................................................................................................................4
Introduction to Your Brother Machine.................................................................................................5
Before Using Your Machine...........................................................................................................................6
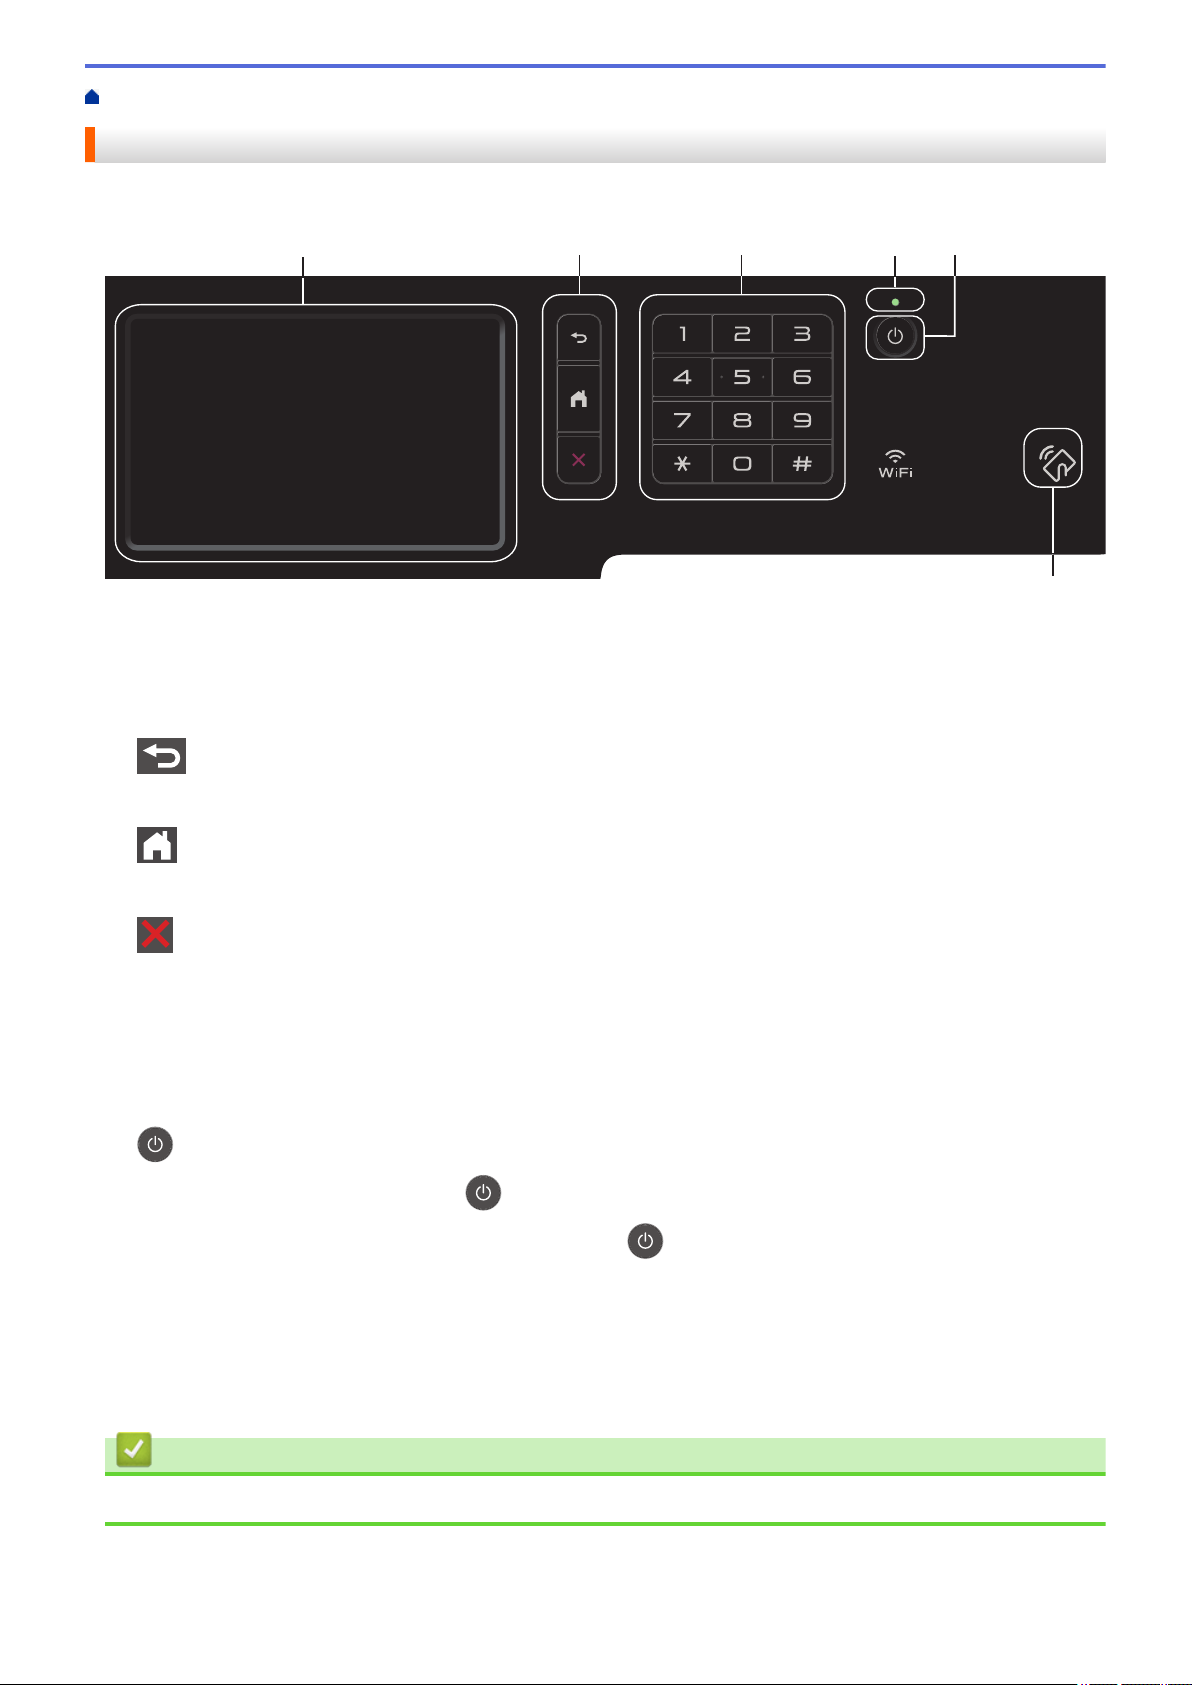
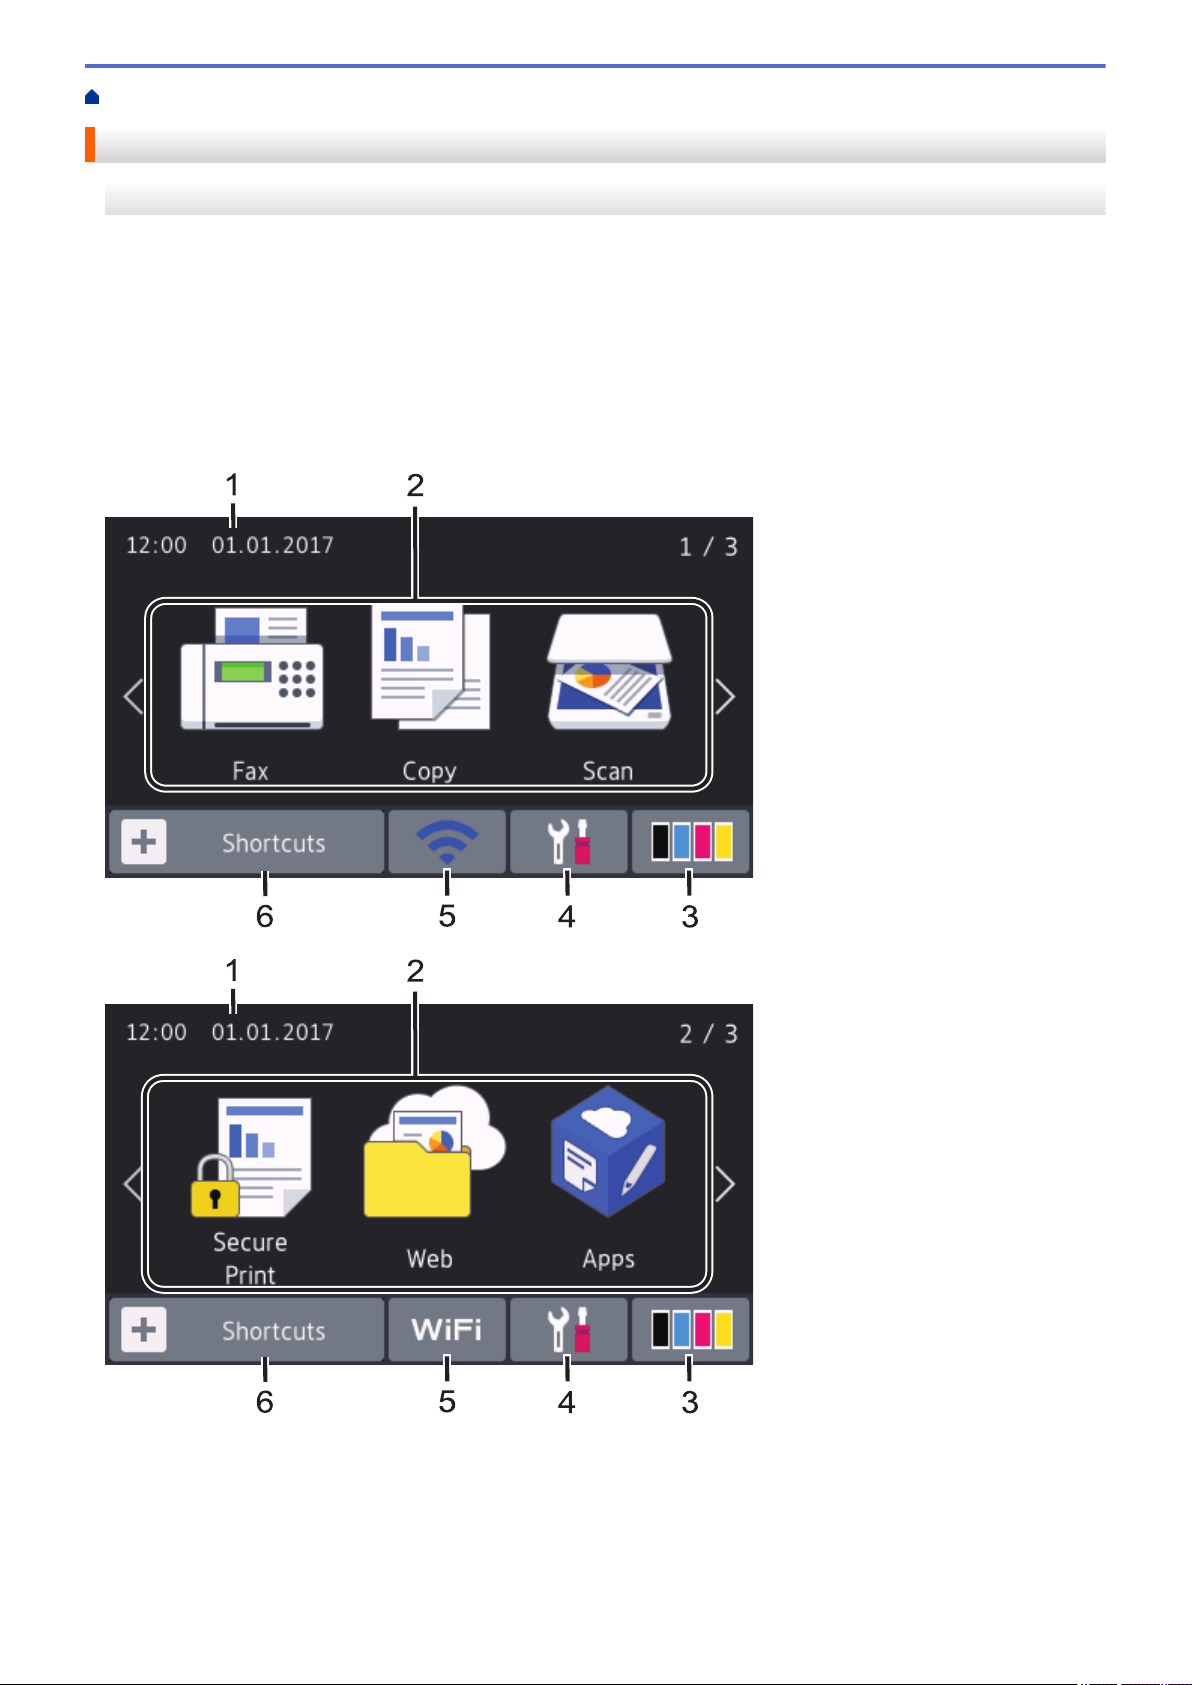
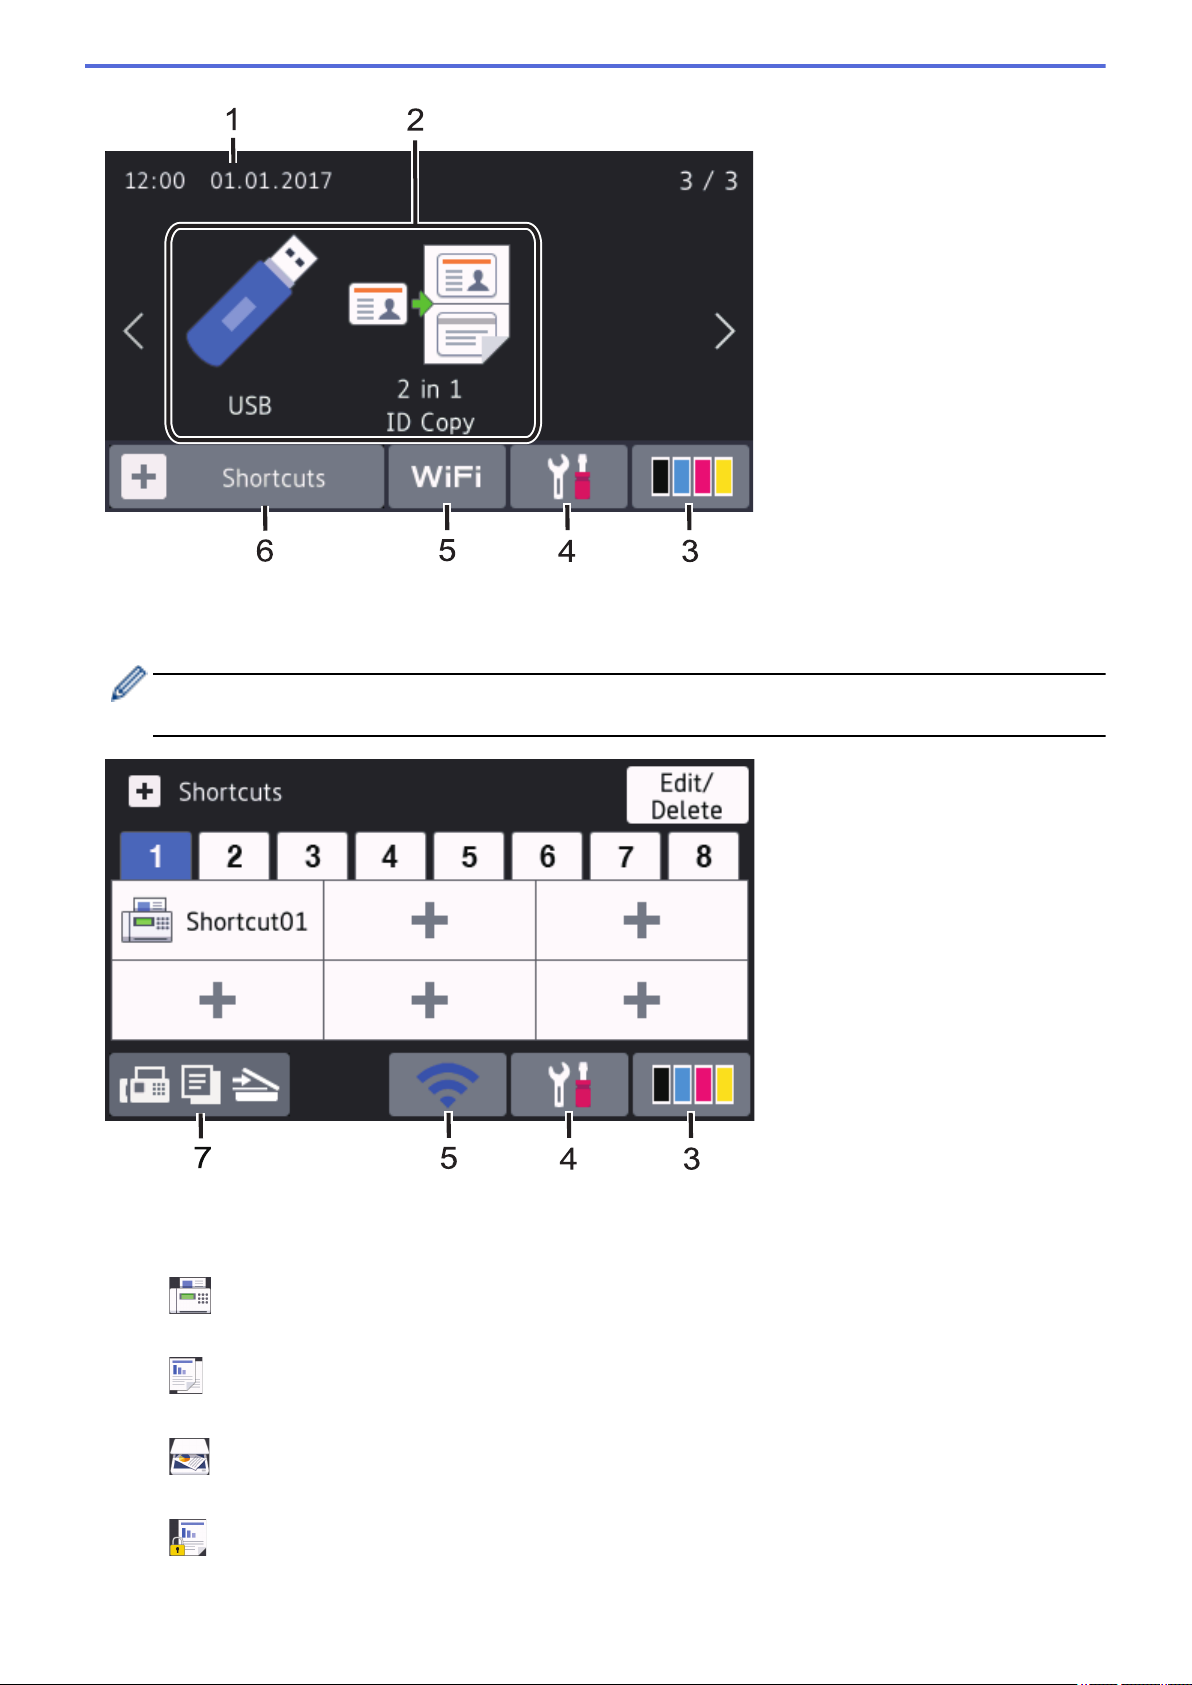
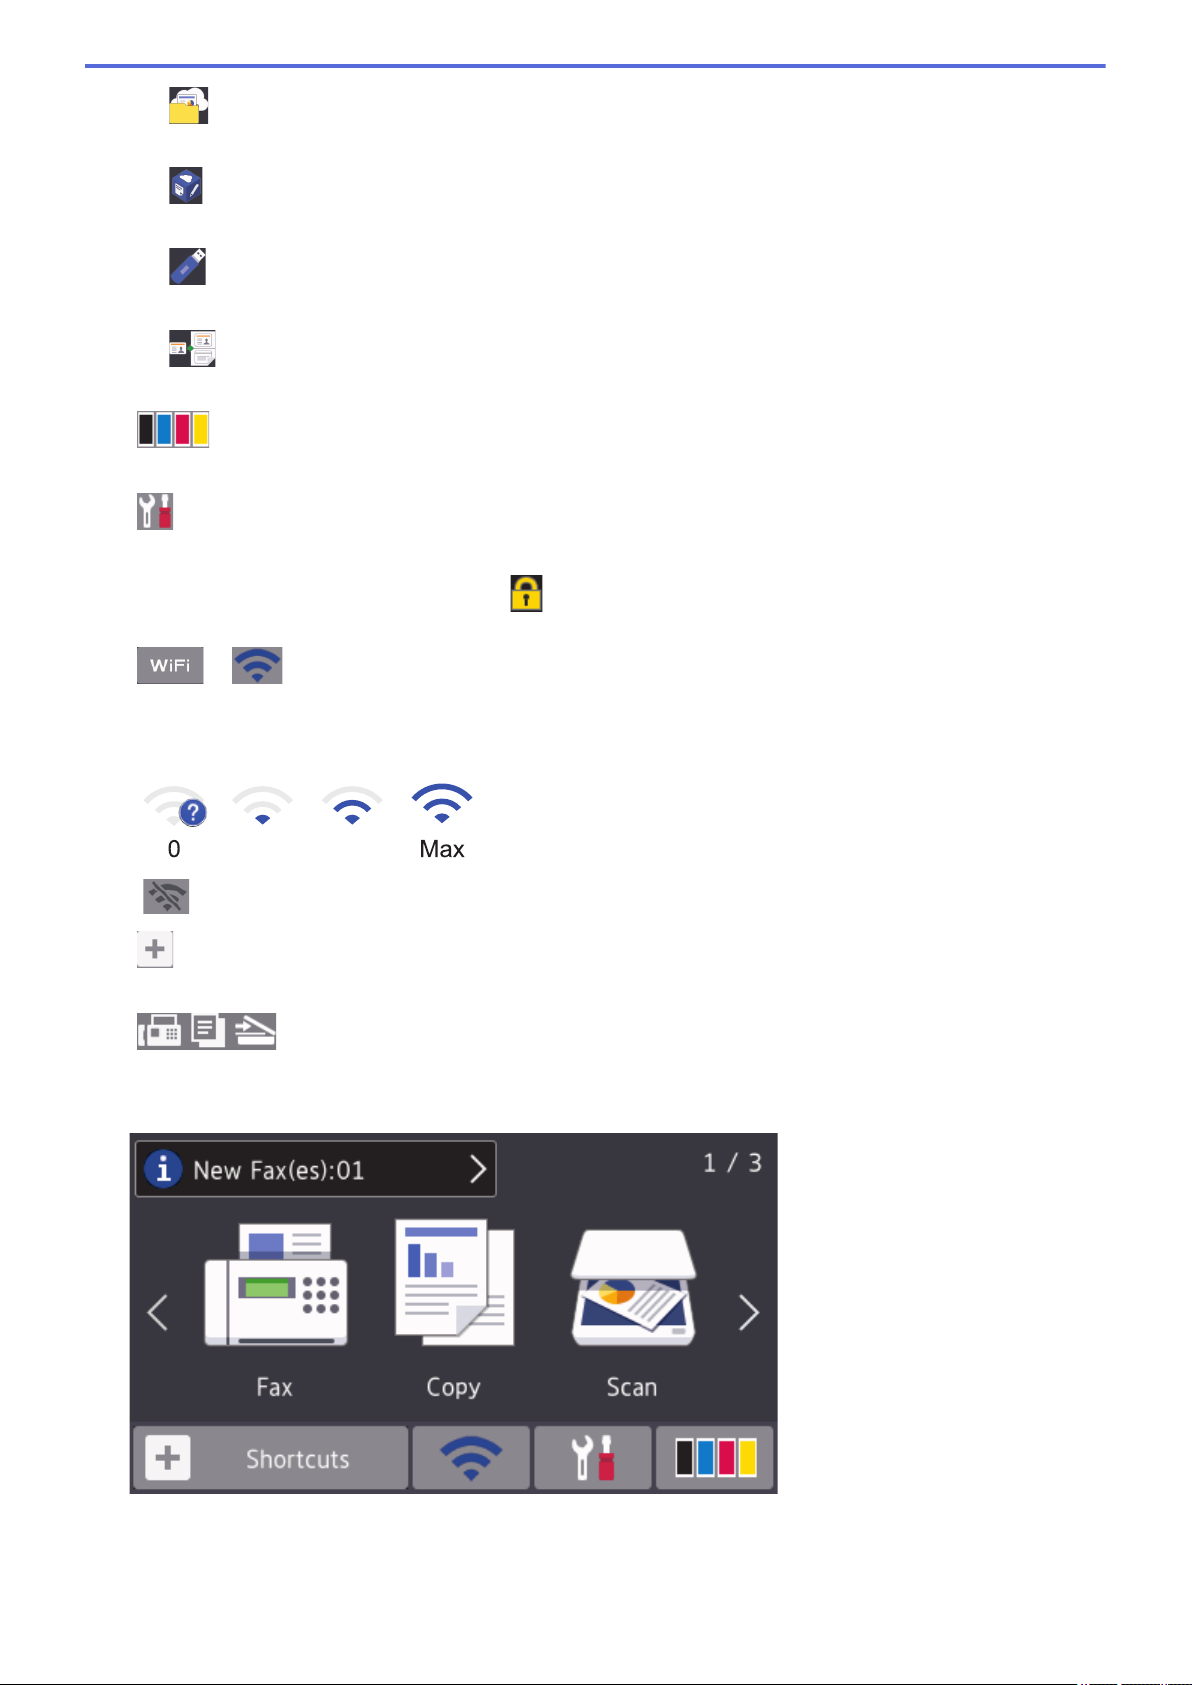
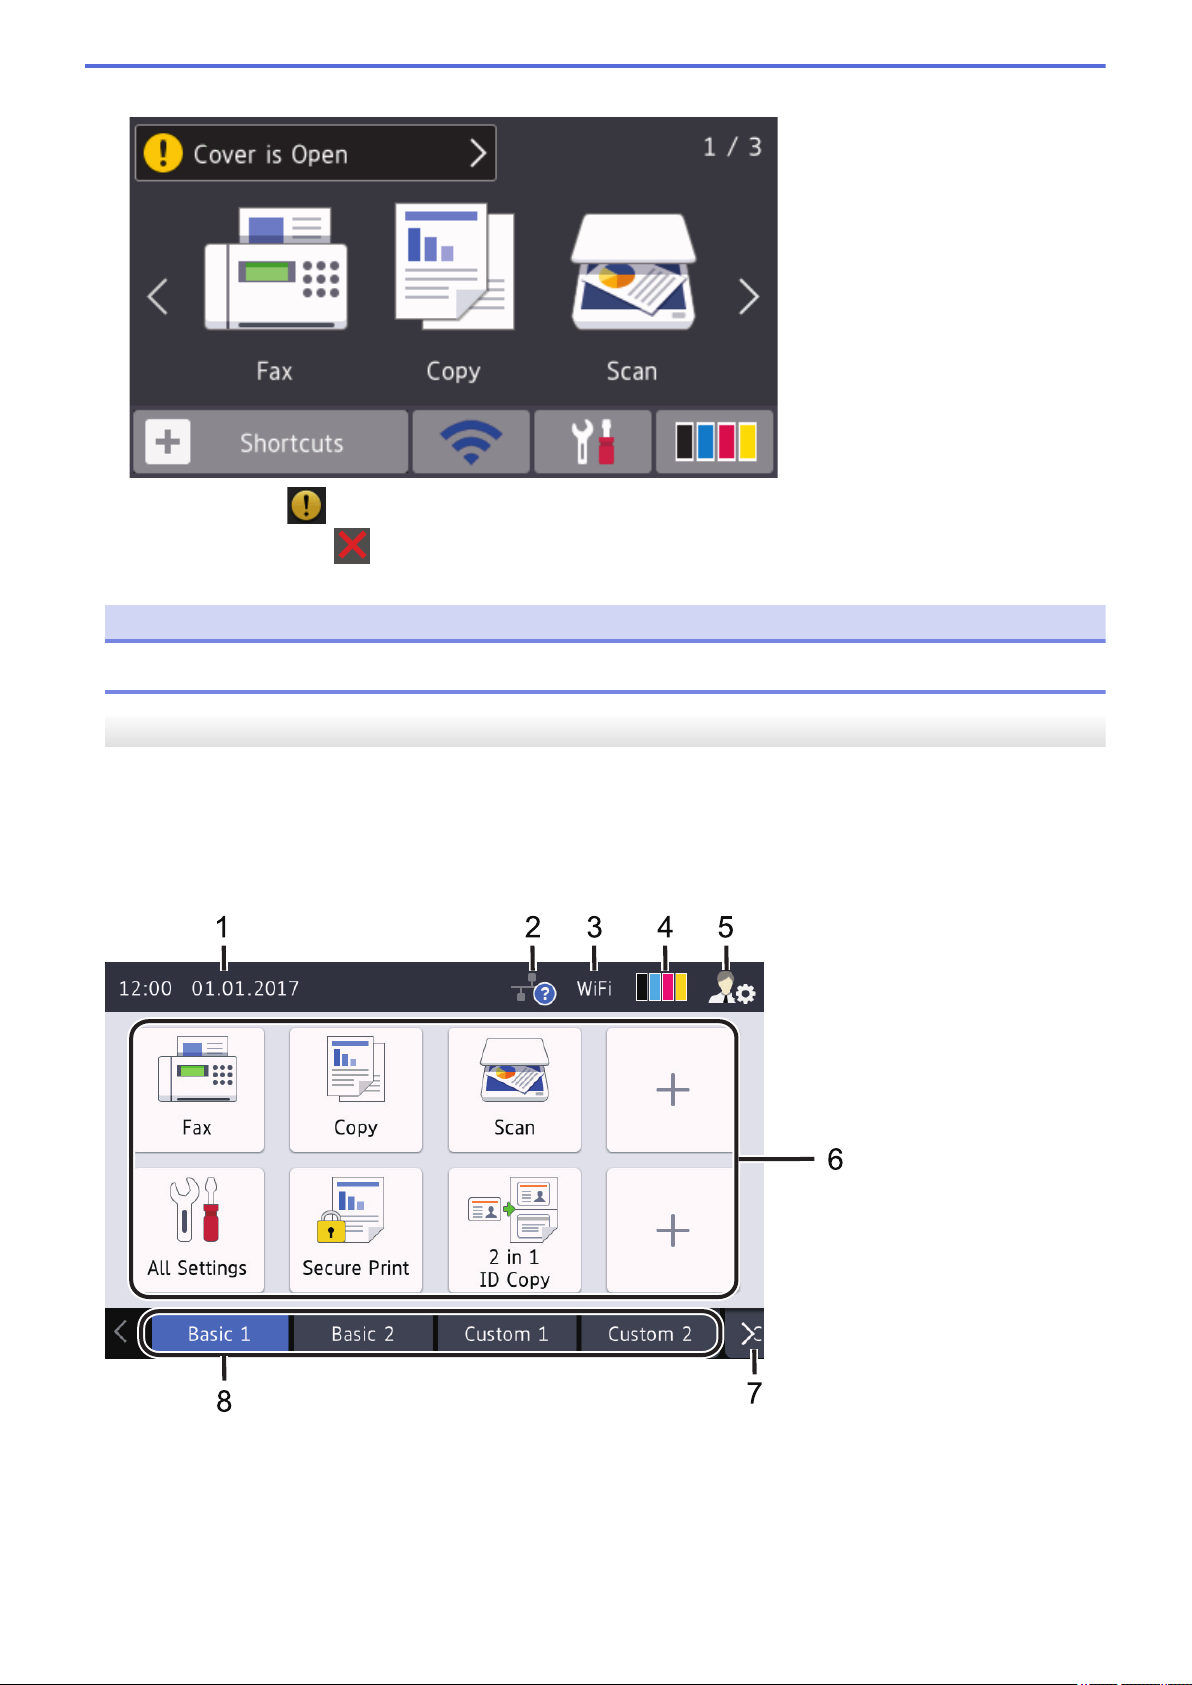
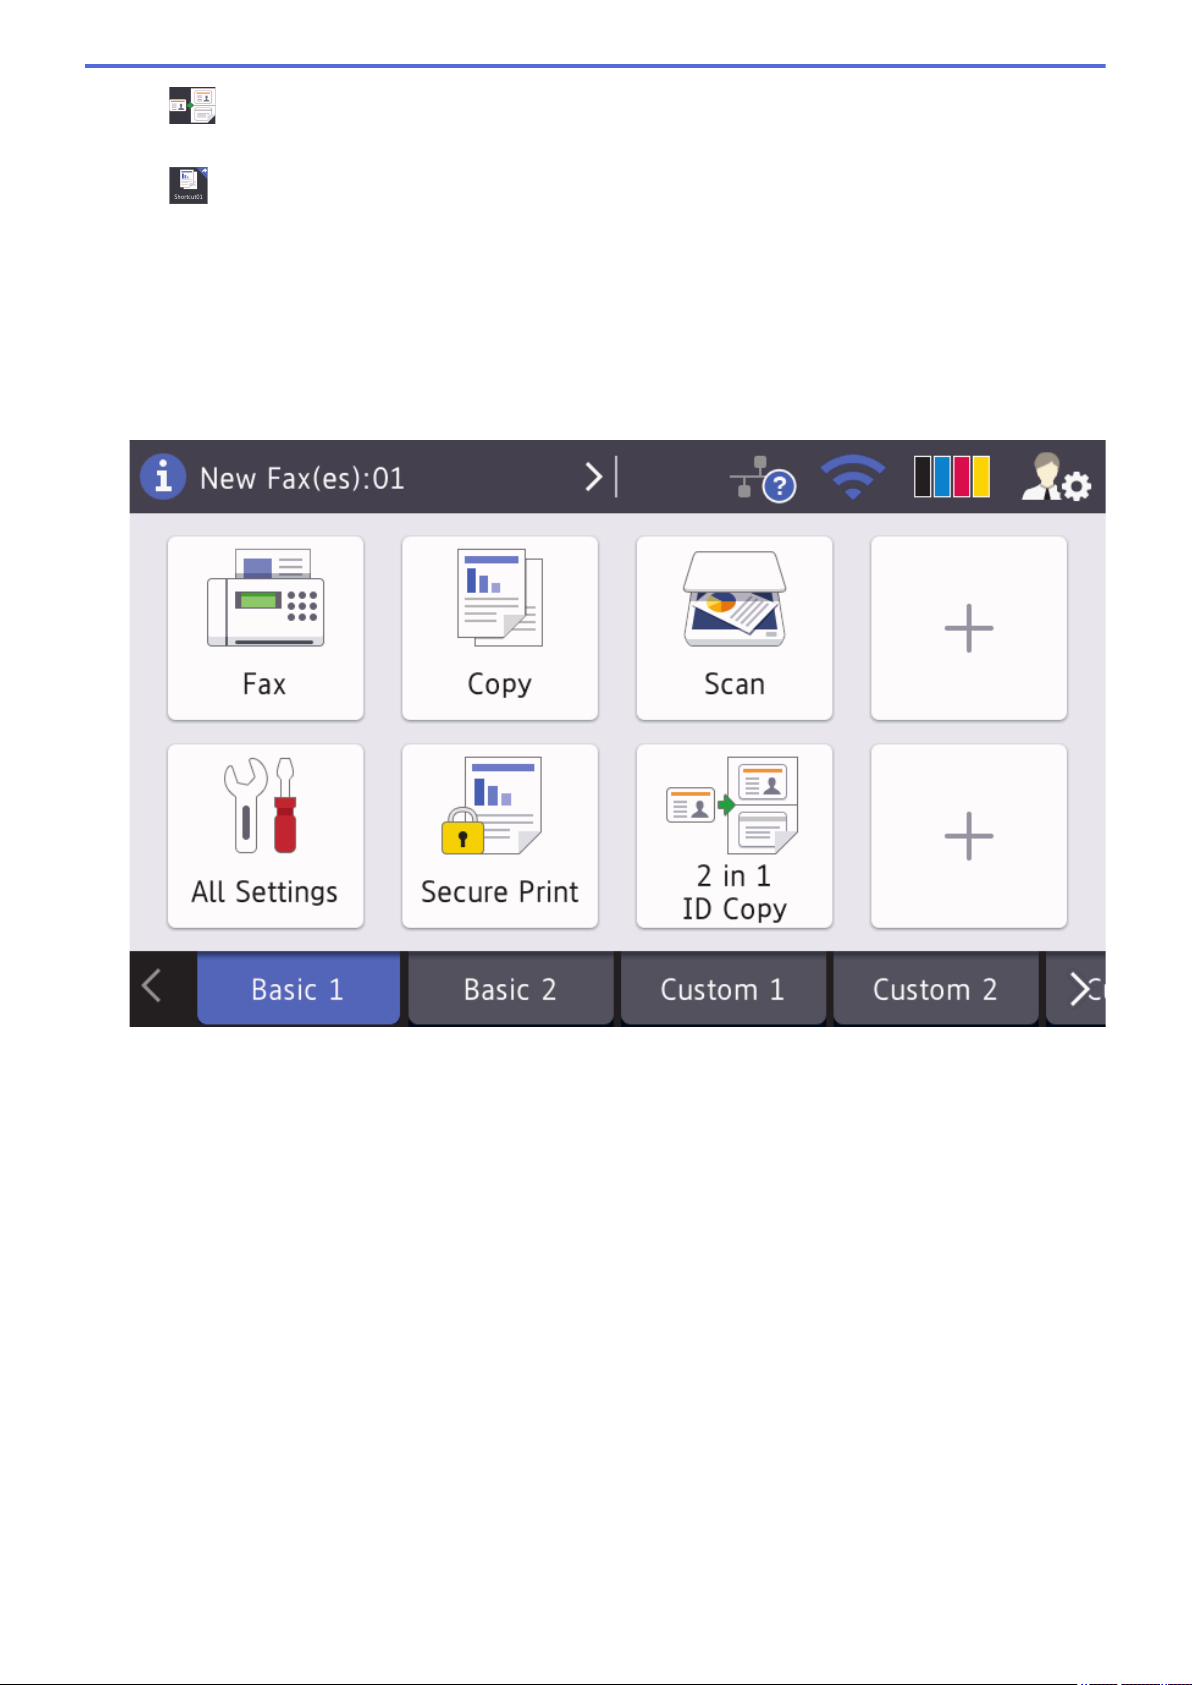
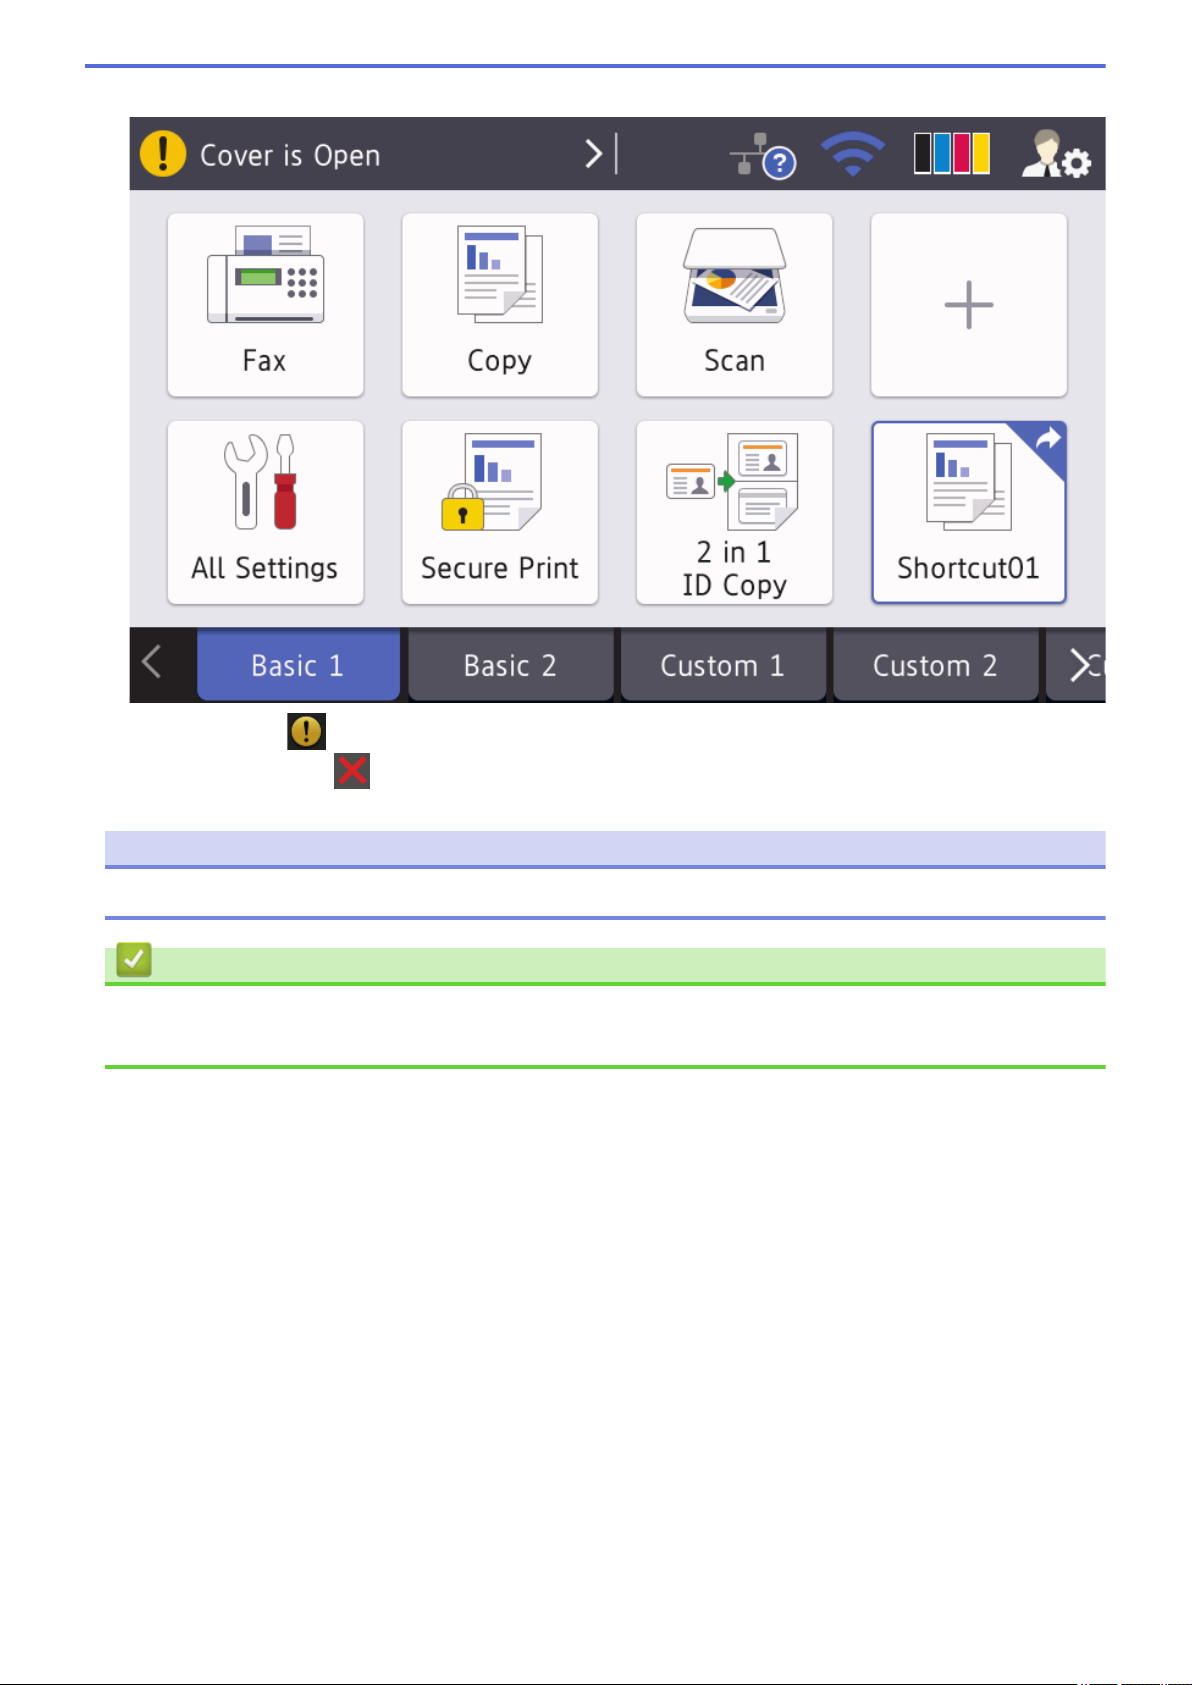
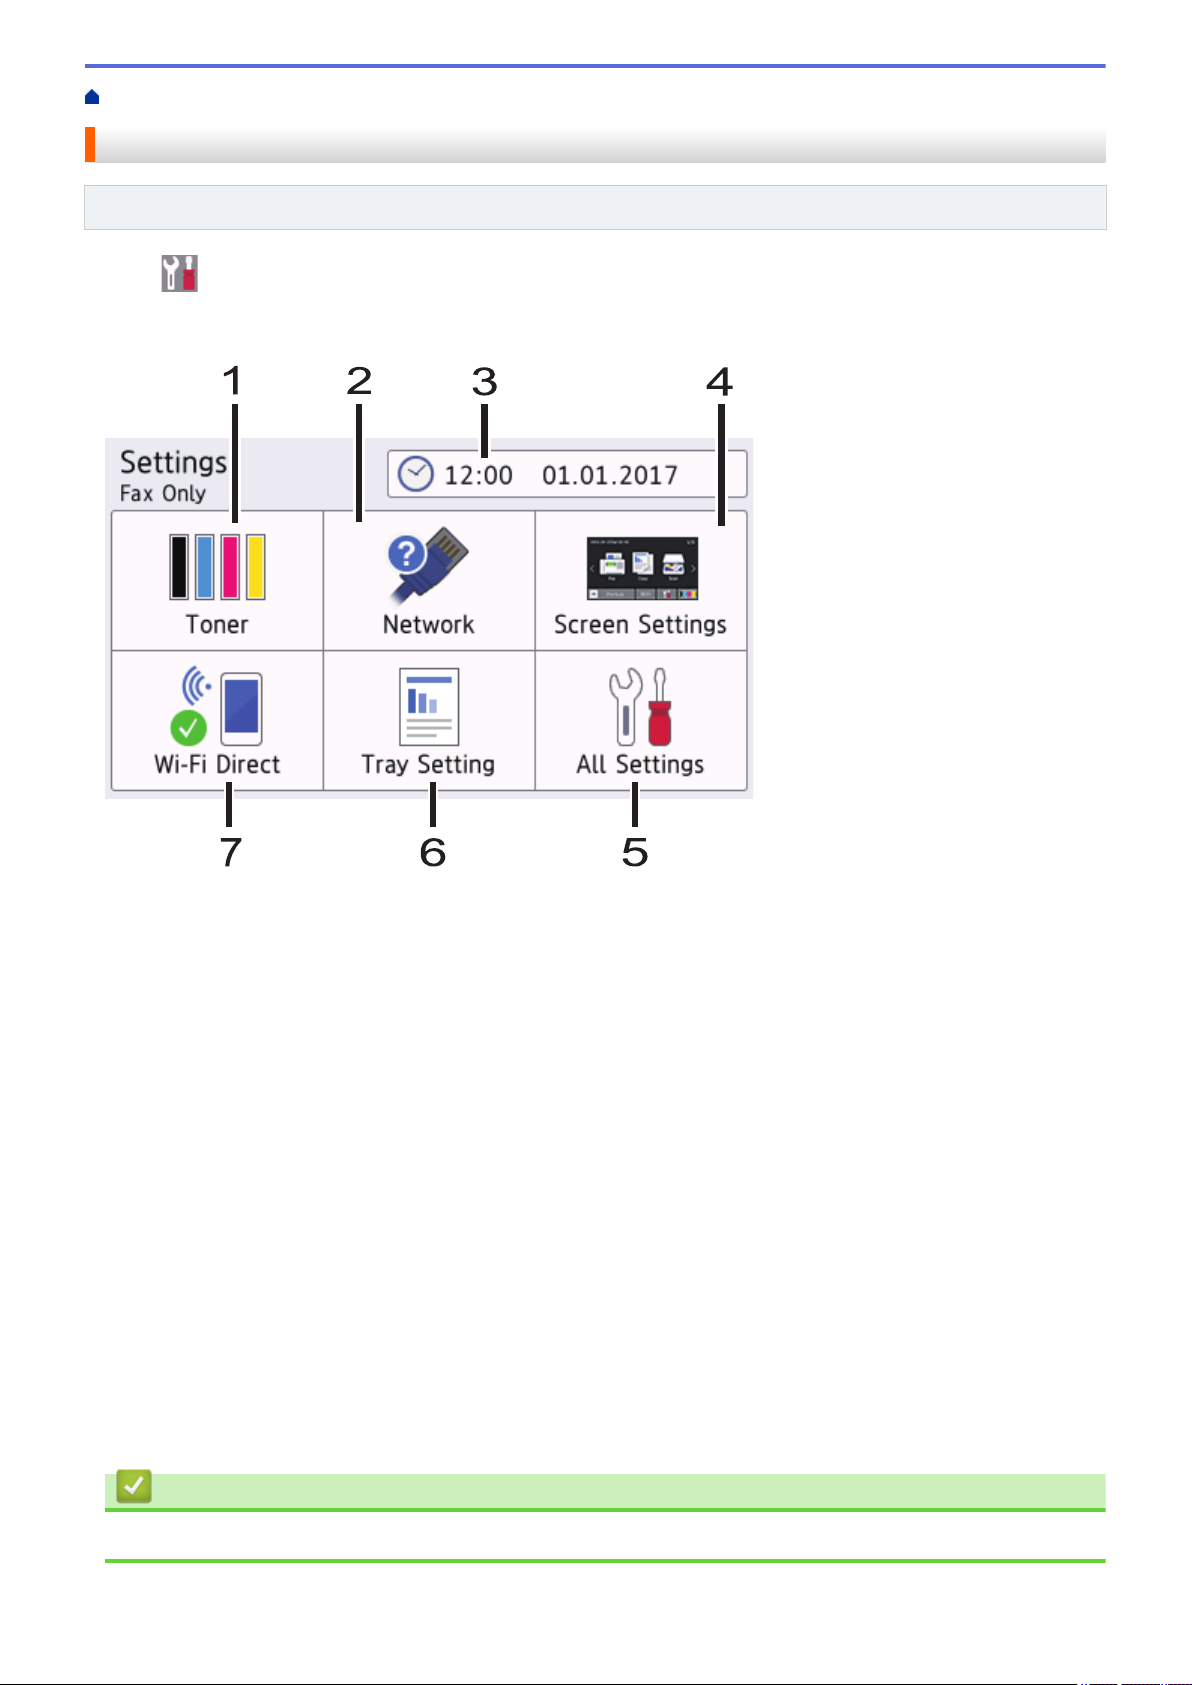
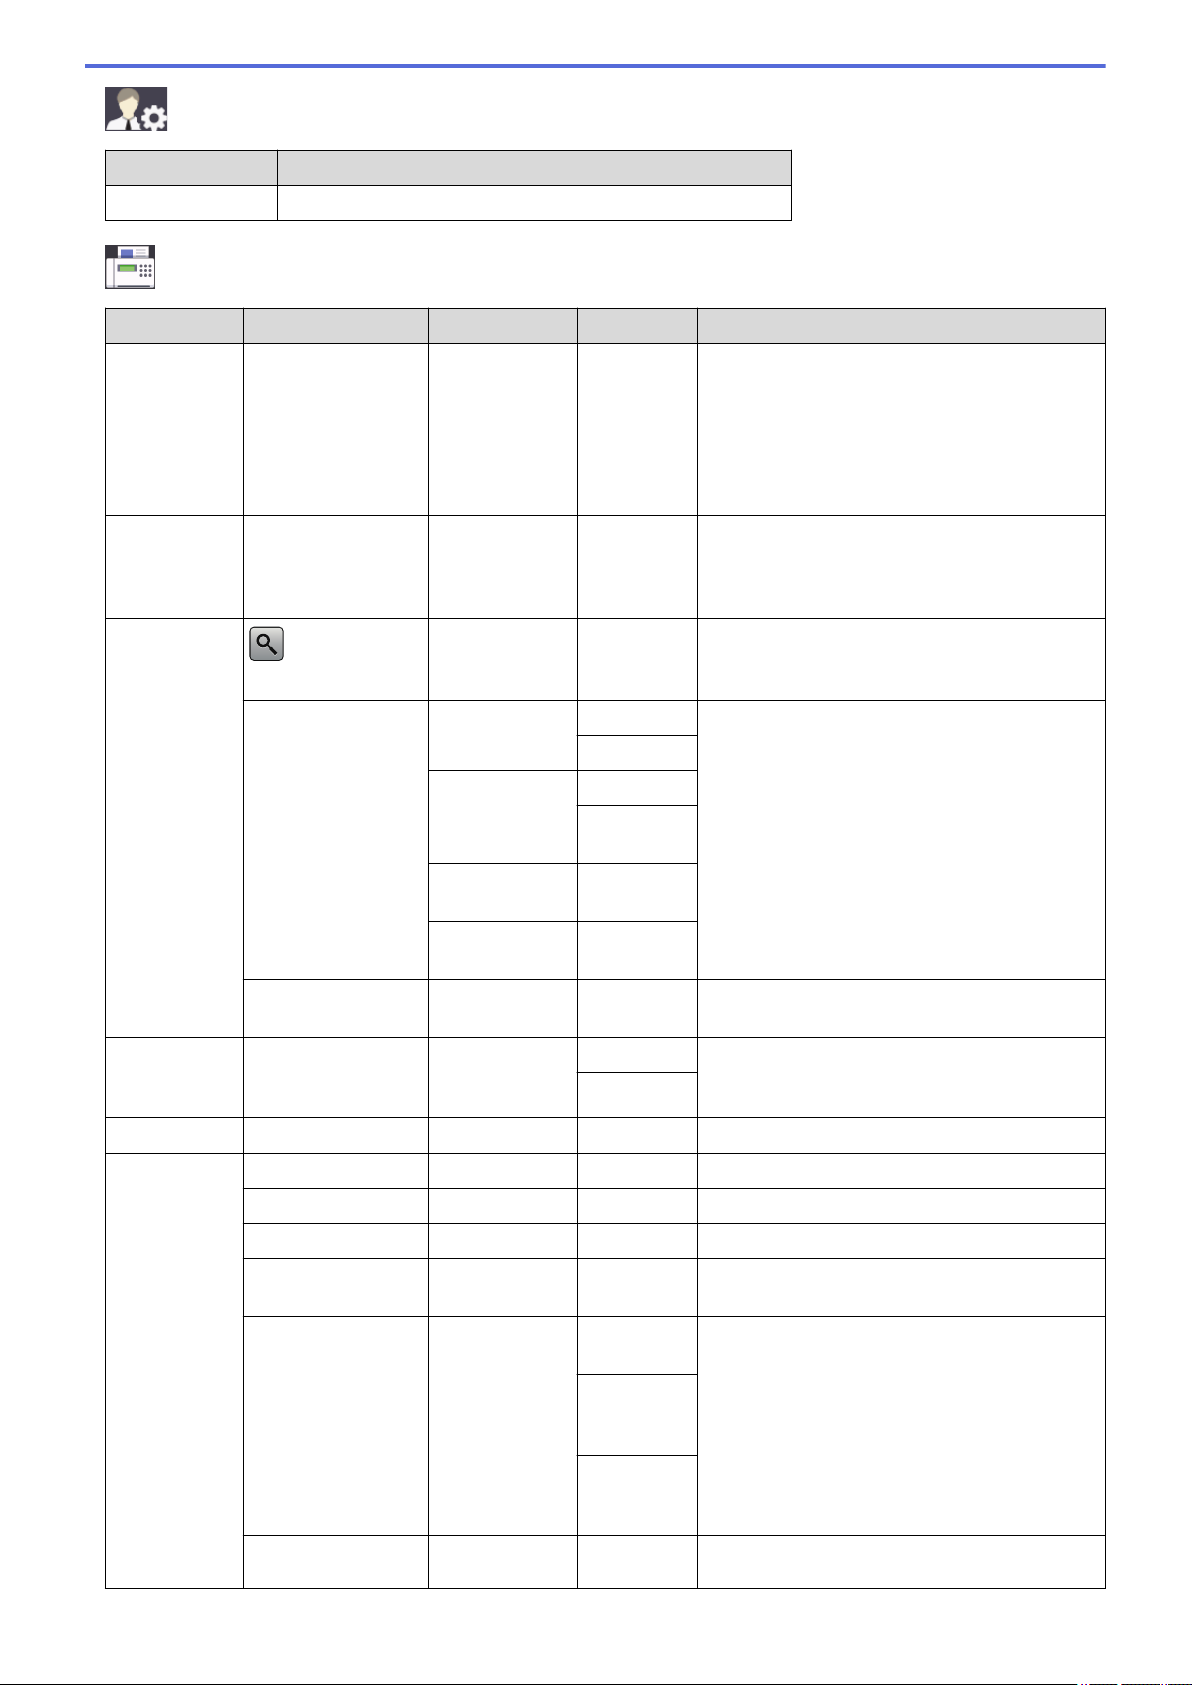
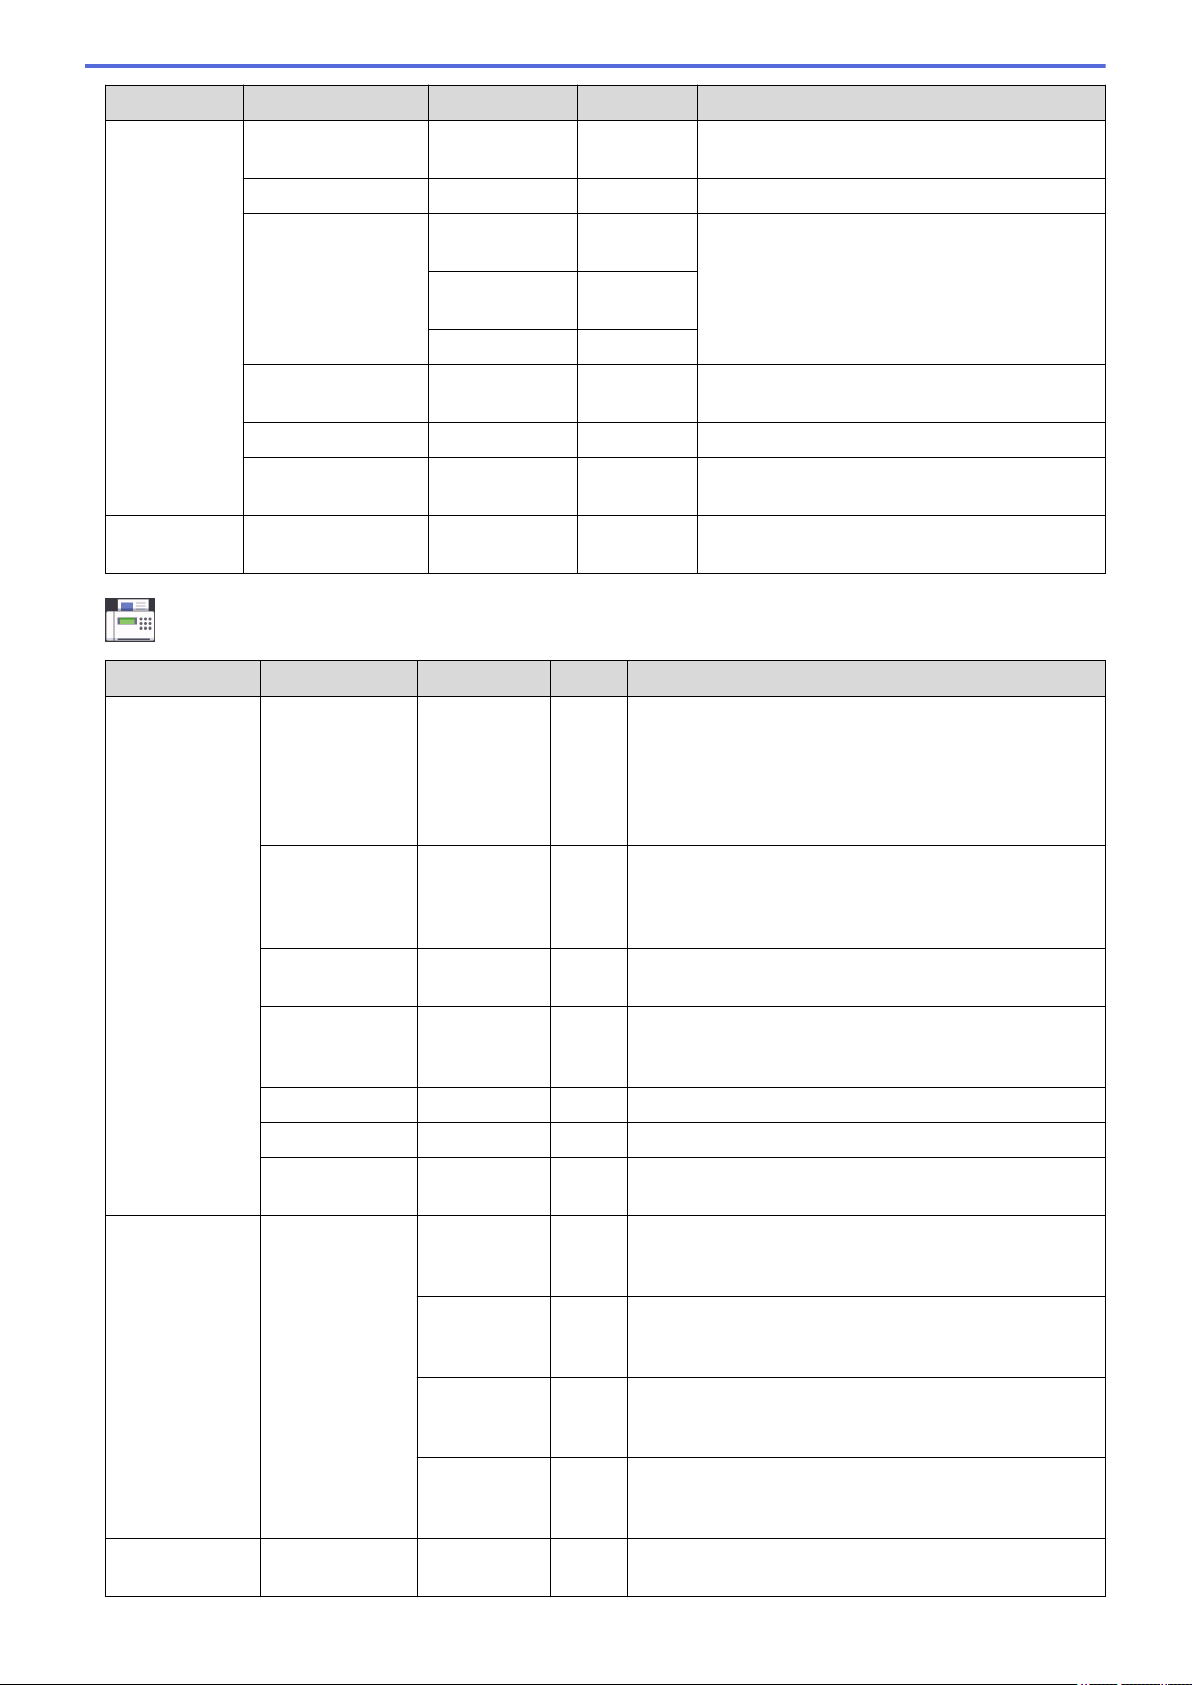
Control Panel Overview.................................................................................................................................7
Load and Print Using the Paper Tray.................................................................................................26
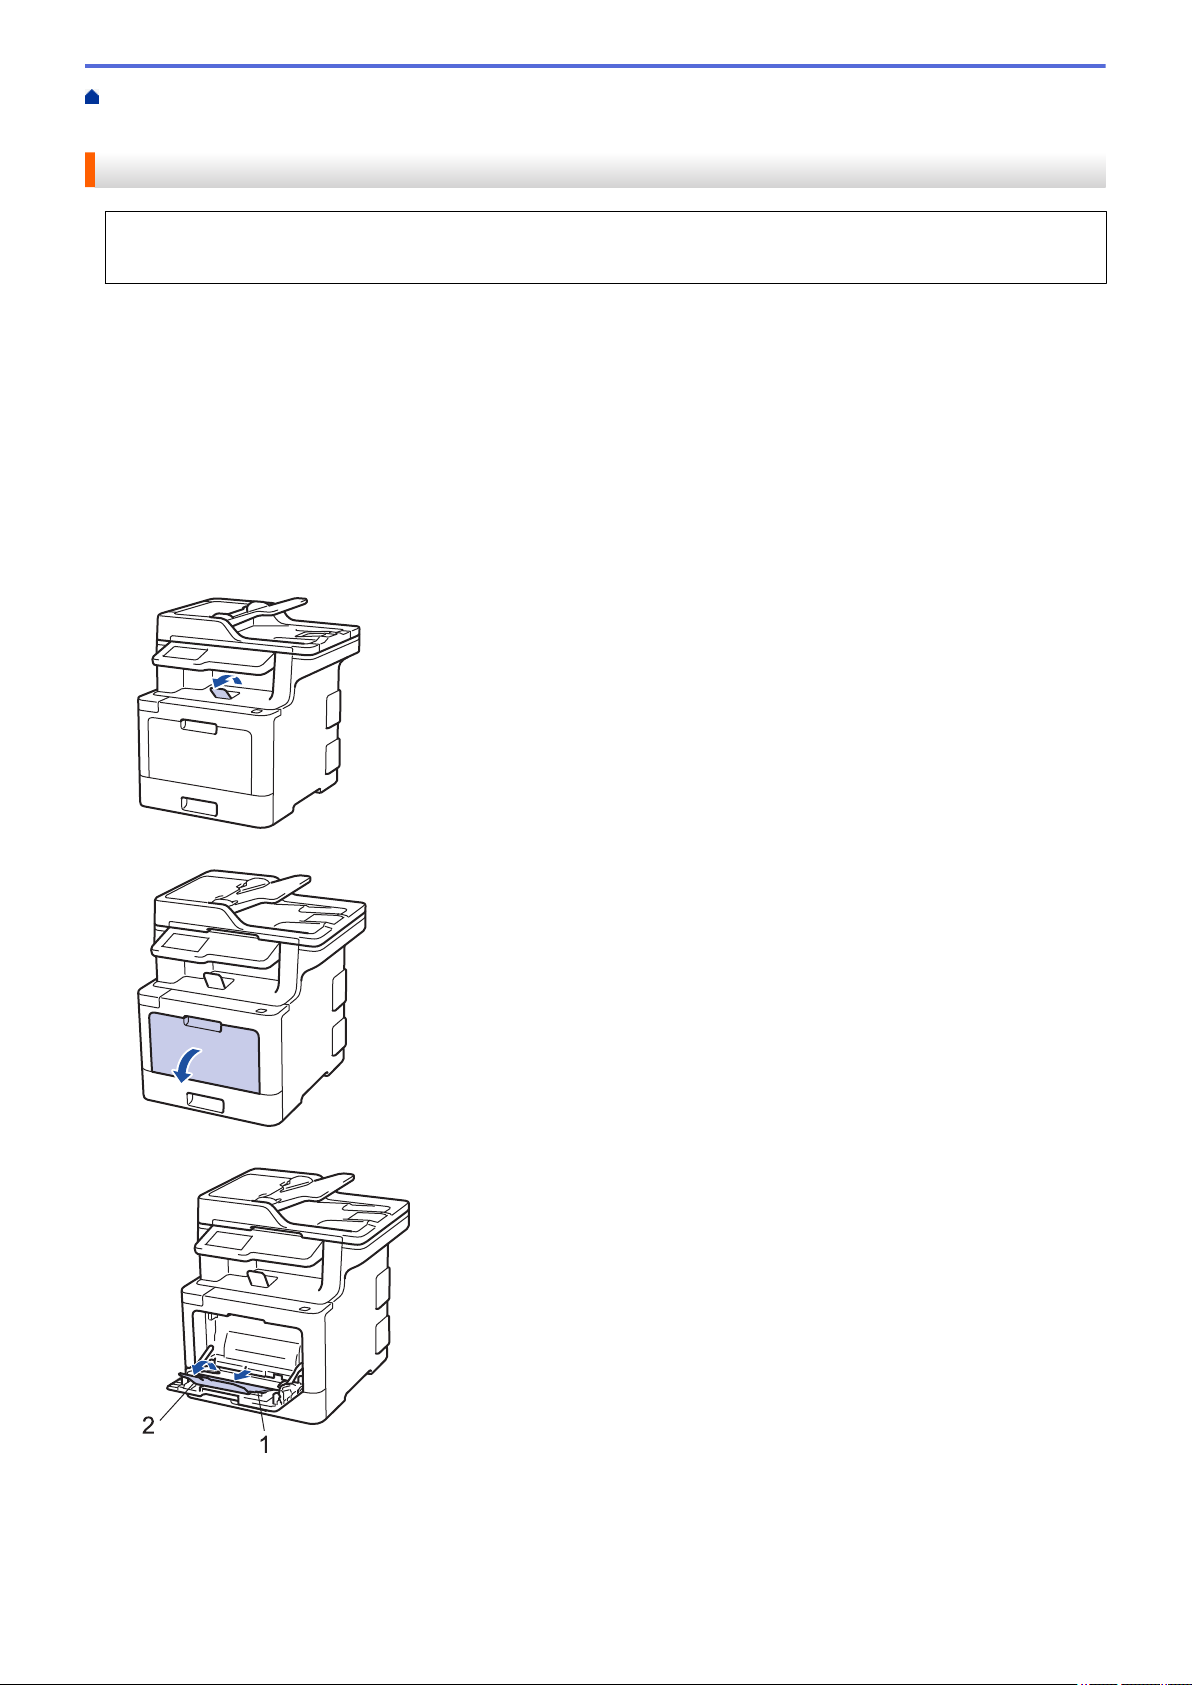
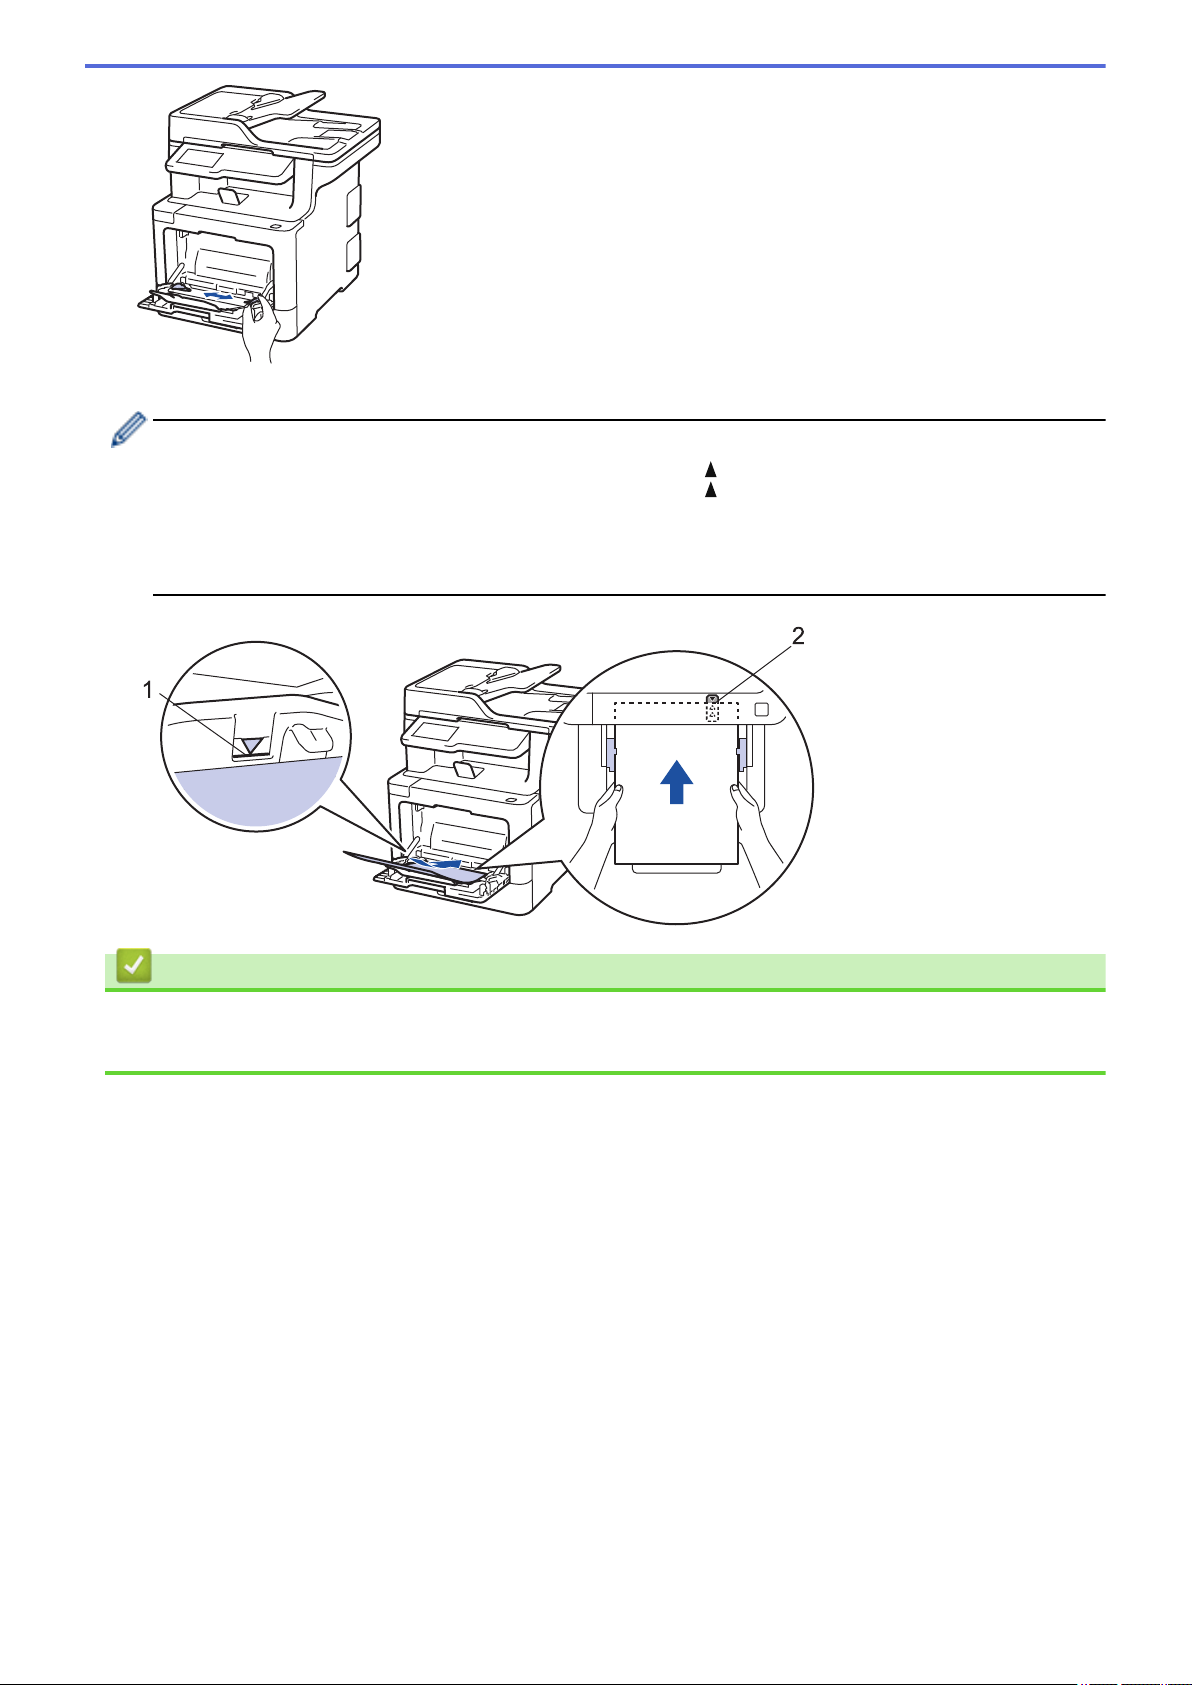
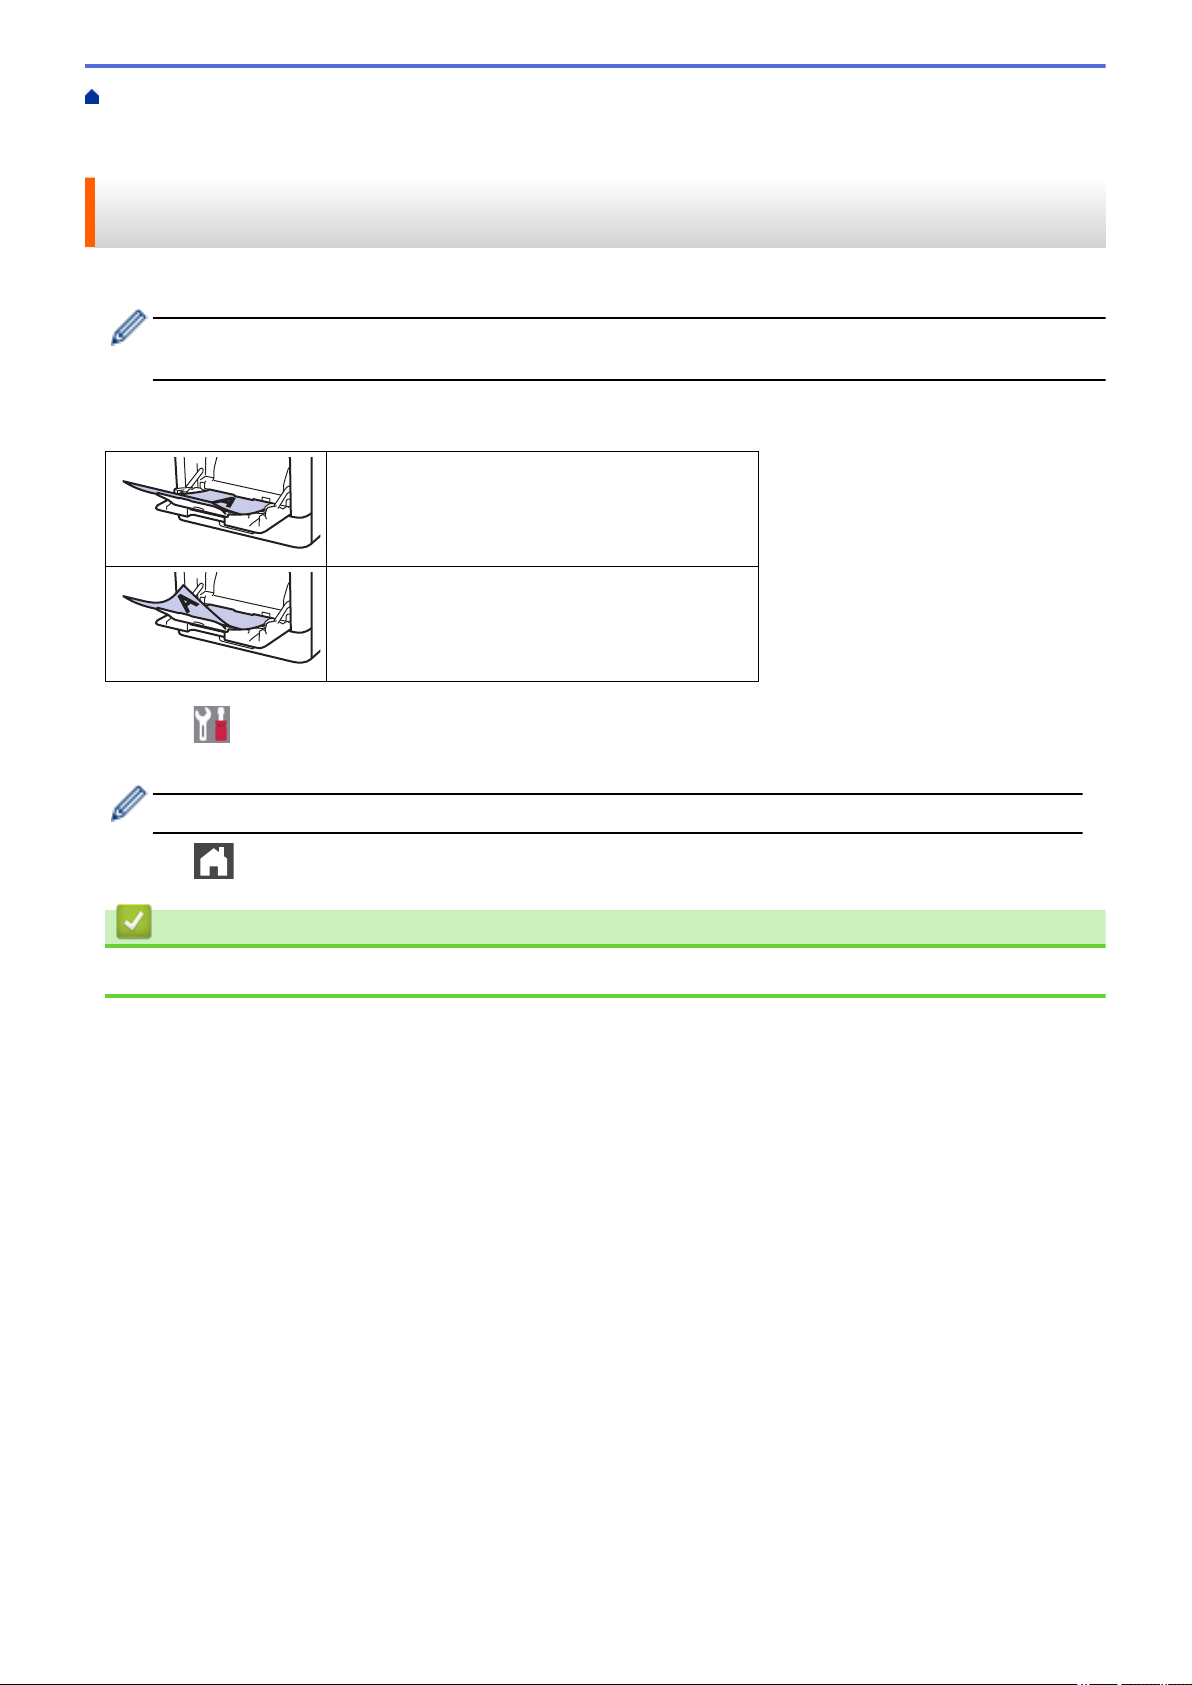
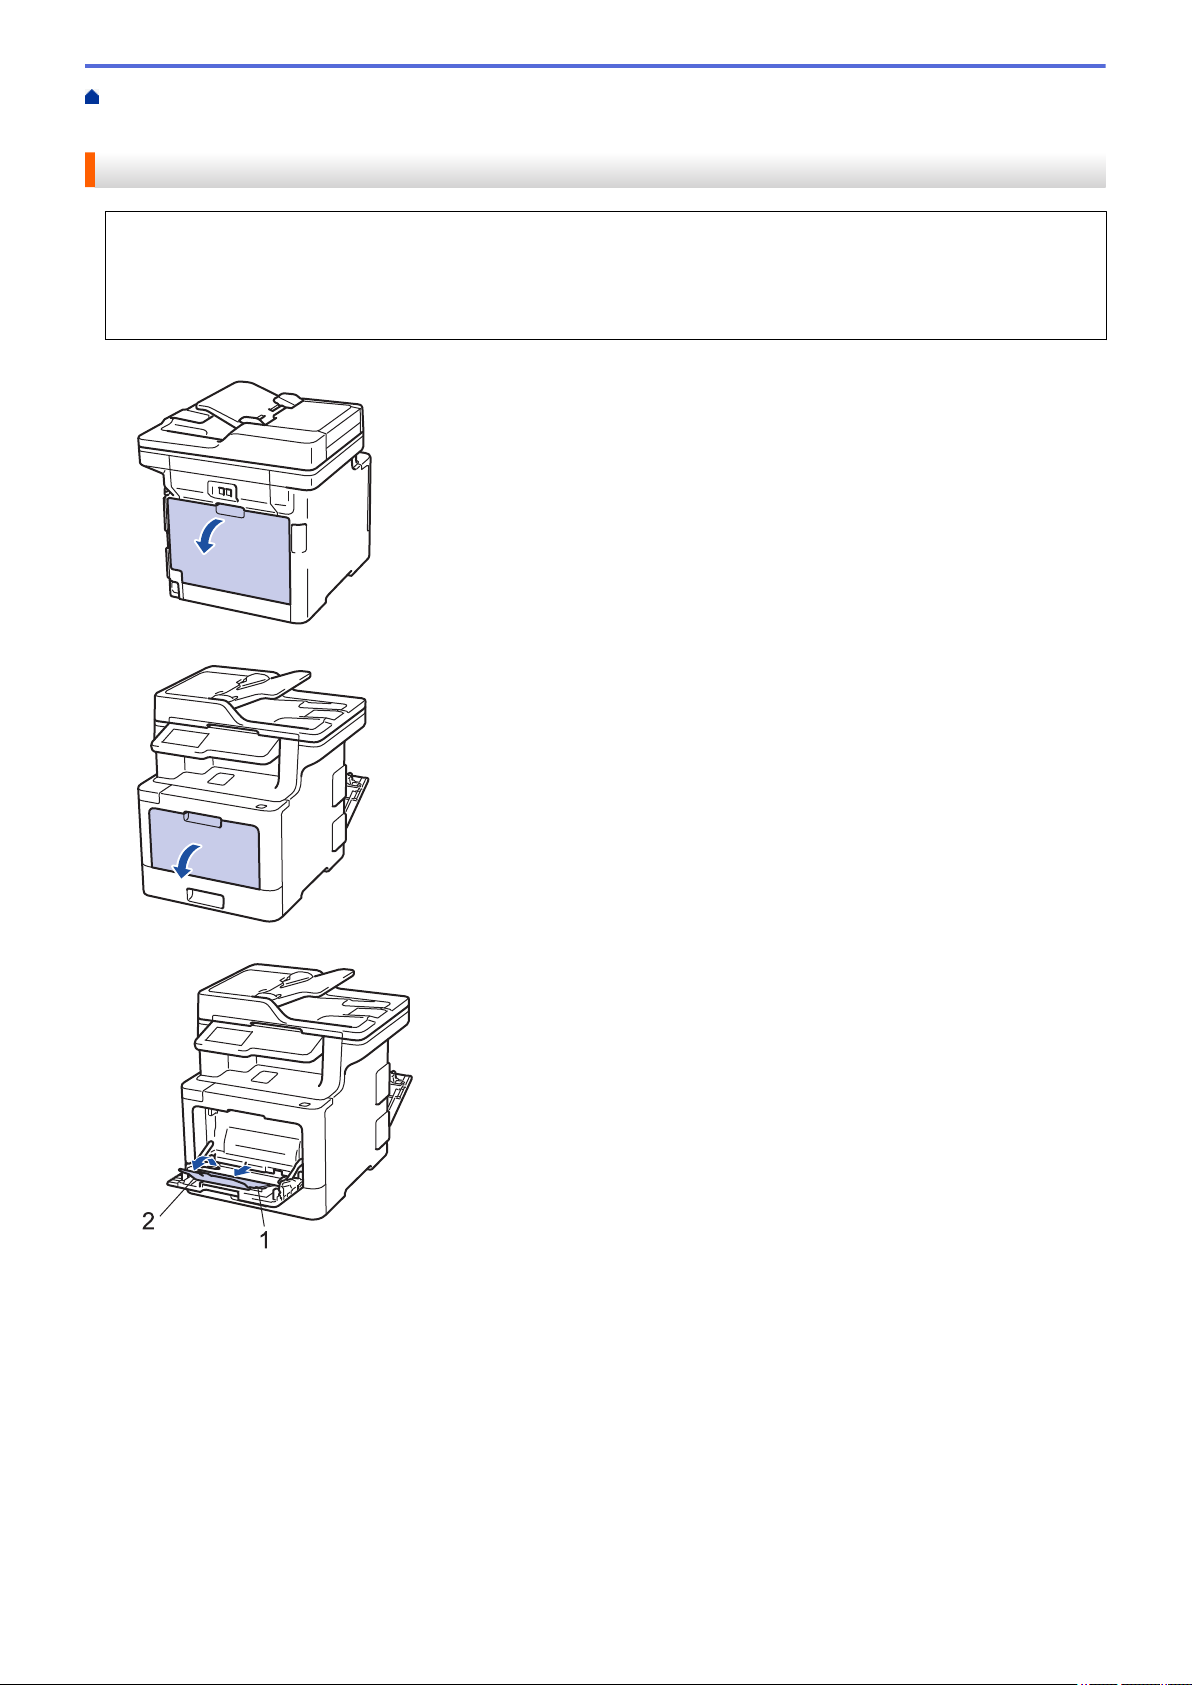
Load and Print Using the Multi‑purpose Tray (MP Tray)....................................................................30
Paper Settings..............................................................................................................................................39
Change the Paper Size and Paper Type............................................................................................40
Select the Tray to Be Used For Printing.............................................................................................41
Change the Check Paper Size Setting...............................................................................................42
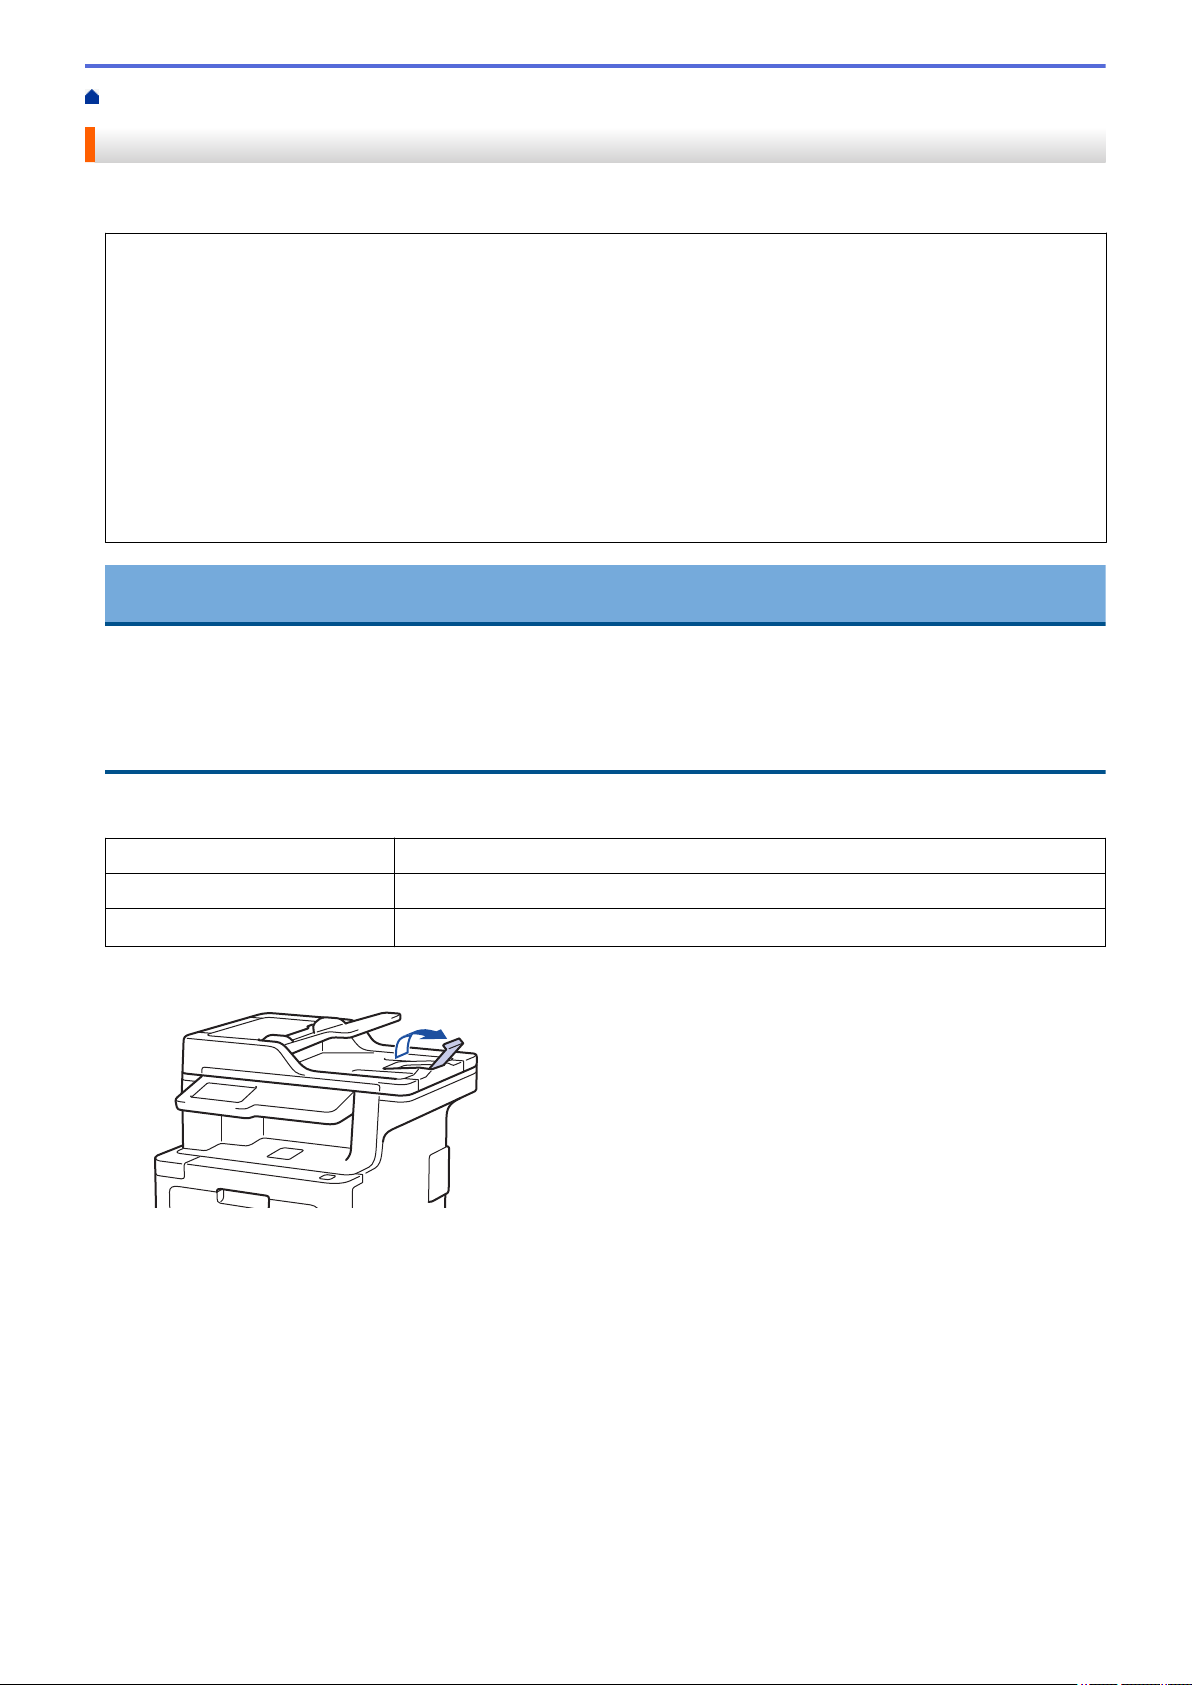
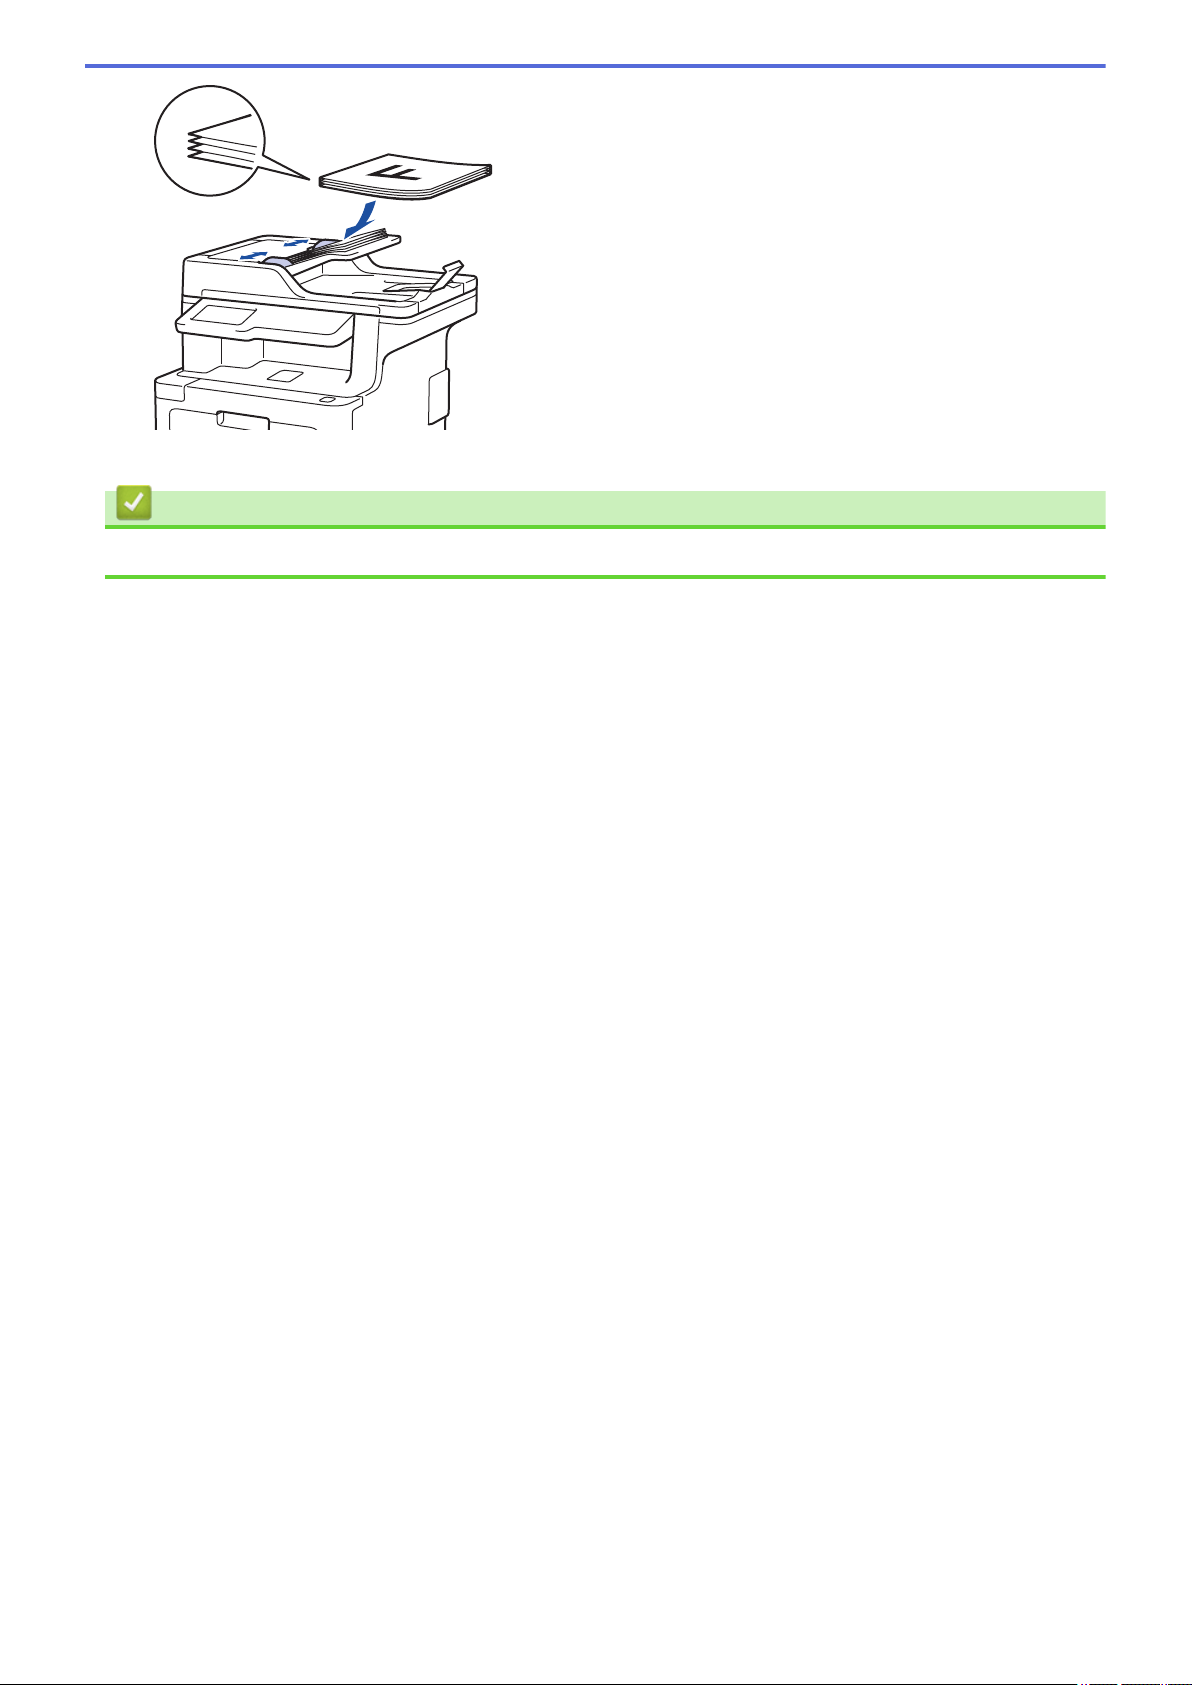
Load Documents in the Automatic Document Feeder (ADF).............................................................45
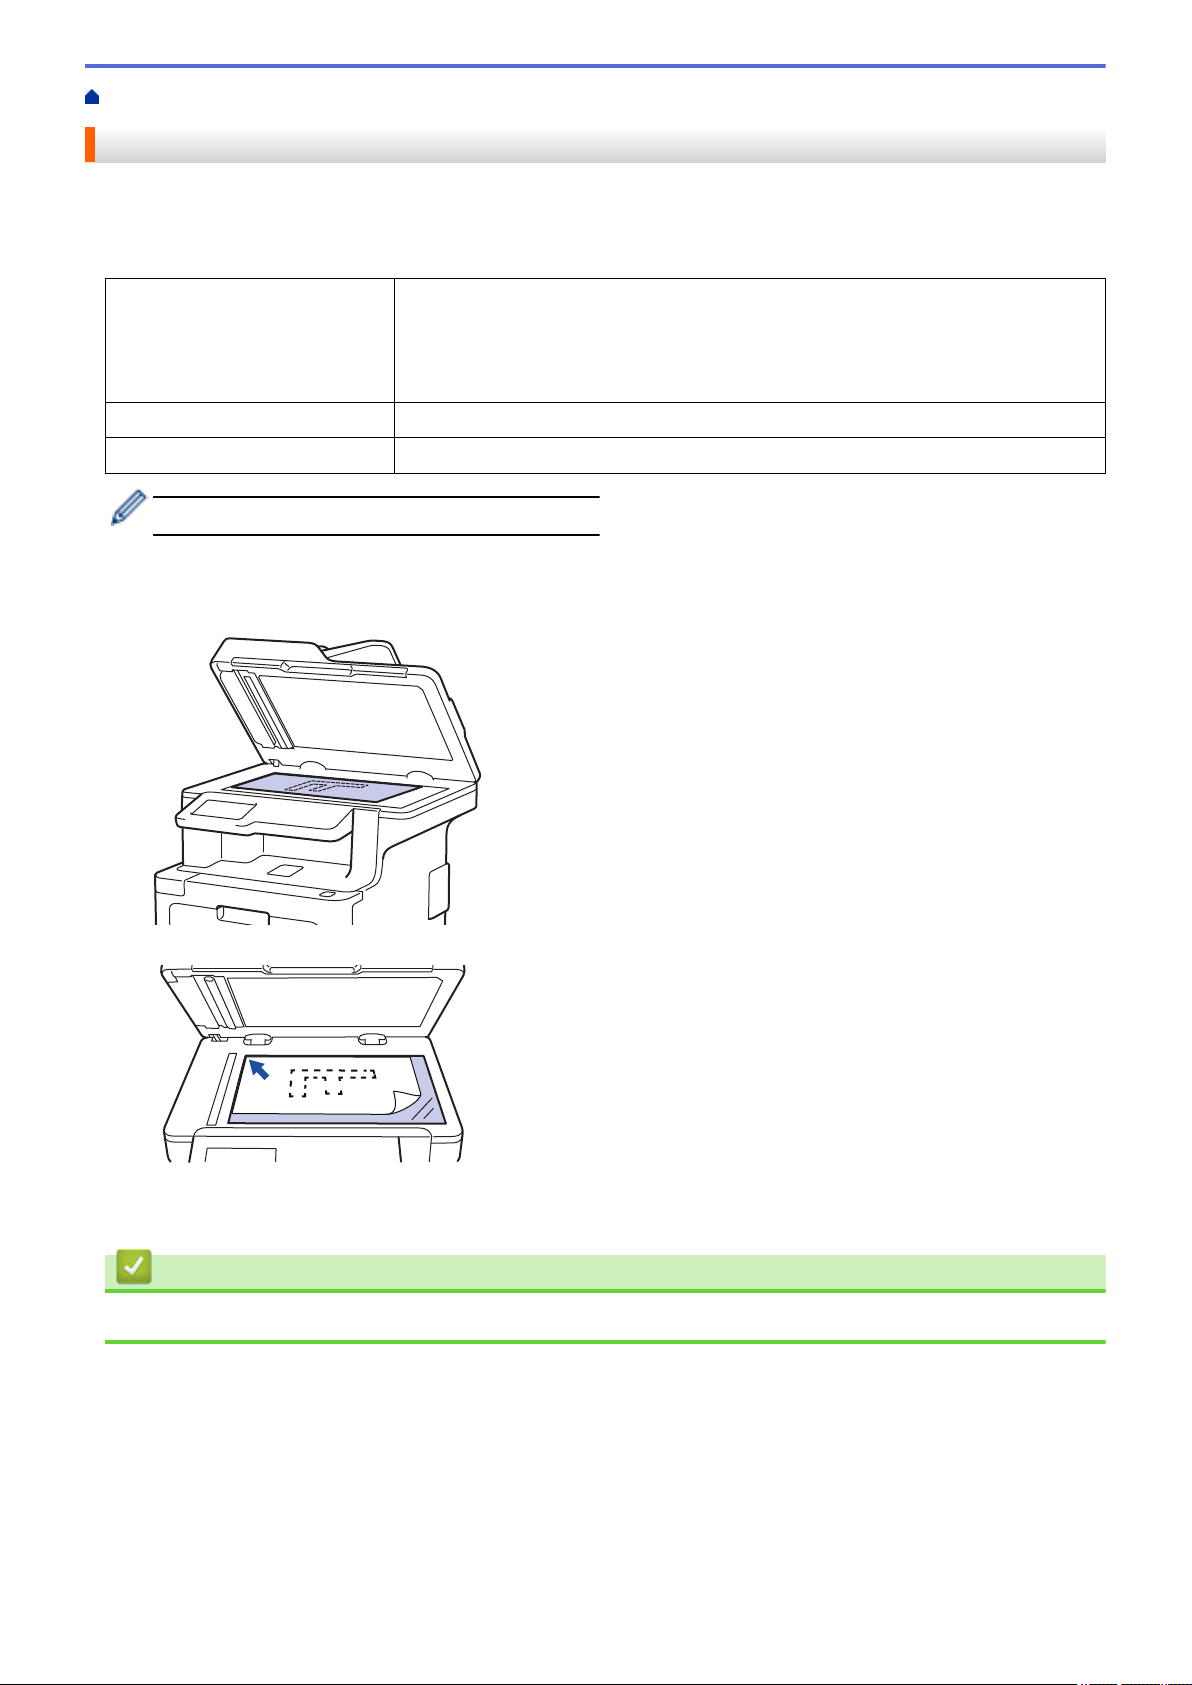
Load Documents on the Scanner Glass.............................................................................................47
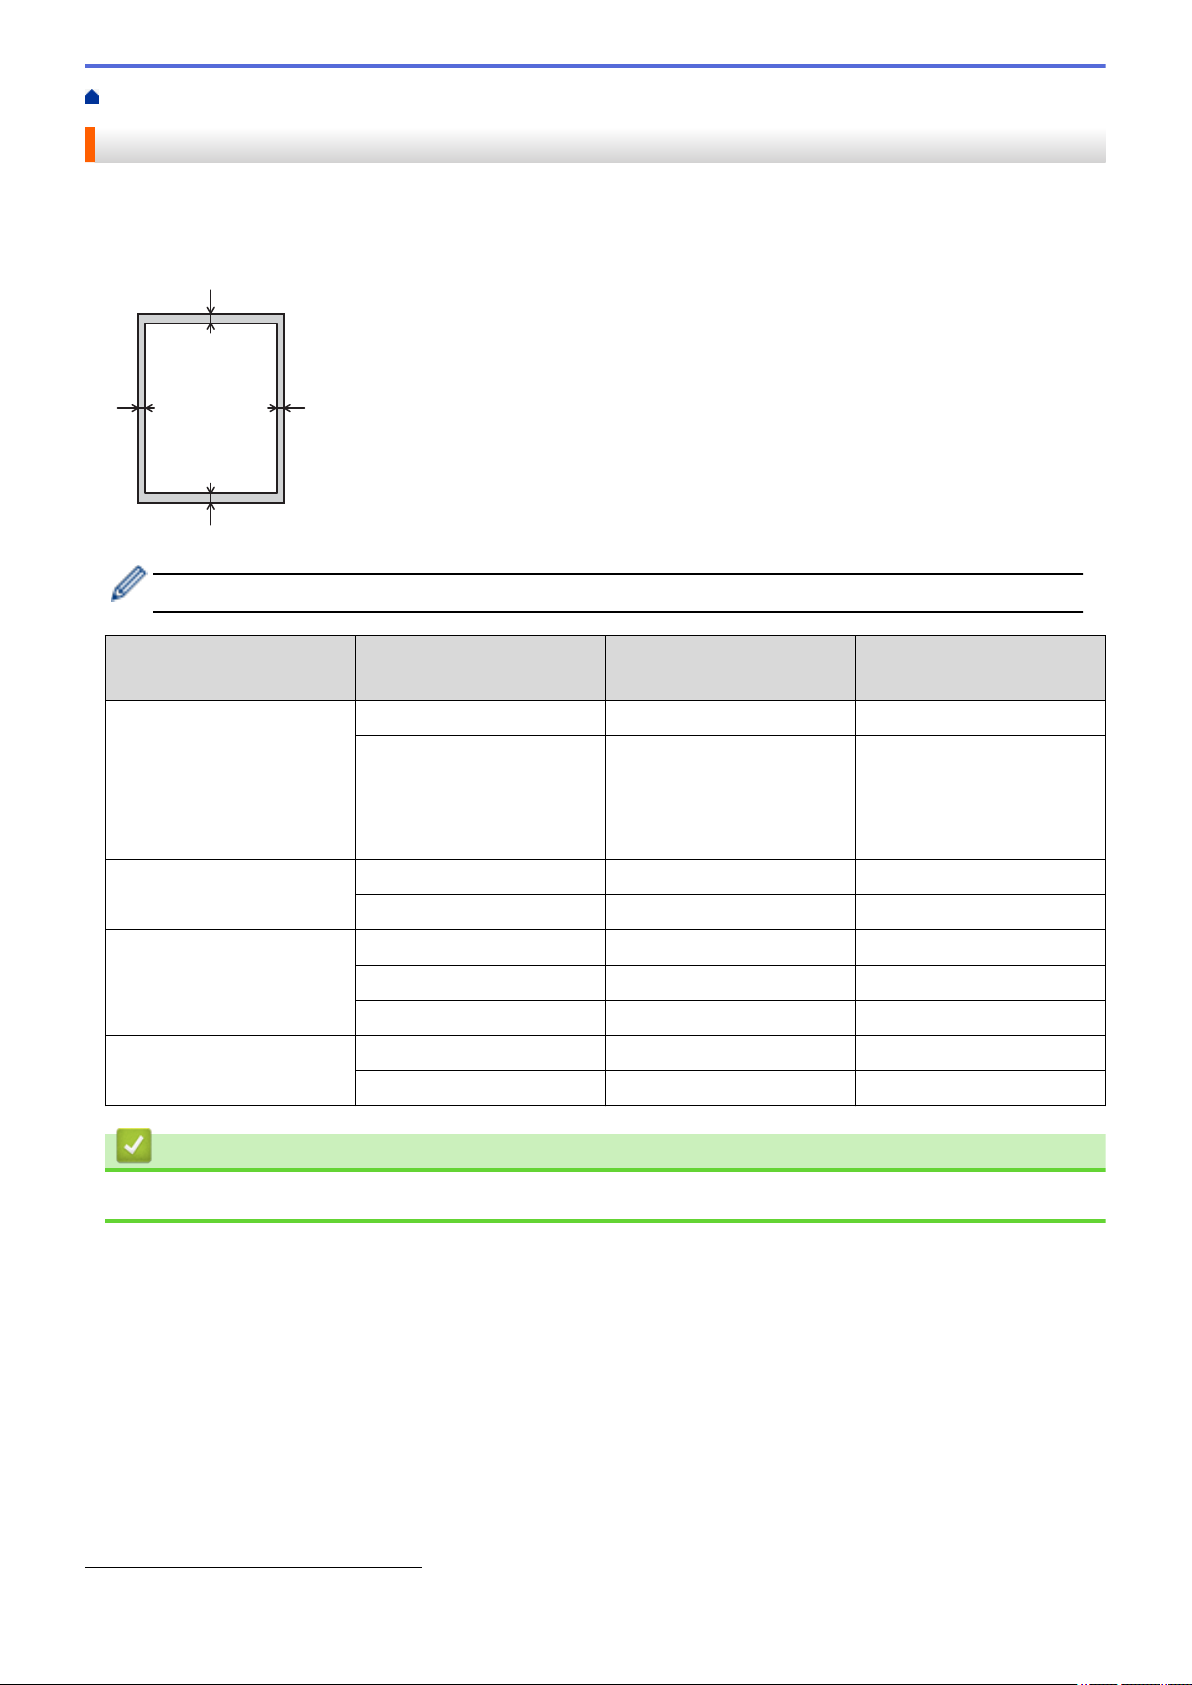
Unscannable and Unprintable Areas...........................................................................................................48
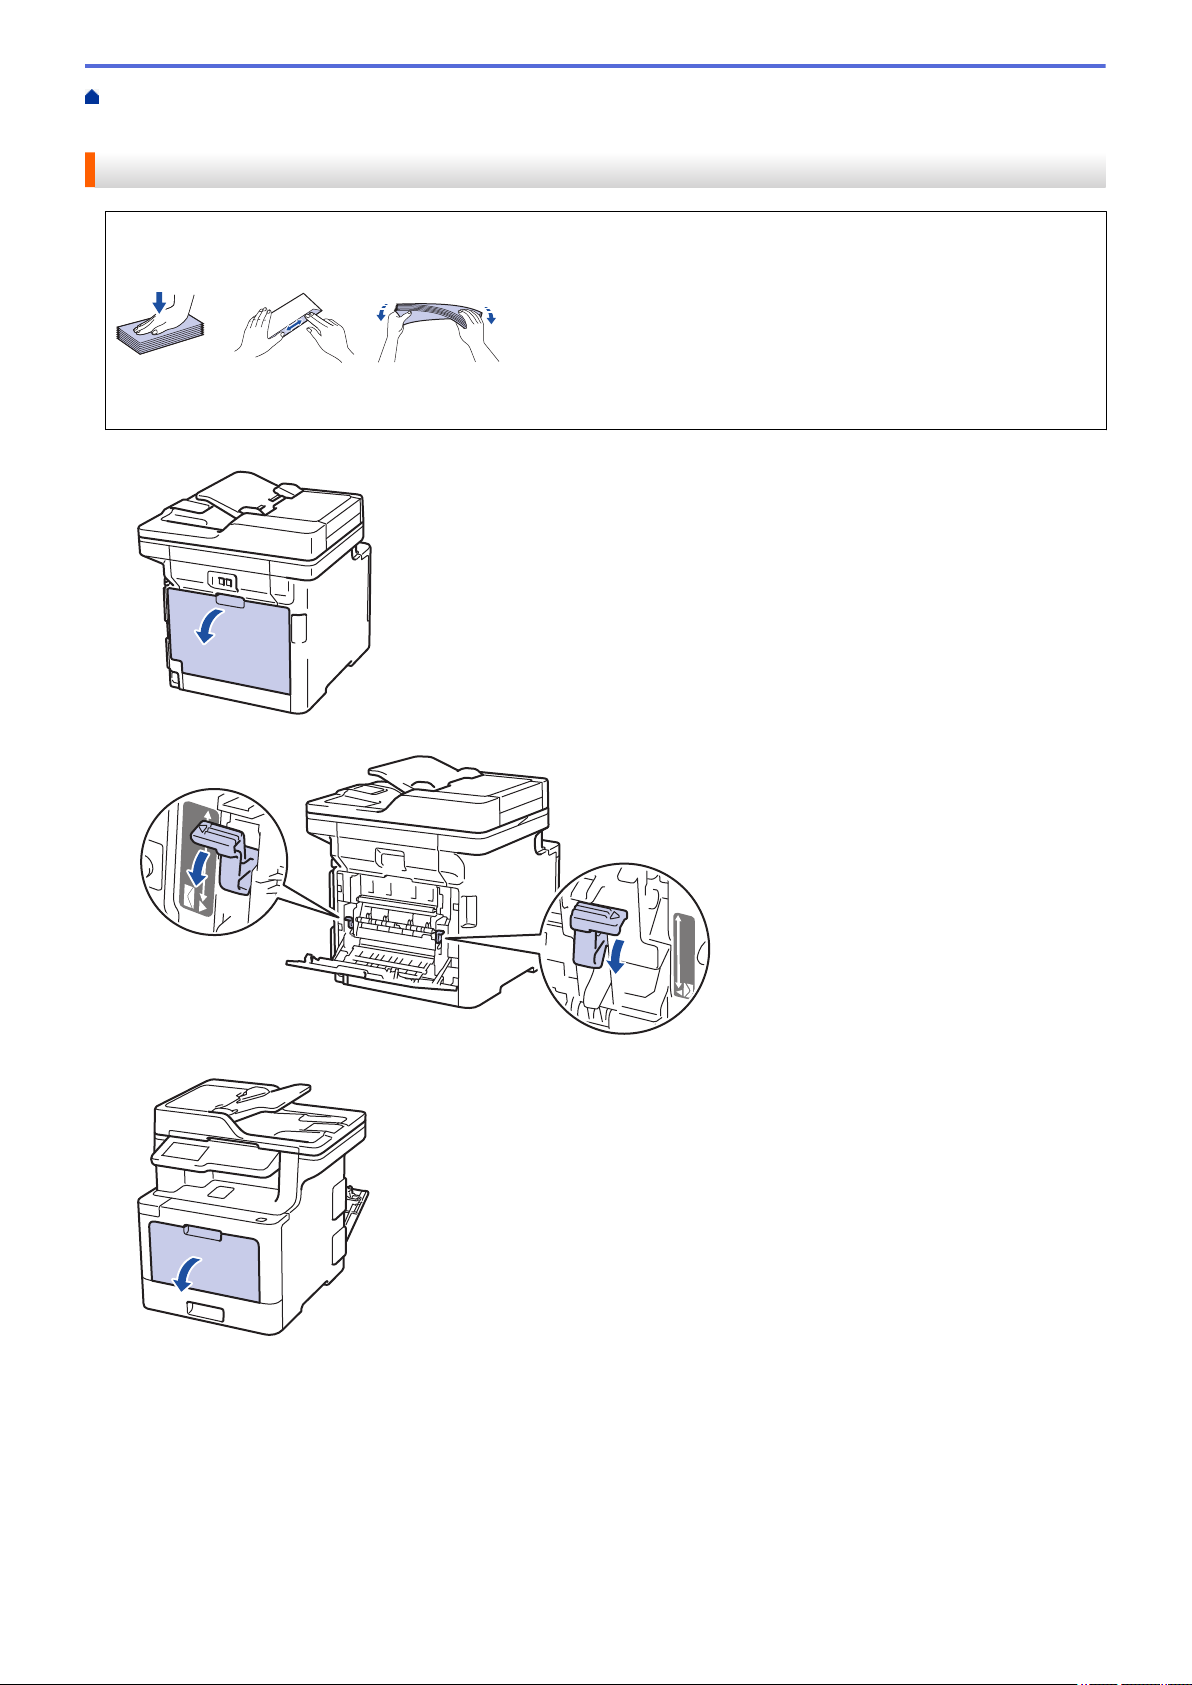
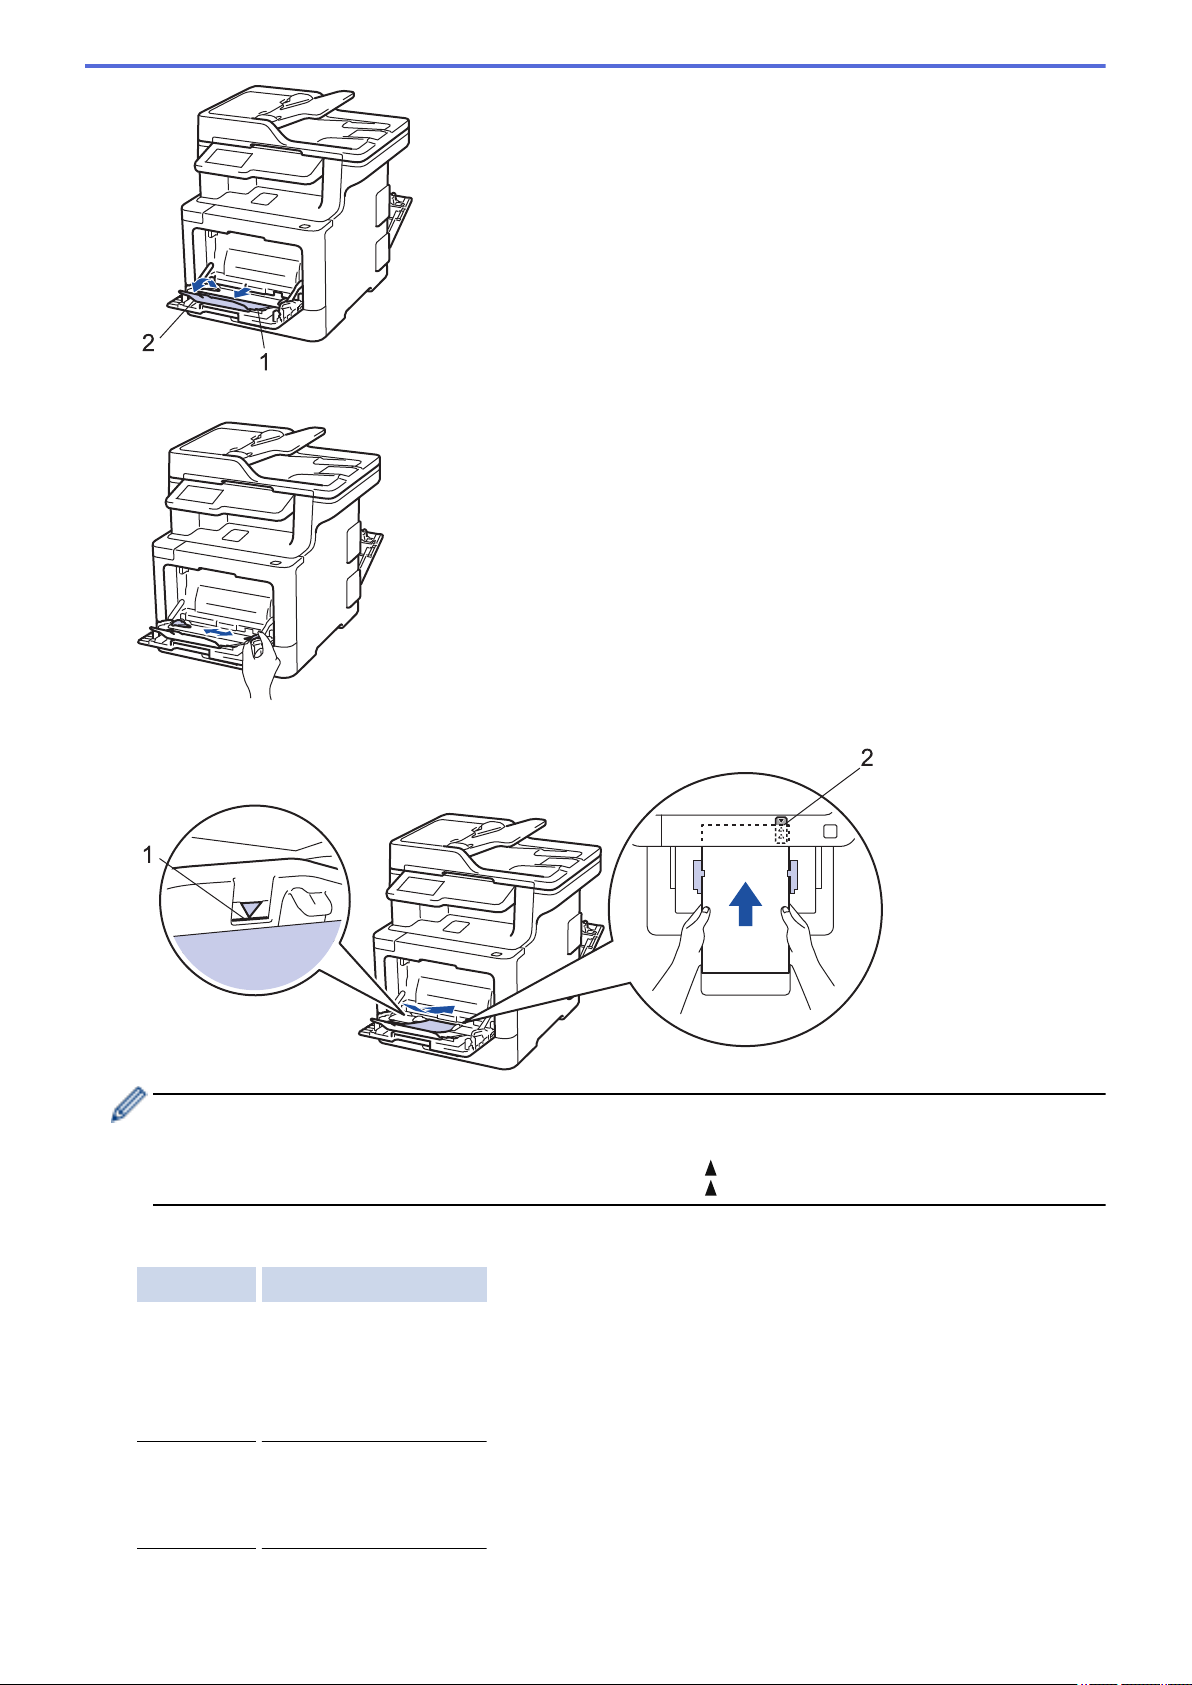
Using Special Paper.....................................................................................................................................49
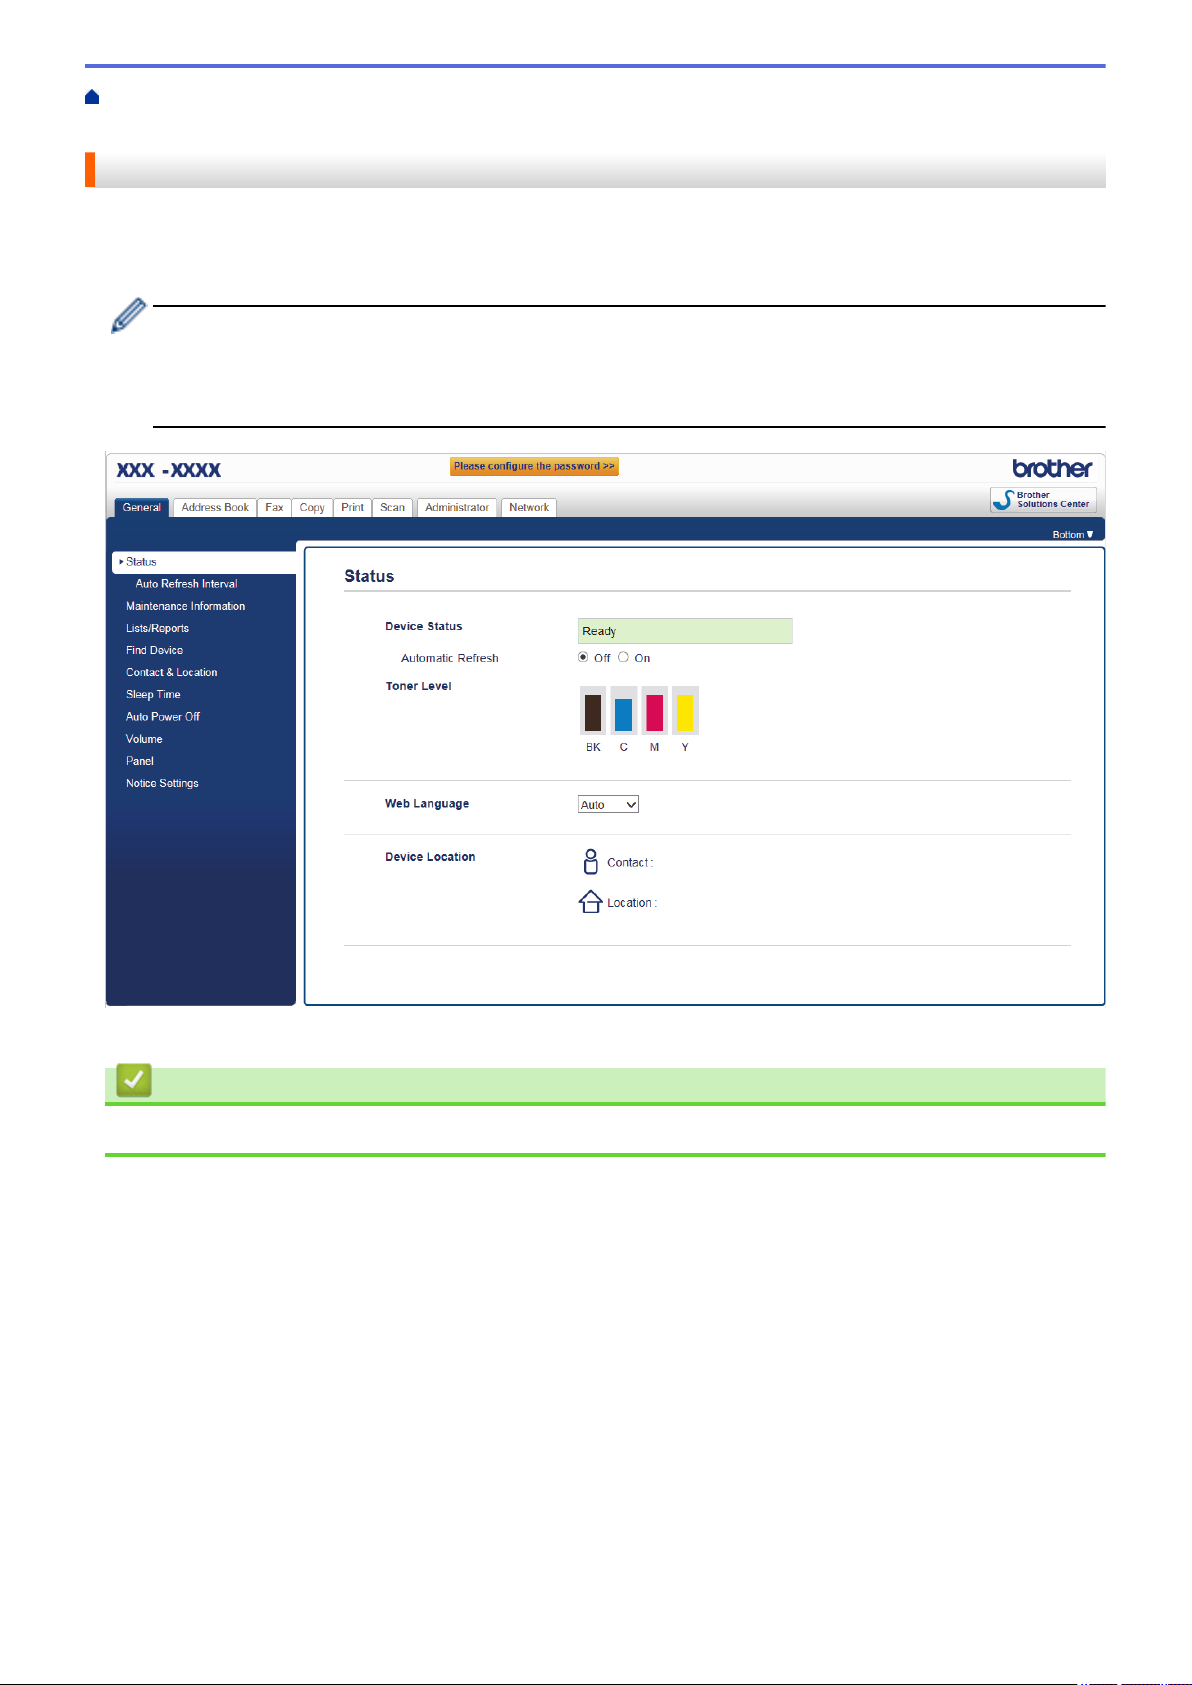
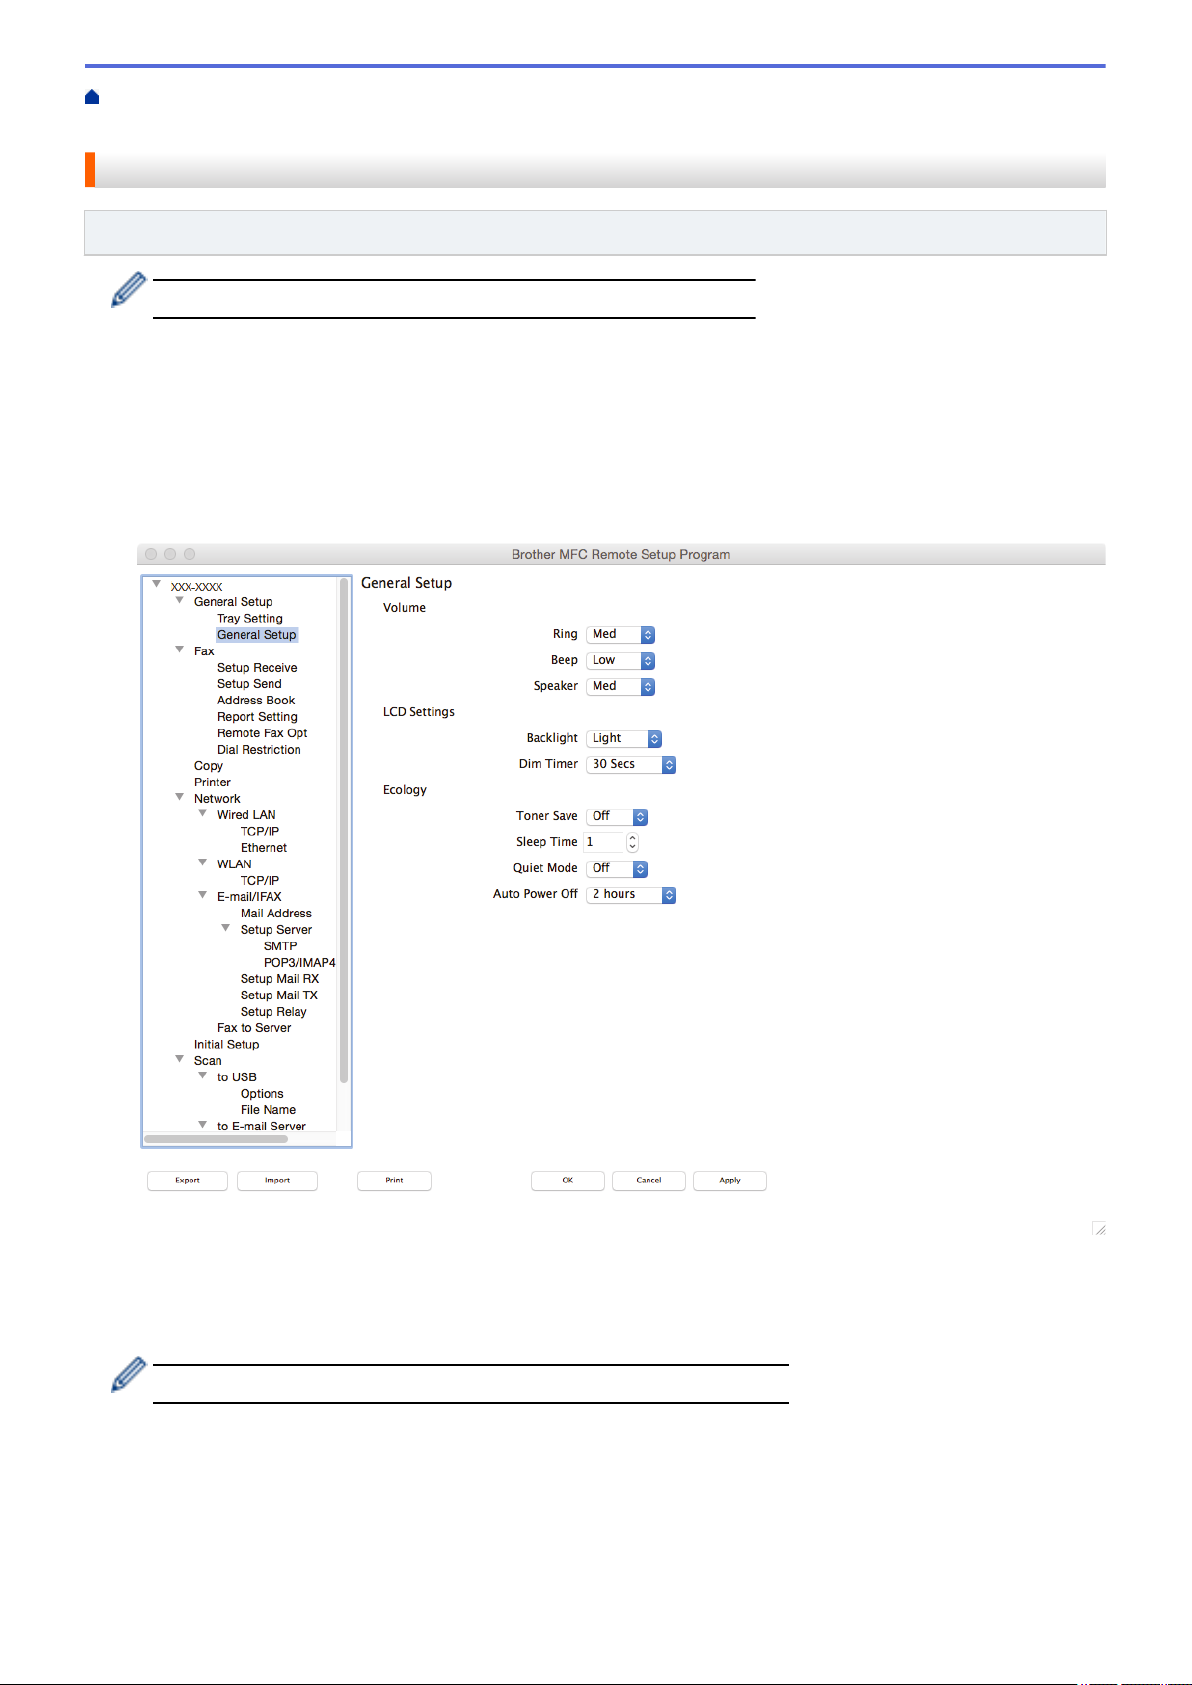
Monitor the Status of the Machine from Your Computer (Mac)..........................................................73
Home > Table of Contents
i
Cancel a Print Job........................................................................................................................................75
Test Print......................................................................................................................................................76
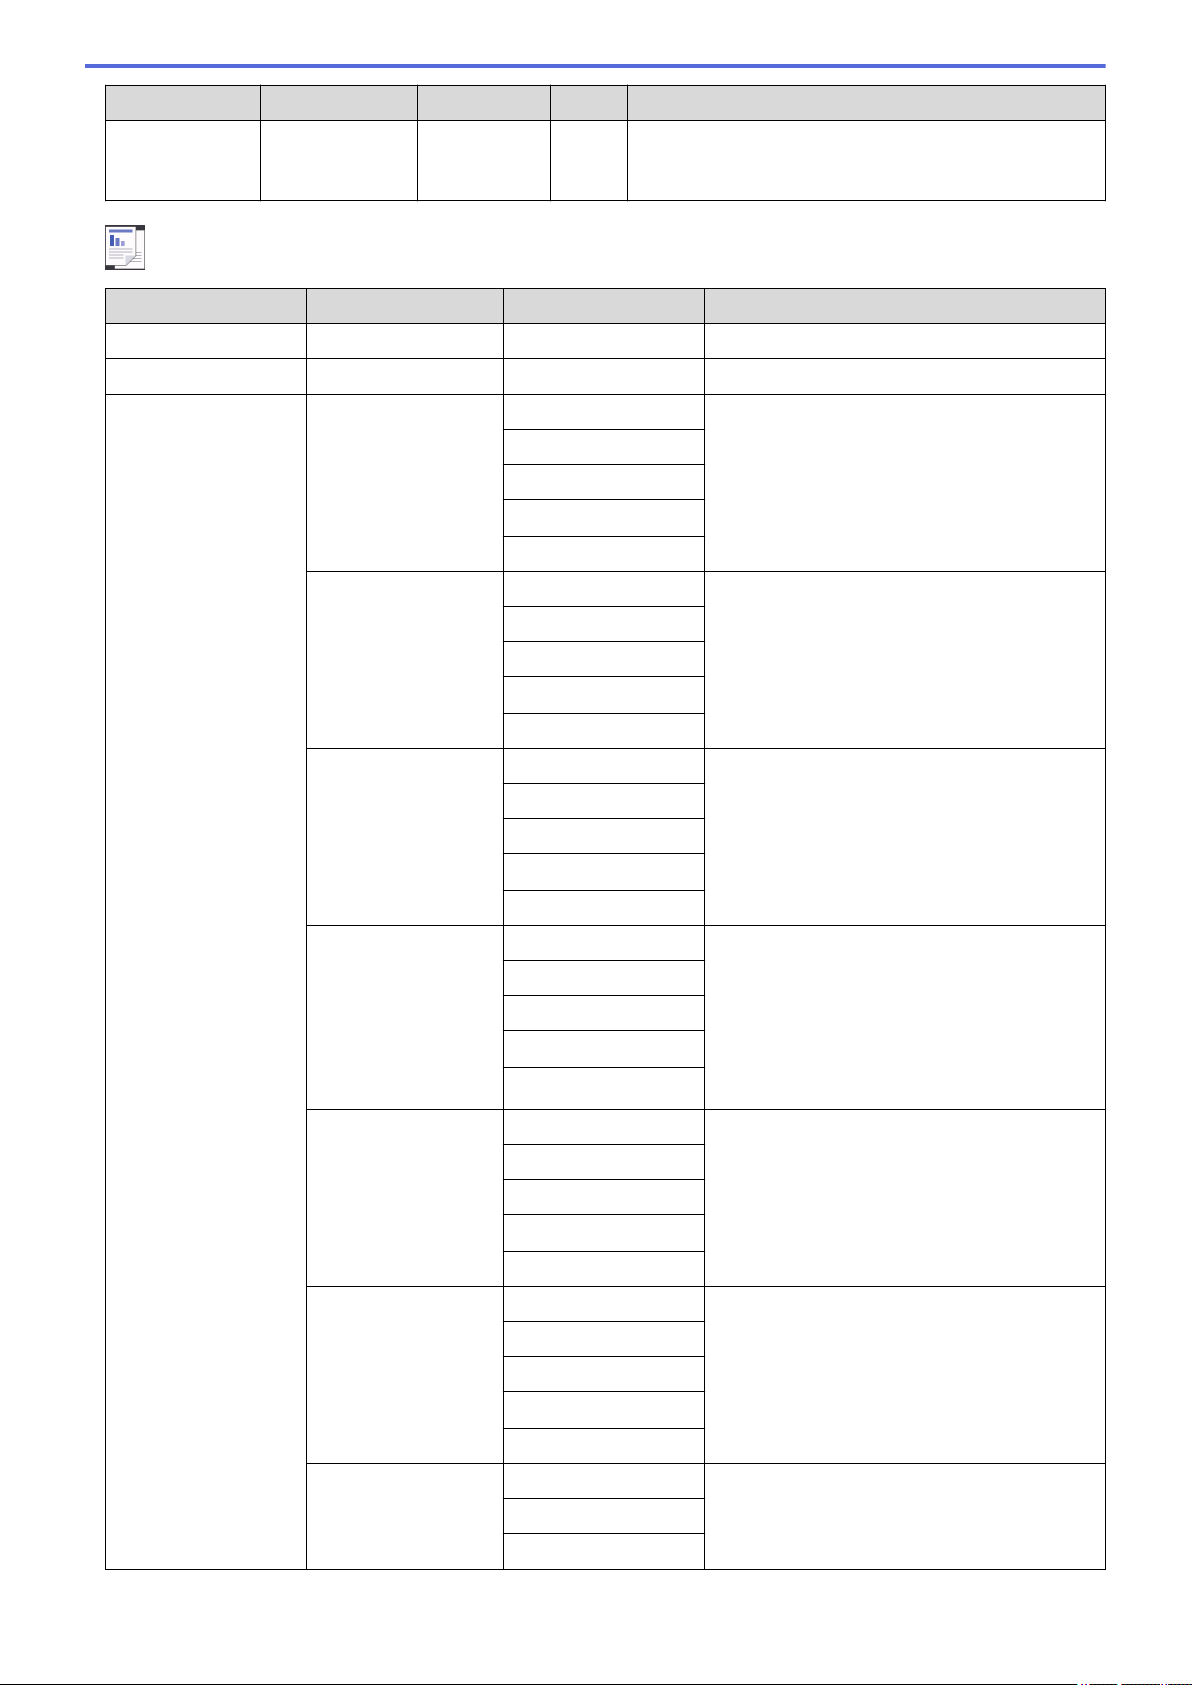
Copy a Document......................................................................................................................................194
Enlarge or Reduce Copied Images............................................................................................................196
Make N in 1 Copies Using the Page Layout Feature.................................................................................197
Copy an ID Card........................................................................................................................................200
Copy on Both Sides of the Paper (2-sided Copy)......................................................................................201
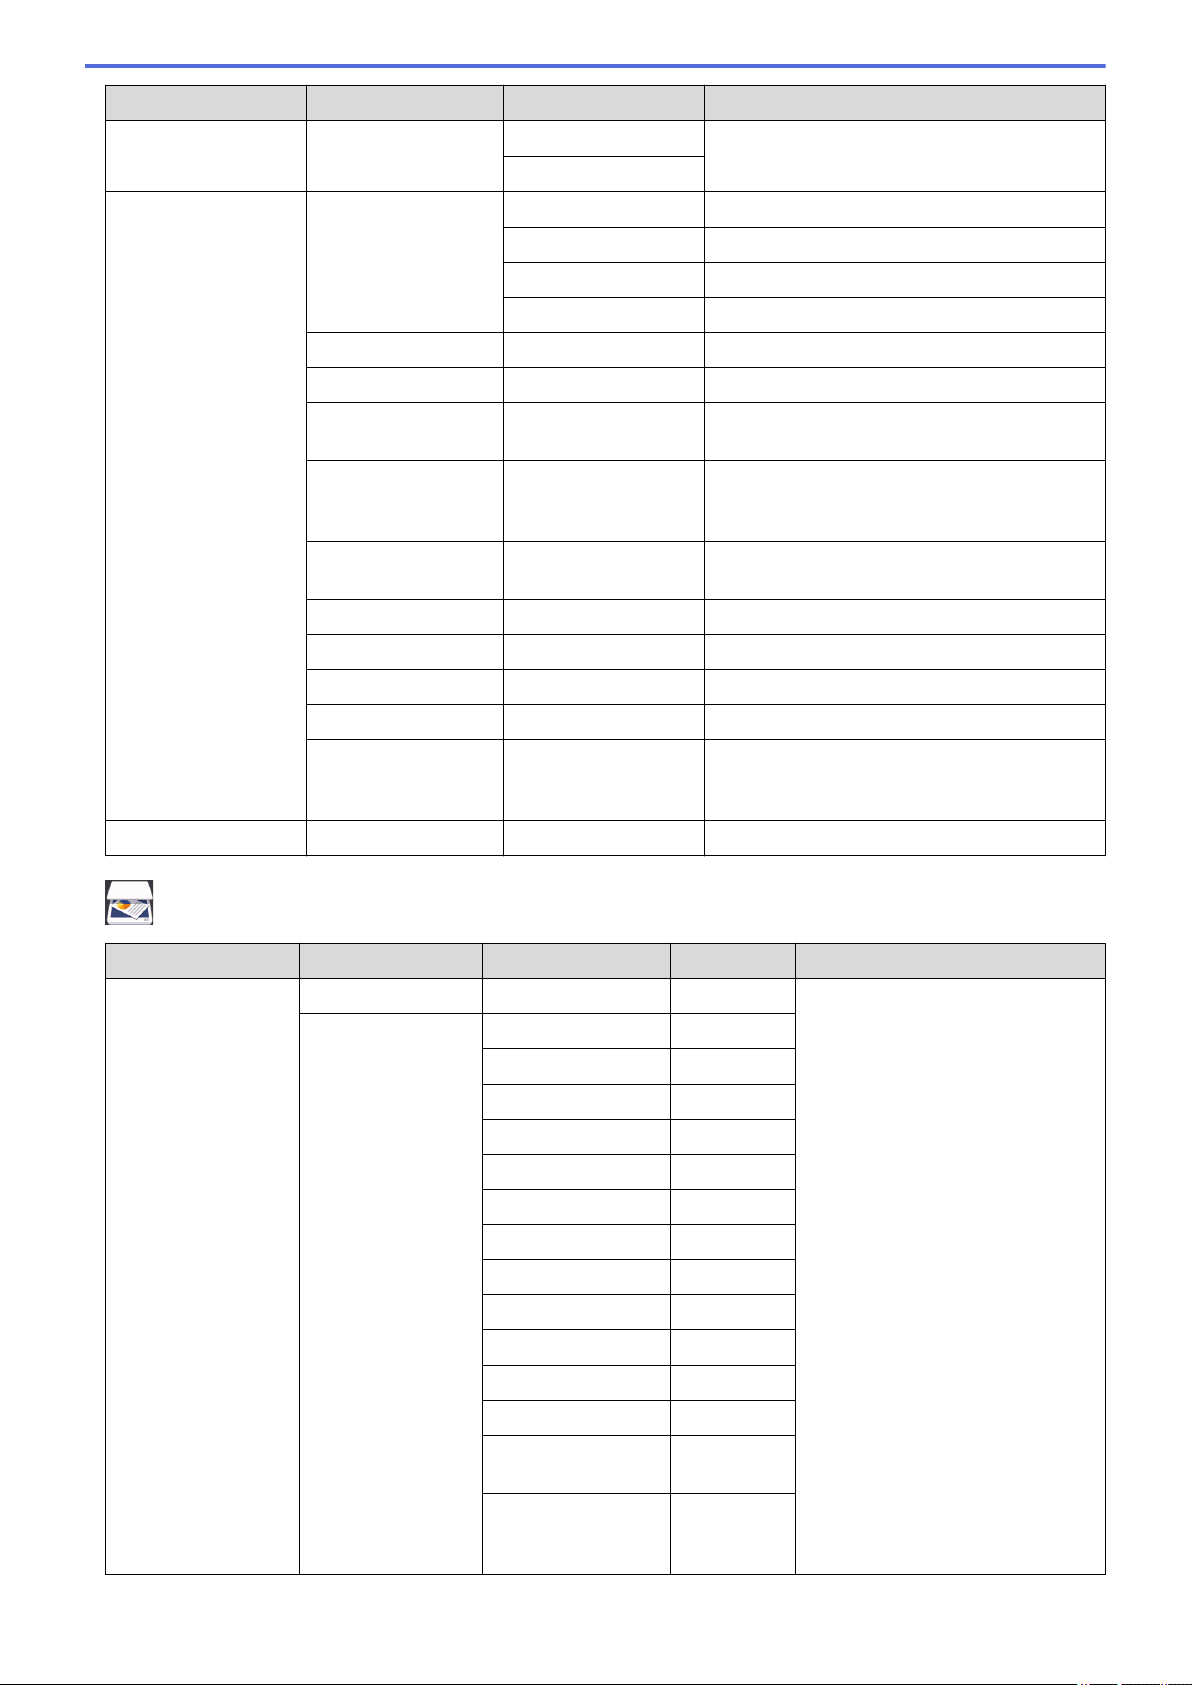
Send a Fax.................................................................................................................................................206
Send a Fax.......................................................................................................................................207
Send a 2-sided Fax from the ADF....................................................................................................209
Send a Fax Manually........................................................................................................................210
Send a Fax at the End of a Conversation........................................................................................211
Send the Same Fax to More than One Recipient (Broadcasting)....................................................212
Home > Table of Contents
ii
Send a Fax in Real Time..................................................................................................................215
Send a Fax at a Specified Time (Delayed Fax)................................................................................216
Add a Cover Page to Your Fax.........................................................................................................217
Cancel a Fax in Progress.................................................................................................................220
Check and Cancel a Pending Fax....................................................................................................221
Receive a Fax............................................................................................................................................223
Brother Web Connect.................................................................................................................................475
Brother Web Connect Overview.......................................................................................................476
Online Services Used with Brother Web Connect............................................................................477
Conditions for Using Brother Web Connect......................................................................................479
Set Up Brother Web Connect...........................................................................................................483
Scan and Upload Documents Using Brother Web Connect.............................................................492
Download and Print Documents Using Brother Web Connect.........................................................493
FaxForward to Cloud or E-mail........................................................................................................496
Outline, Scan, and Copy or Cut Parts of Your Documents Using Brother Web Connect.................499
NotePrint and NoteScan...................................................................................................................504
Google Cloud Print.....................................................................................................................................509
Google Cloud Print Overview...........................................................................................................510
Before Using Google Cloud Print.....................................................................................................511
Print from Google Chrome™ or Chrome OS™.................................................................................515
Print from Google Drive™ for Mobile................................................................................................516
Print from Gmail™ Webmail Service for Mobile................................................................................517
Document is Jammed in the Top of the ADF Unit............................................................................566
Document is Jammed under the Document Cover..........................................................................567
Remove Small Scraps of Paper Jammed in the ADF......................................................................568
Paper Jams................................................................................................................................................569
Paper is Jammed in the MP tray......................................................................................................570
Paper is Jammed in the Paper Tray.................................................................................................571
Paper is Jammed in the Back of the Machine..................................................................................573
Paper is Jammed Inside the Machine..............................................................................................575
Paper is Jammed underneath the Paper Tray..................................................................................578
Improve the Print Quality............................................................................................................................583
Telephone and Fax Problems....................................................................................................................589
Set Dial Tone Detection....................................................................................................................592
Set Telephone Line Compatibility for Interference and VoIP Systems.............................................593
Other Problems..........................................................................................................................................606
Check the Machine Information.................................................................................................................608
Reset Your Brother Machine......................................................................................................................609
Replace the Toner Cartridge............................................................................................................614
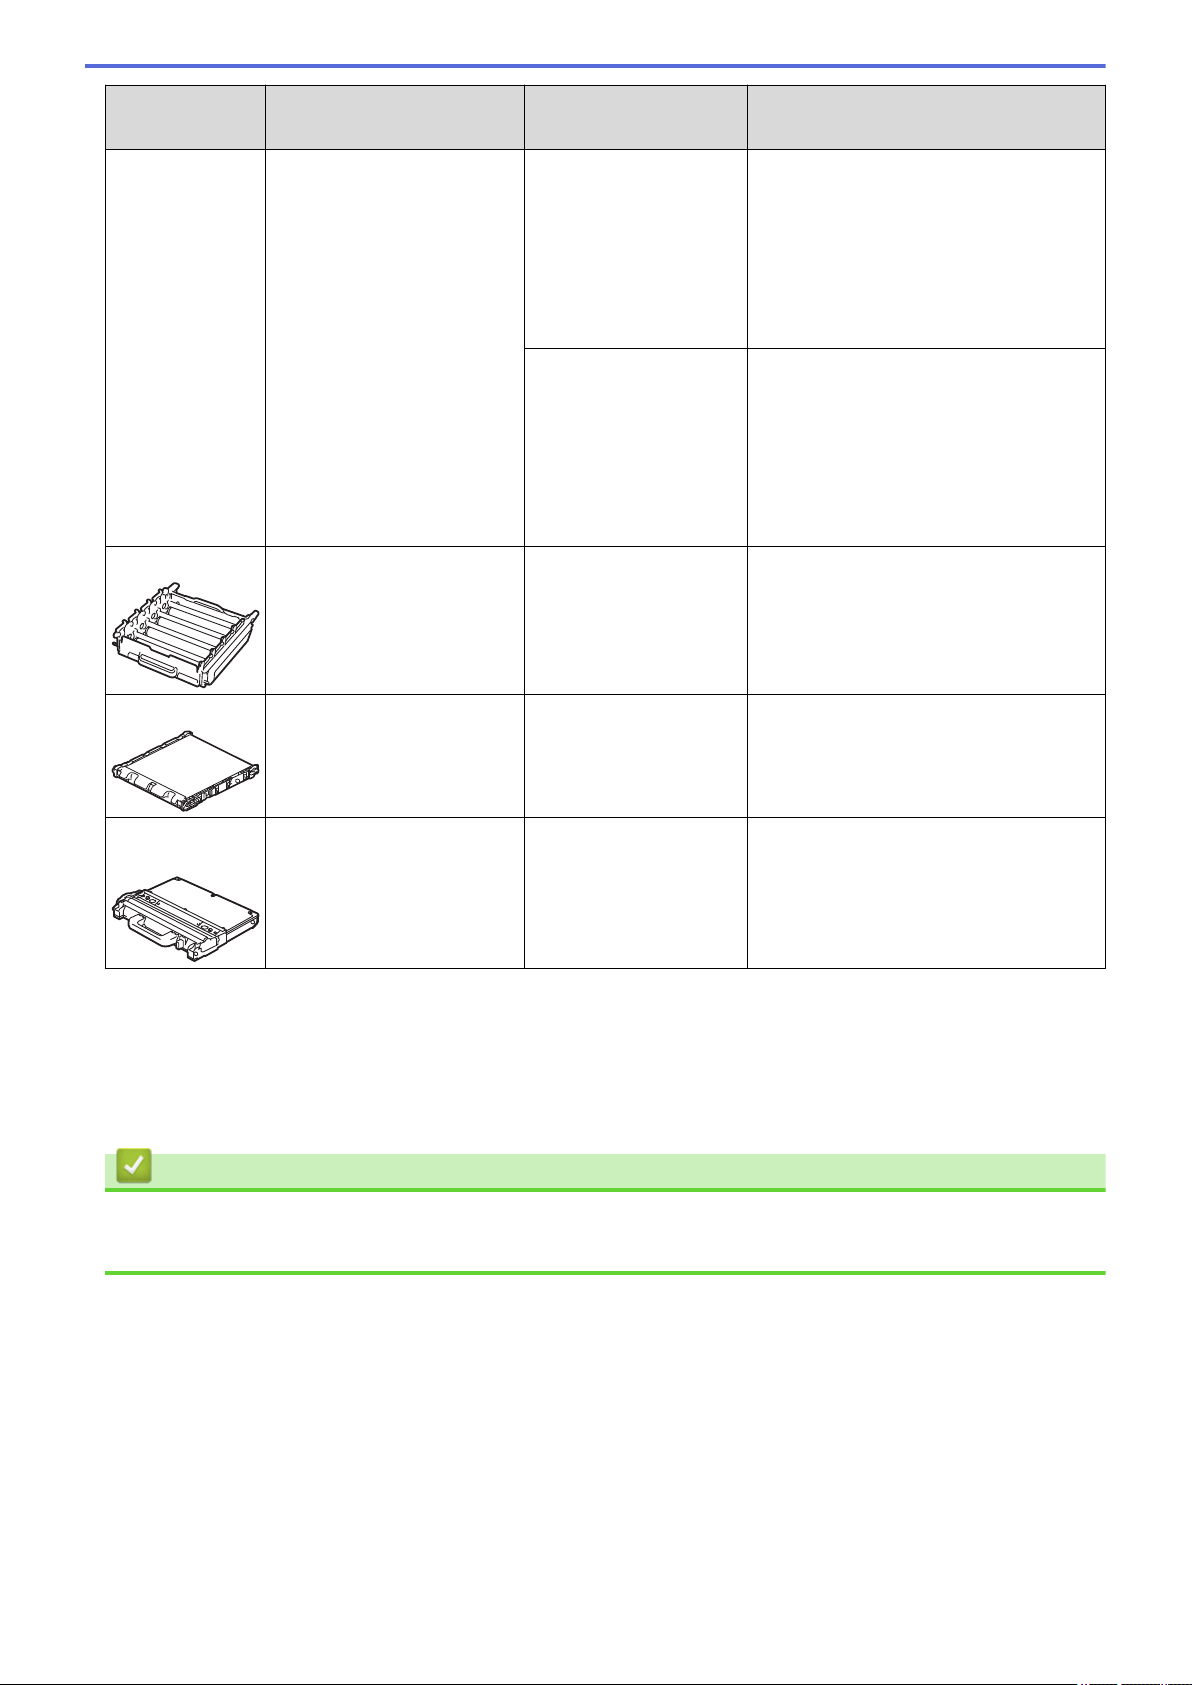
Replace the Drum Unit.....................................................................................................................617
Replace the Belt Unit........................................................................................................................621
Replace the Waste Toner Box..........................................................................................................624
Clean the Machine.....................................................................................................................................628
Clean the Scanner............................................................................................................................630
Clean the Laser Scanner Windows..................................................................................................631
Clean the Touchscreen LCD............................................................................................................634
Clean the Corona Wires...................................................................................................................635
Clean the Drum Unit.........................................................................................................................637
Clean the Paper Pick-up Rollers......................................................................................................642
Libble takes abuse of its services very seriously. We're committed to dealing with such abuse according to the laws in your country of residence. When you submit a report, we'll investigate it and take the appropriate action. We'll get back to you only if we require additional details or have more information to share.
Product:
Forumrules
To achieve meaningful questions, we apply the following rules:
First, read the manual;
Check if your question has been asked previously;
Try to ask your question as clearly as possible;
Did you already try to solve the problem? Please mention this;
Is your problem solved by a visitor then let him/her know in this forum;
To give a response to a question or answer, do not use this form but click on the button 'reply to this question';
Your question will be posted here and emailed to our subscribers. Therefore, avoid filling in personal details.
Register
Register getting emails for Brother MFC-L8690CDW at:
new questions and answers
new manuals
You will receive an email to register for one or both of the options.
Get your user manual by e-mail
Enter your email address to receive the manual of Brother MFC-L8690CDW in the language / languages: English as an attachment in your email.
The manual is 15,08 mb in size.
You will receive the manual in your email within minutes. If you have not received an email, then probably have entered the wrong email address or your mailbox is too full. In addition, it may be that your ISP may have a maximum size for emails to receive.
If you have not received an email with the manual within fifteen minutes, it may be that you have a entered a wrong email address or that your ISP has set a maximum size to receive email that is smaller than the size of the manual.
The email address you have provided is not correct.
Please check the email address and correct it.
Your question is posted on this page
Would you like to receive an email when new answers and questions are posted? Please enter your email address.