INDEX
Appendix A-35
A
2
M
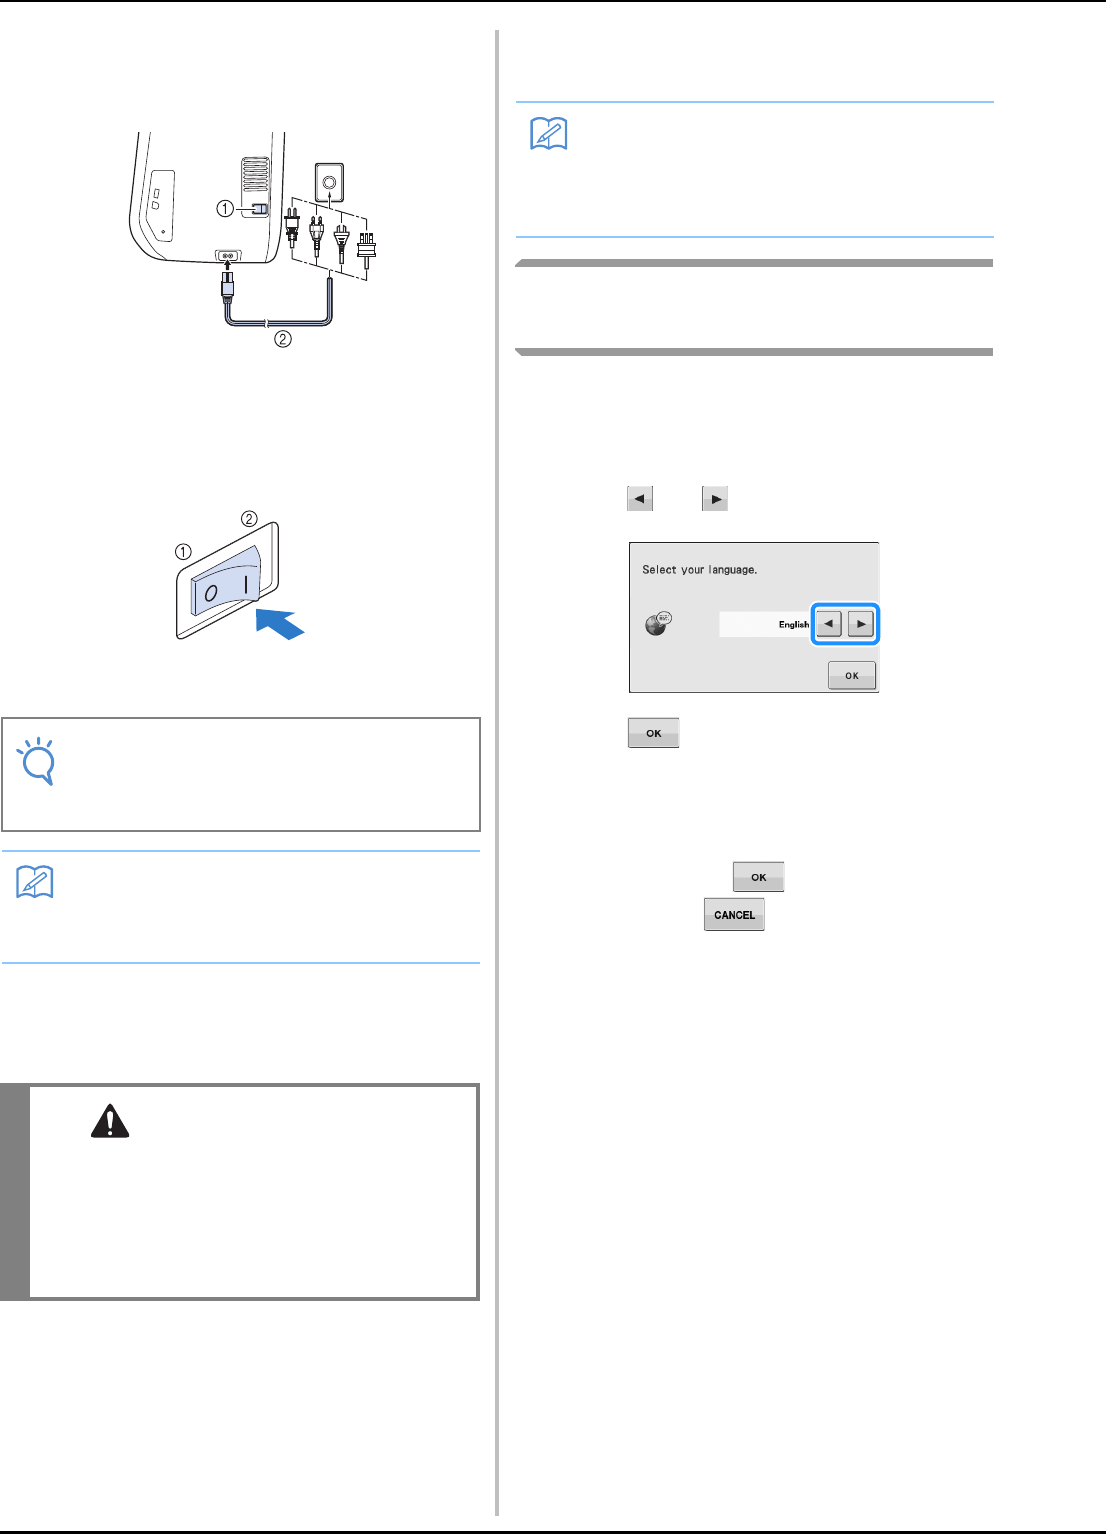
Main power switch ....., B-17
Mirror imag
.... S-21, S-86
Multi-dir
. S-63
MY CUSTOM
designing
........ S-1
enter
........... S-105
key functions
...... S-105
retrieving
..... S-111
saving
........ S-11
storing in your l
..... S-110
N
Needle
changing the nee
.......
changing the nee
..... S-25
fabric
.
mode
.......
twin ne
...........
Nee
......, B-44
Needle cl
.......
Needle mode sele
.........
Nee
.........
Needle pos
........ S-18, S-25
Needle Position button
...
O
Operation buttons ...., B-11
Overcast
... S-31, S-33
P
Patchwork ....... S-32
Piecing
...... S-36
1/4" quilting foot w
...... S-3
Pintuck
........ S-30
Pivoting
... S-15
Point delete key
.. S-1
Power co
.........
Power co
..
Presser foot
adapter
........
attaching
...........
pressure
....... S-17
removing
.....
types
........ S-67
Presser foot holder
.., B-47
Presser foot holder screw
..
Presser foot lever
......, S-8
Presser Foot Lifter button
......
Presser foot/
Needle
.. , B-44 , B-47 , B-49 , B-53
Pre-tension disk
........, B-34 , B-36
Q
Quil ... S-35
free motion
......... S-40
with s
..... S-39
R
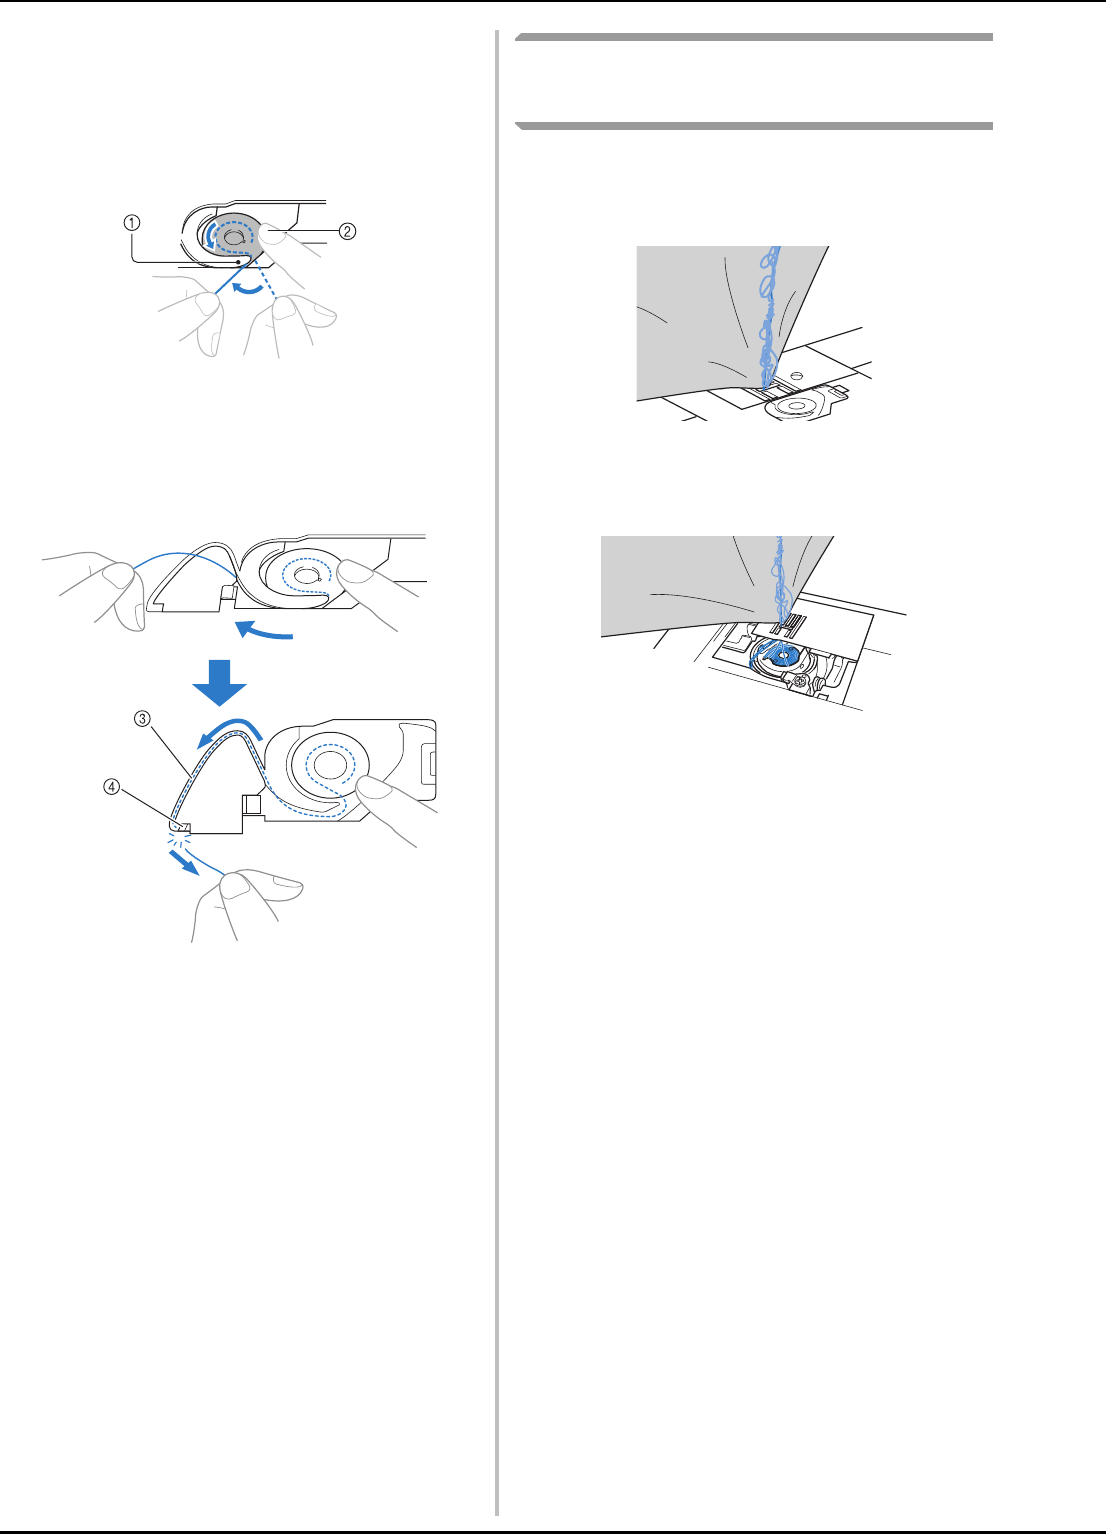
Race ......
Reinforcem
........ B-11, S-5
Retri
charact
........ S-98
computer
........ S-1
machine’s m
..... S-9
MY CUSTO
....... S-111
stit
...... S-23
USB media
....... S-9
util
.......... S-2
Reverse Stitch button
......, S-5
Rever
.......
S
Sati ......, S-87
Saving
character/de
.......
computer
...
machine’
..........
MY CUSTO
.........
stit
..........
USB media
.......
util
.....
Scallop stitches
........
Screen bright
....... A-18
Set key
.......
Sett
automatic rei
........
automatic thre
.....
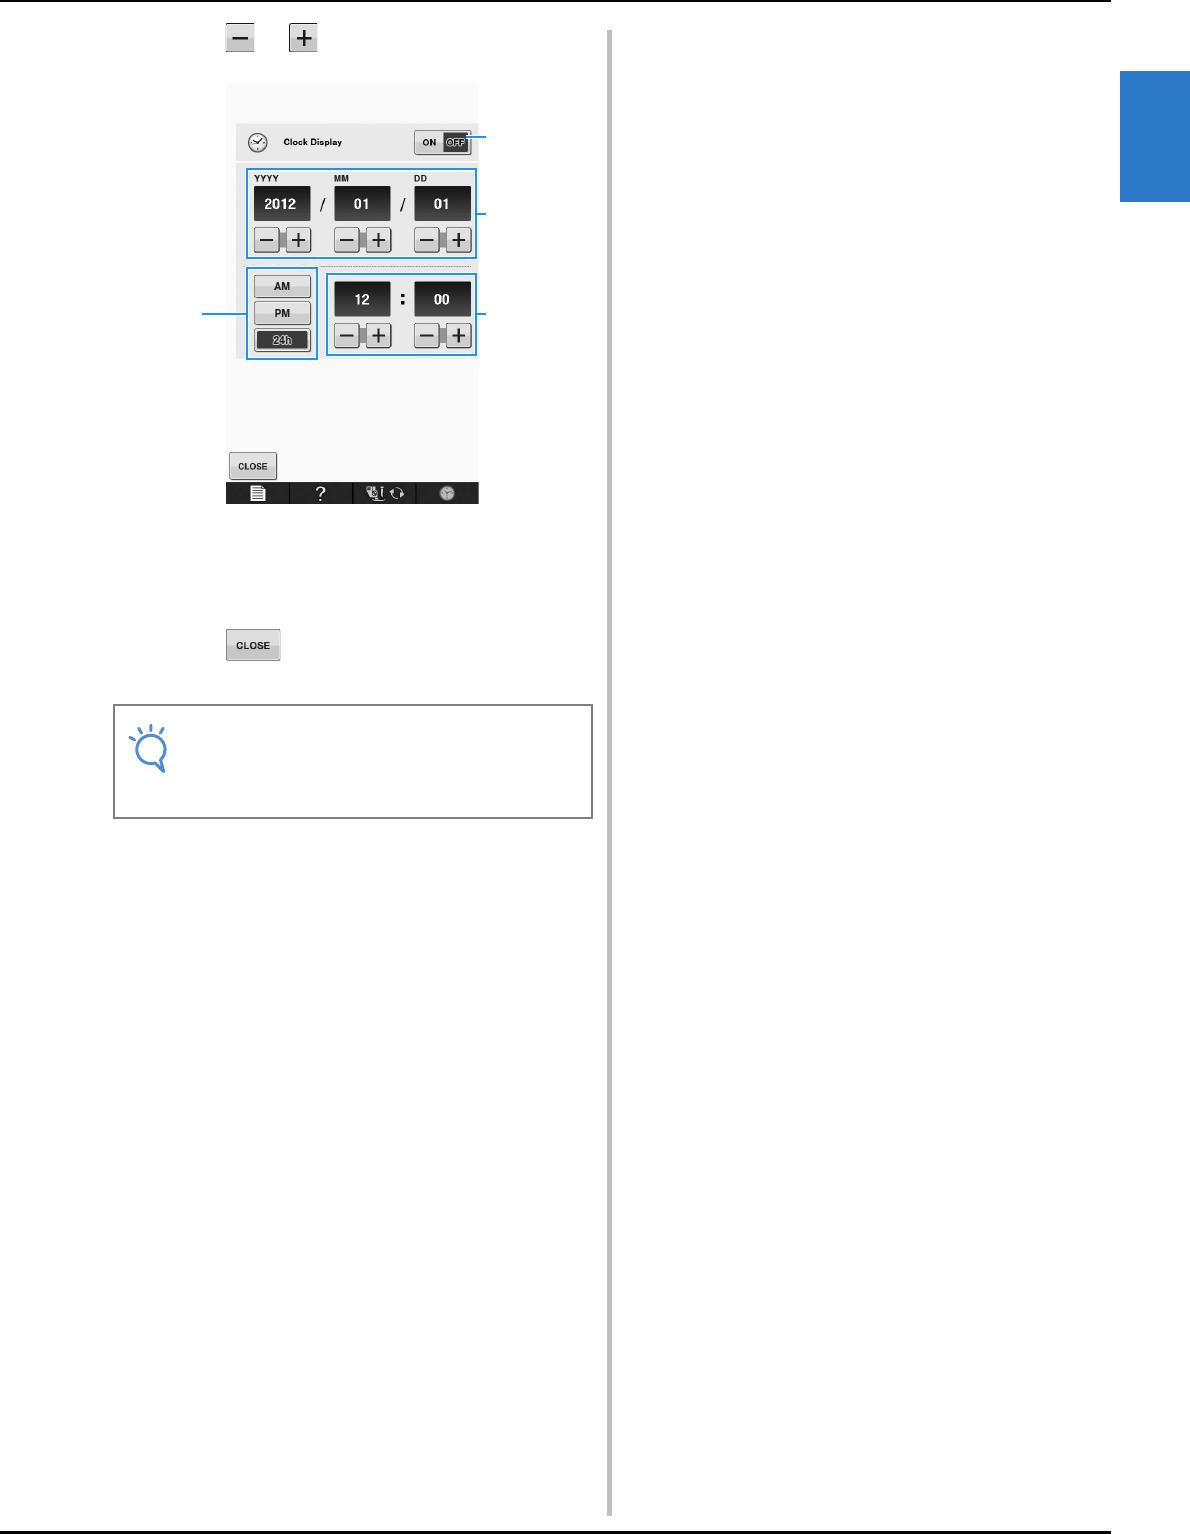
display language
......... B-27
machine settin
......... B-23
stit
.....
stit
........
threa
........
Sewing m
....... B-28
Sewing speed c
....., B-11, S-3
Sewing type selection ke
.....
Shelltu
.....
Shutoff support mode
........ B-26
Single/Repea
........
Single/T
.......
Siz
......
Smoc
......
Speak
........ B-24
Special spool
....... B-
Specificat
..... A-31
Spool cap
......... B-9
Spool net
..... B-45
Spool pin
....... B-9
Star
...... B-11
Step stitch patterns
........
Stitch setting char
...........
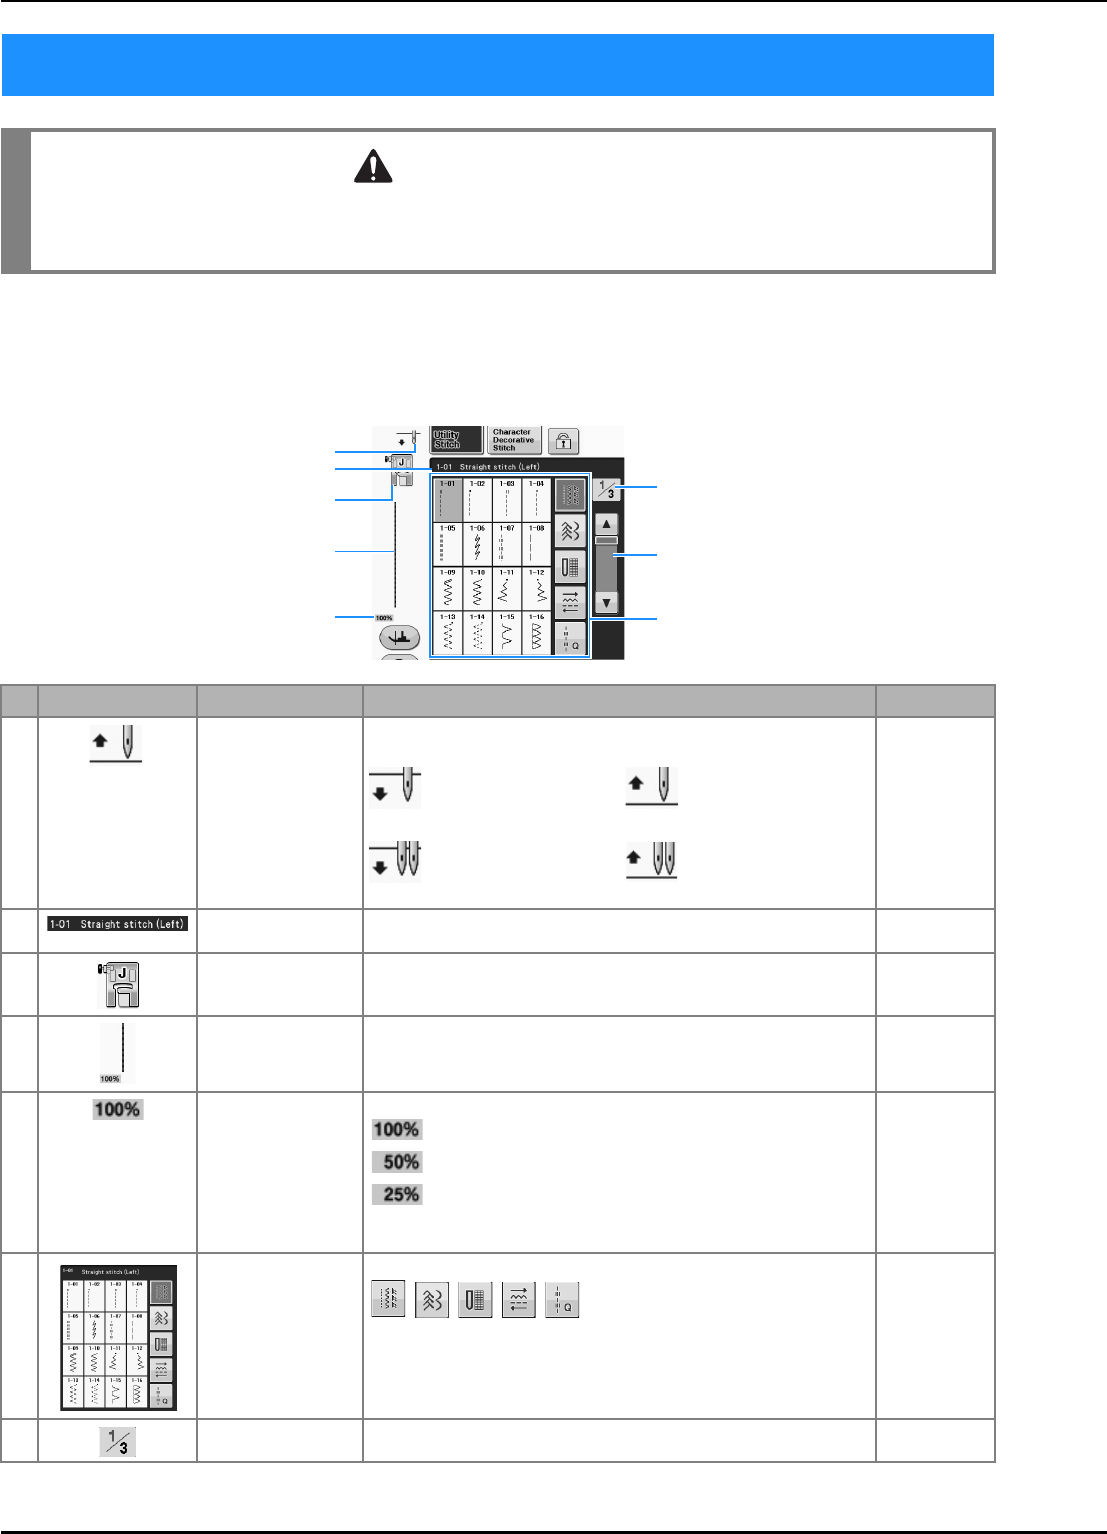
Stra
.........
Stra
........
Stra
........
Supplemental spool pin
...... B-9, B-, B-4
T
Tape attach .....
Tape or e
.......
Test key
....... S-107, S-110
Thread
fabric
..
threa
........
Thread cutter
......., S-4
Thread Cutter button
......... B-11
Thread density key
........
Thread guide
.........., B-33, B-36, B-4
Thread guide plate
........ B-9, B-, B-40
Top cover
...... B-9
Top stitching
........
Touch pen
..., A-18
Troubleshooting
....... A-19
Twin needl
..... B-43
U
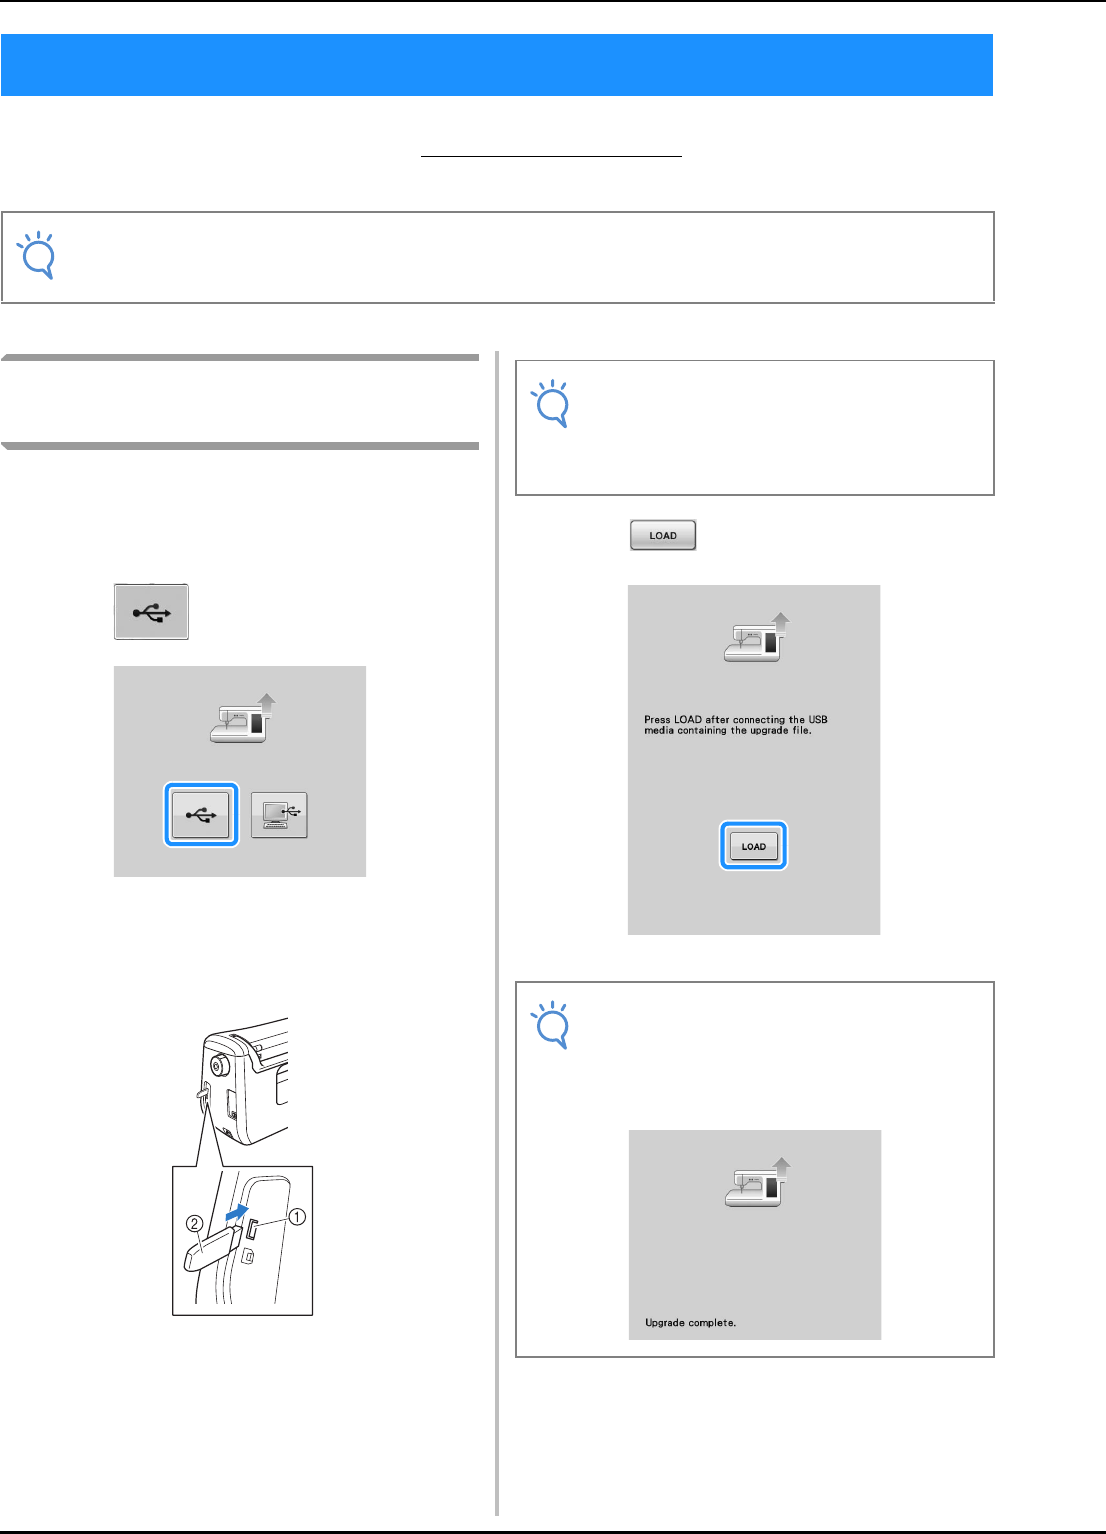
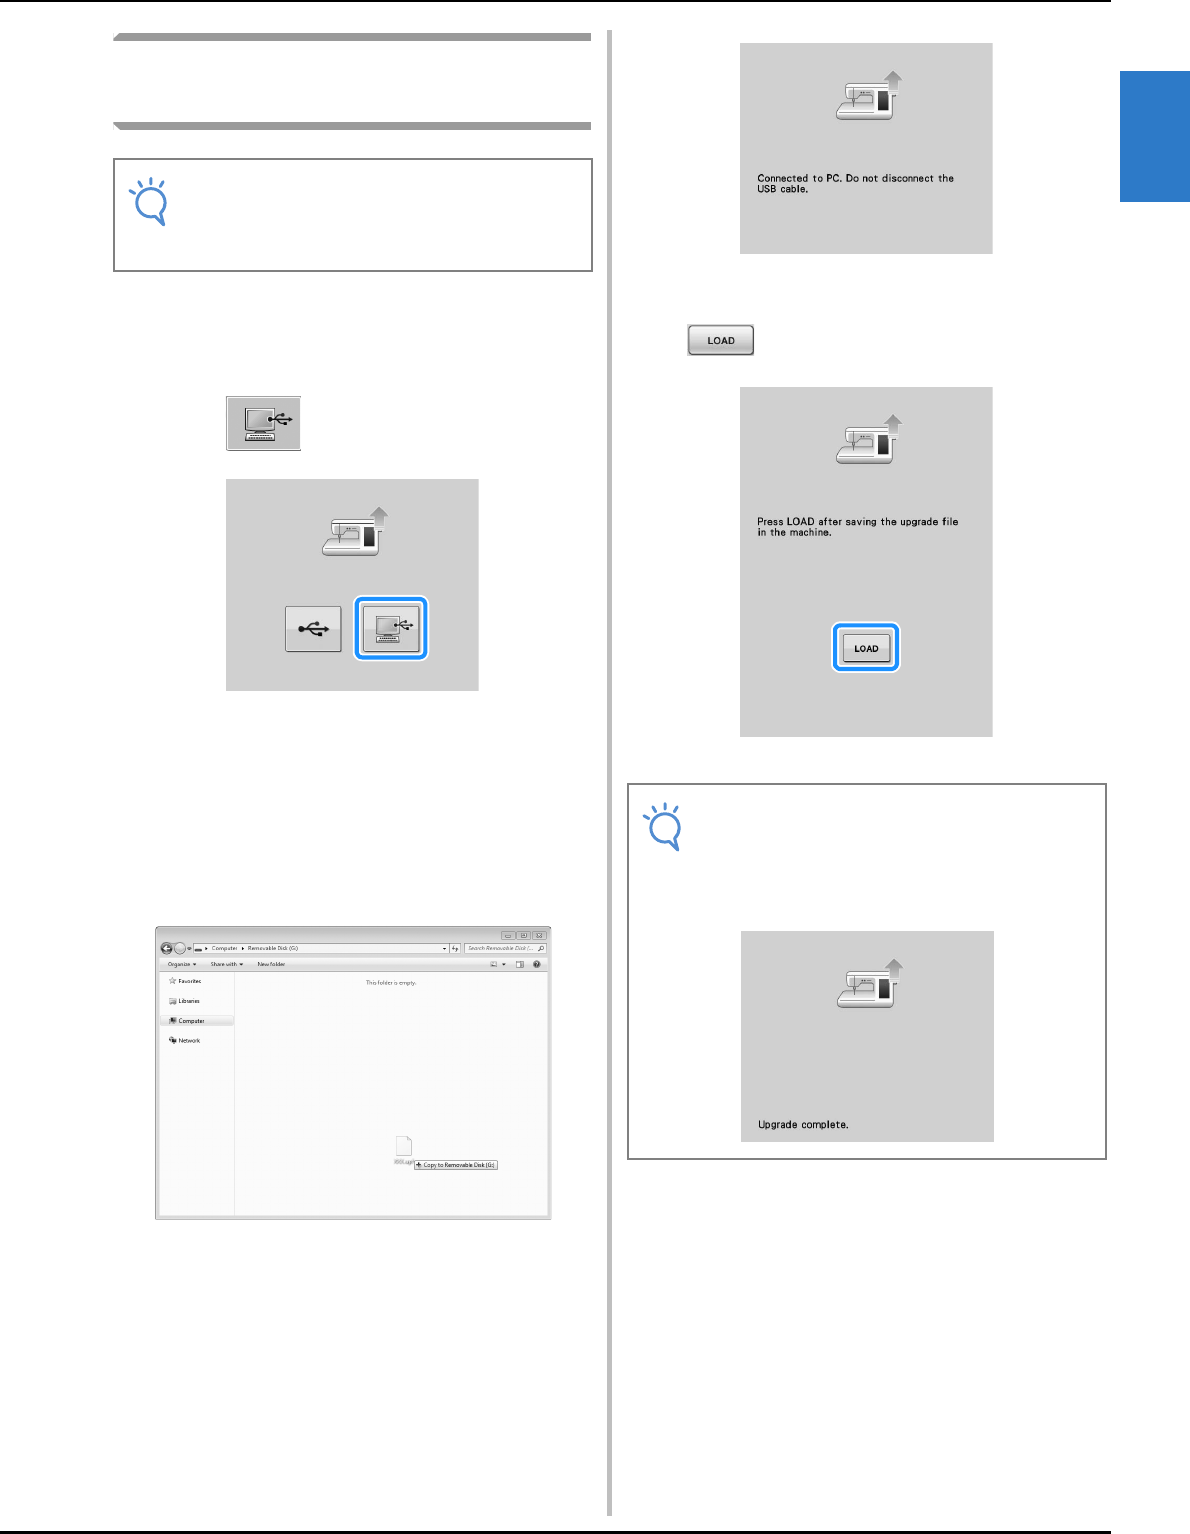
Upgradi ...... A-32
Upper th
twin ne
......... B-43
using the
...... B-40
using the spool net
...... B-