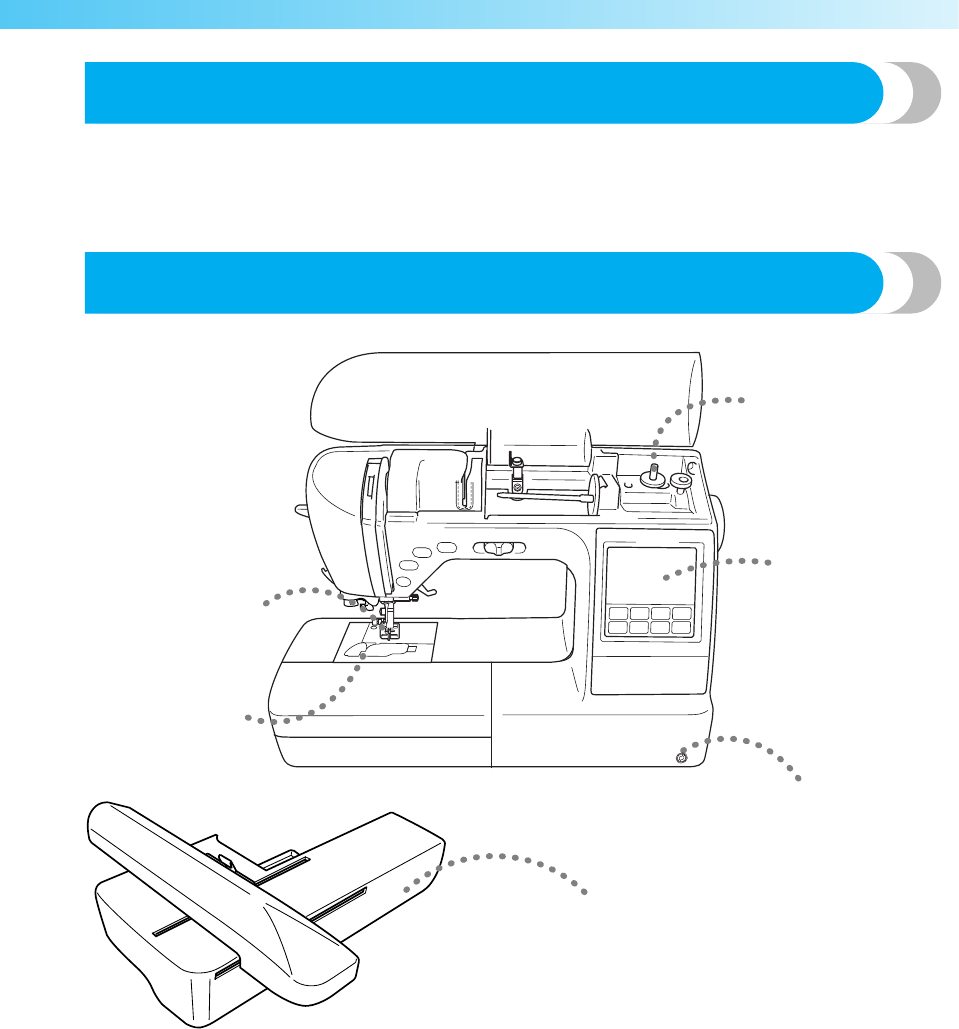
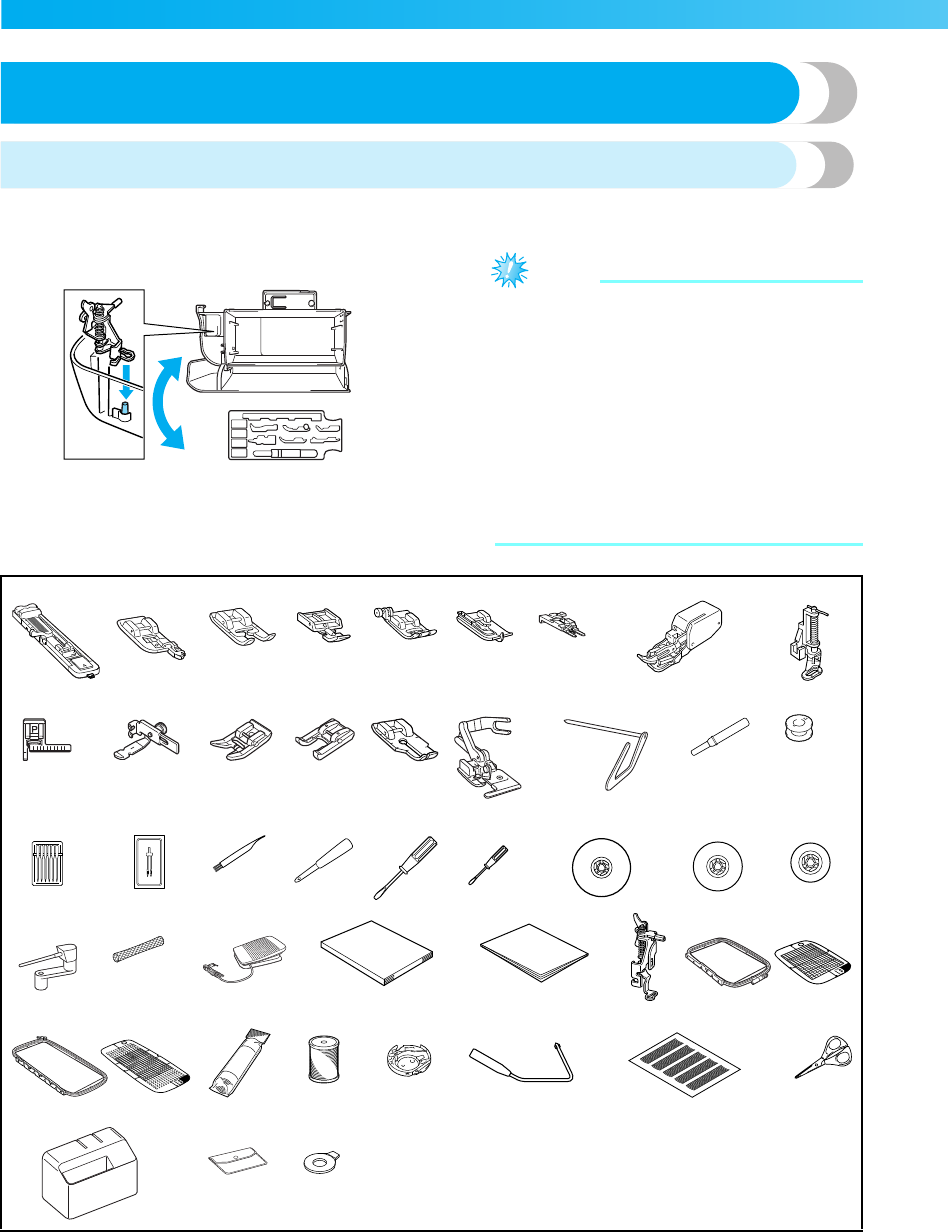
Included accessories.......................................................................................................................................10
Names of Machine Parts and Their Functions ...................................................................13
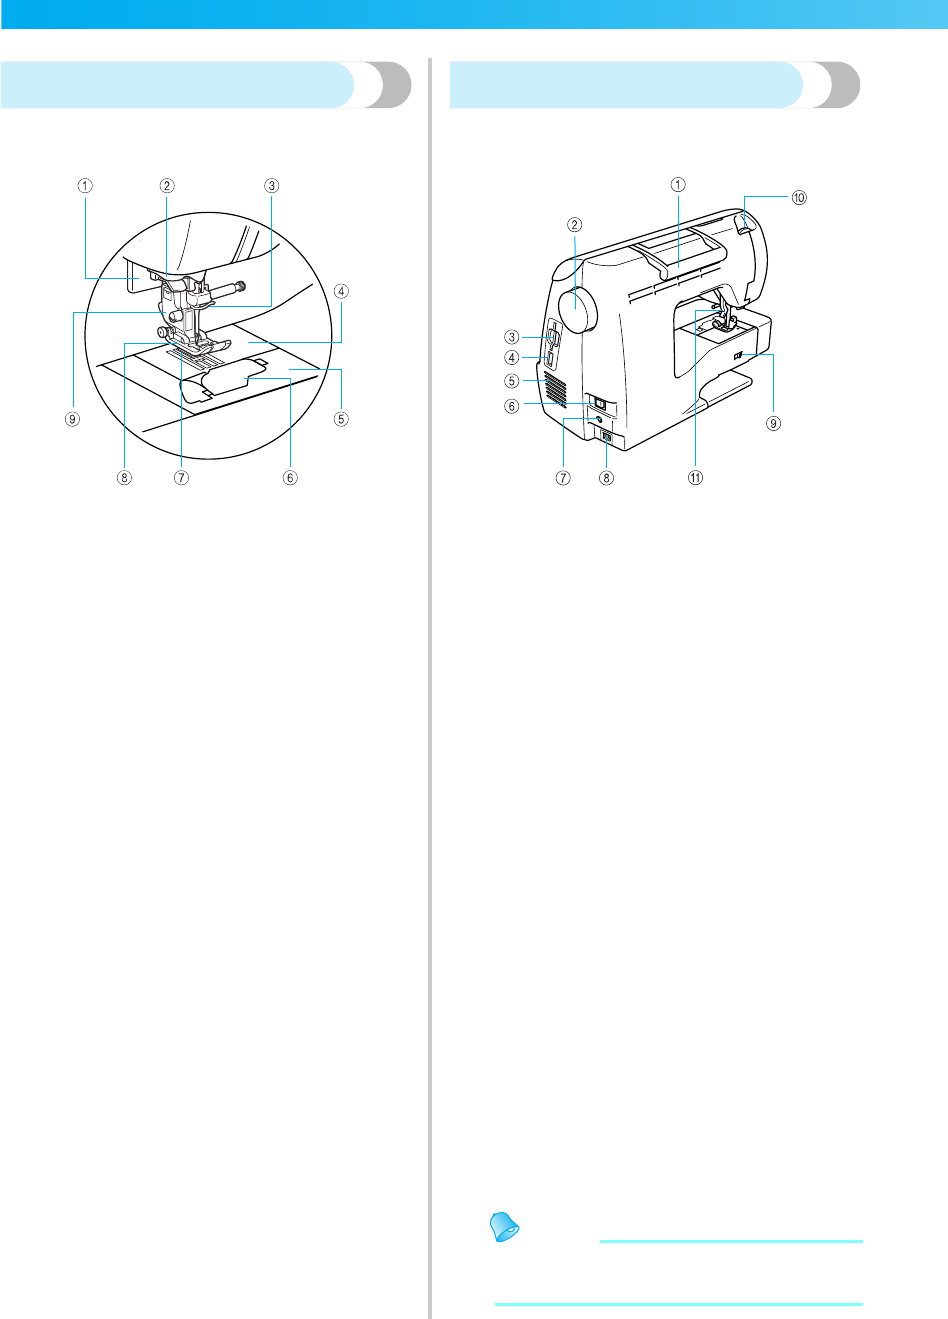
Front view.......................................................................................................................................................13
Needle and presser foot section ......................................................................................................................14
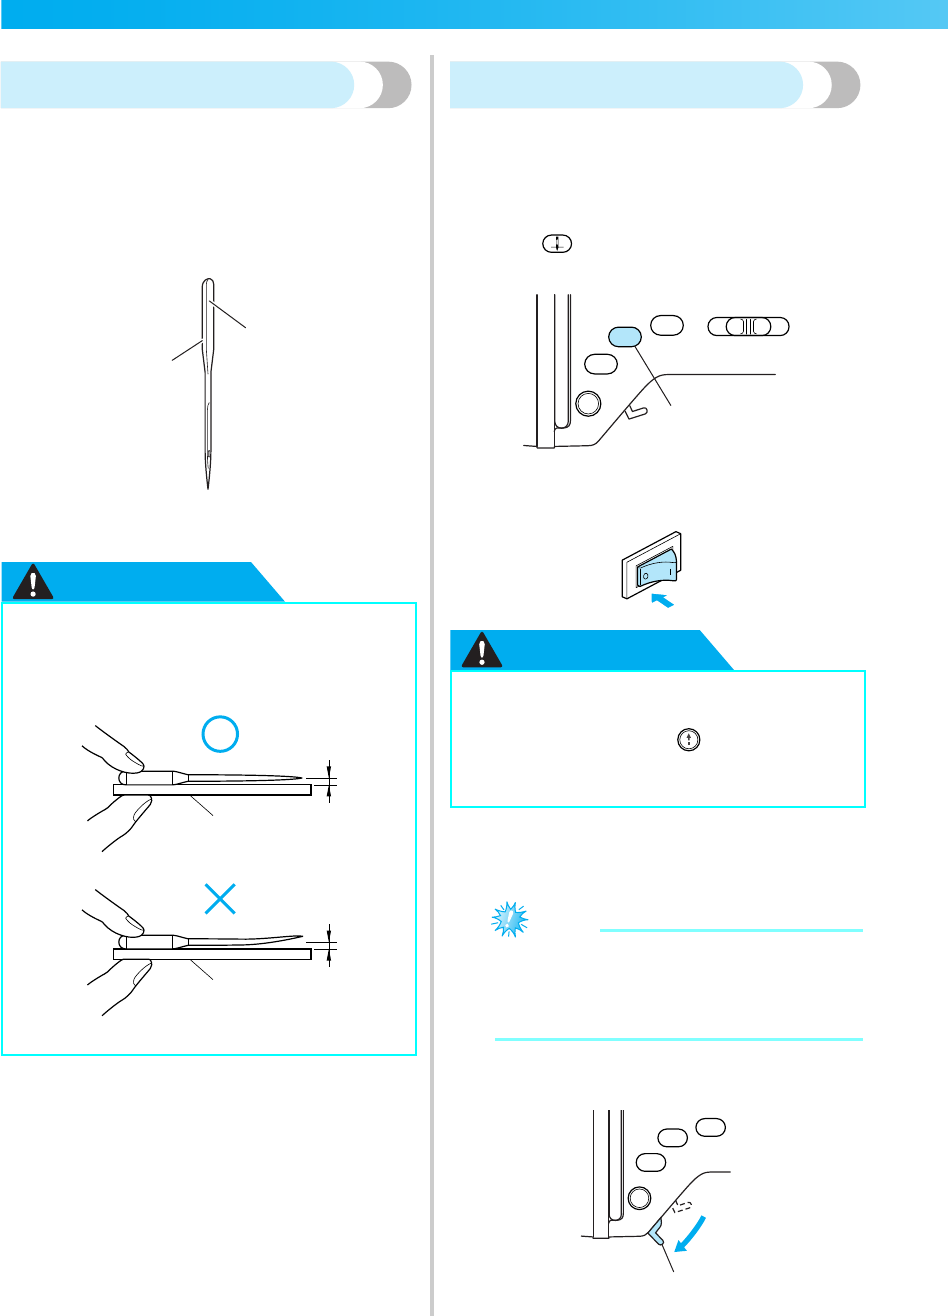
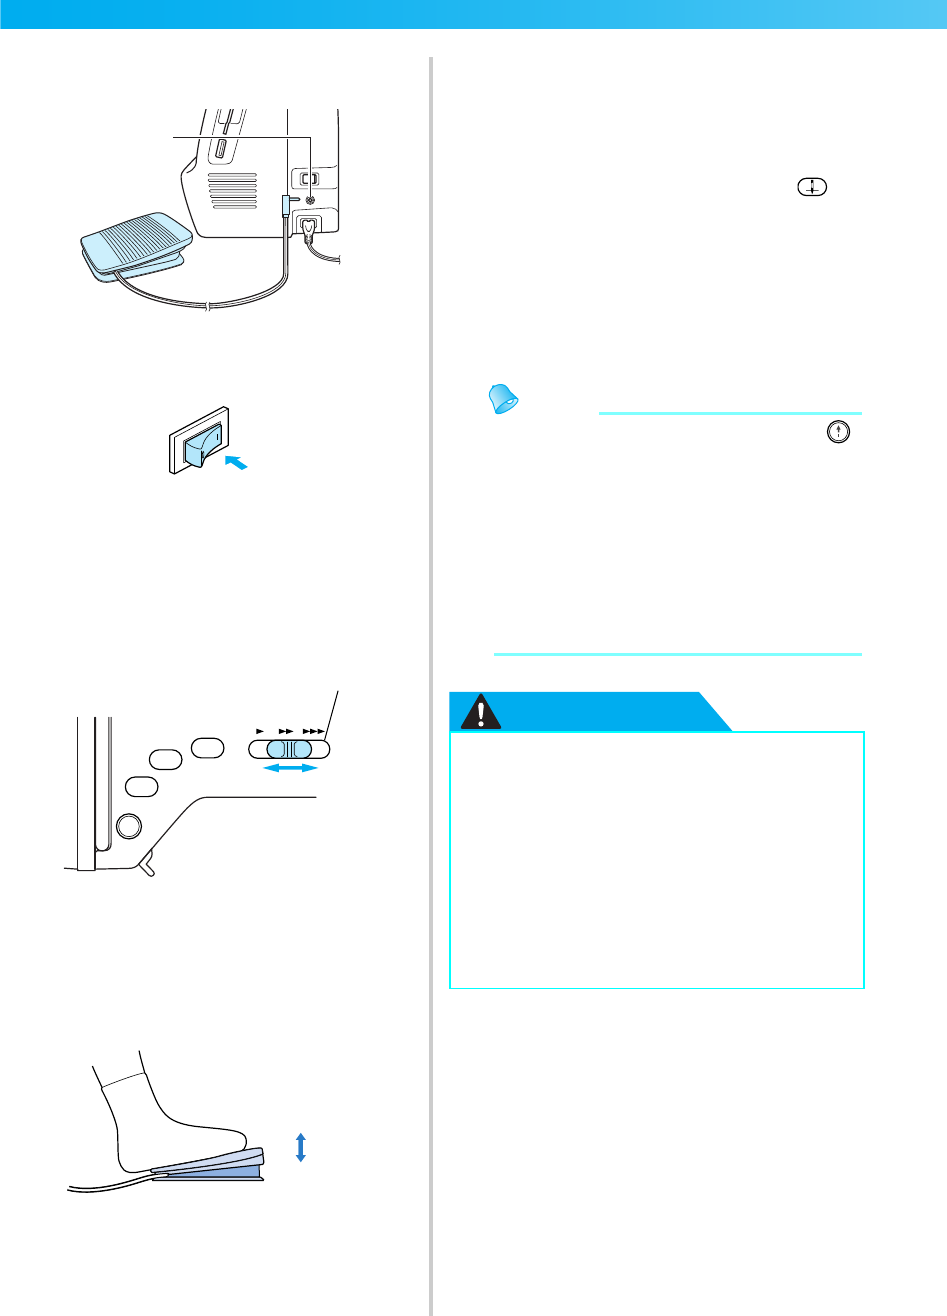
Turning the Machine On/Off.............................................................................................18
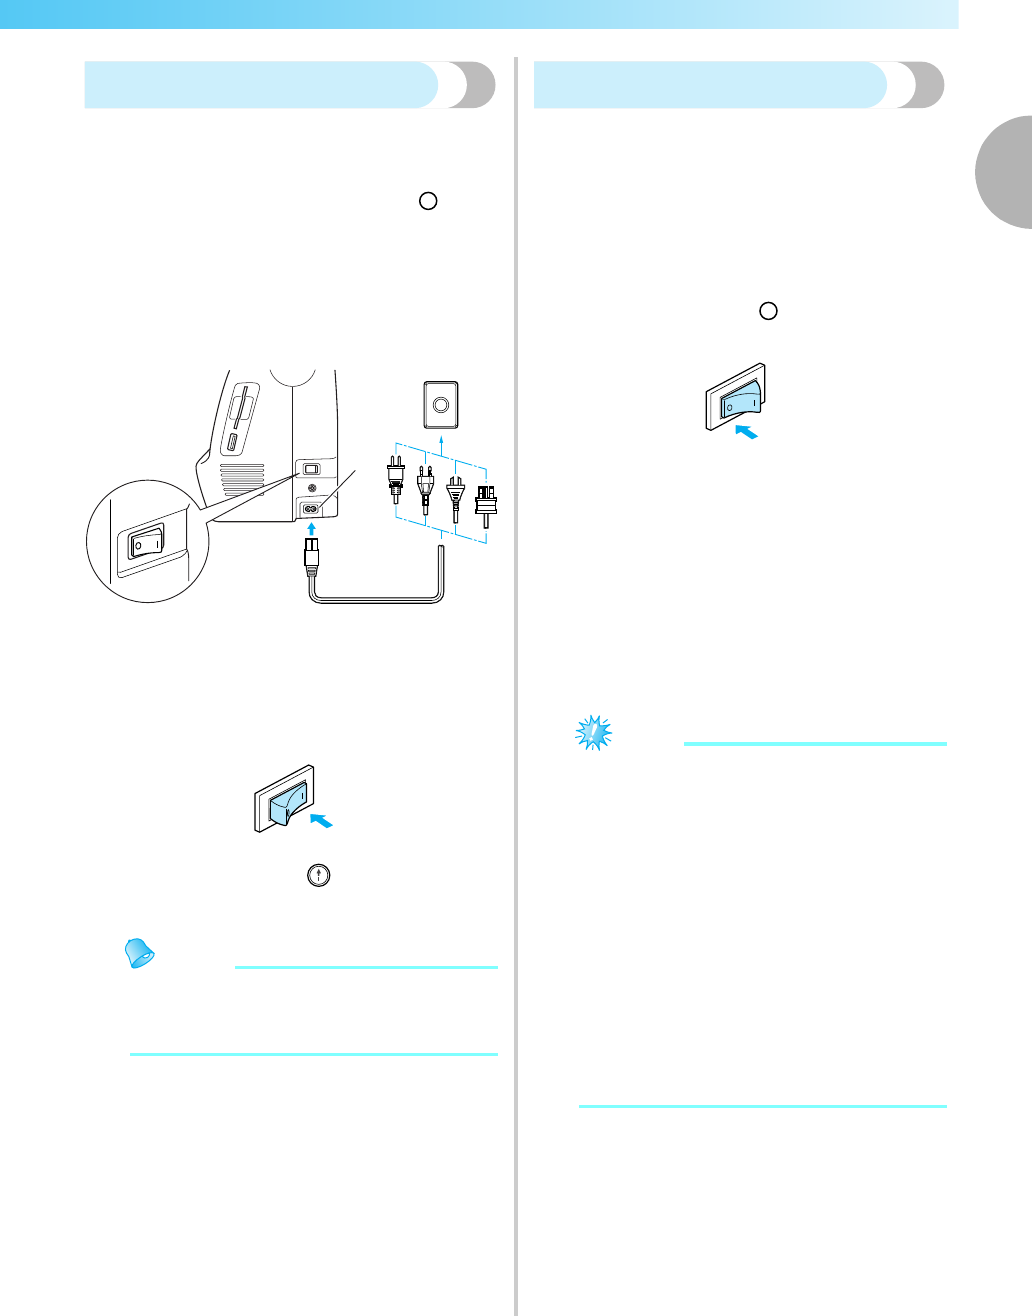
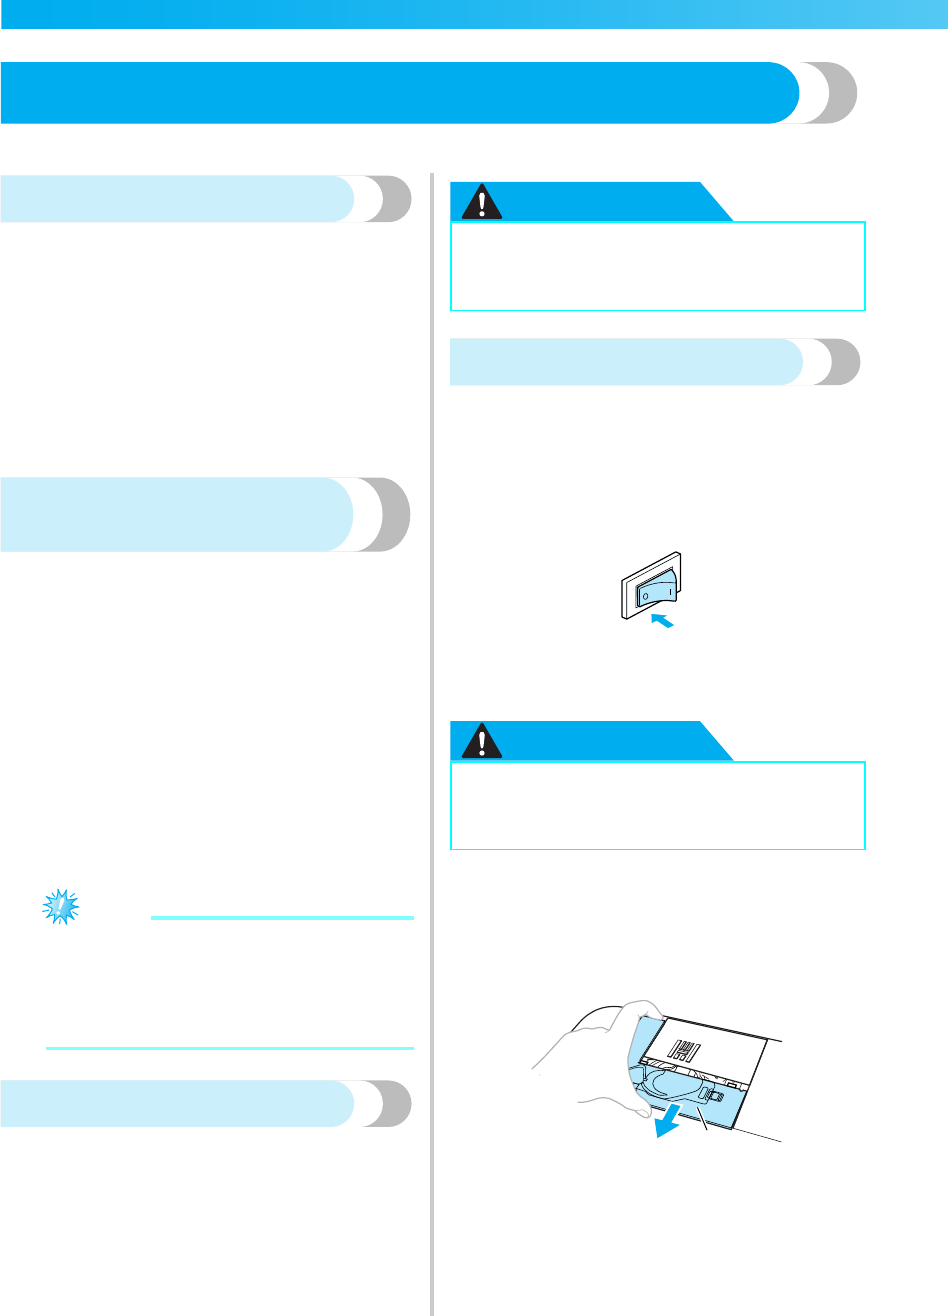
Power supply precautions...............................................................................................................................18
Turning on the machine..................................................................................................................................19
Turning off the machine..................................................................................................................................19
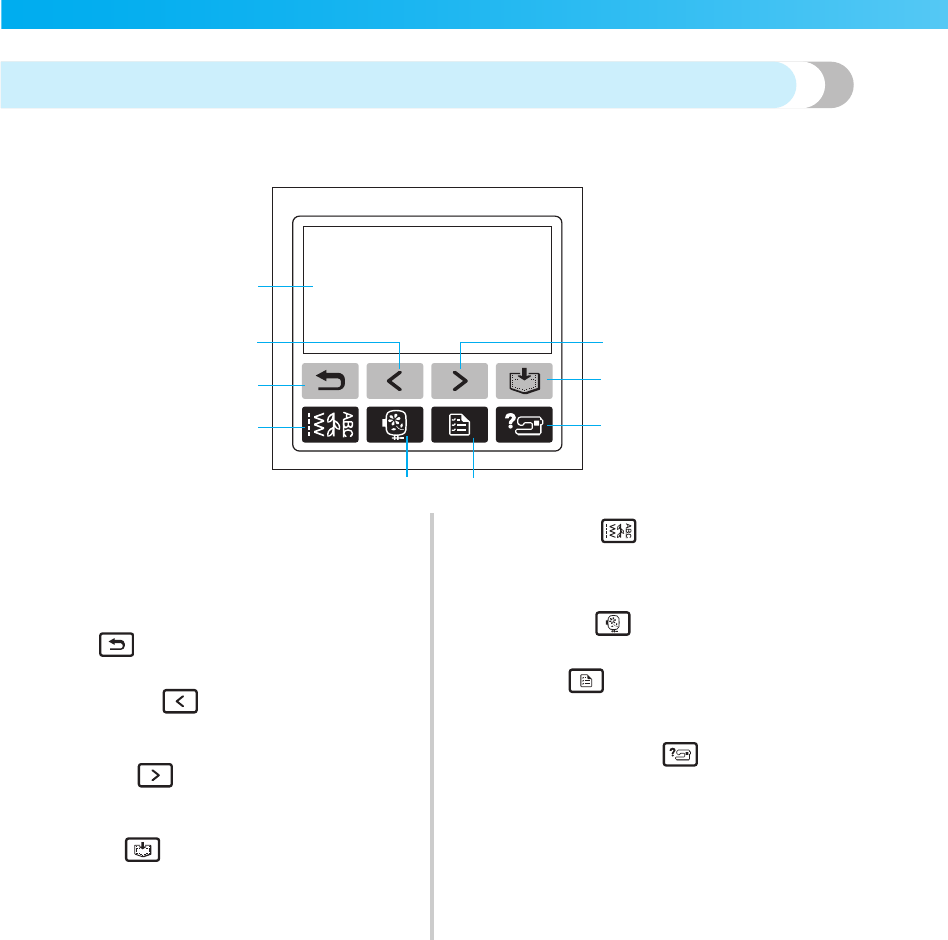
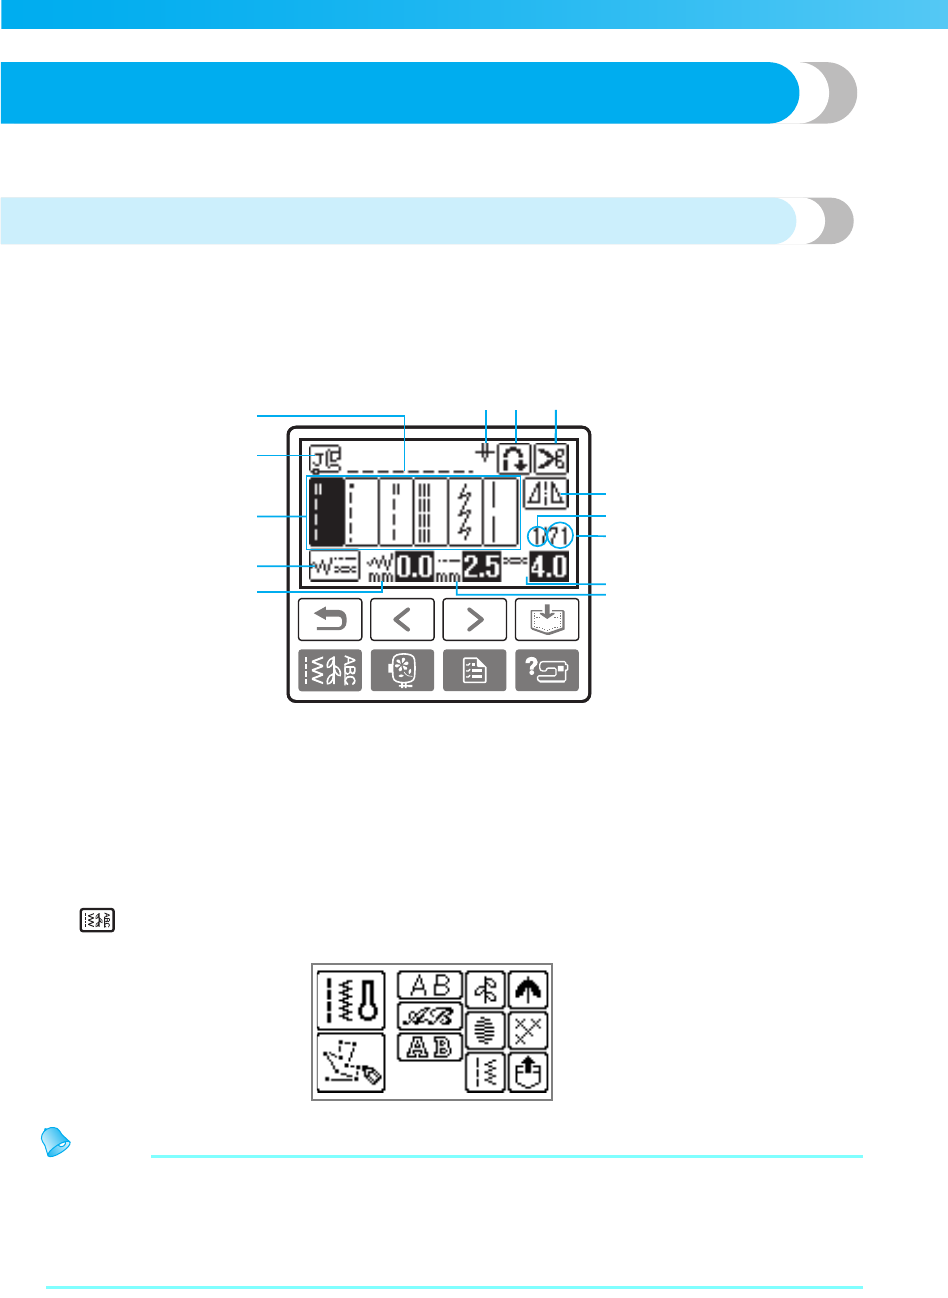
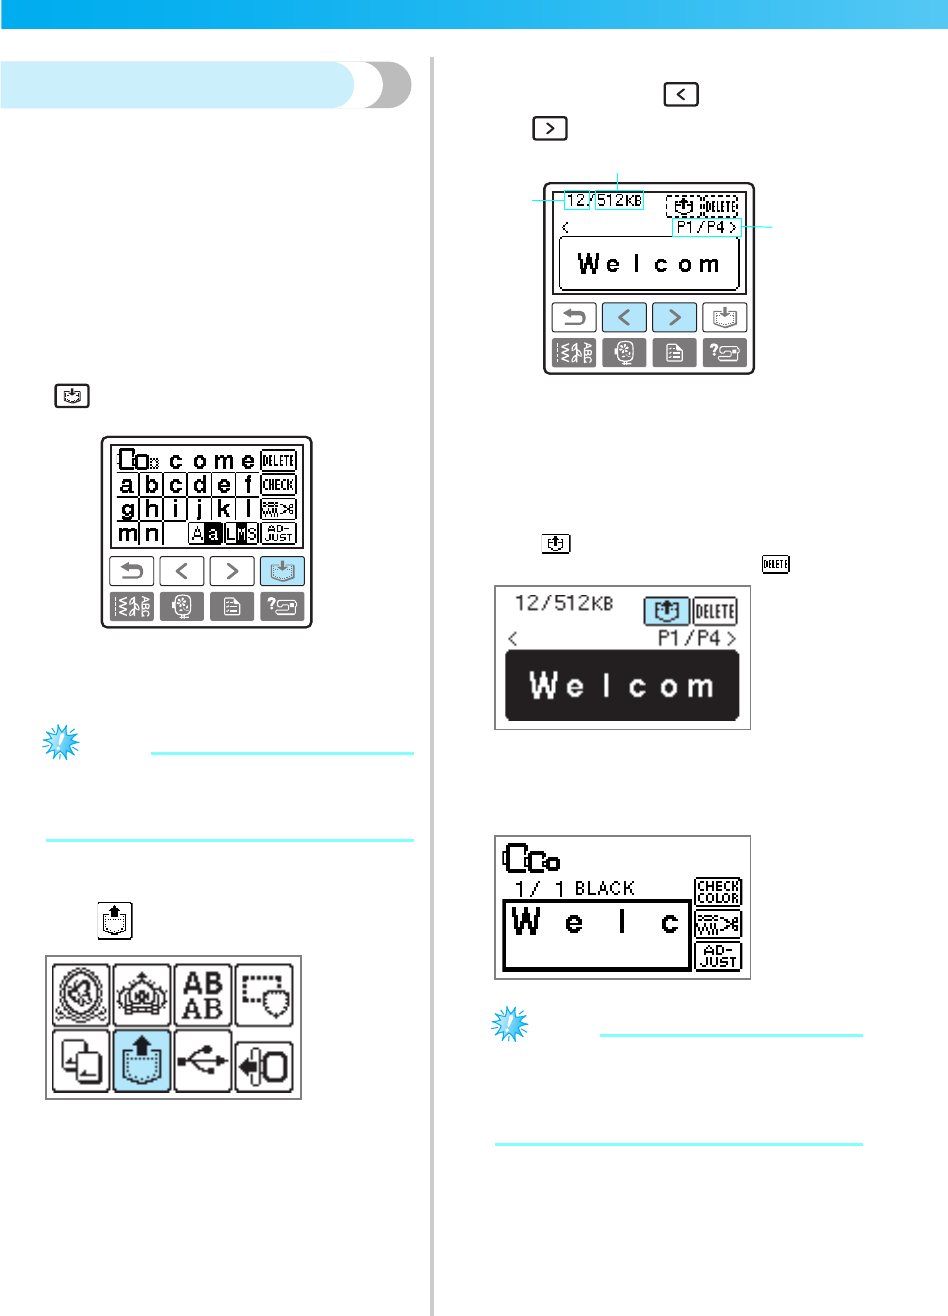
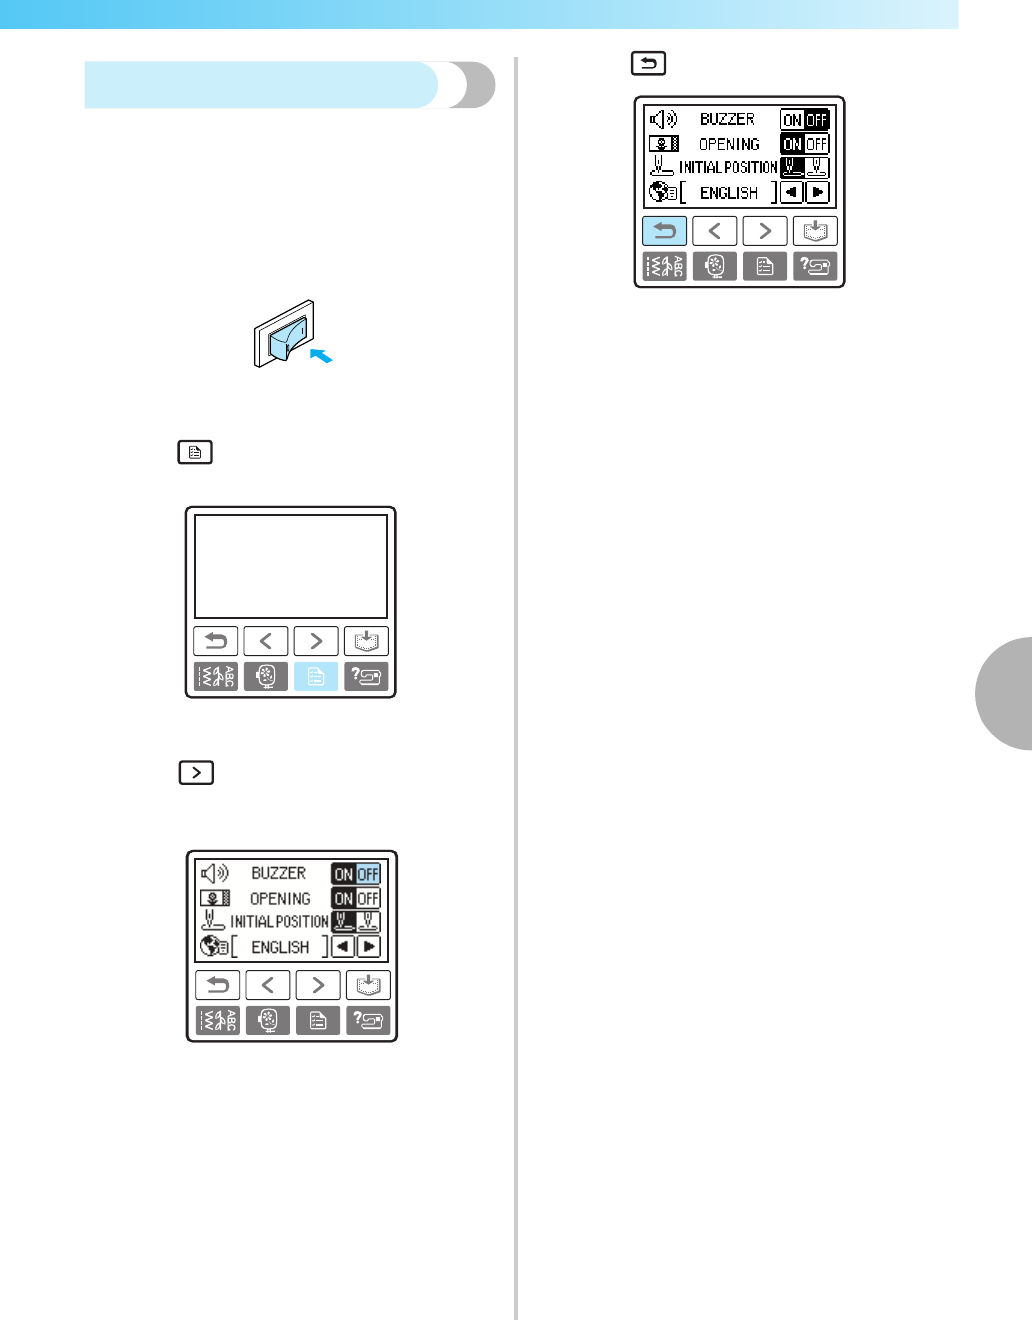
Viewing the LCD.............................................................................................................................................20
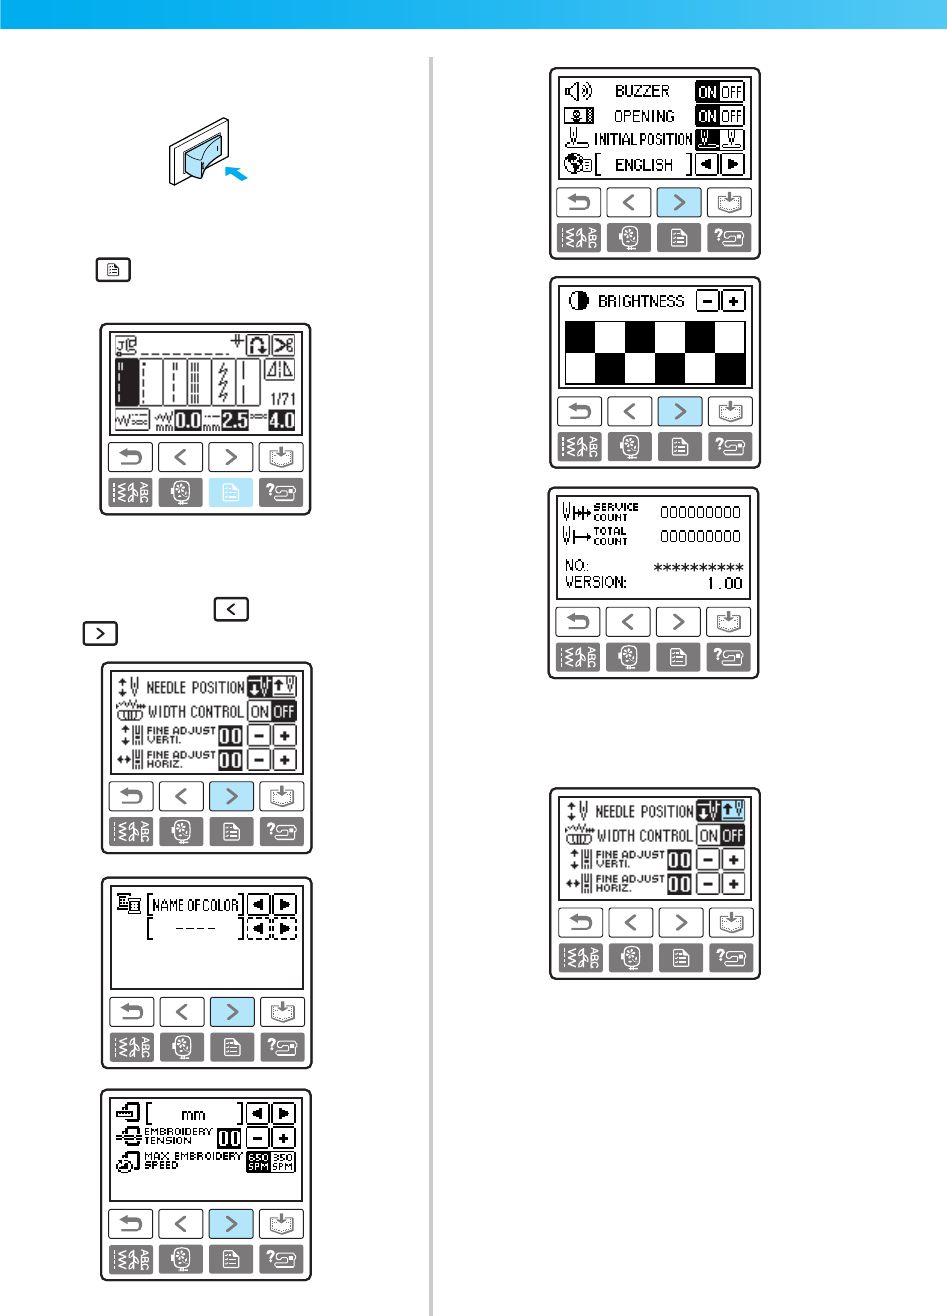
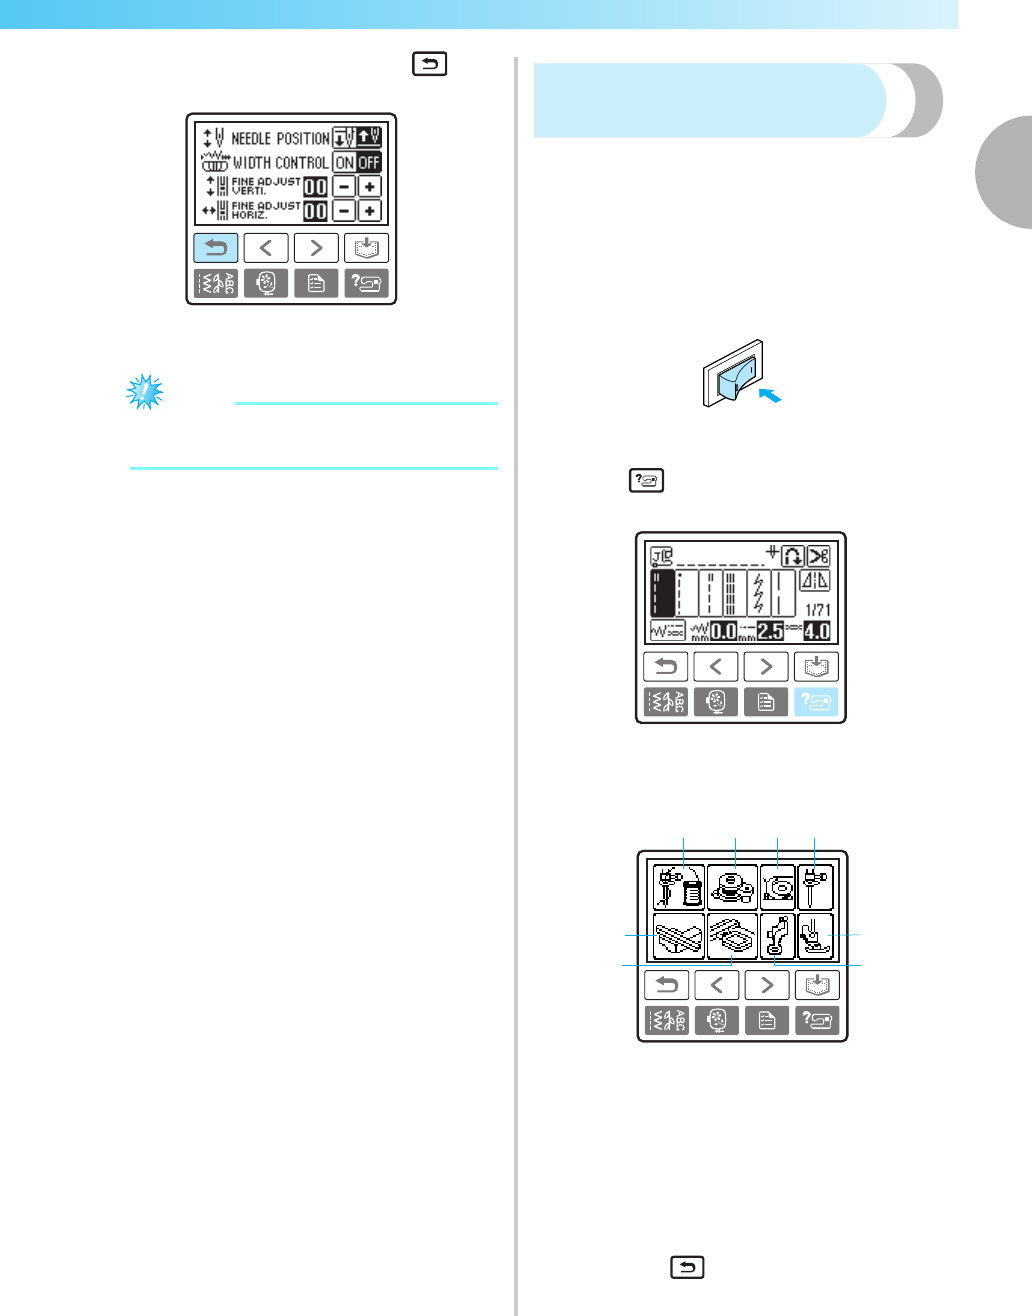
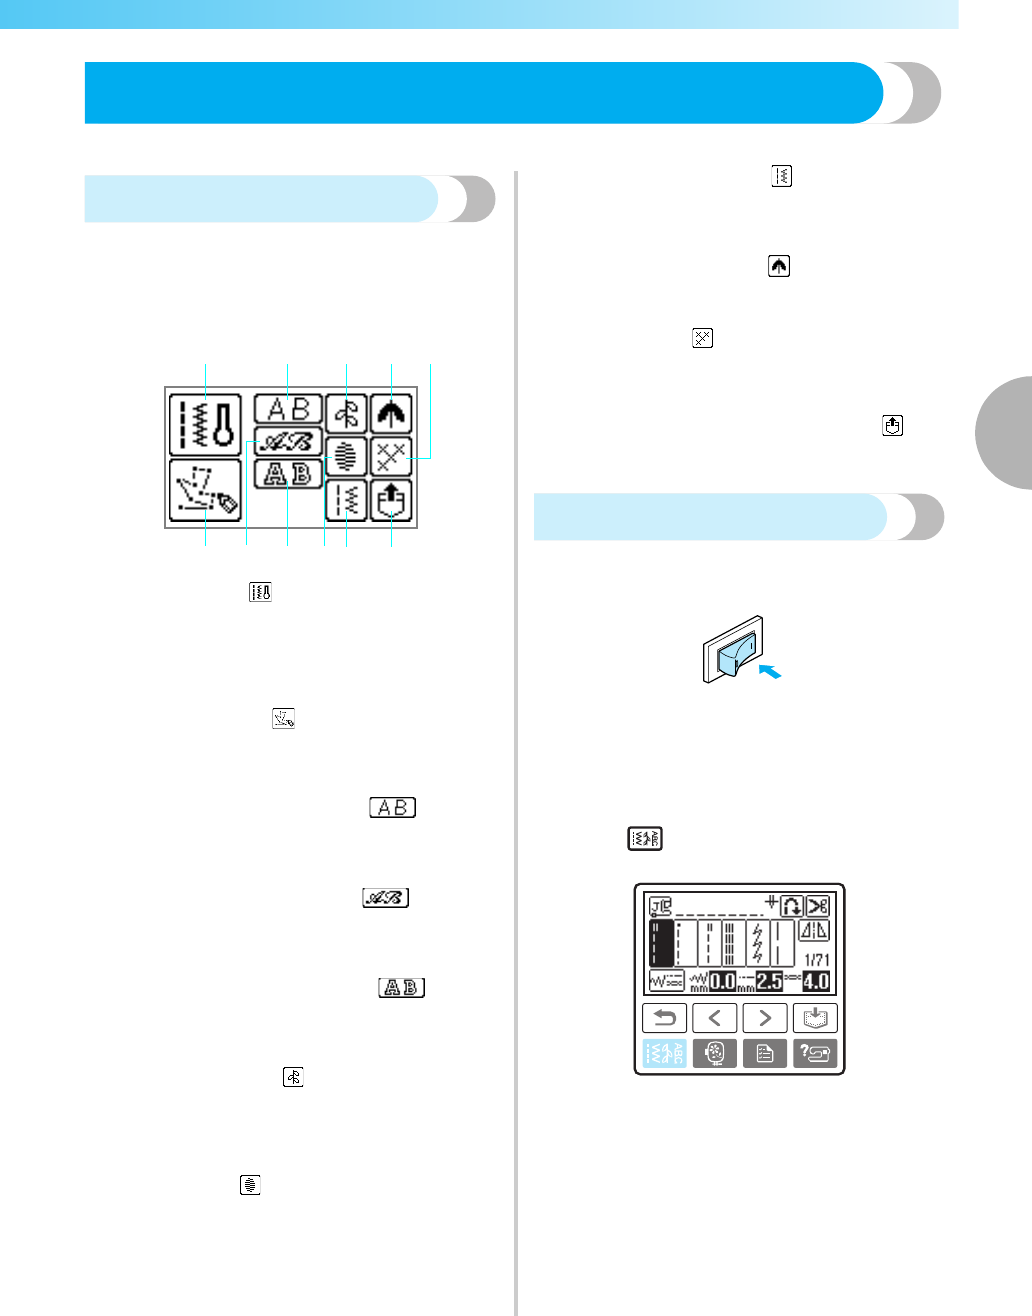
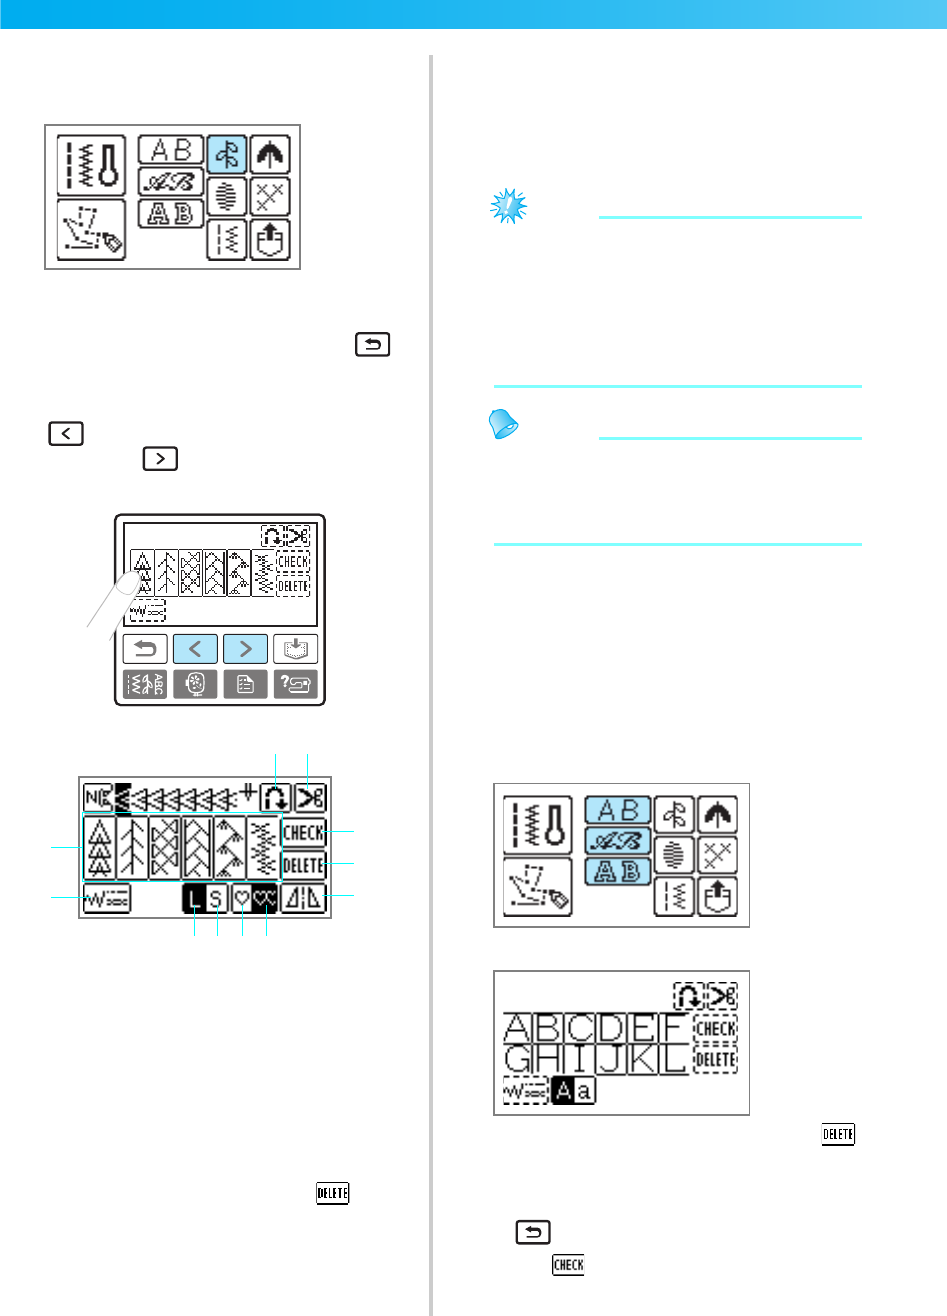
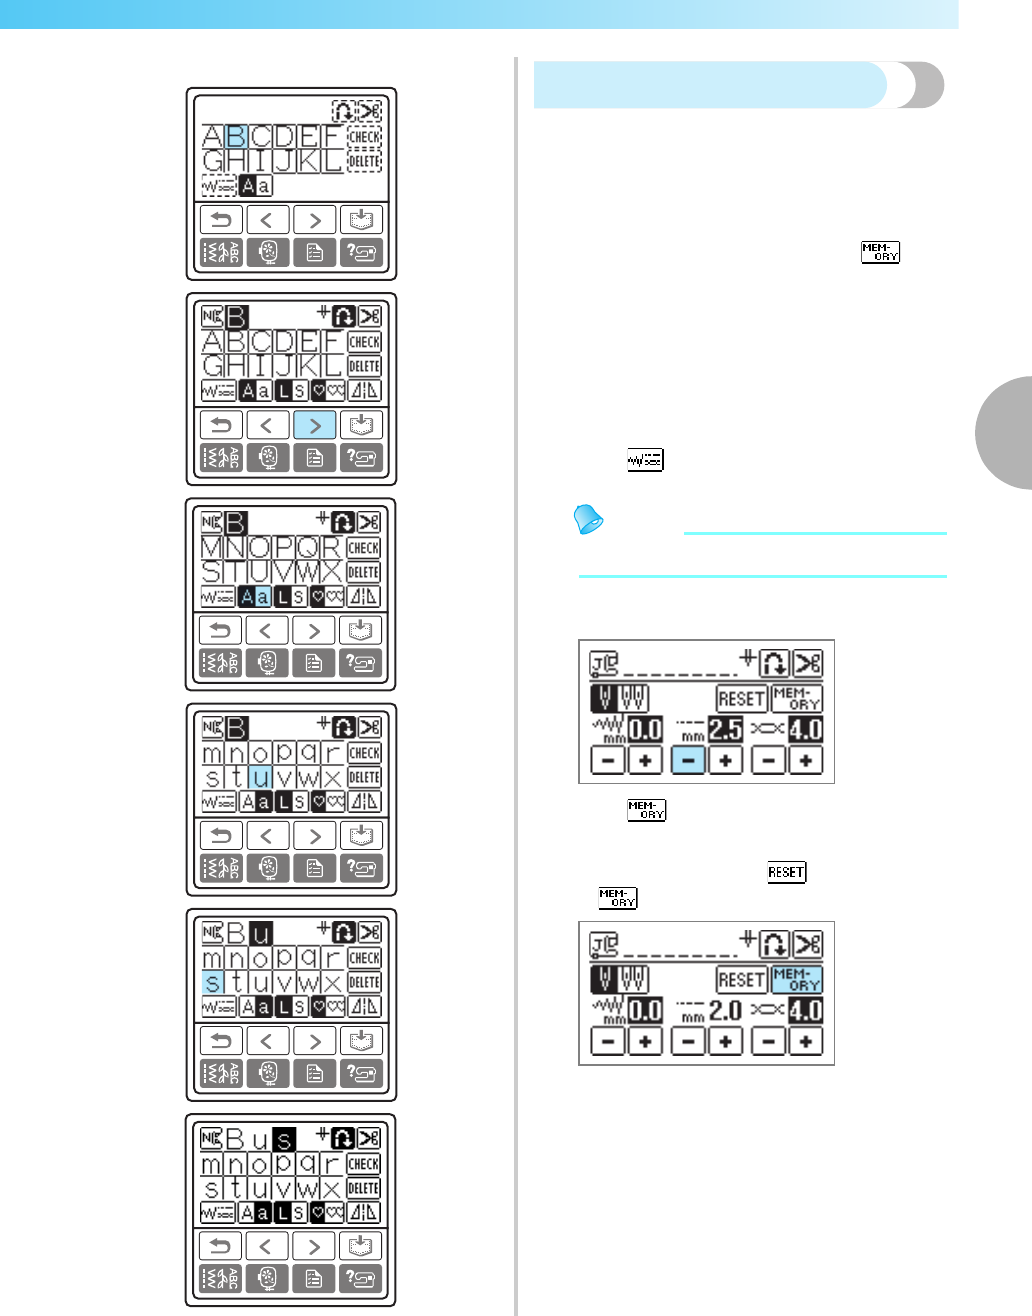
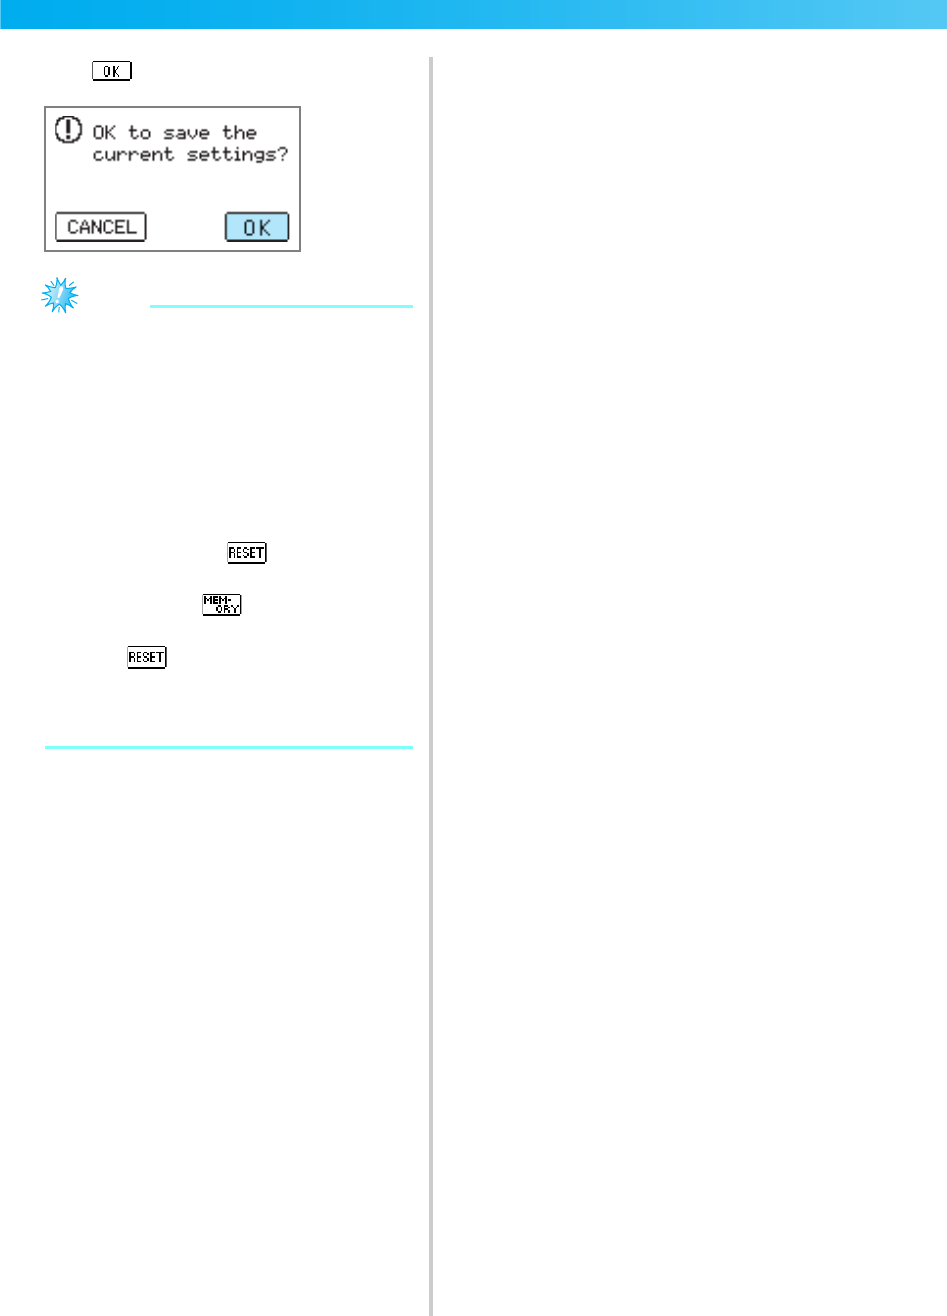
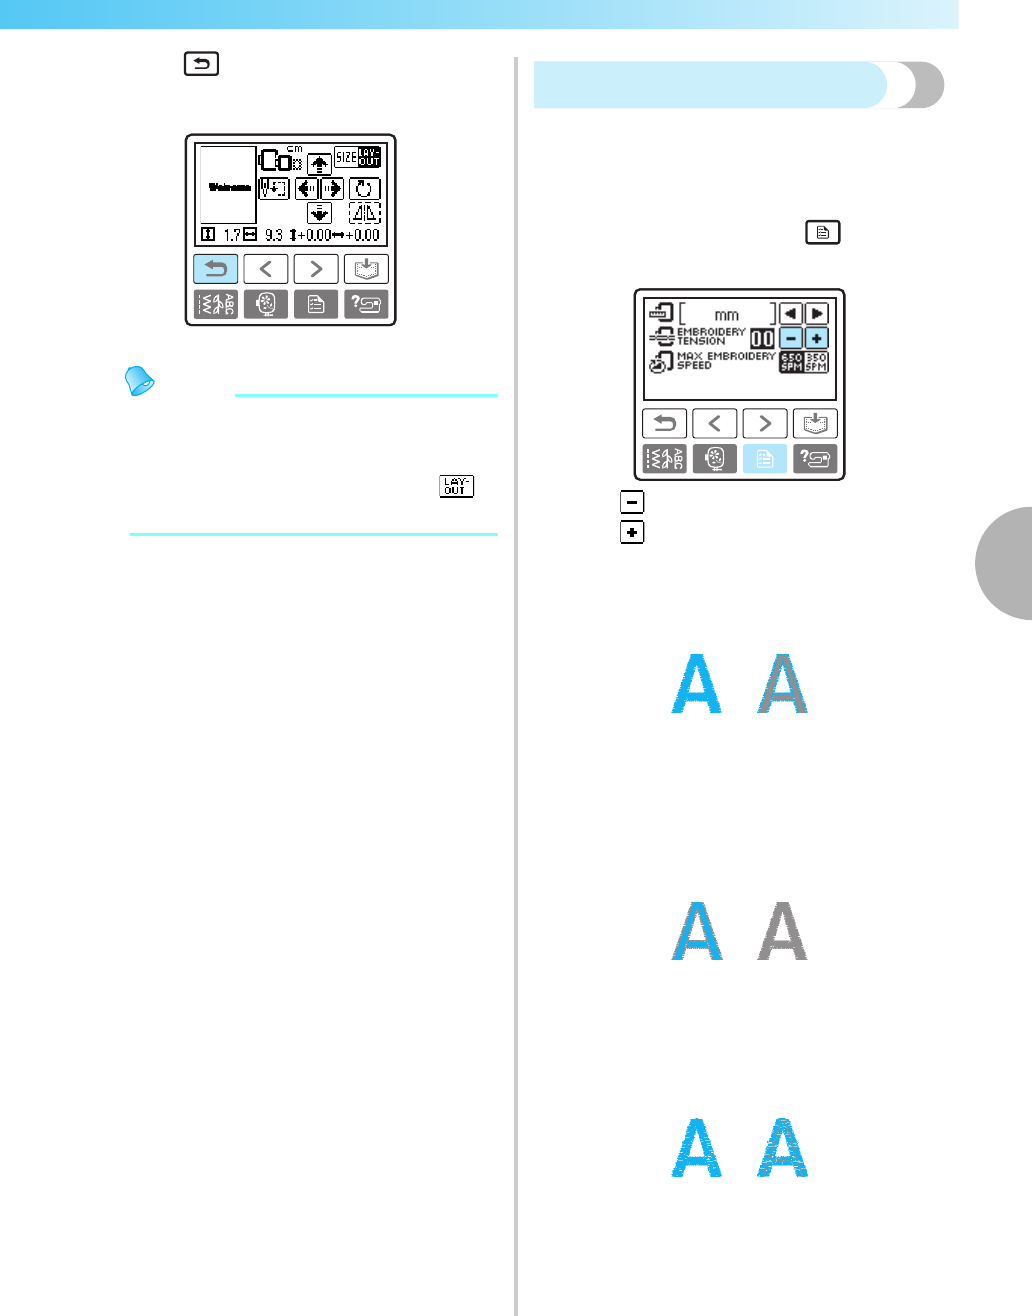
Changing the machine settings........................................................................................................................21
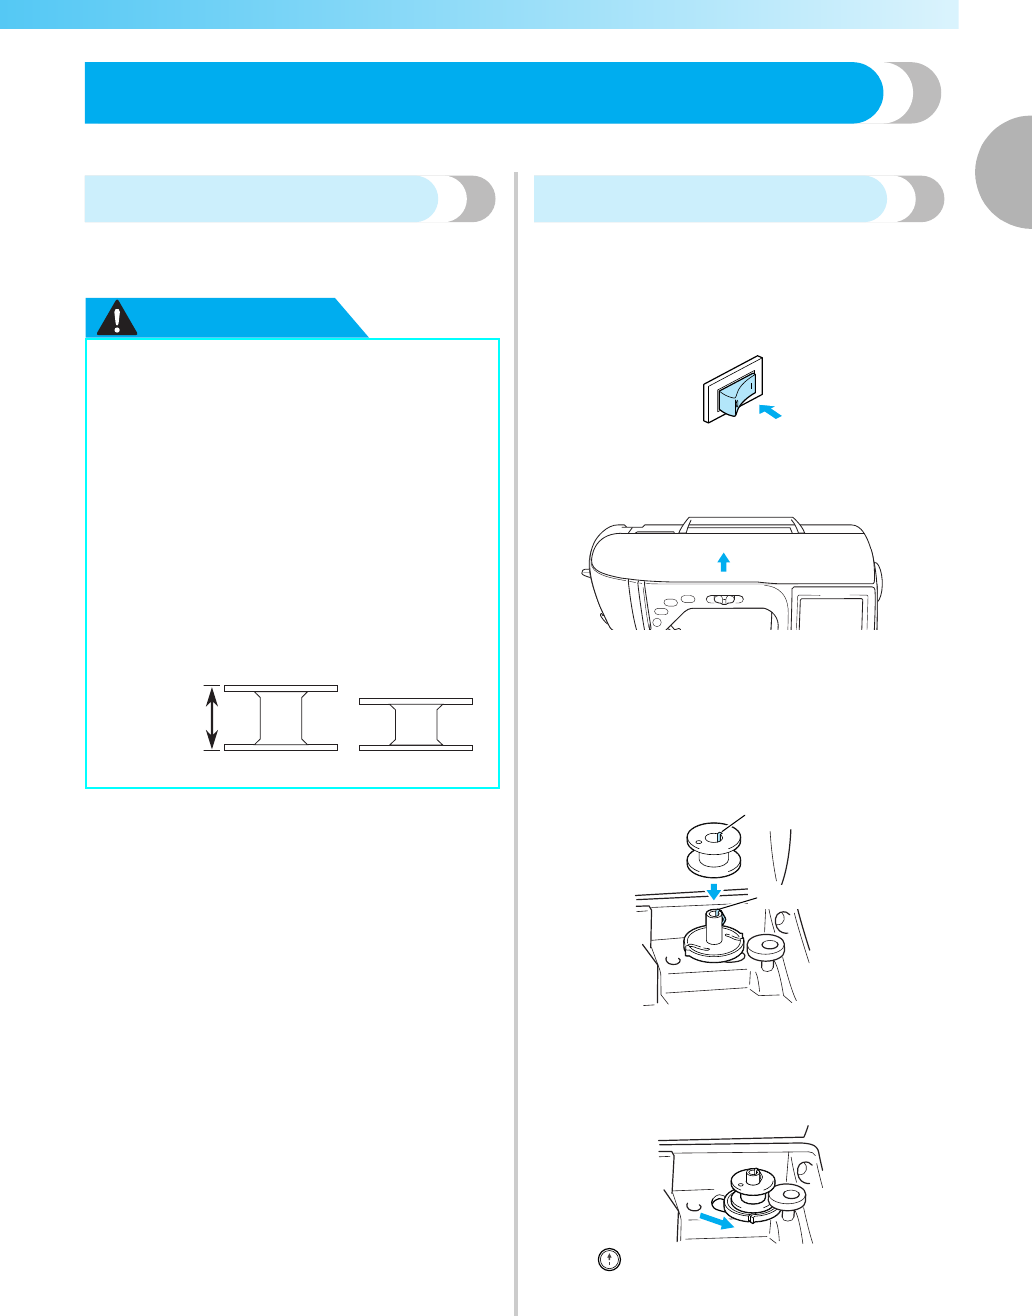
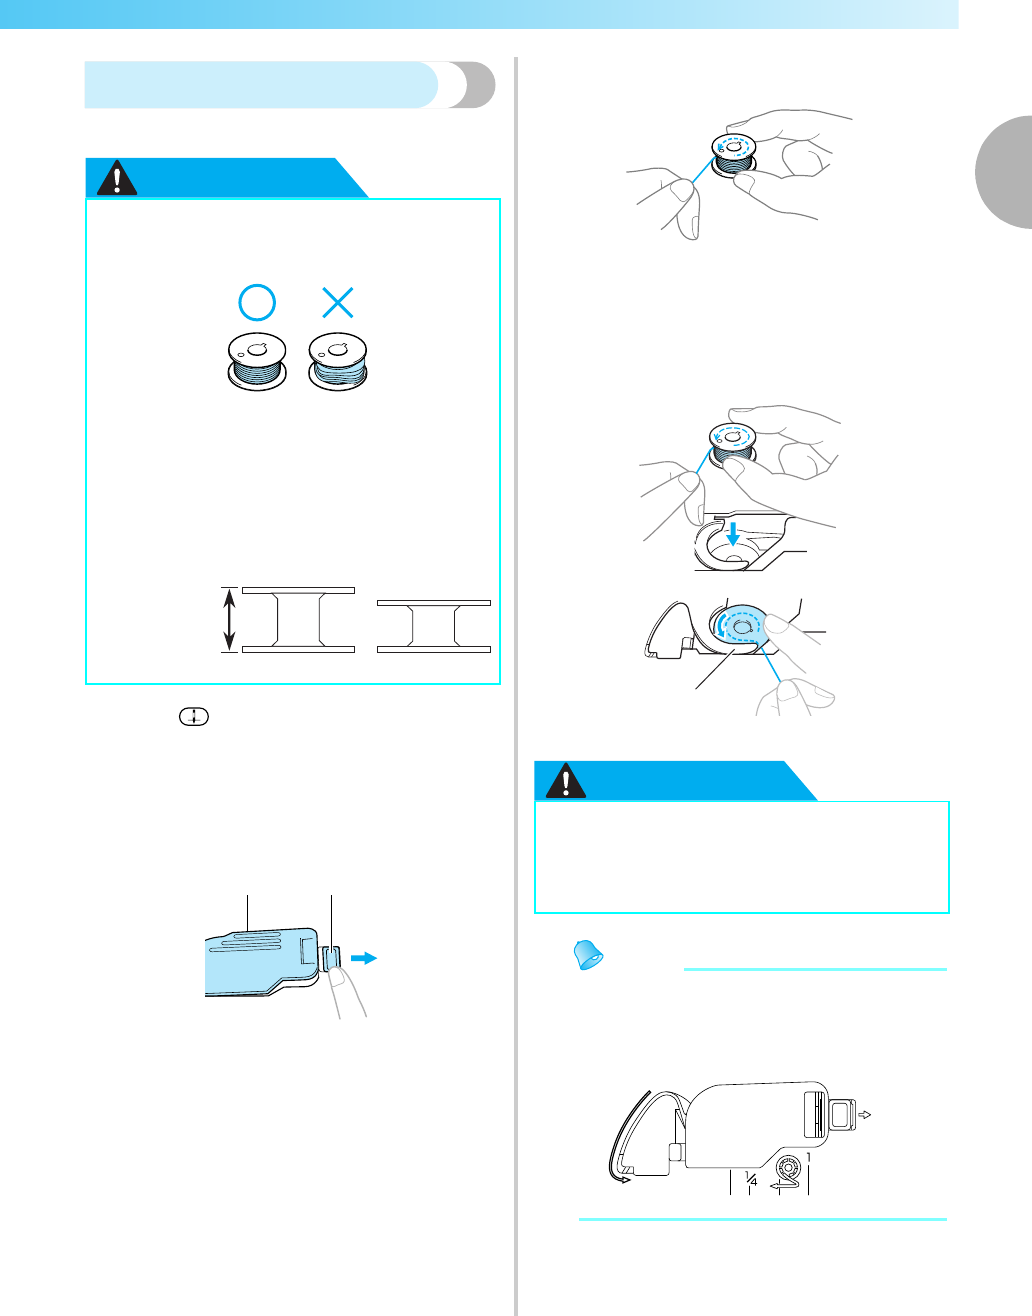
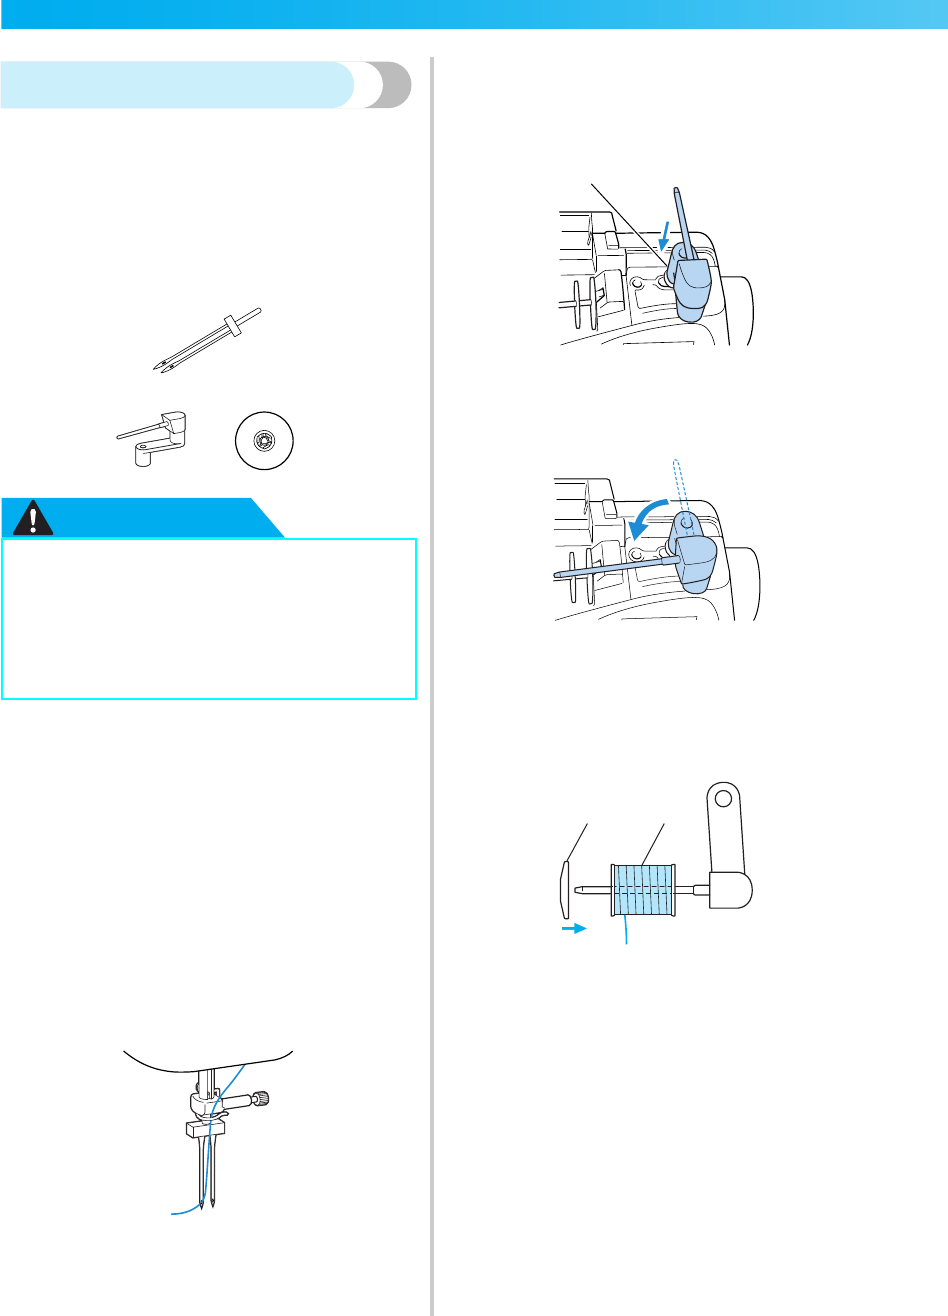
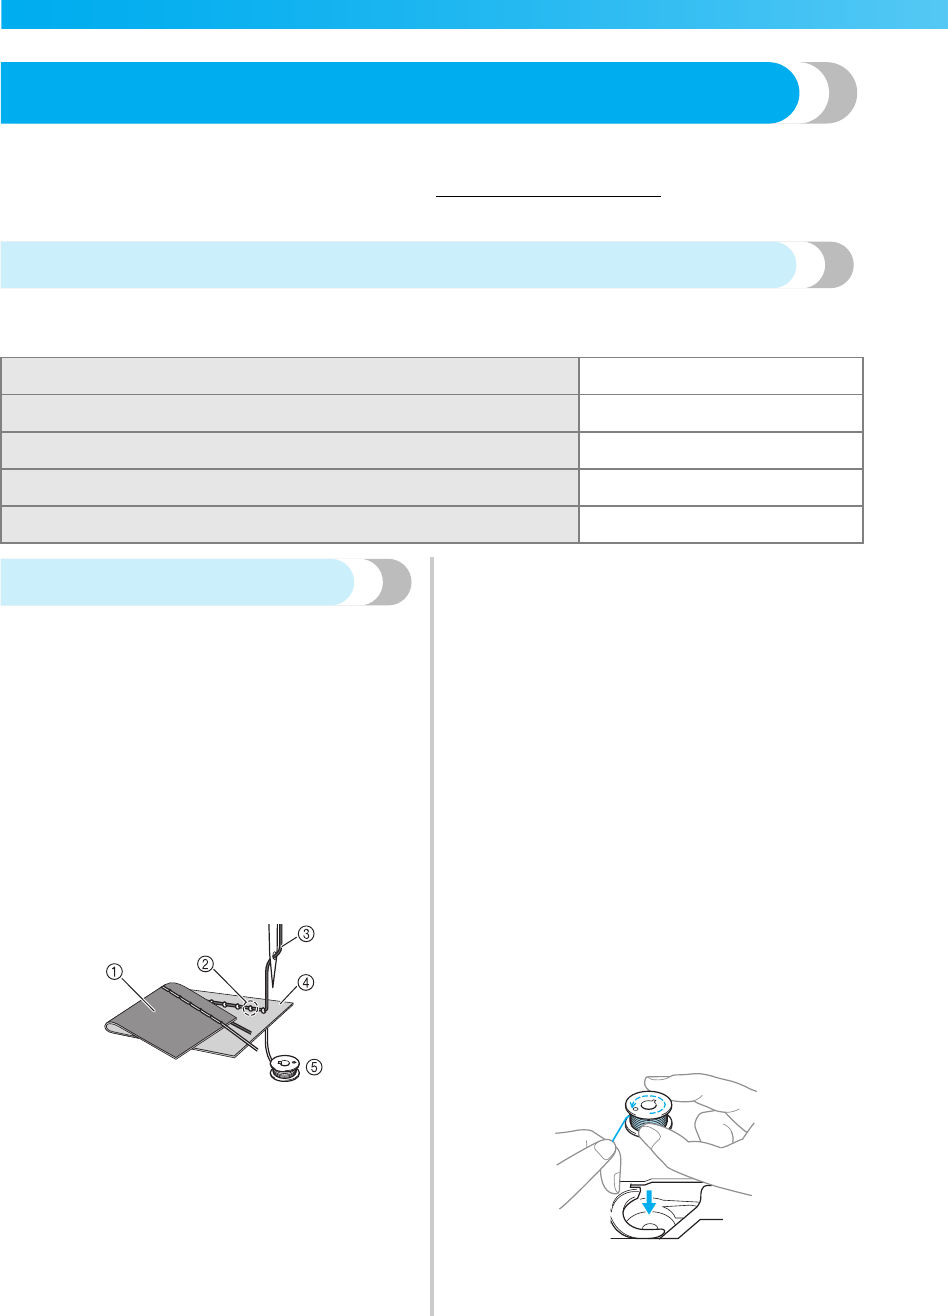
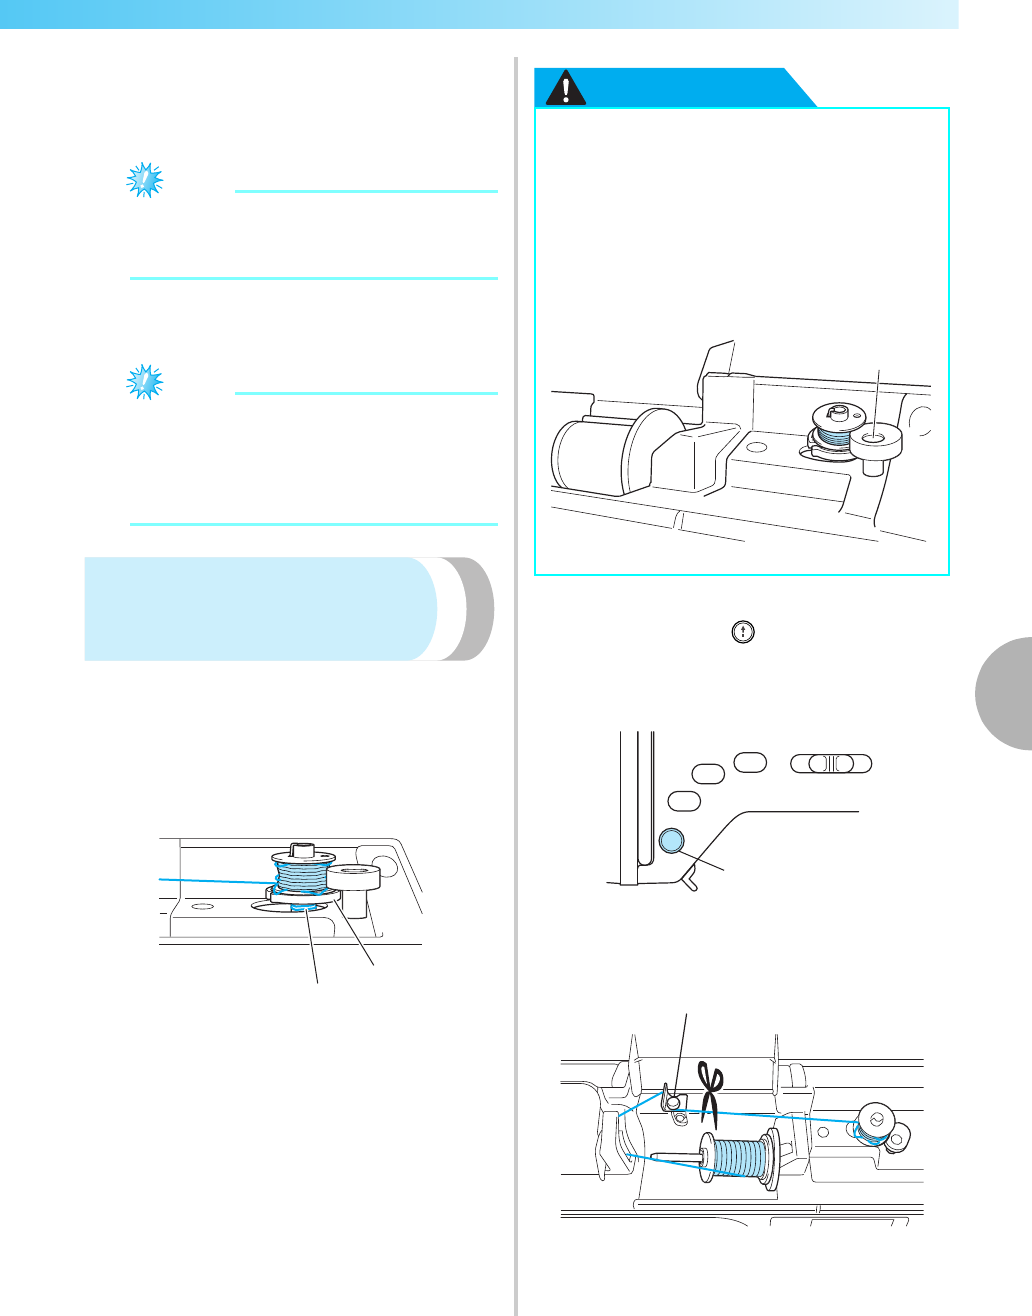
Winding the bobbin........................................................................................................................................25
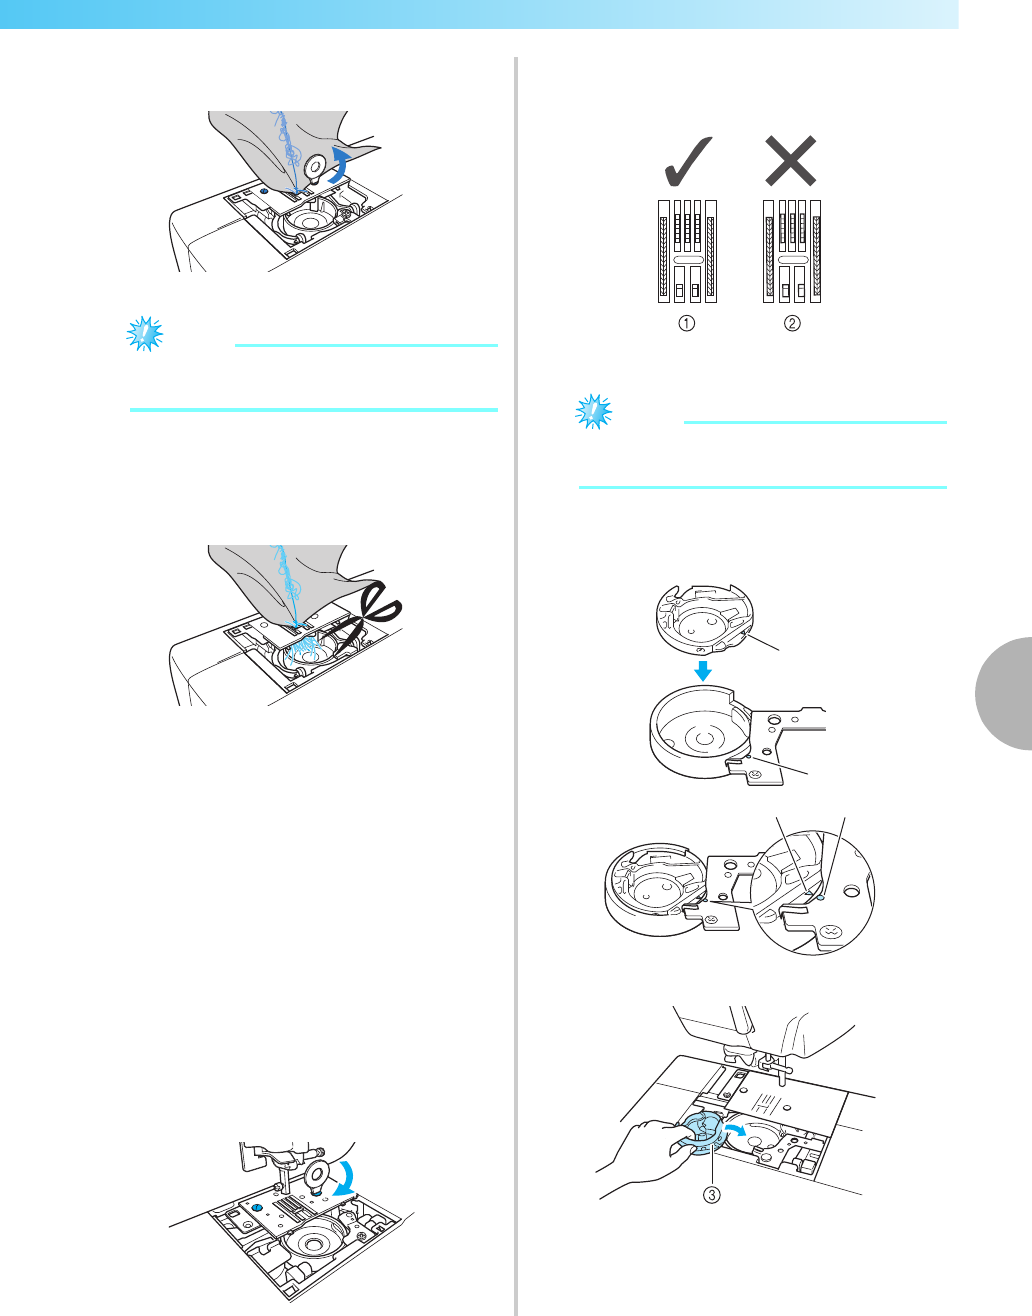
Installing the bobbin .......................................................................................................................................29
About the spool of thread................................................................................................................................31
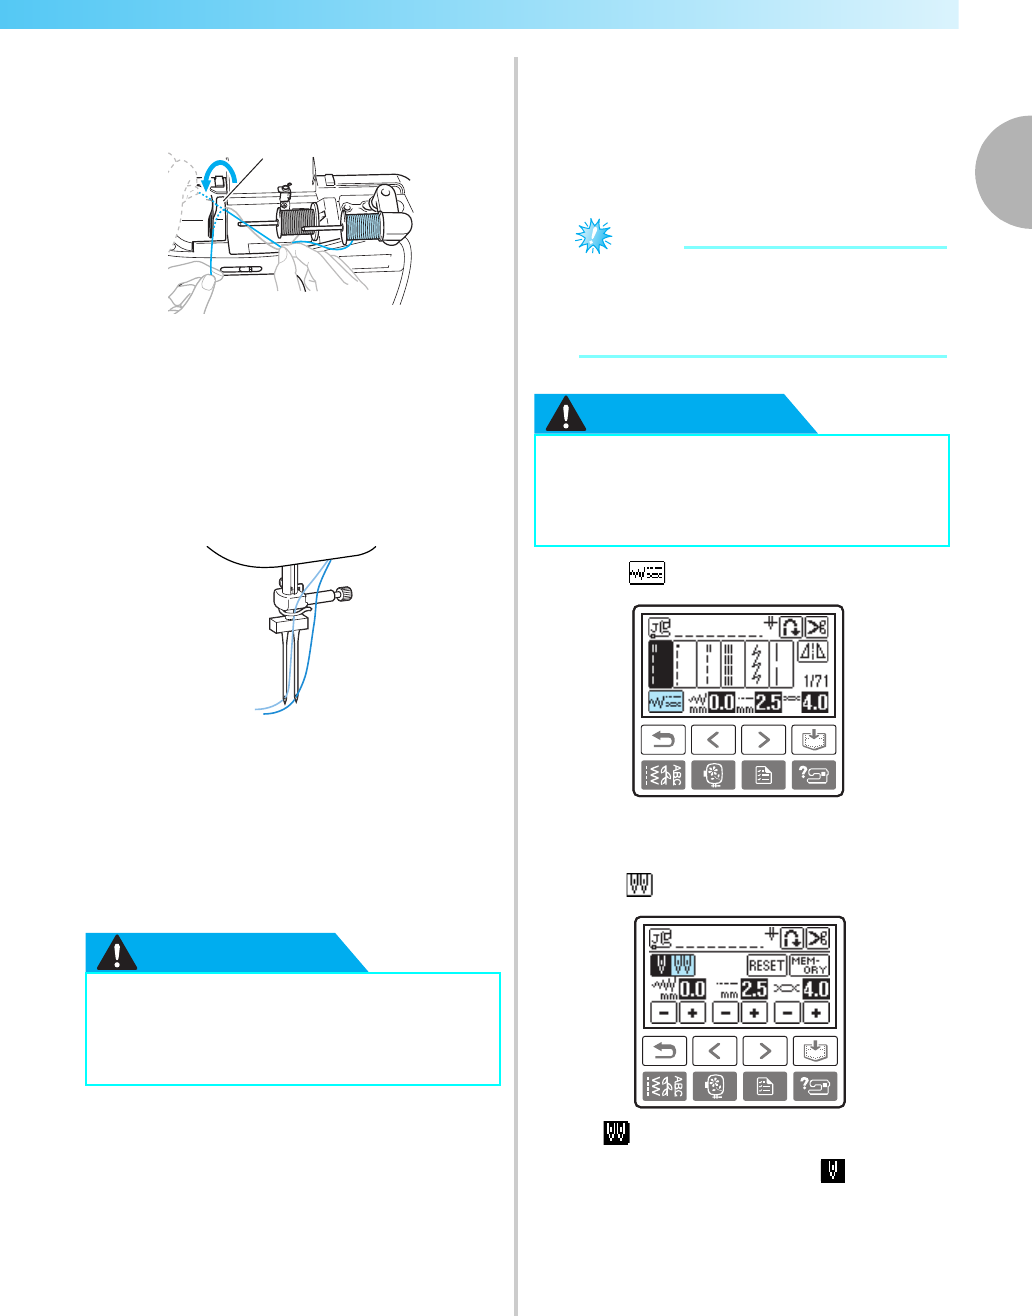
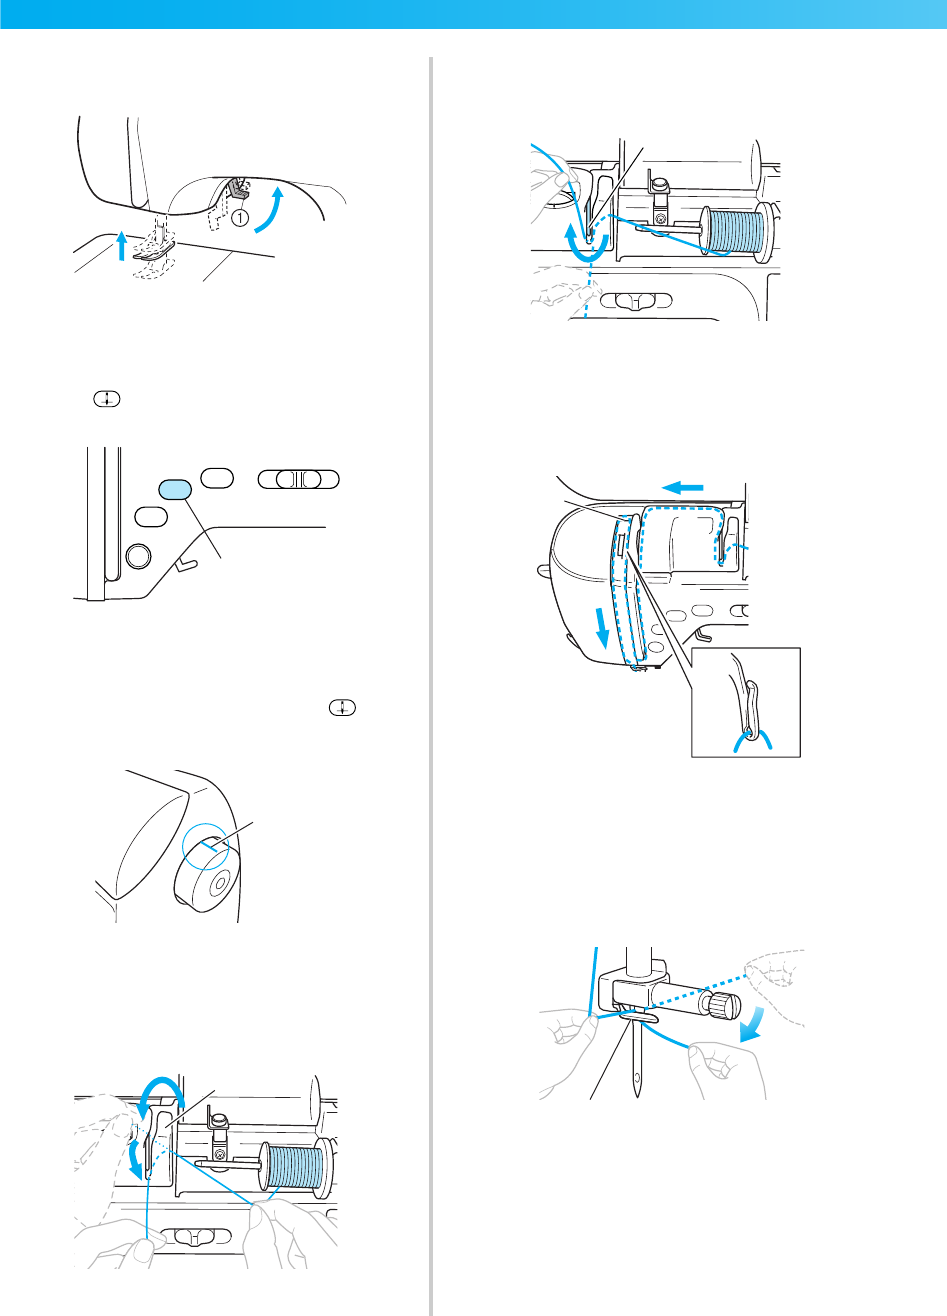
Threading the upper thread.............................................................................................................................31
Threading the needle ......................................................................................................................................34
Threading the needle manually (without using the needle threader)................................................................35
Using the twin needle.....................................................................................................................................36
Pulling up the bobbin thread...........................................................................................................................38
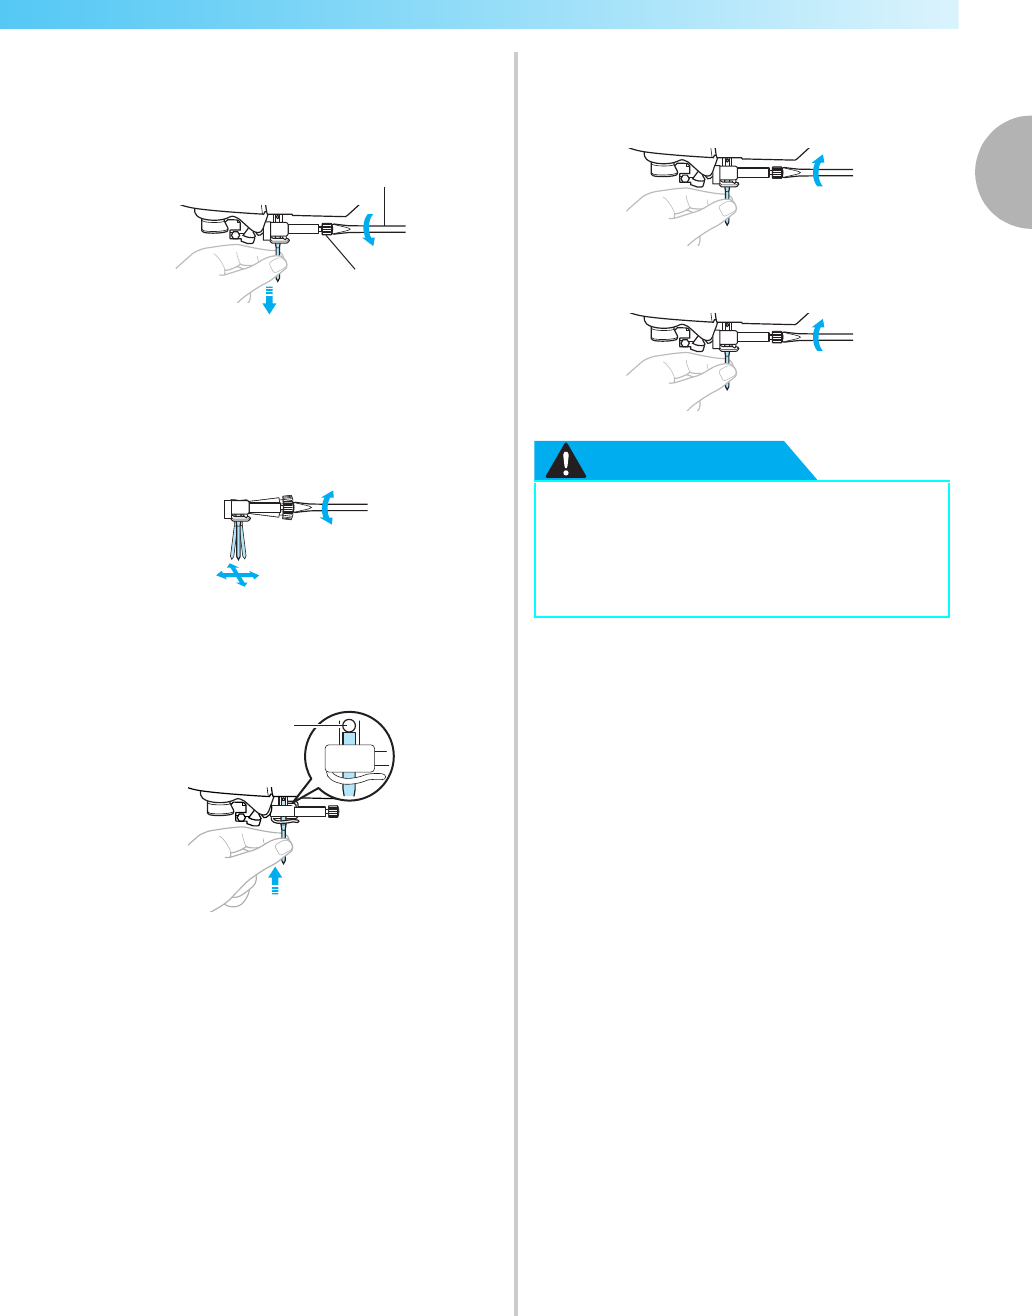
Replacing the Needle ........................................................................................................40
Needle types and their uses.............................................................................................................................41
Checking the needle.......................................................................................................................................42
Replacing the needle.......................................................................................................................................42
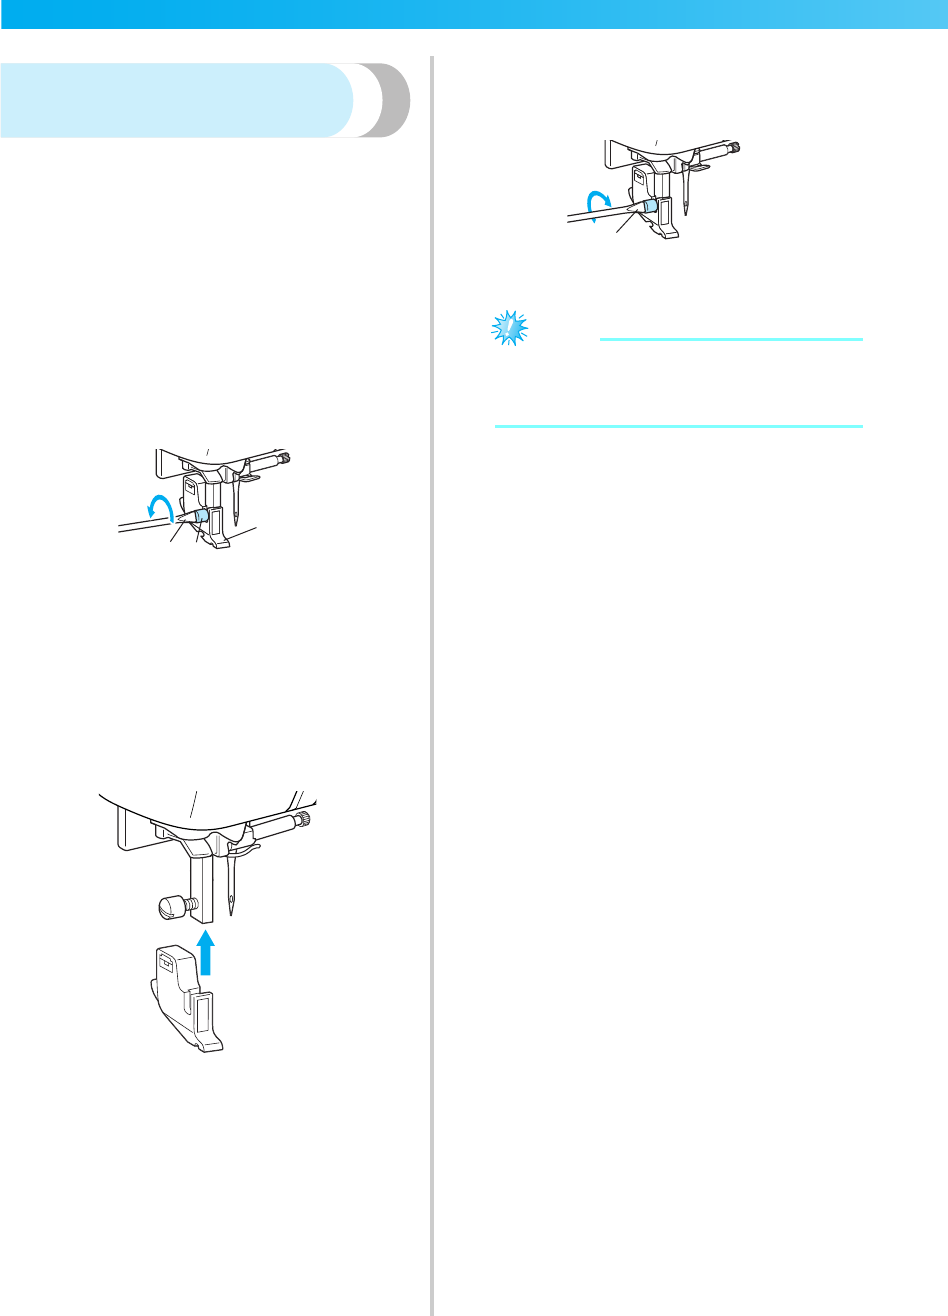
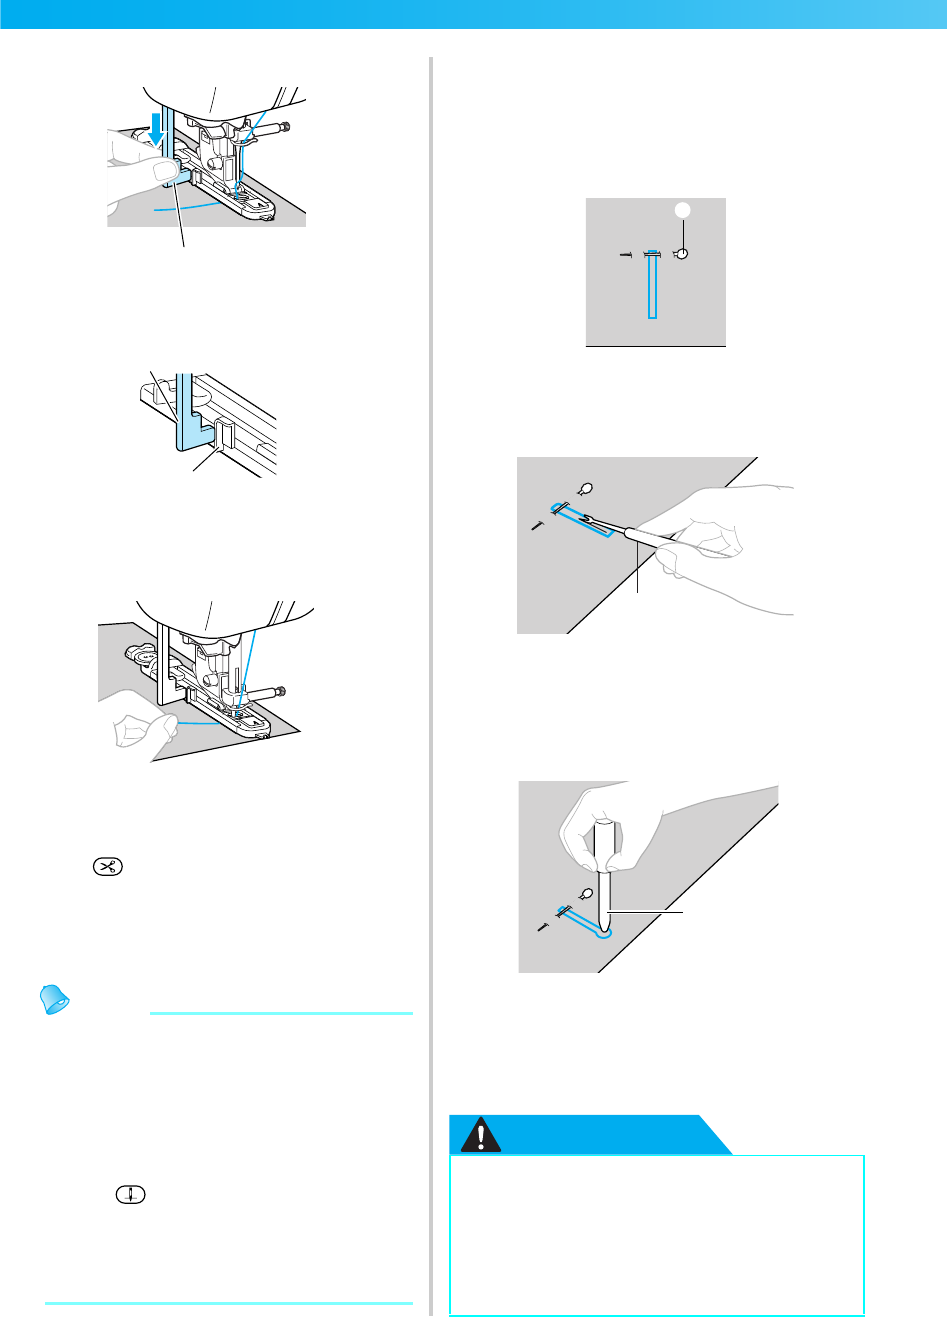
Replacing the Presser Foot ................................................................................................44
Replacing the presser foot...............................................................................................................................44
Removing and attaching the presser foot holder..............................................................................................46
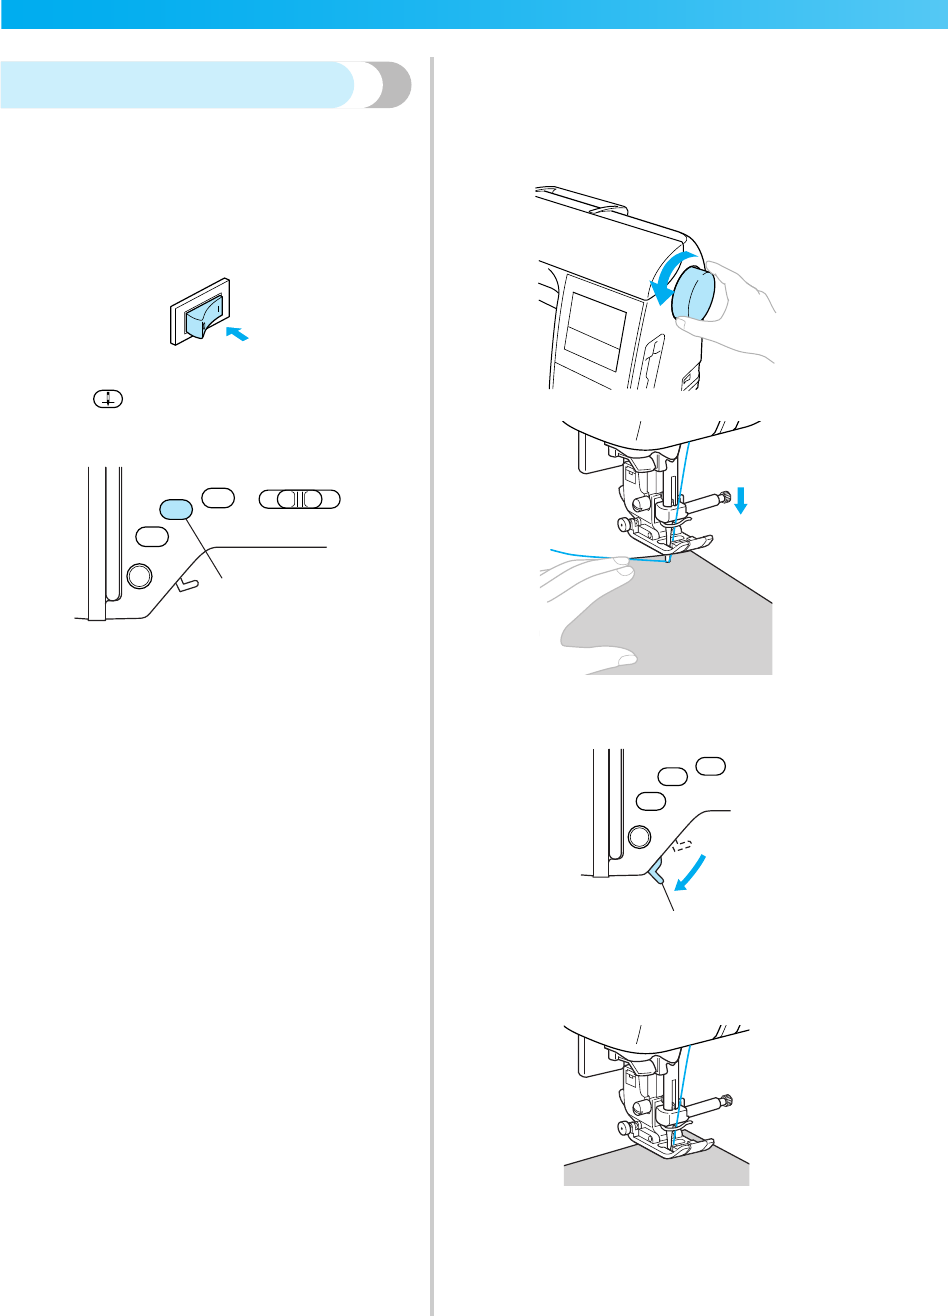
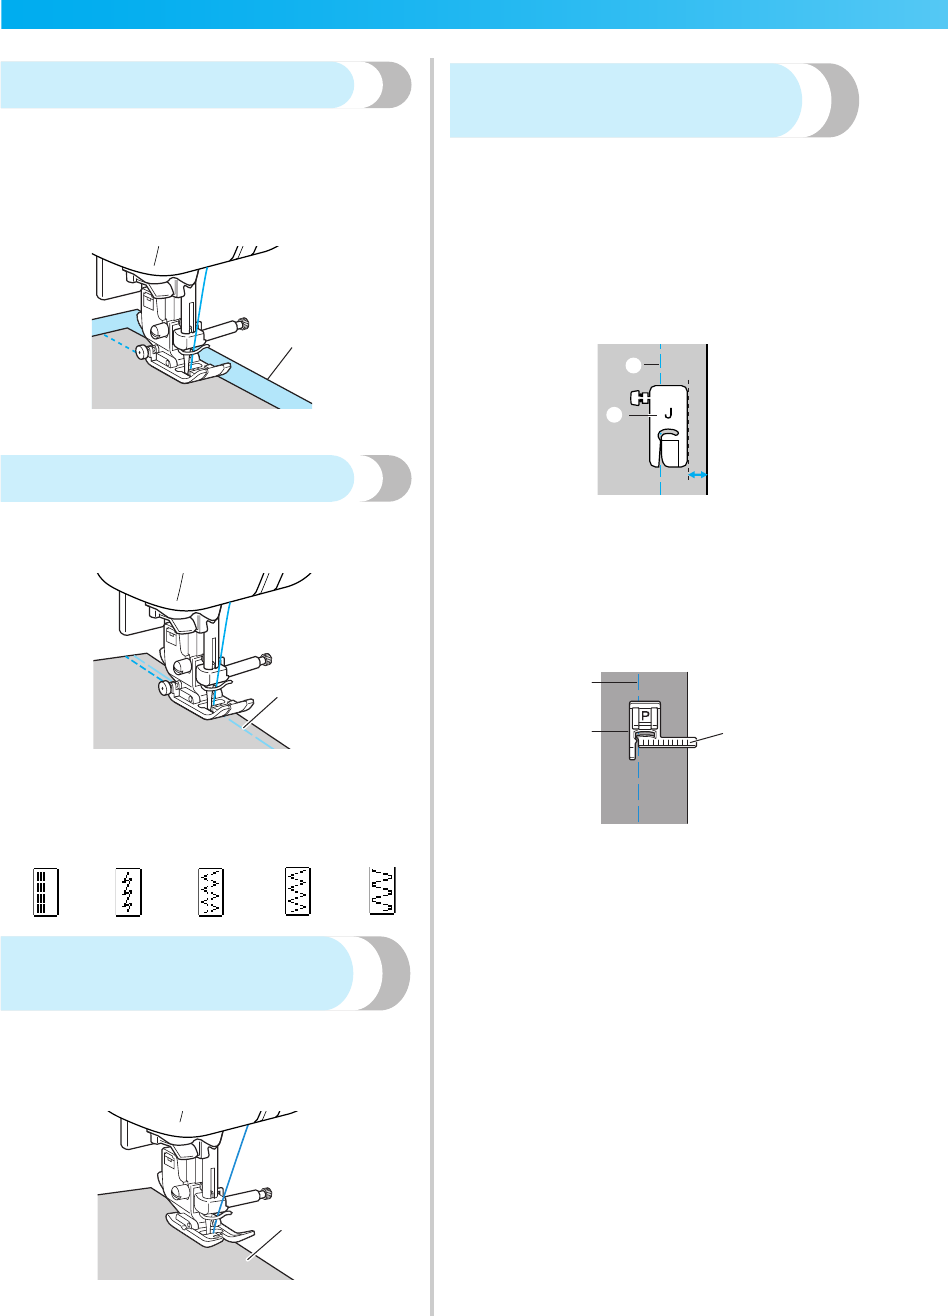
General sewing procedure..............................................................................................................................50
Positioning the fabric ......................................................................................................................................52
Starting to sew.................................................................................................................................................53
Securing the stitching......................................................................................................................................55
Cutting the thread ...........................................................................................................................................56
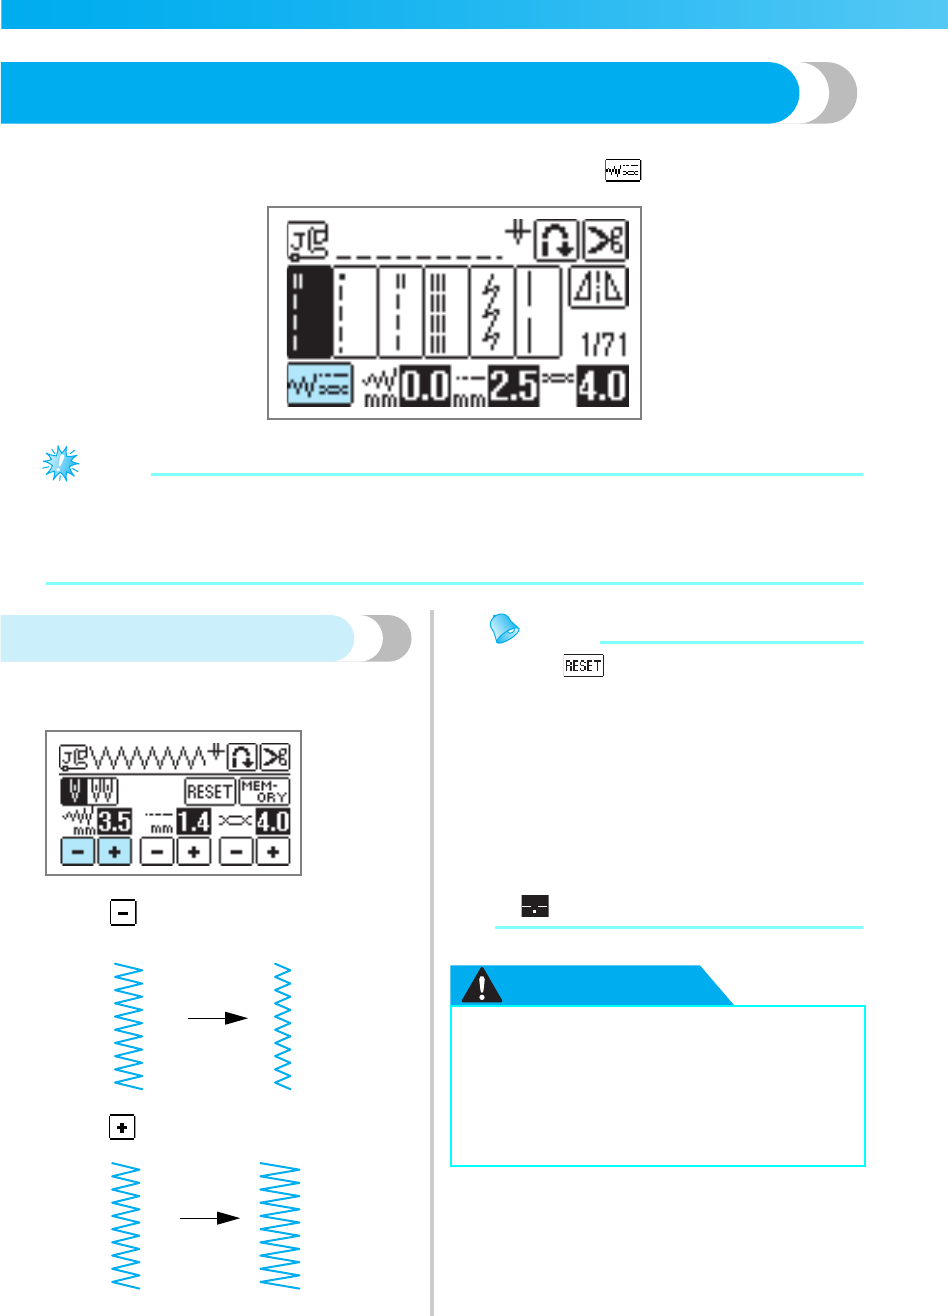
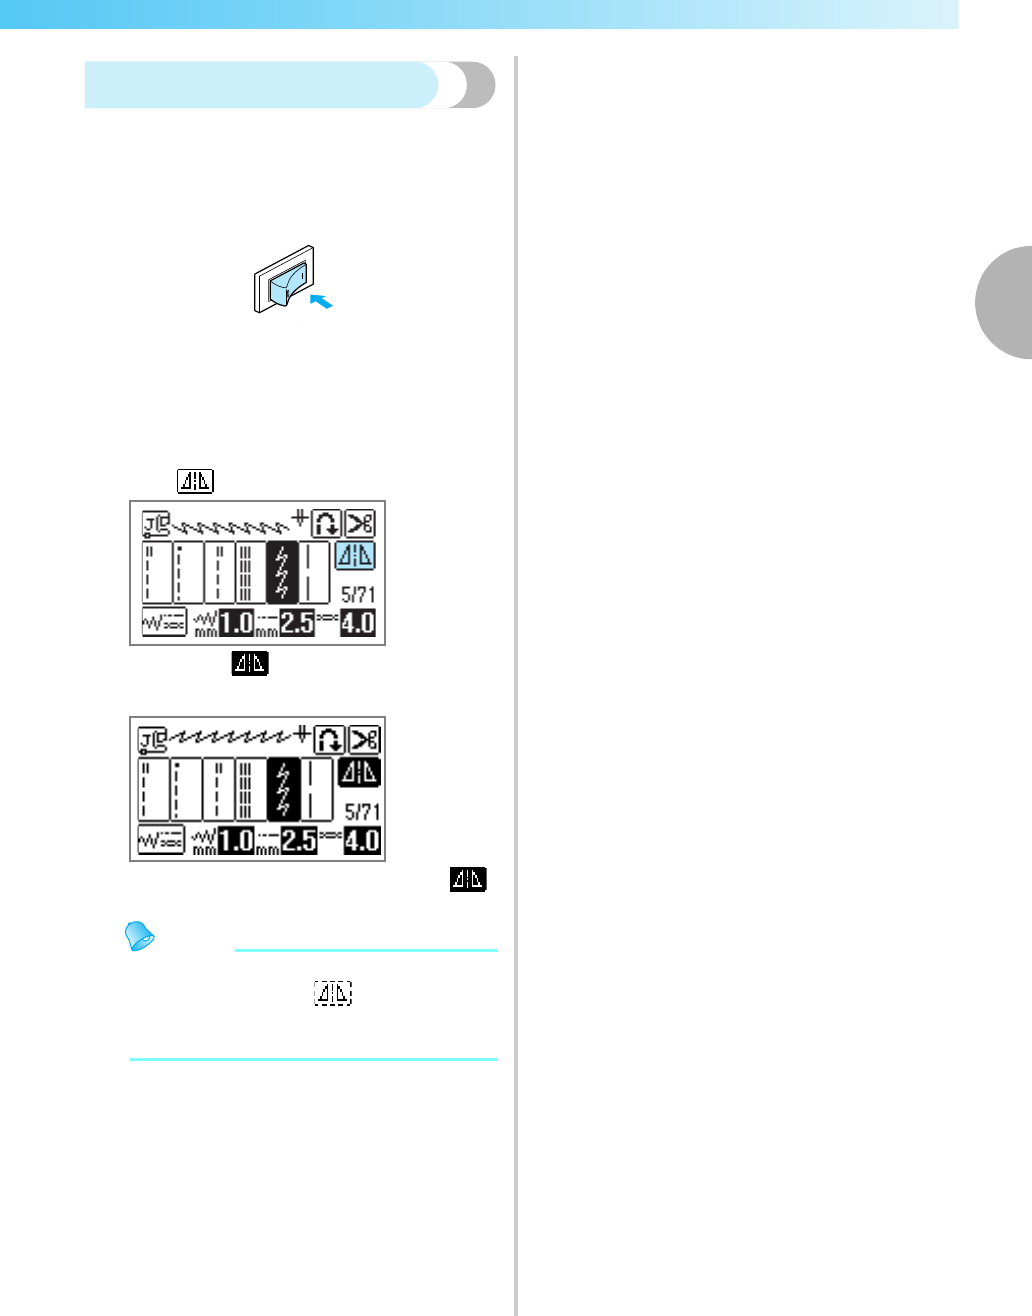
Setting the Stitch...............................................................................................................58
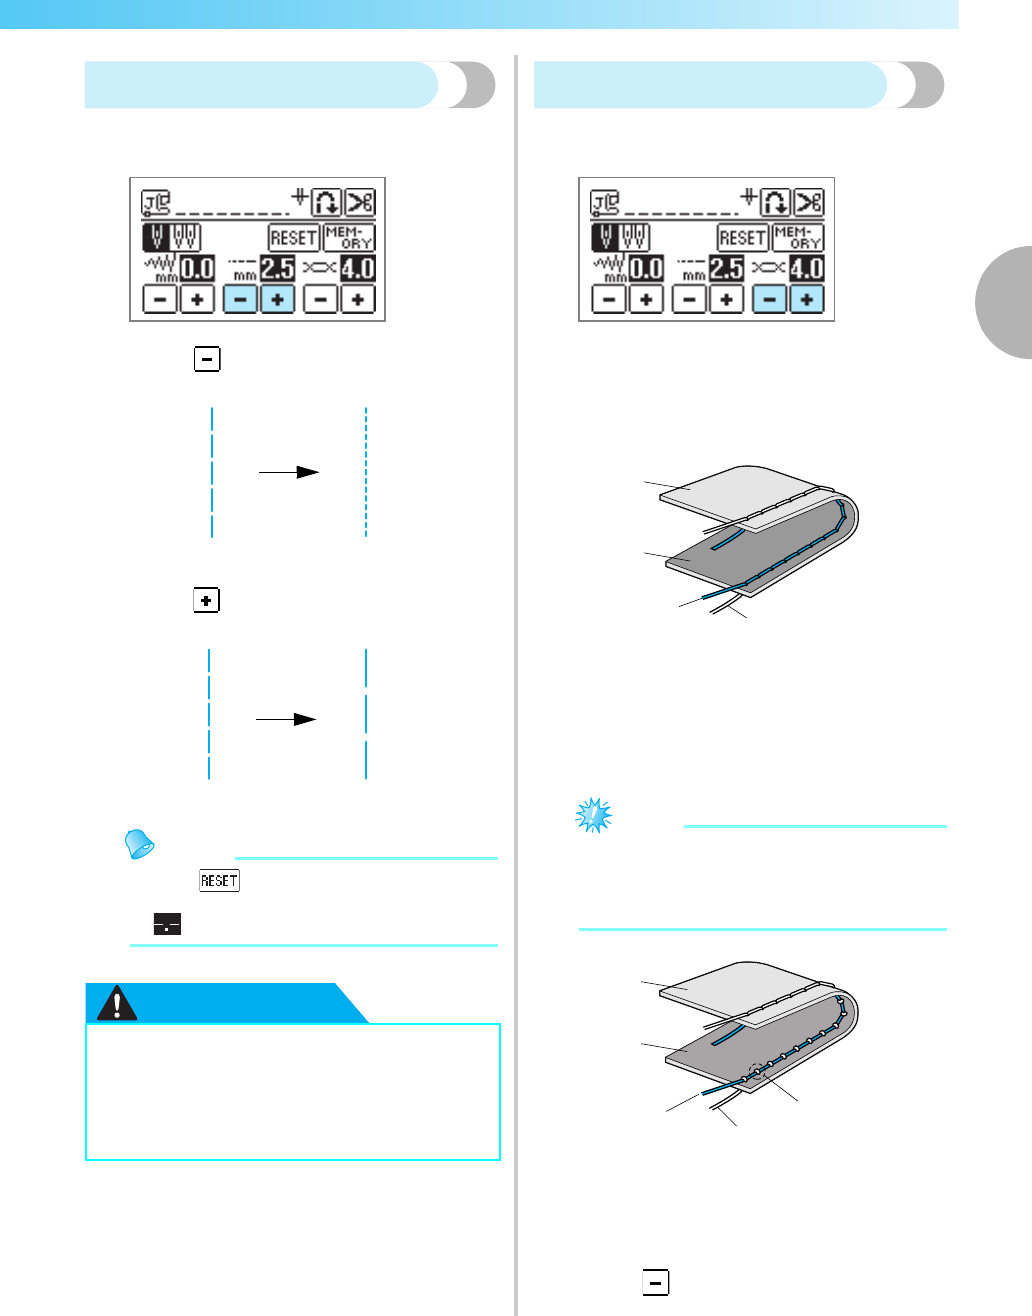
Adjusting the stitch width................................................................................................................................58
Adjusting the stitch length...............................................................................................................................59
Adjusting the thread tension............................................................................................................................59
Automatically cutting the thread .....................................................................................................................62
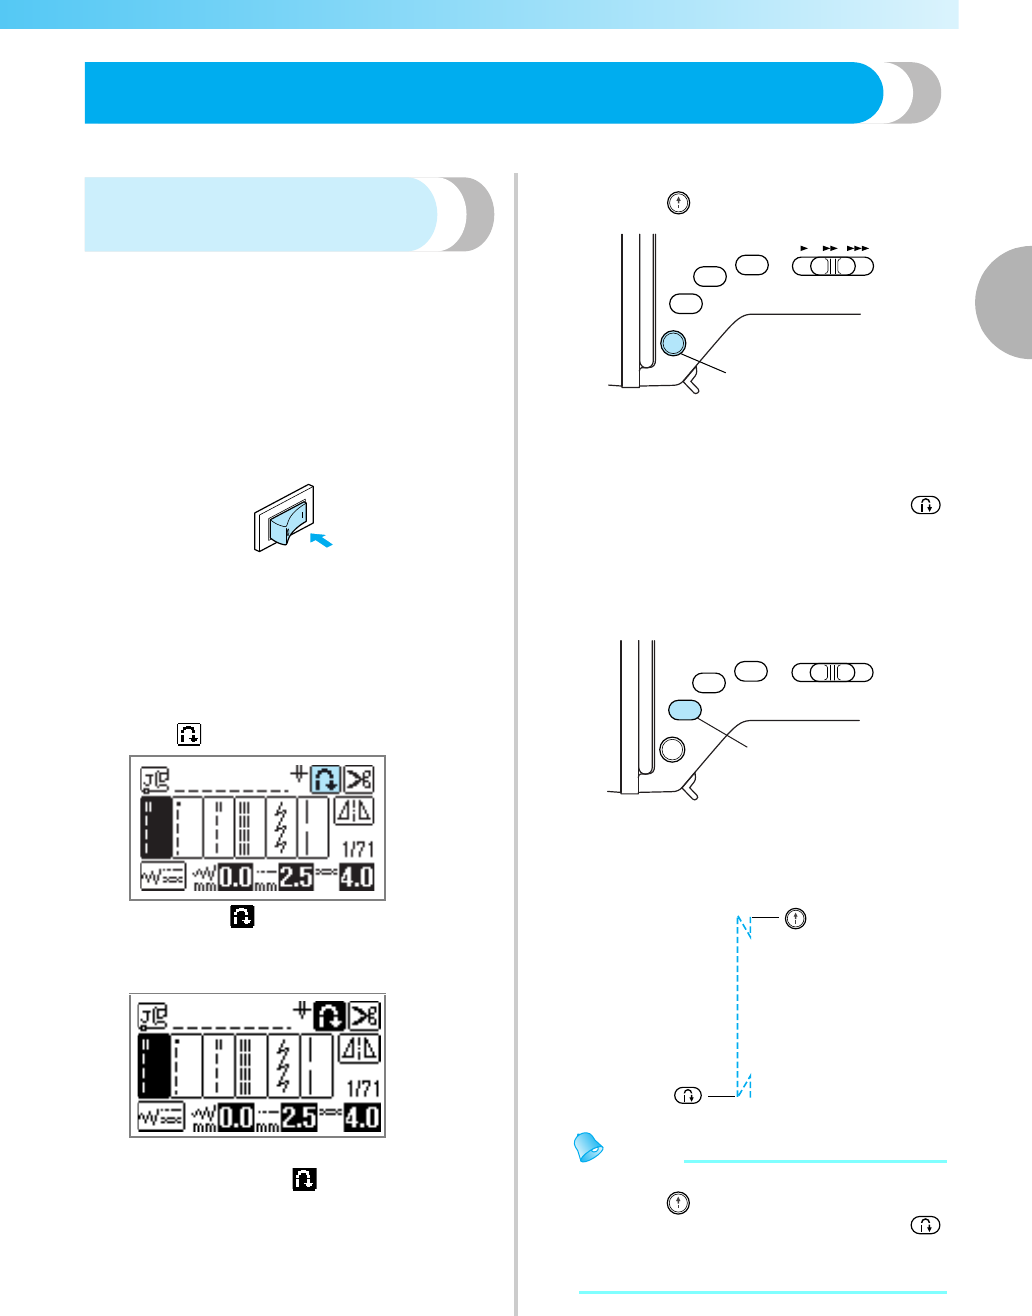
Changing the sewing direction........................................................................................................................64
Adjusting the presser foot pressure..................................................................................................................64
Sewing leathers or vinyl fabrics.......................................................................................................................66
Sewing an even seam allowance.....................................................................................................................66
Hands-free raising and lifting of the presser foot..............................................................................................67
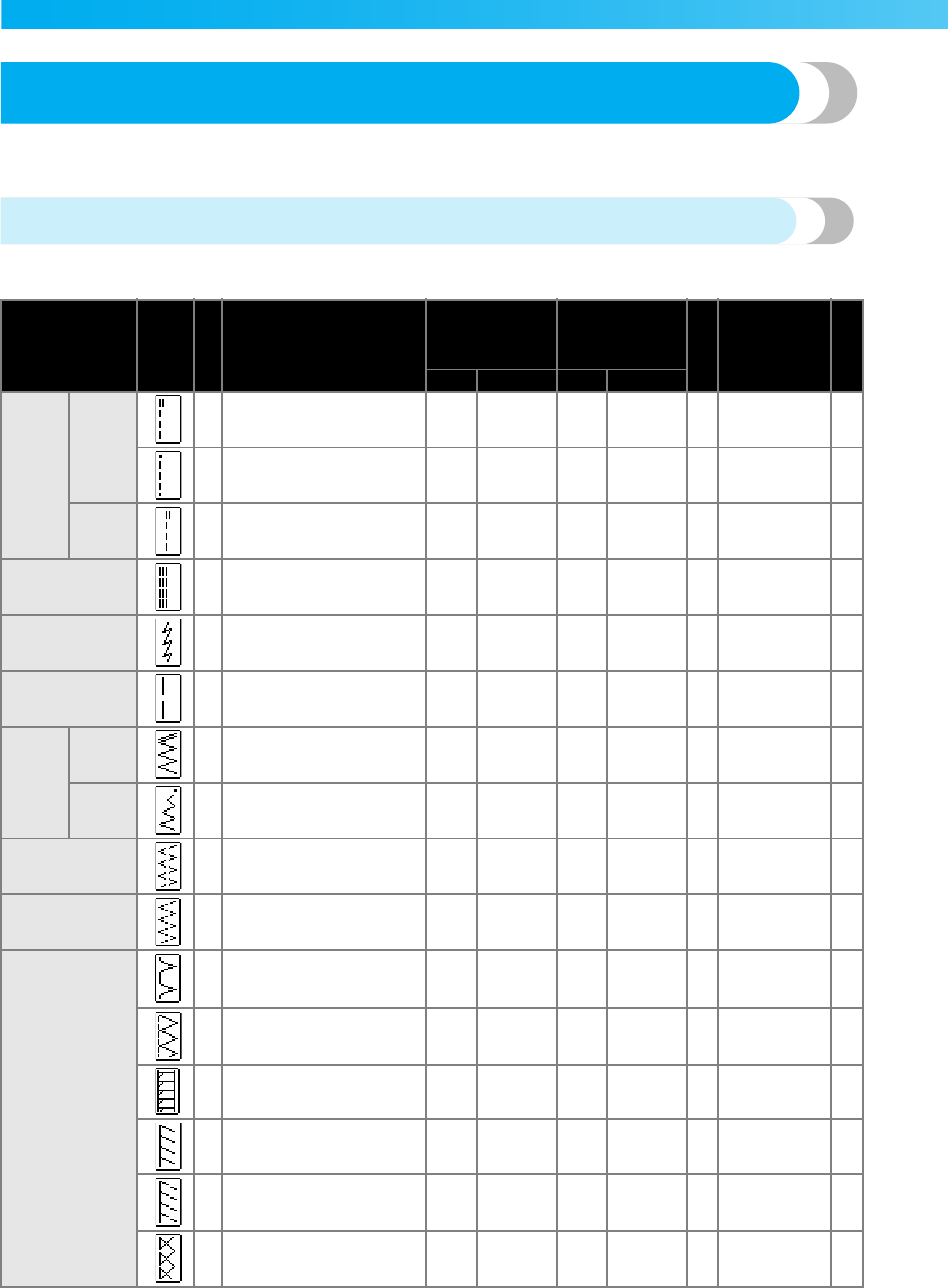
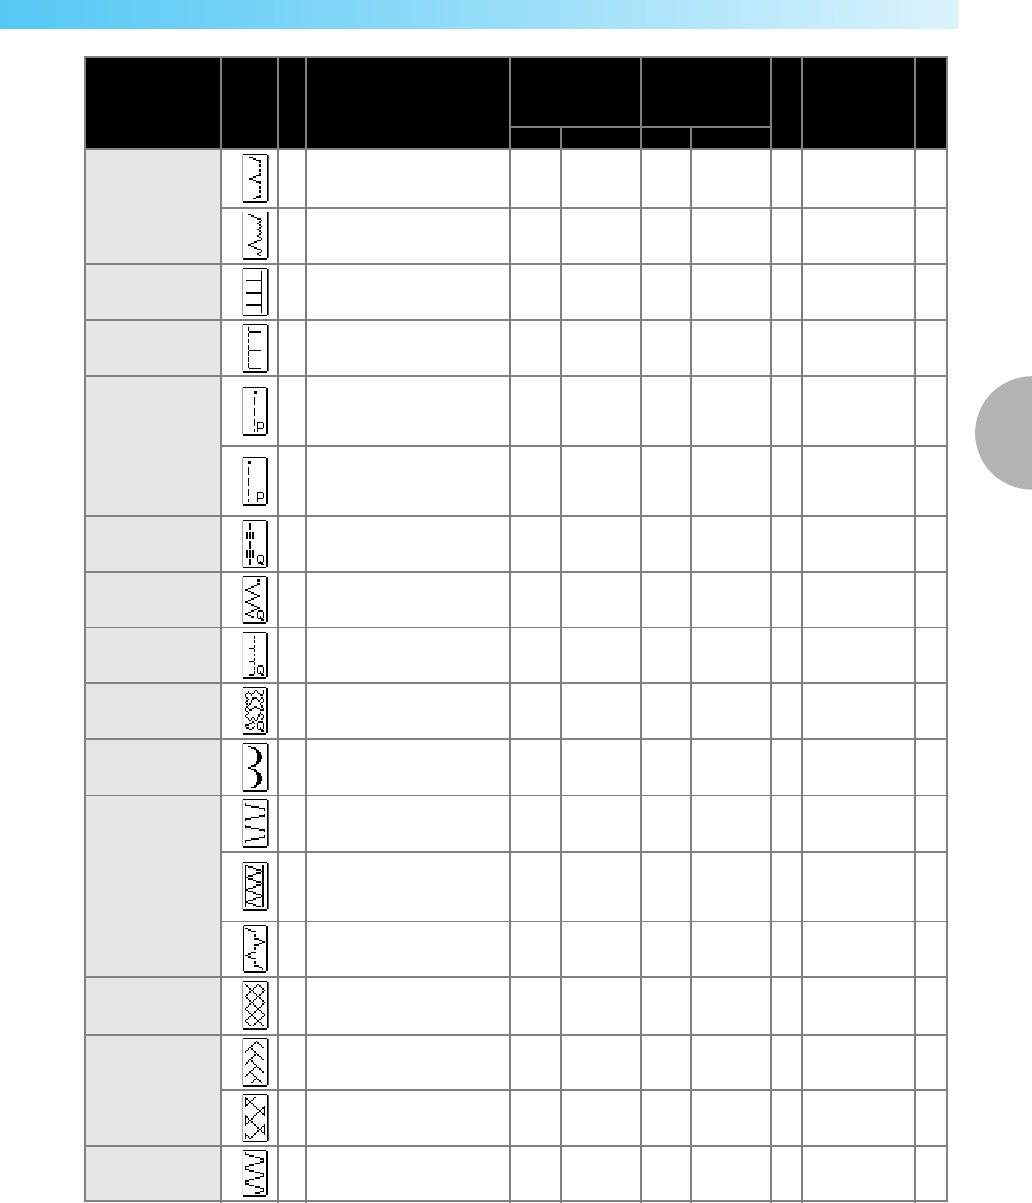
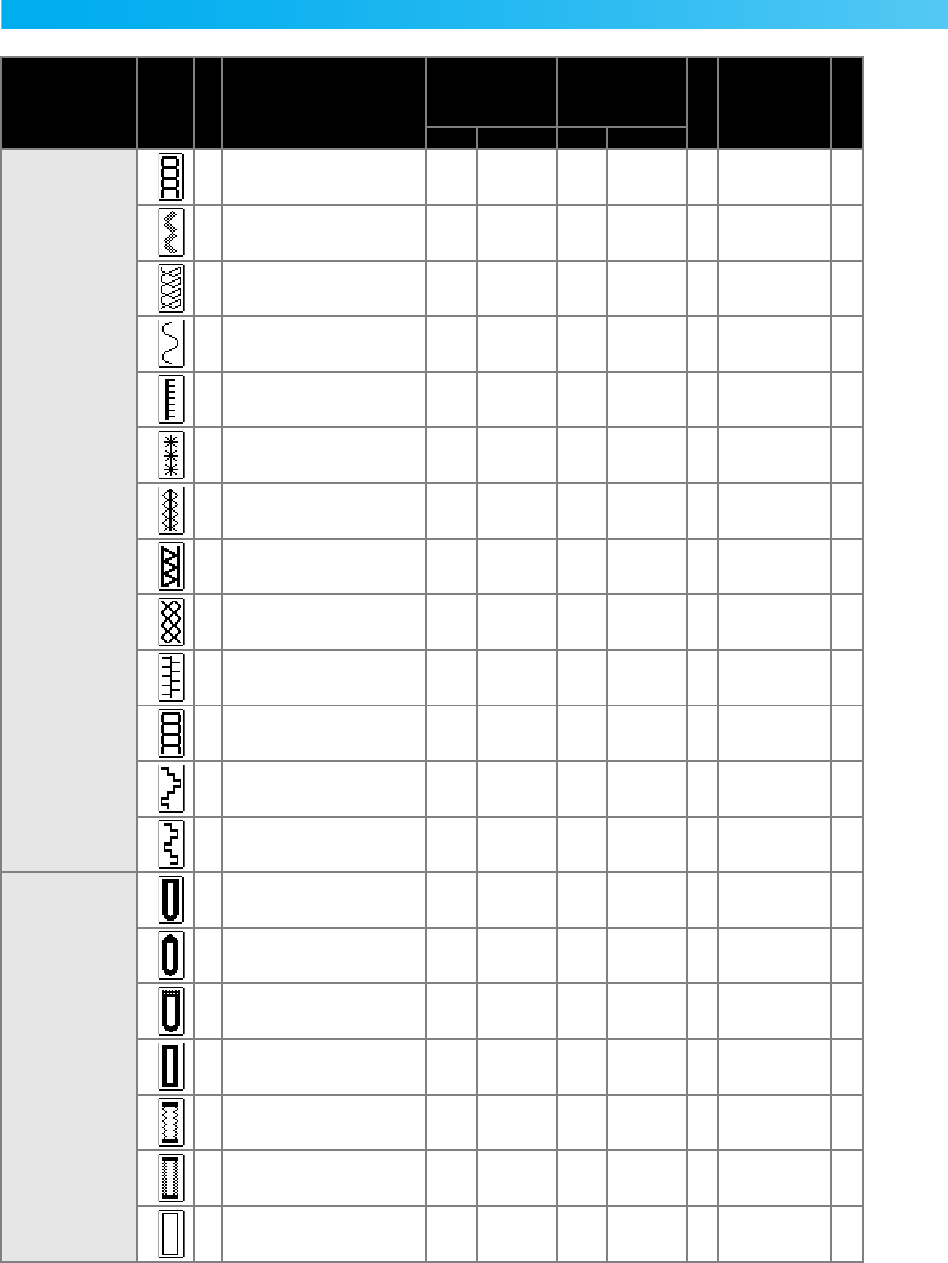
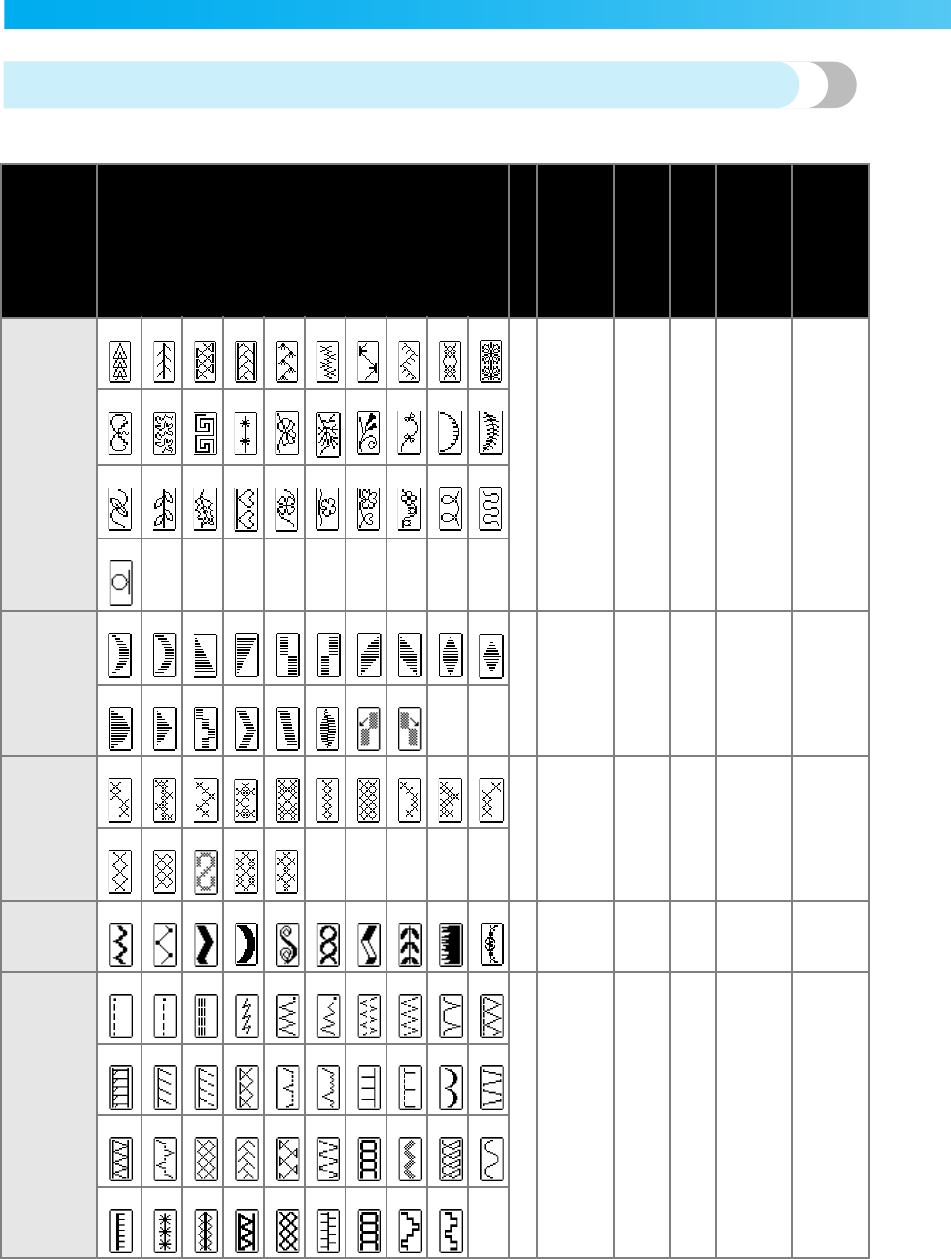
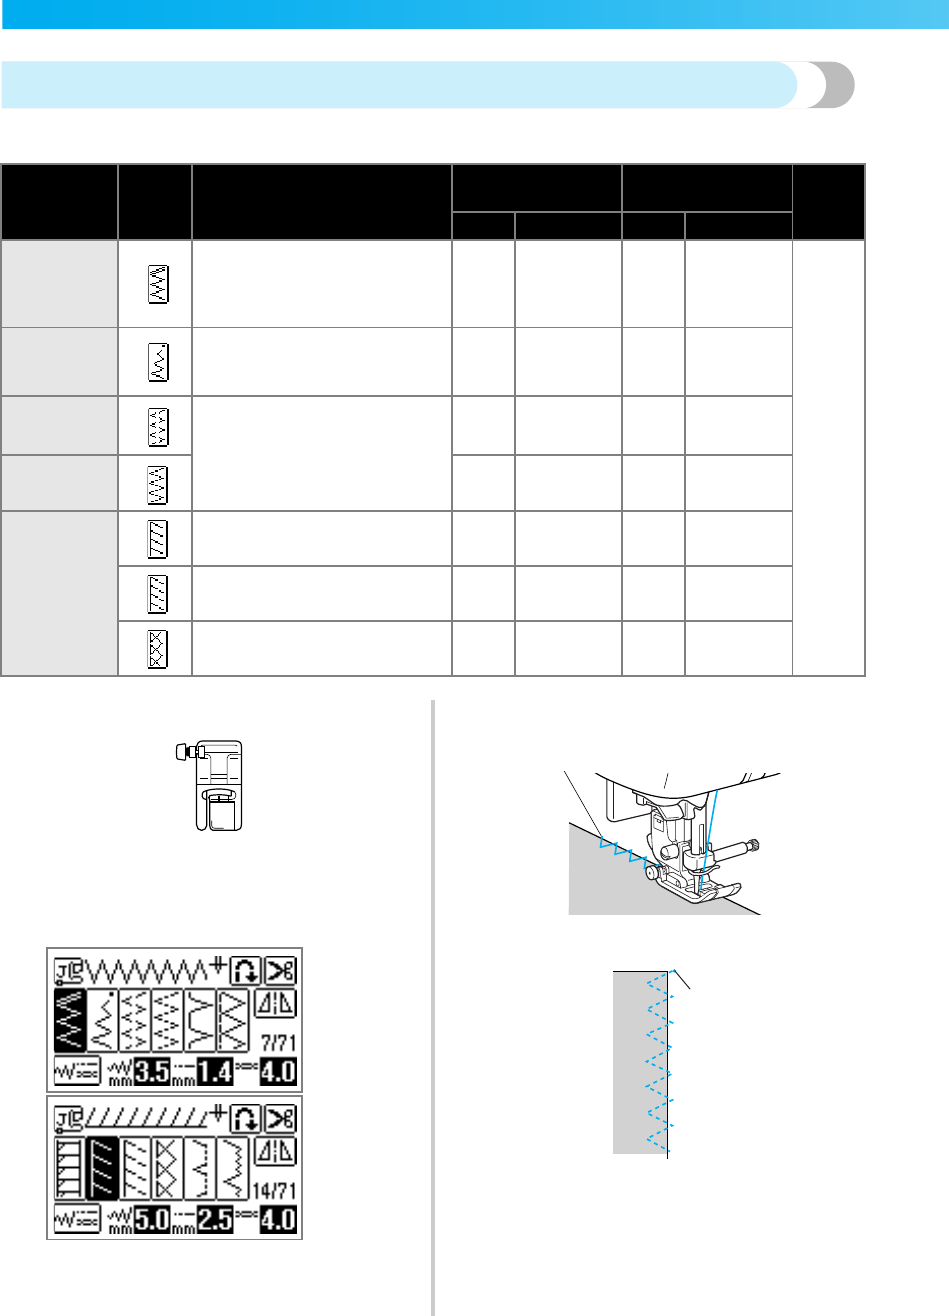
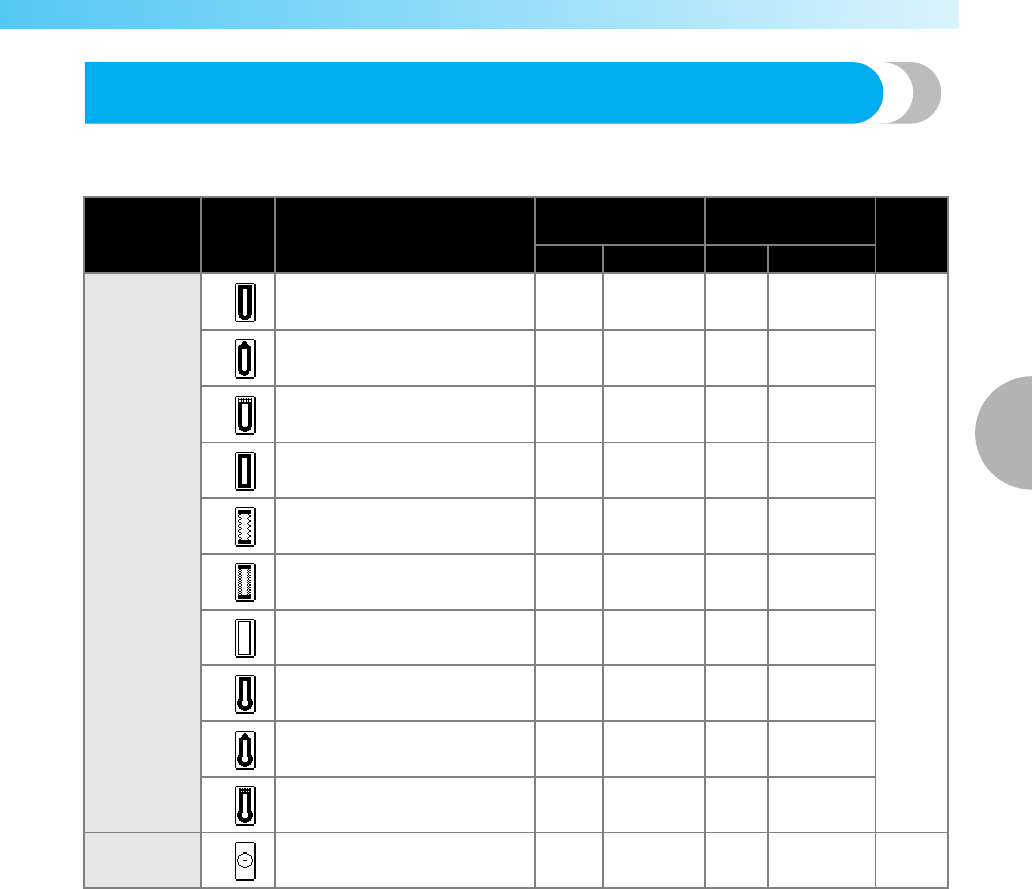
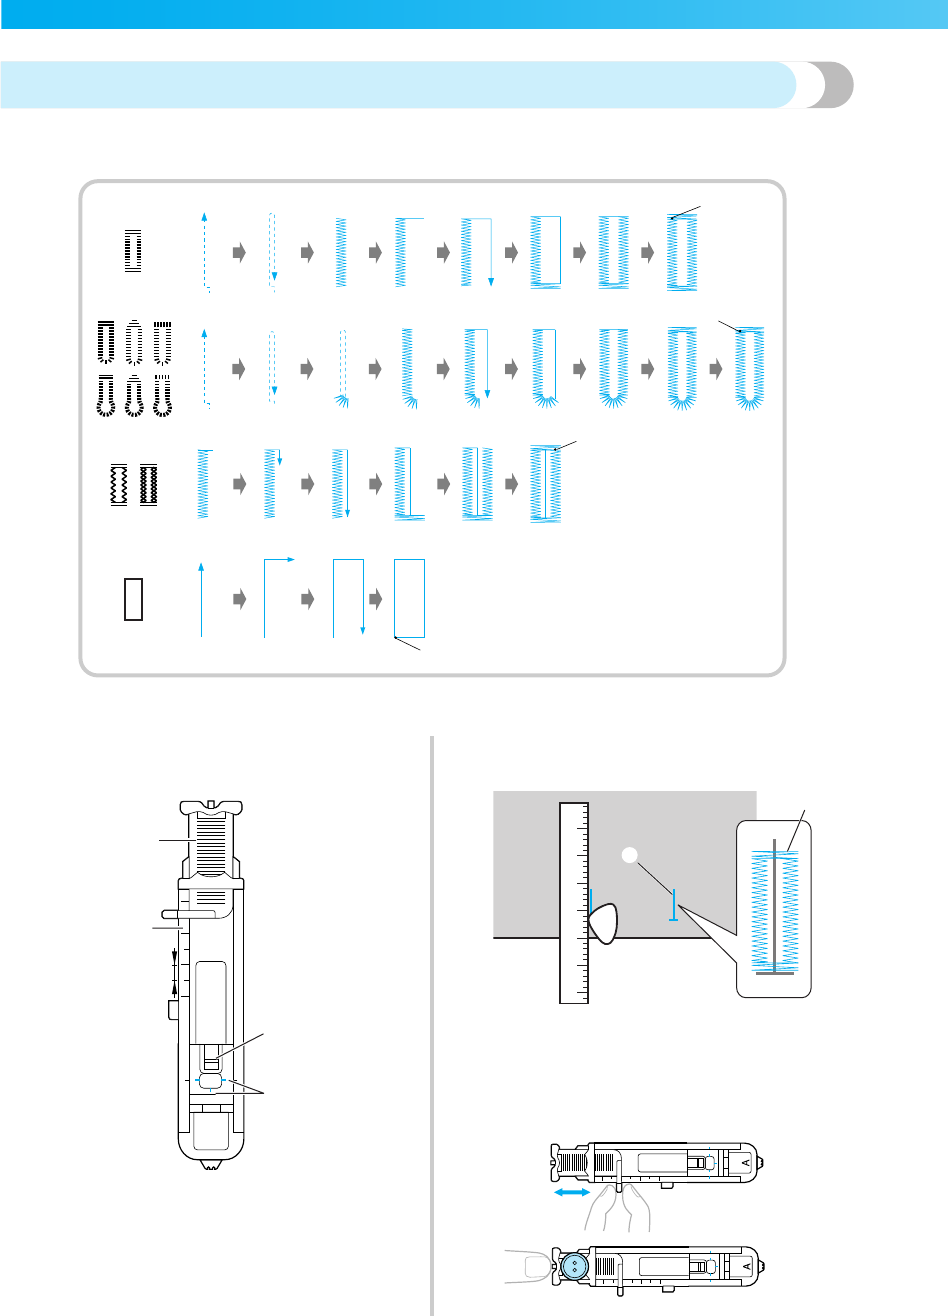
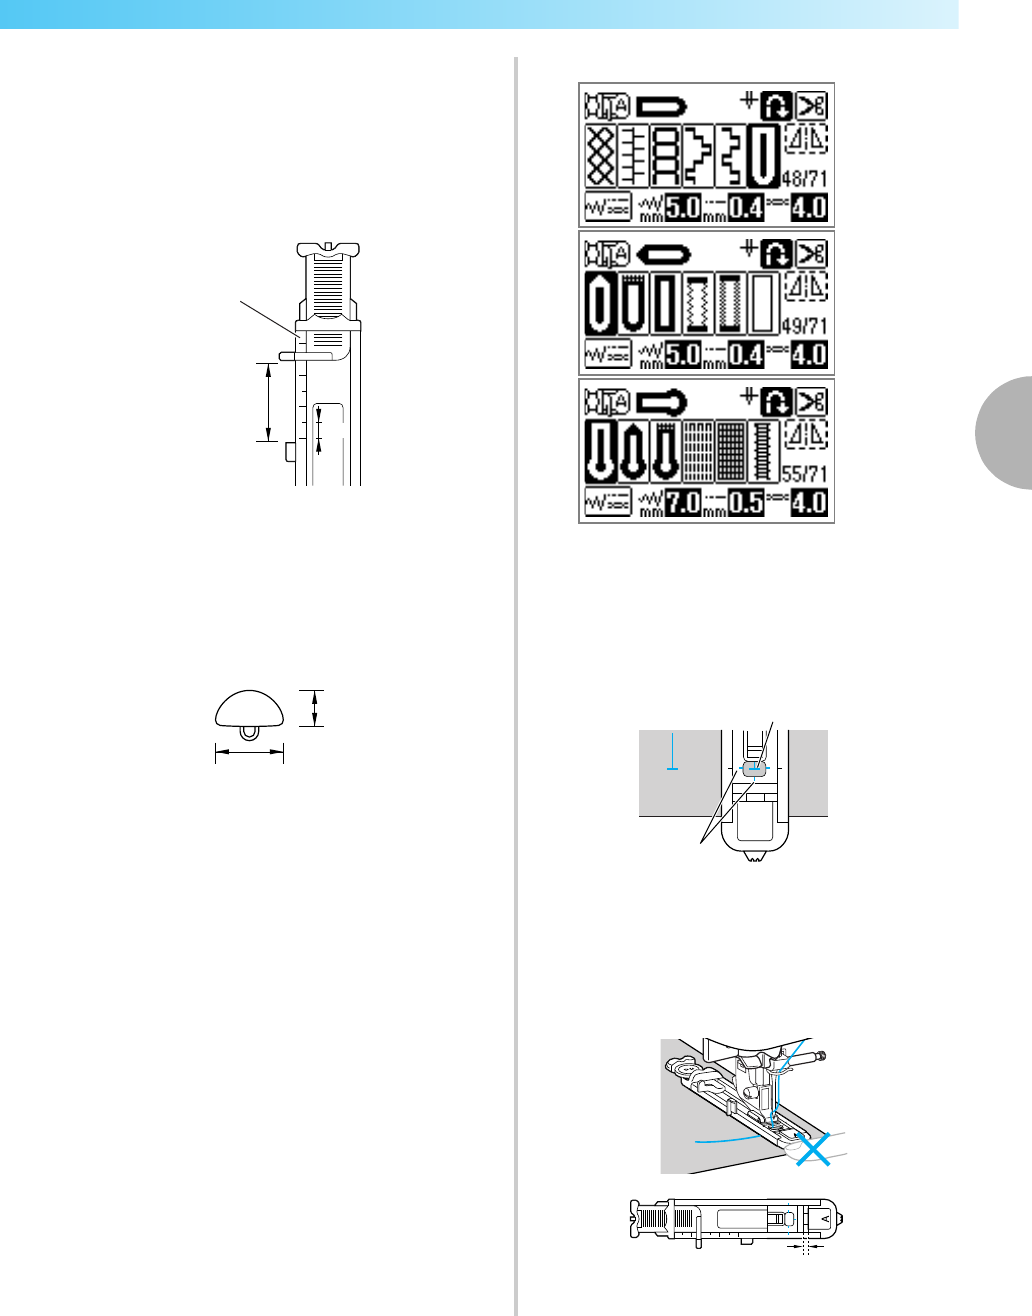
Other stitches..................................................................................................................................................74
Inserting a centered zipper..............................................................................................................................96
Inserting a side zipper.....................................................................................................................................98
Inserting a centered zipper............................................................................................................................101
Inserting a piping..........................................................................................................................................102
Sewing Stretch Fabrics and Elastic Tape..........................................................................103
Bar tack stitching...........................................................................................................................................113
Changing the pattern size..............................................................................................................................129
Changing the stitch density ...........................................................................................................................129
Changing the length for satin stitches............................................................................................................130
Realigning the pattern...................................................................................................................................136
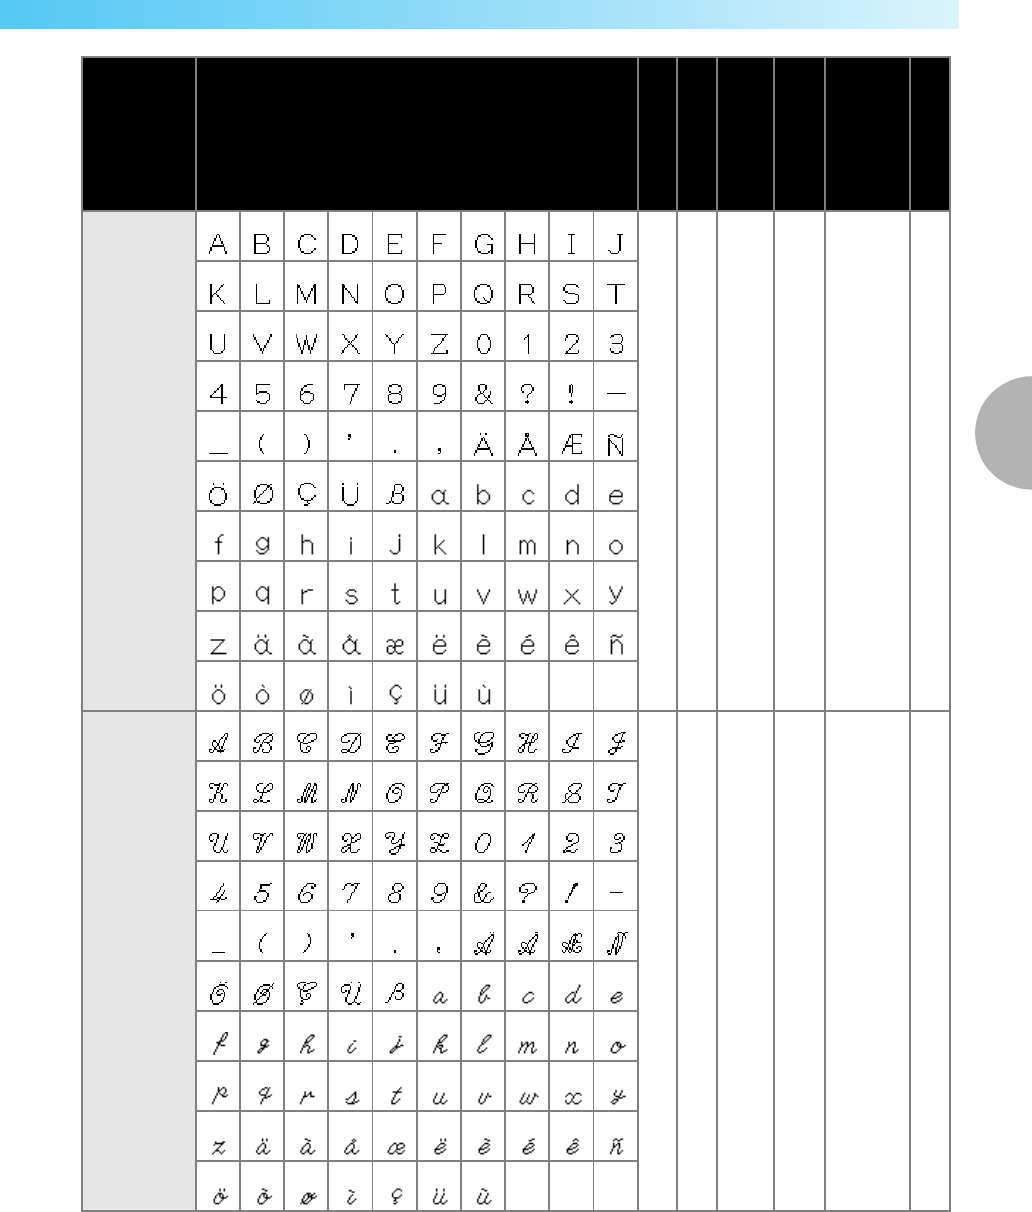
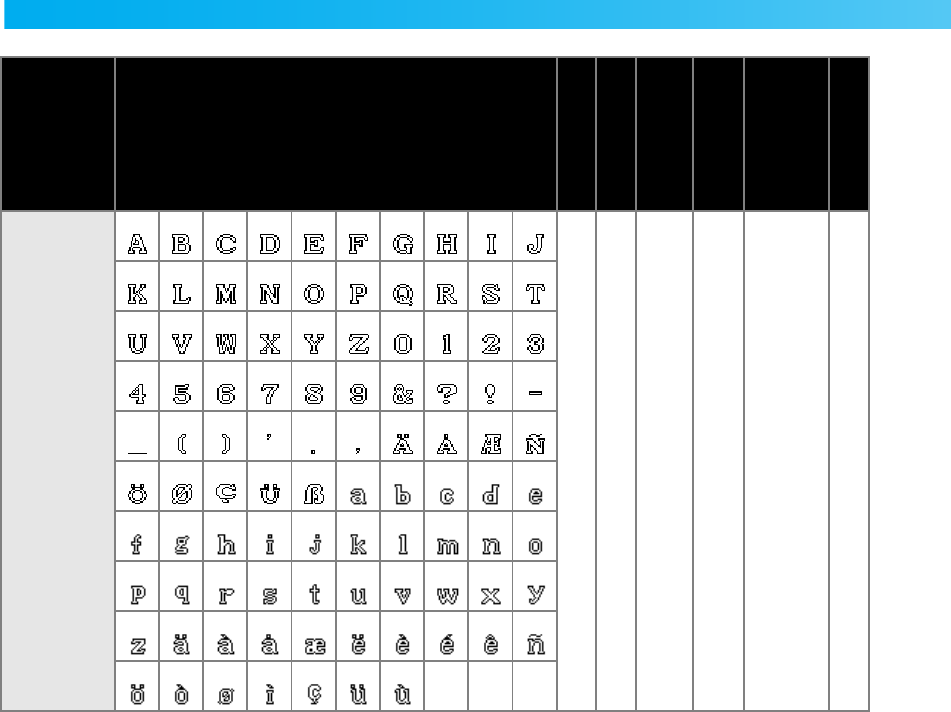
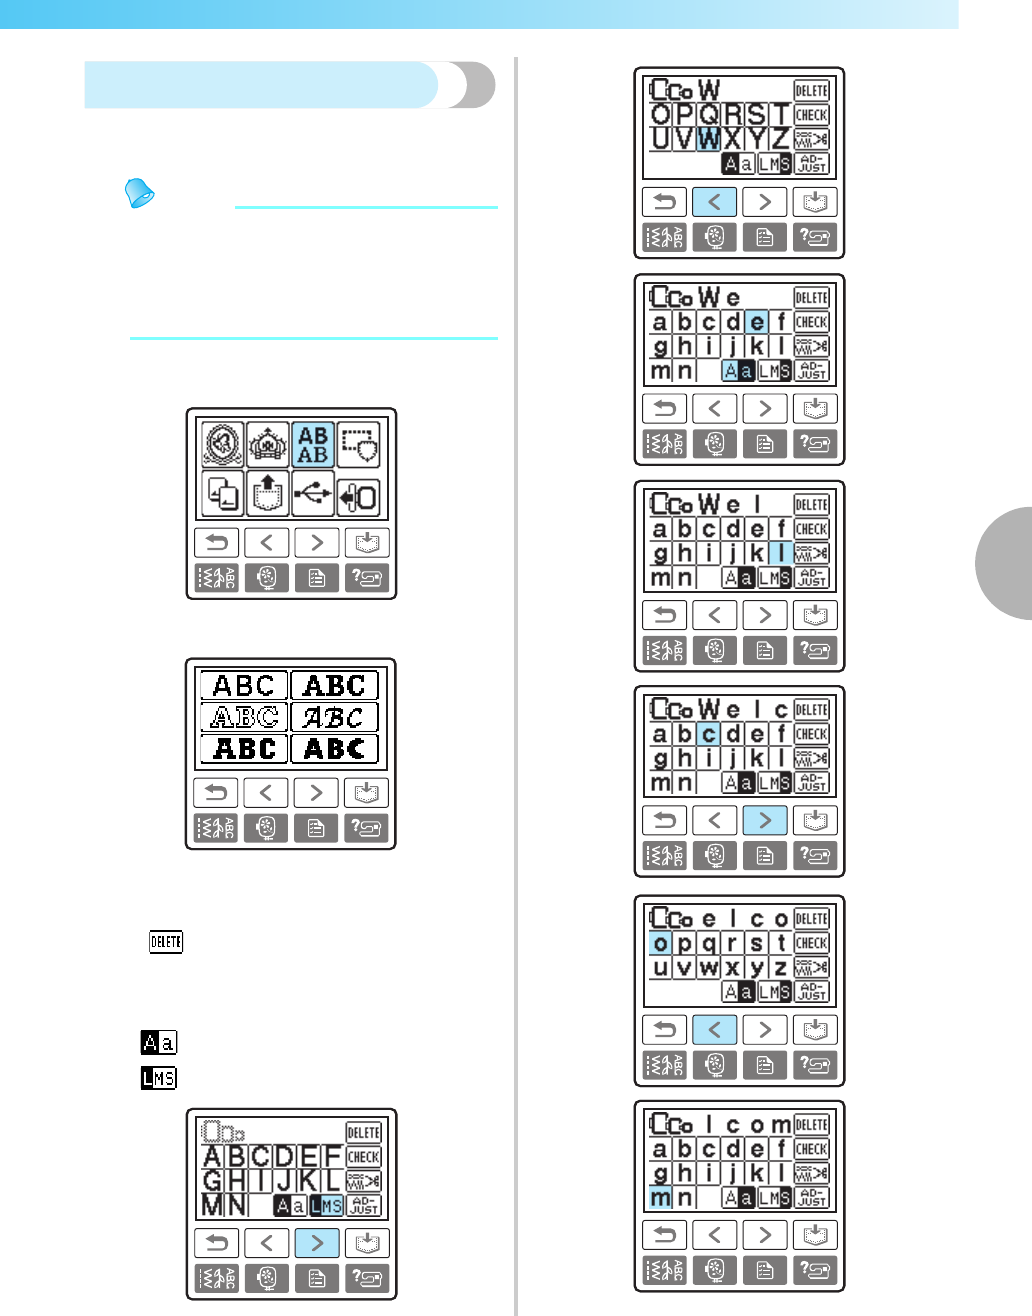
Designing a Pattern (My Custom Stitch)..........................................................................139
Drawing a sketch of the pattern.....................................................................................................................139
Entering the pattern data ...............................................................................................................................140
Examples of designs......................................................................................................................................142
What to prepare............................................................................................................................................144
Embroidery step by step................................................................................................................................146
Attaching the Embroidery Foot........................................................................................147
Attaching the embroidery foot.......................................................................................................................147
Removing the embroidery foot......................................................................................................................149
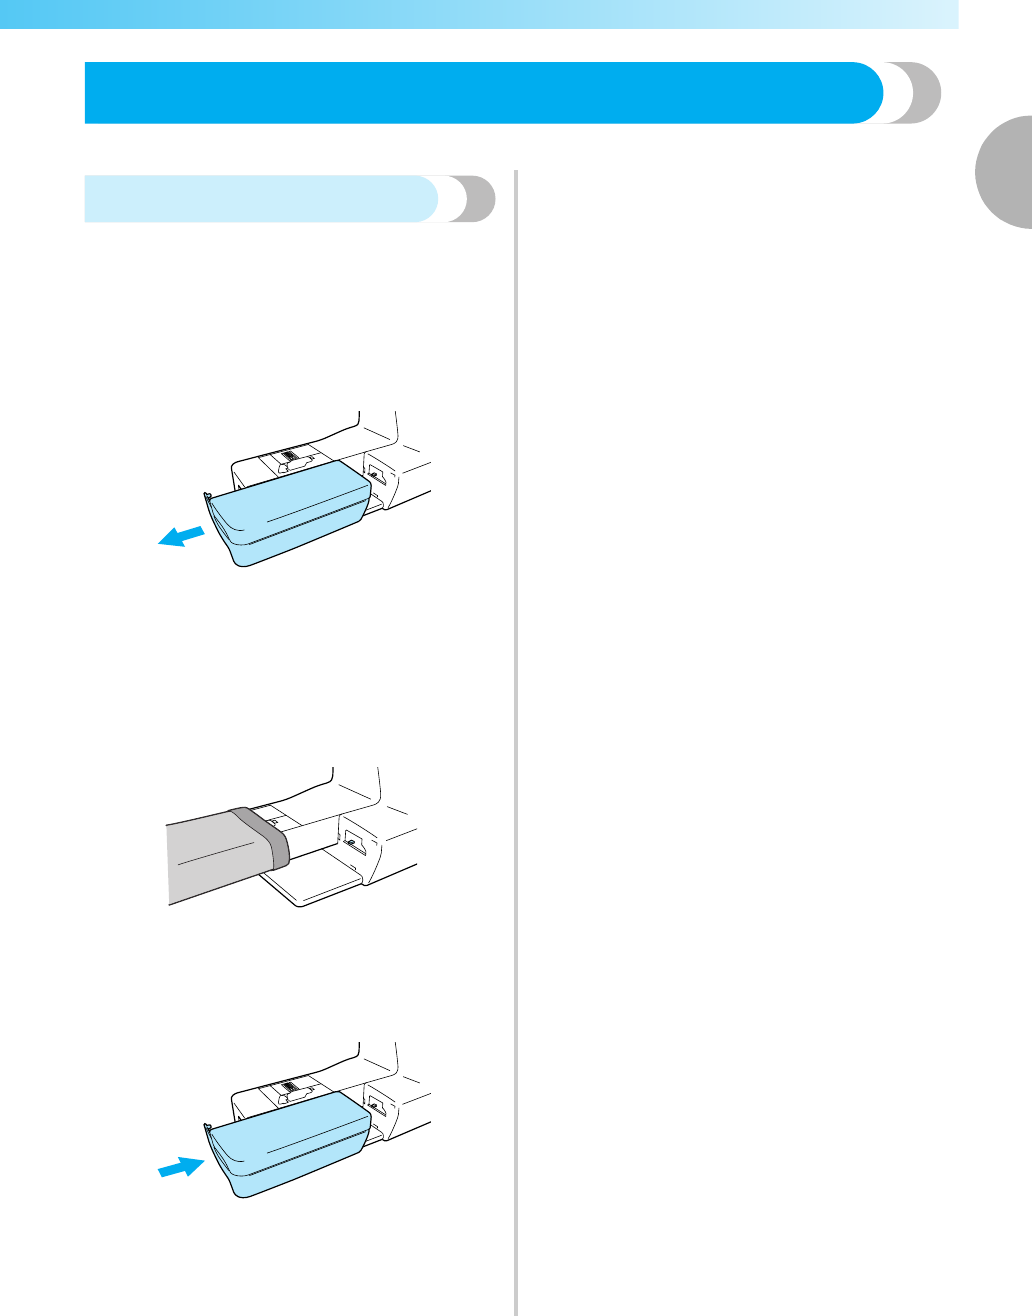
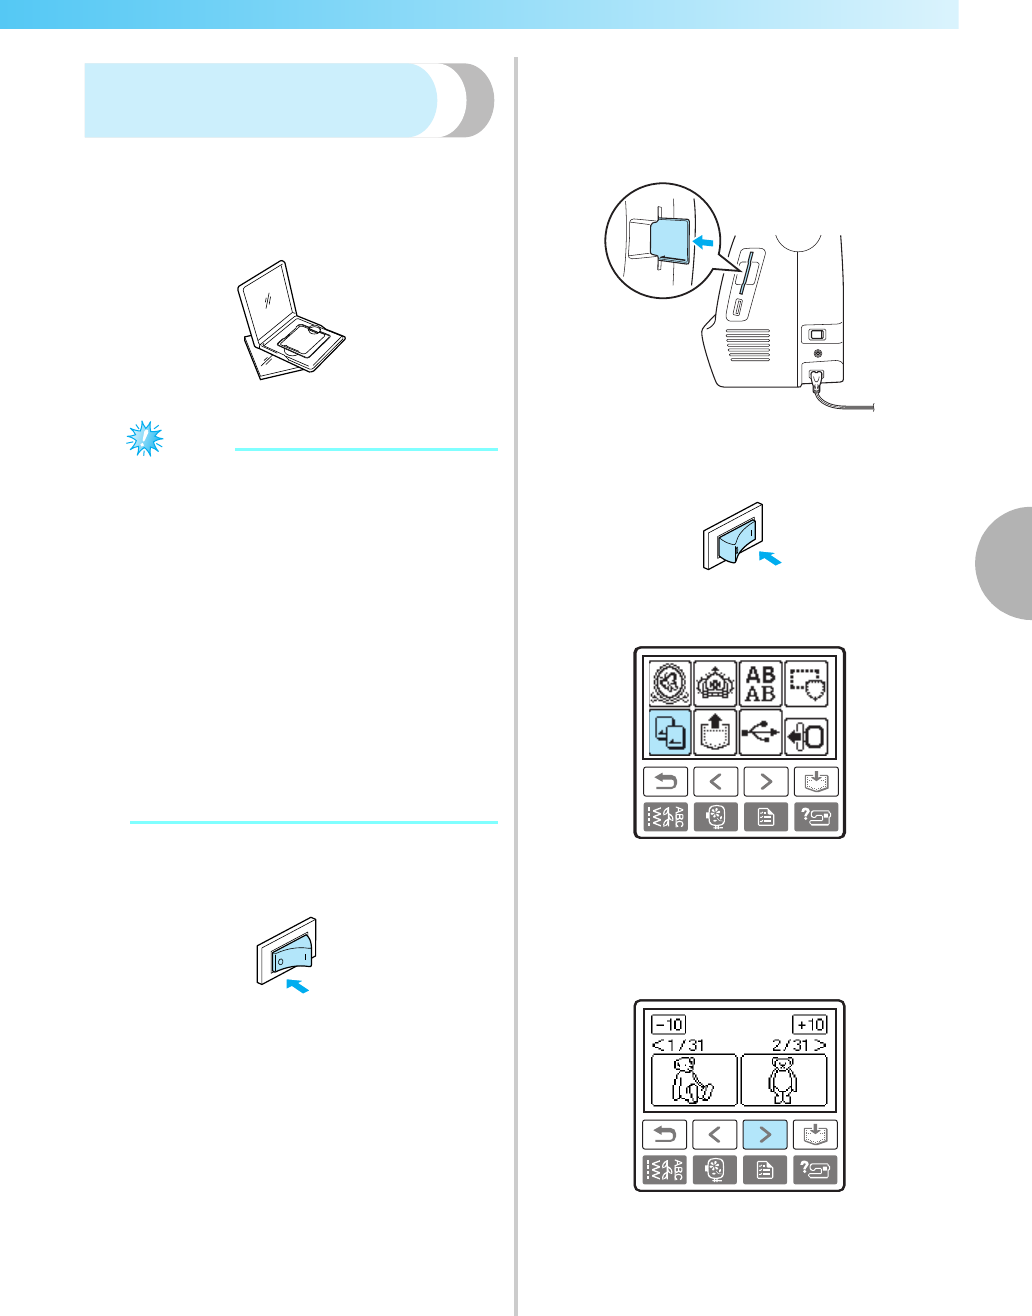
Attaching the Embroidery Unit........................................................................................150
Embroidery unit precautions .........................................................................................................................150
Attaching the embroidery unit.......................................................................................................................150
Removing the embroidery unit......................................................................................................................152
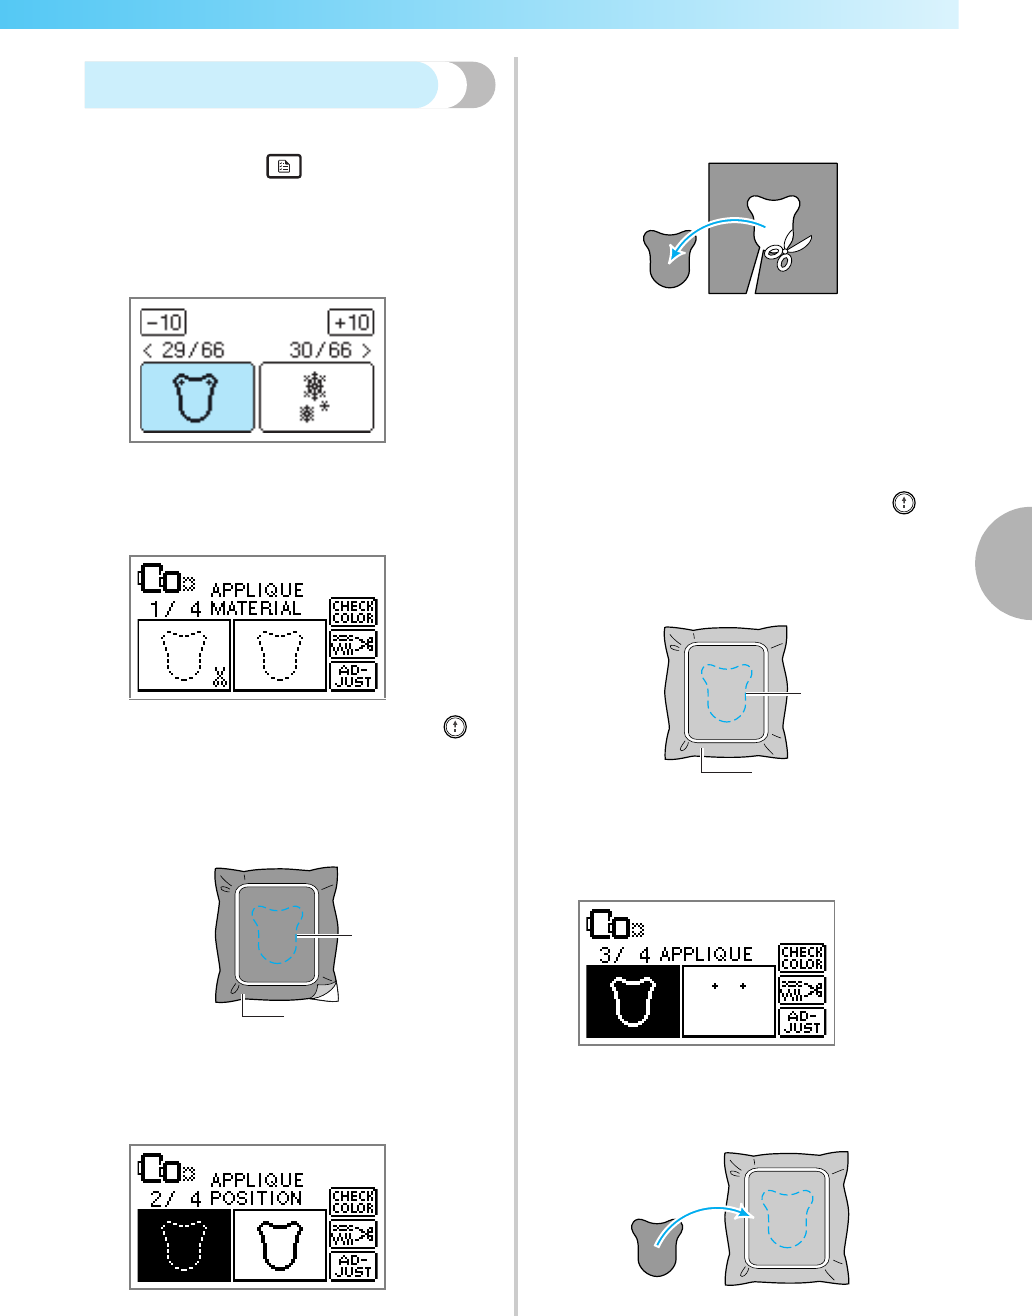
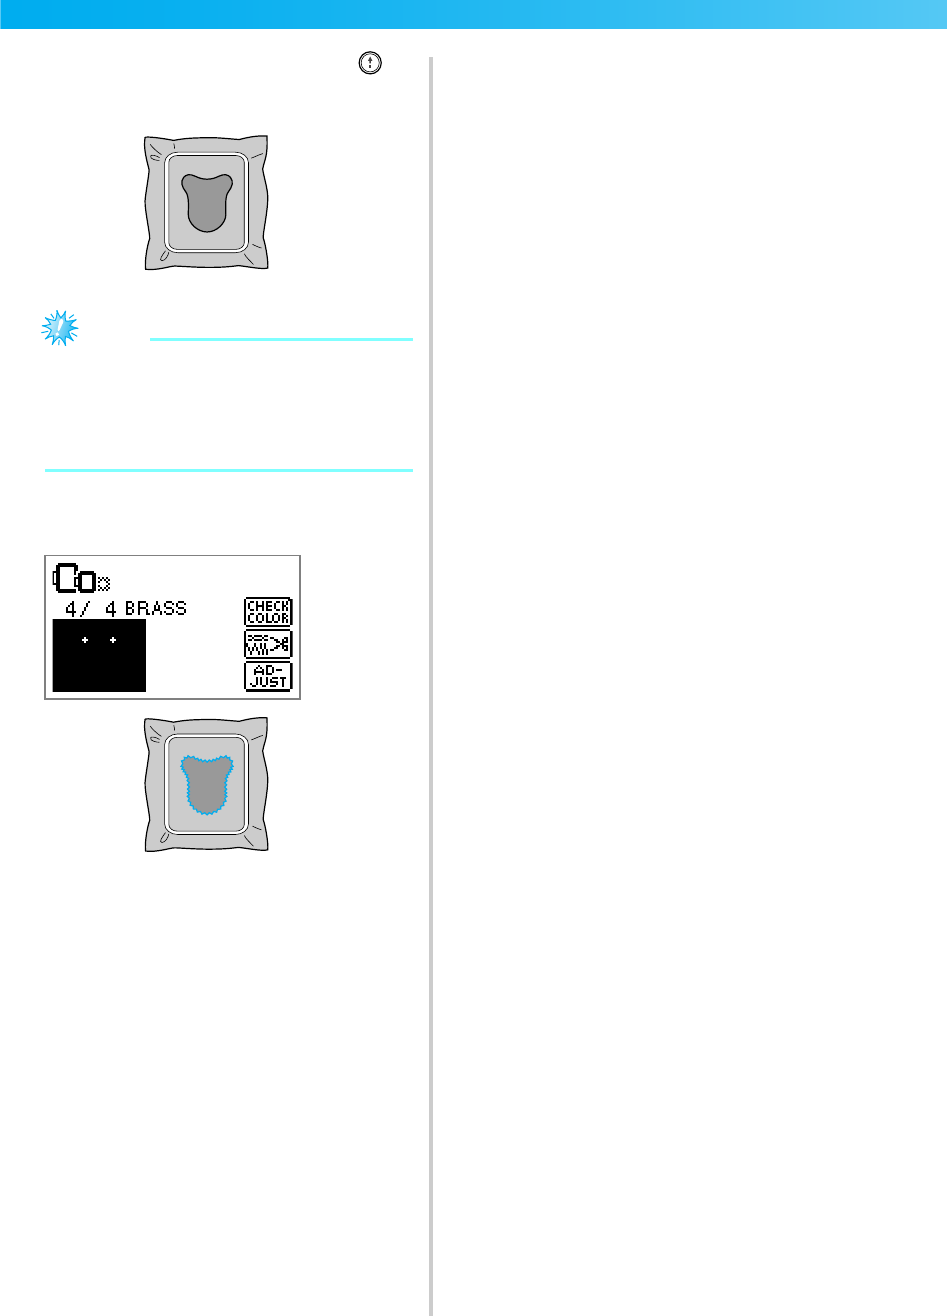
Preparing the Fabric........................................................................................................153
Attaching a stabilizer material to the fabric ...................................................................................................153
Setting the fabric in the embroidery frame.....................................................................................................154
Attaching the Embroidery Frame.....................................................................................157
Attaching the embroidery frame....................................................................................................................157
Removing the embroidery frame...................................................................................................................158
Copyright information ..................................................................................................................................159
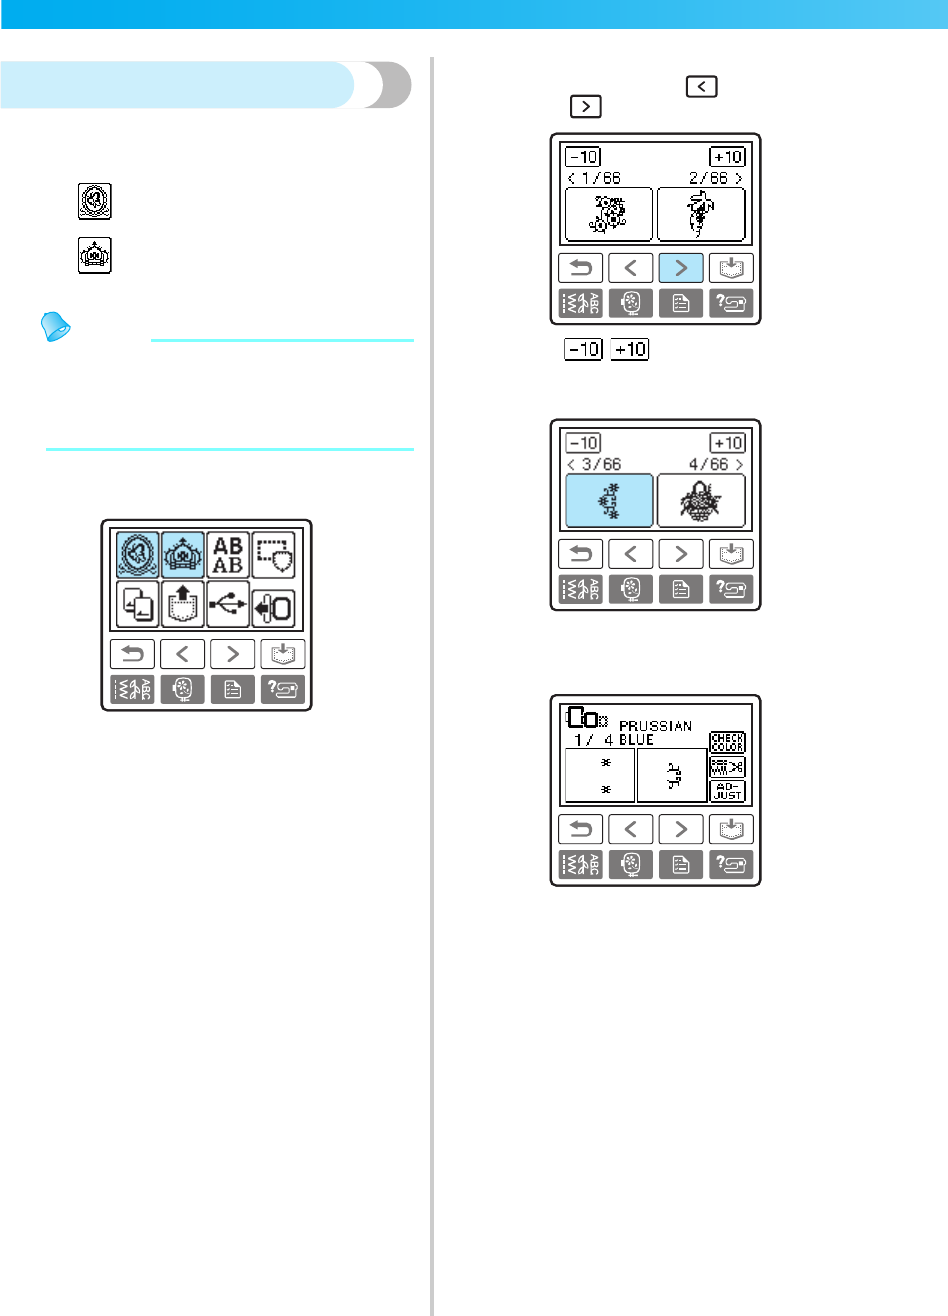
Selecting a frame pattern...............................................................................................................................164
Using an embroidery card (sold separately)...................................................................................................165
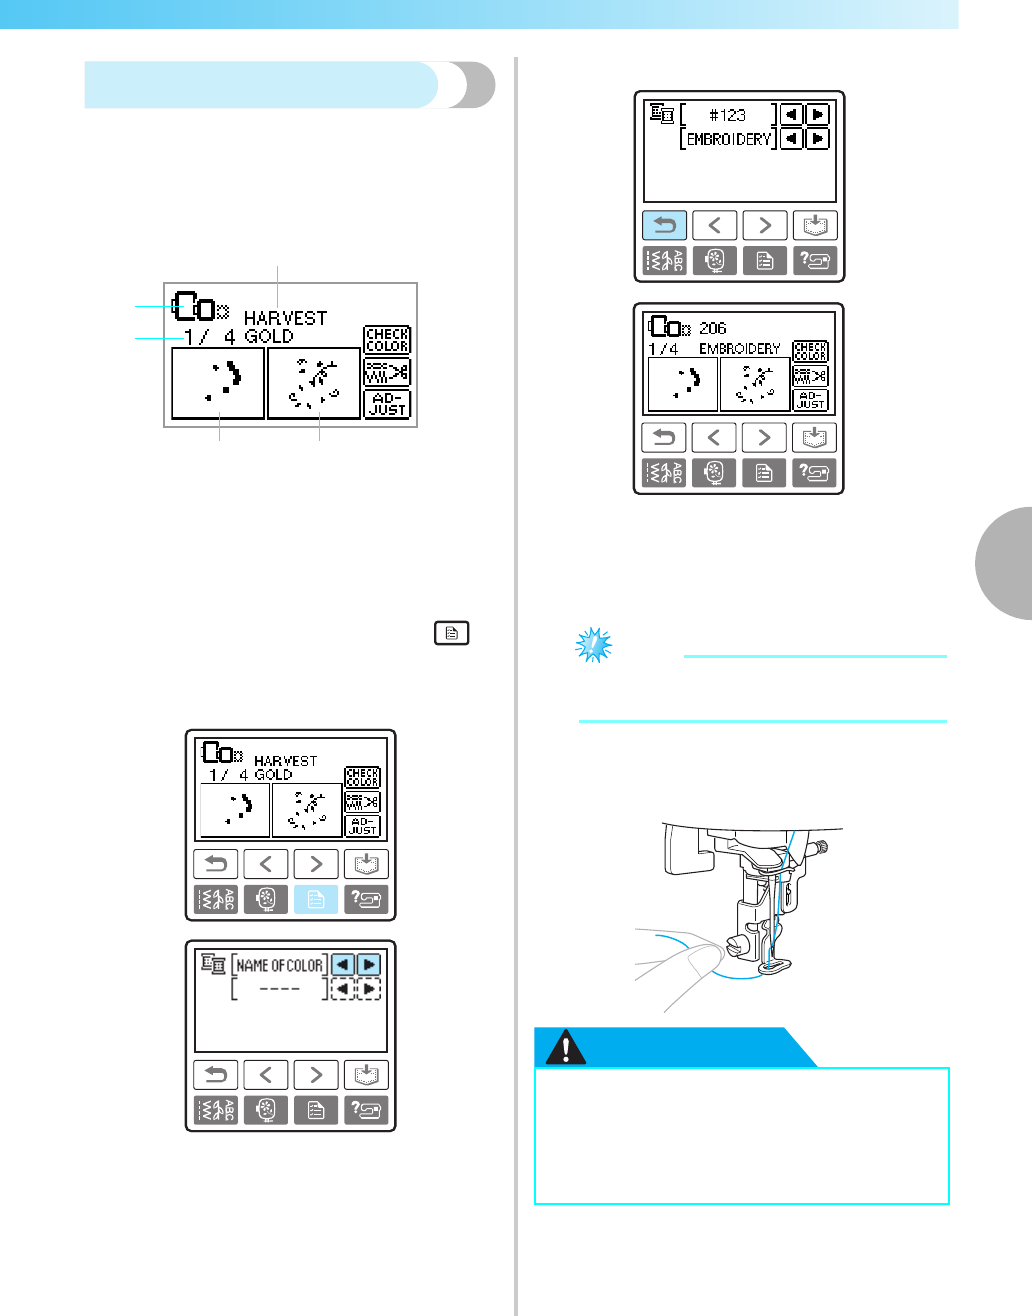
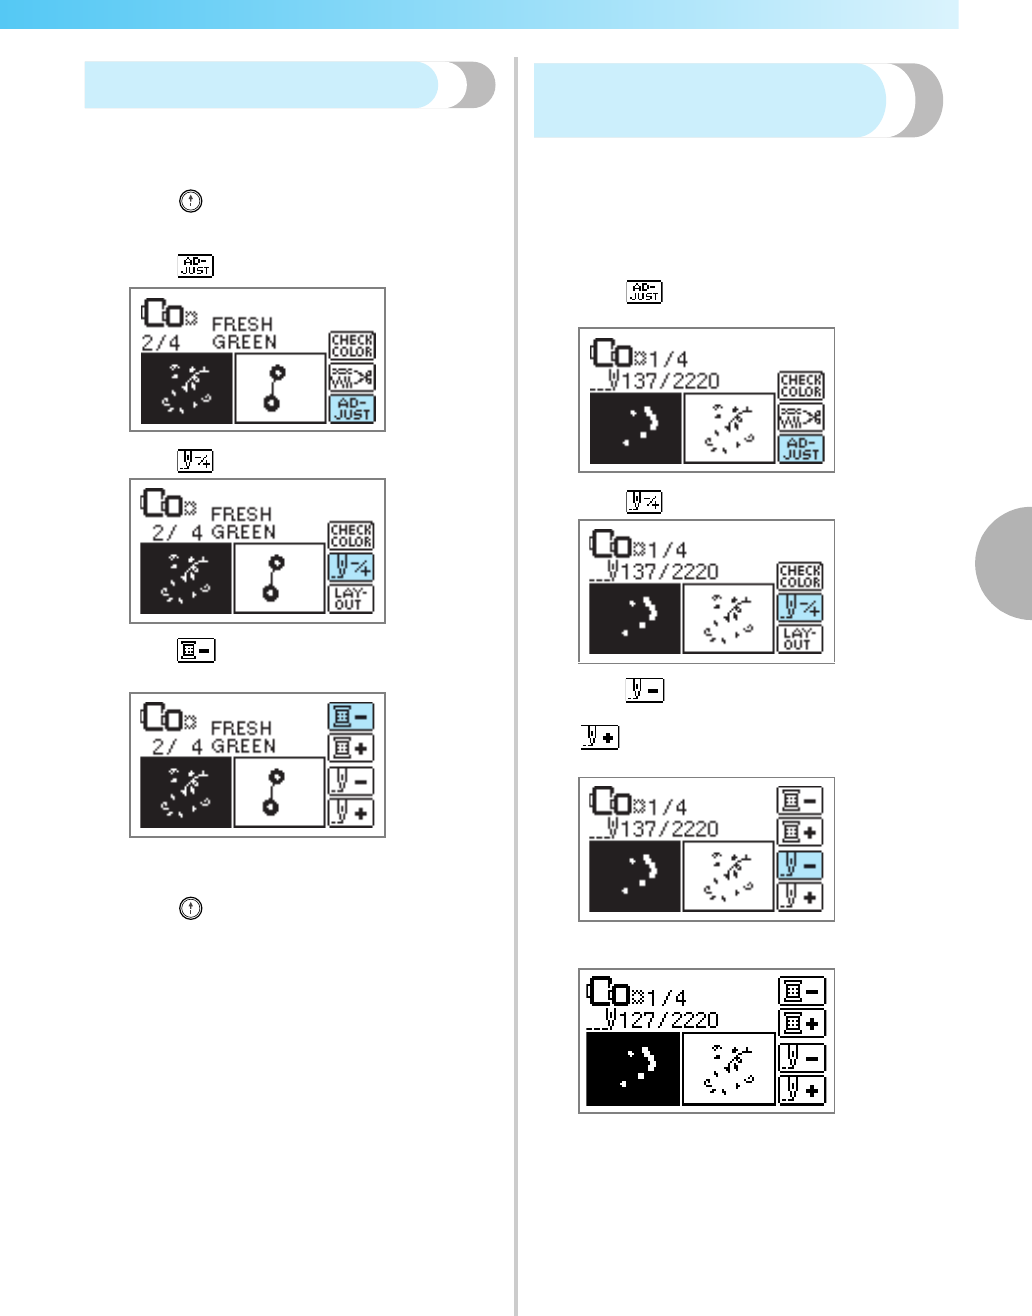
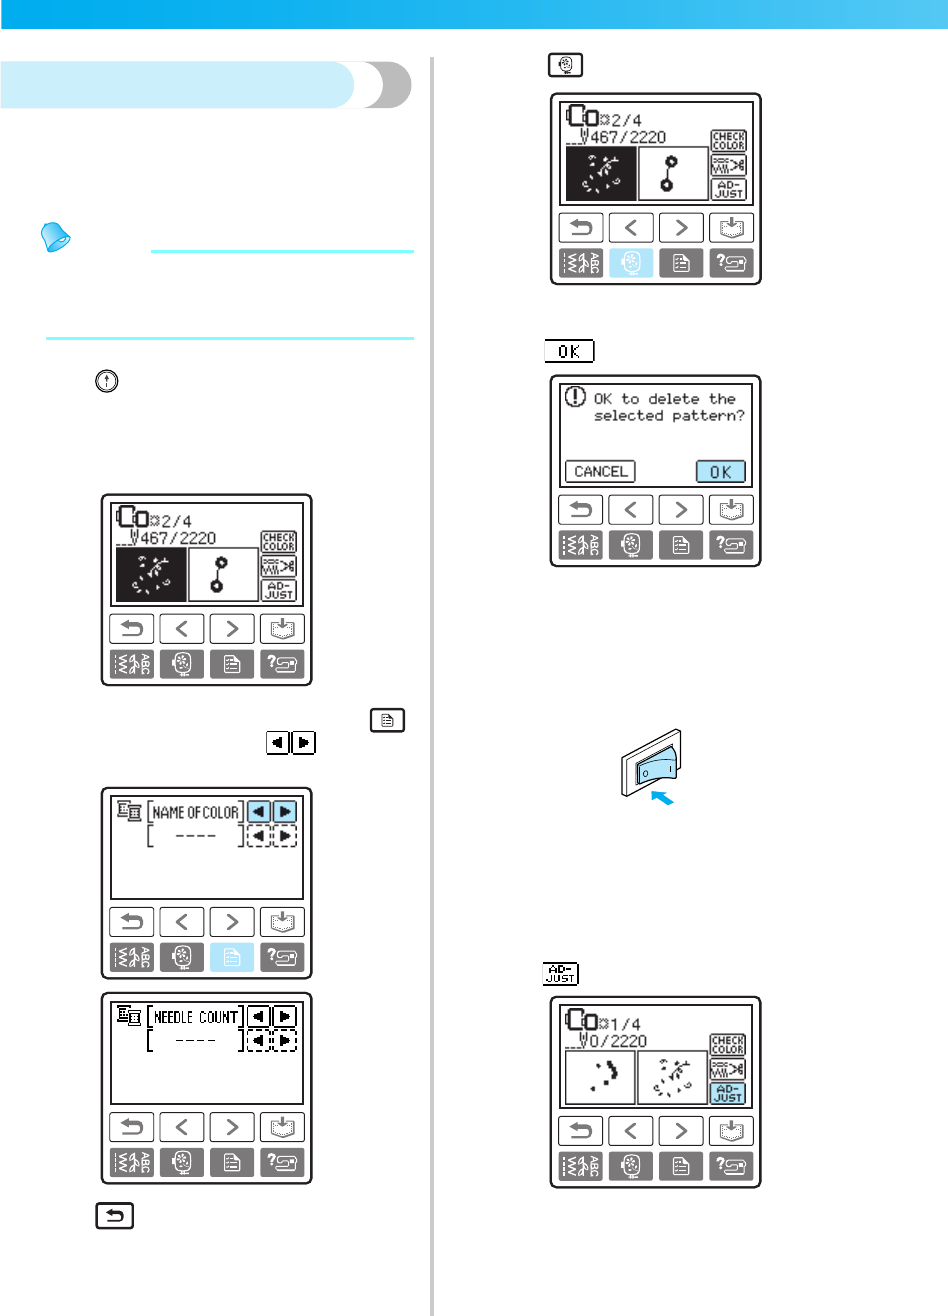
Embroidering a pattern..................................................................................................................................167
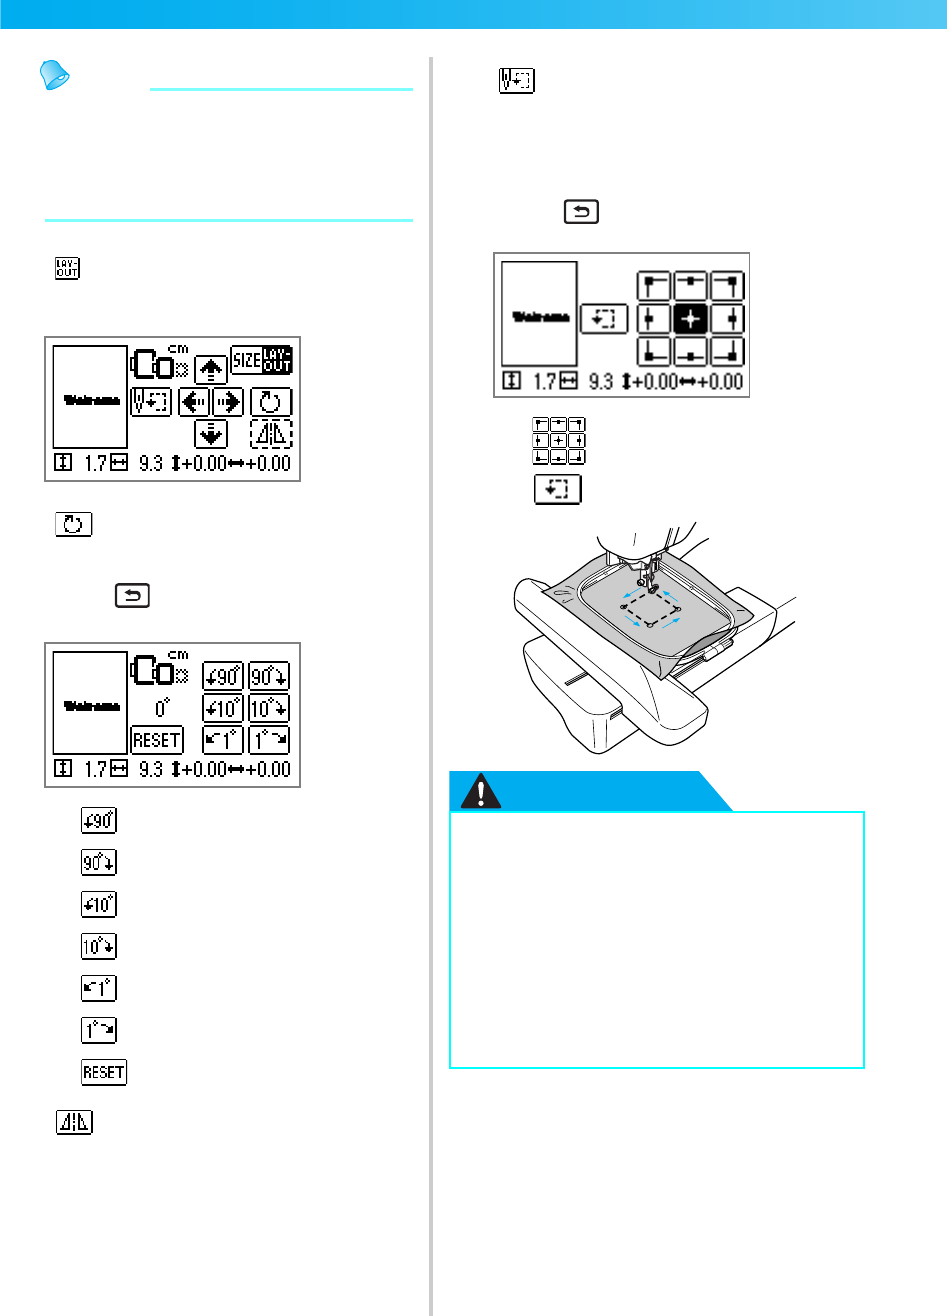
Adjusting the layout......................................................................................................................................171
Adjusting the thread tension..........................................................................................................................173
Adjusting the alternate bobbin case (with no color on the screw)..................................................................174
Thread runs out partway through a design.....................................................................................................175
Stopping while embroidering........................................................................................................................176
Using the Memory Function............................................................................................178
Embroidery data precautions.........................................................................................................................178
Care and Maintenance ....................................................................................................184
Restrictions on oiling.....................................................................................................................................184
Precautions on storing the machine...............................................................................................................184
Cleaning the machine surface.......................................................................................................................184
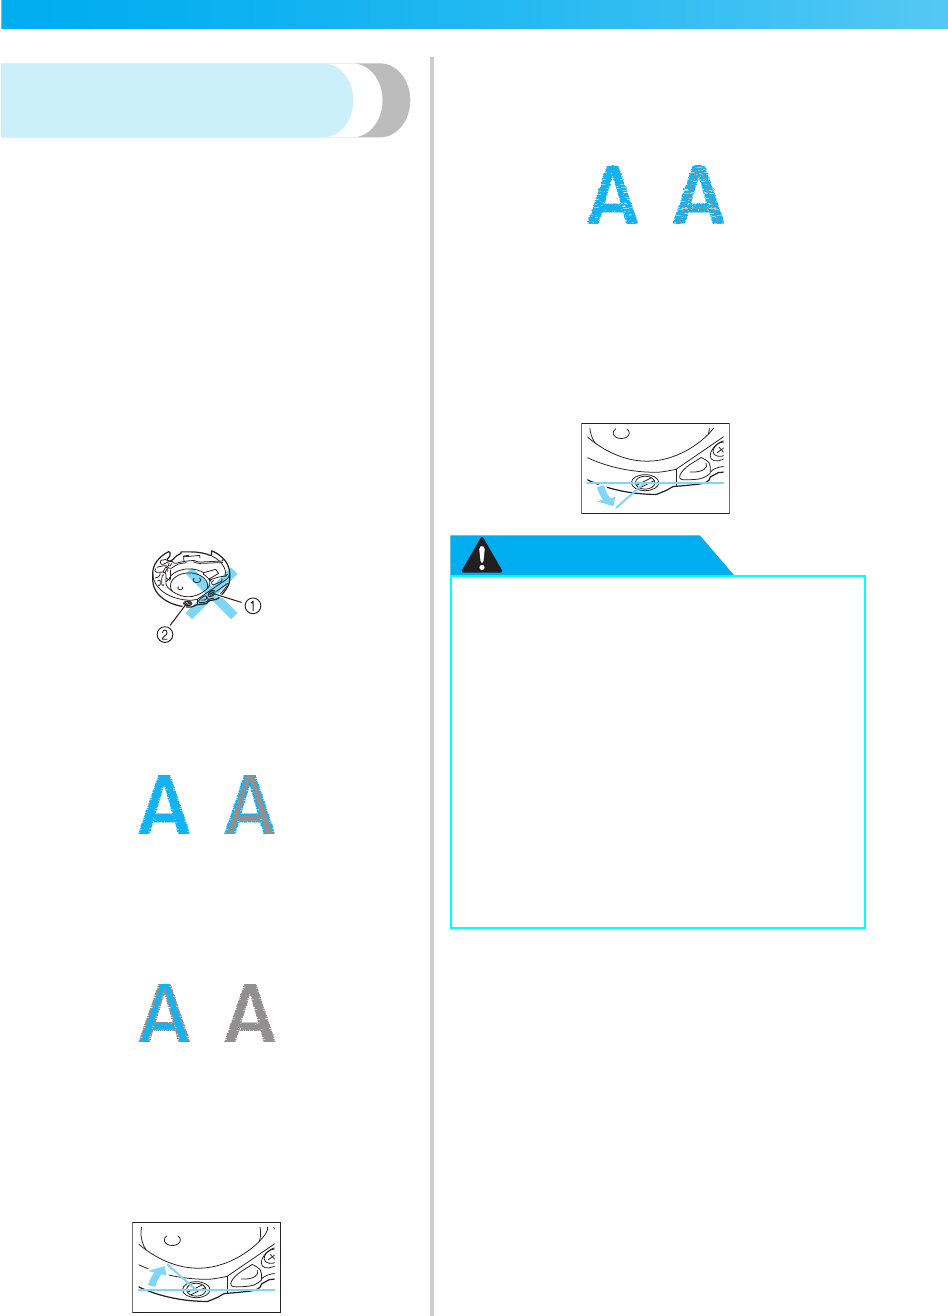
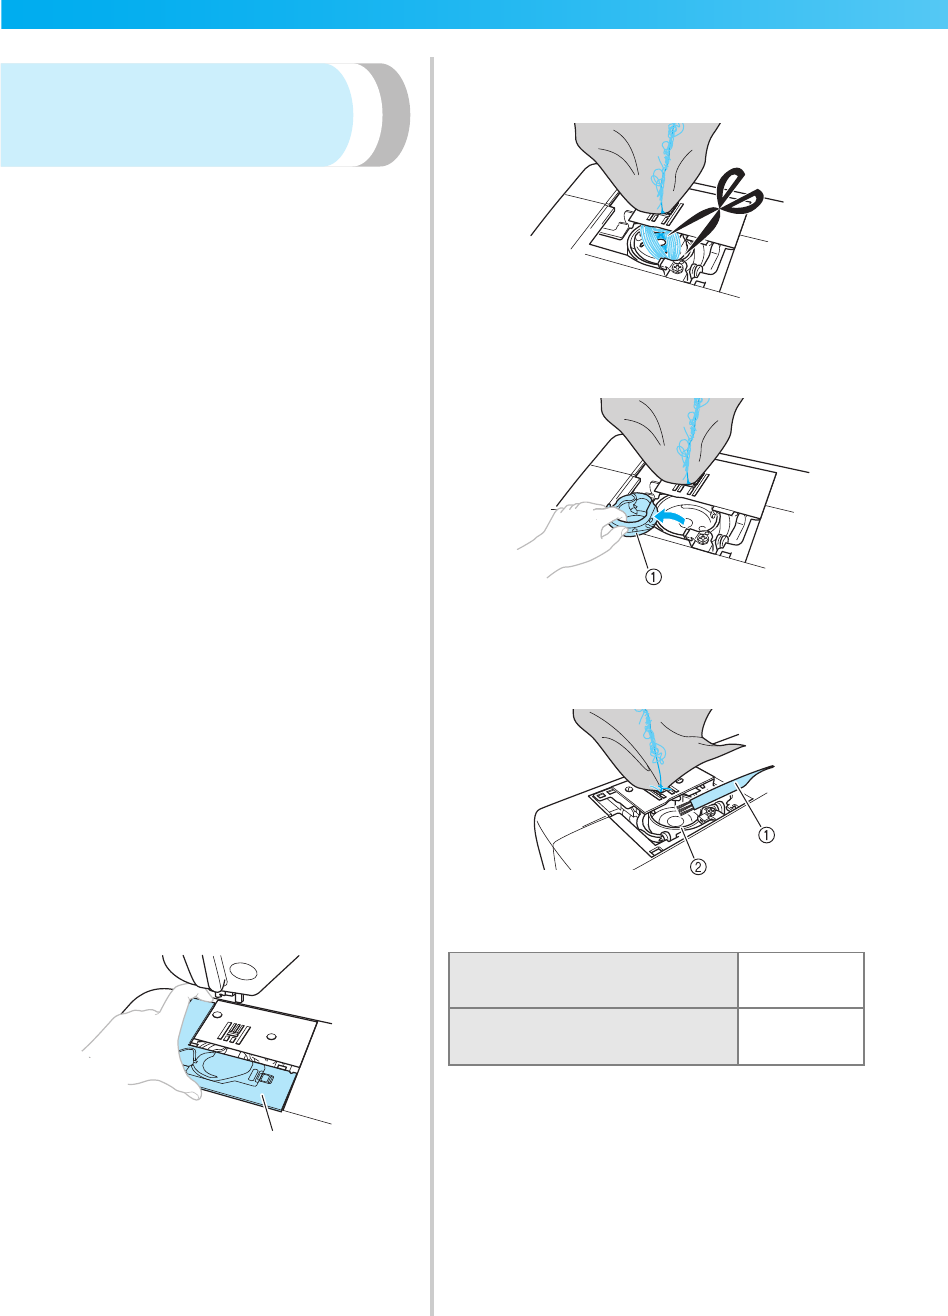
Cleaning the race..........................................................................................................................................184
Fabric is caught in the machine and cannot be removed...............................................................................190
When the thread became tangled under the bobbin winder seat...................................................................193
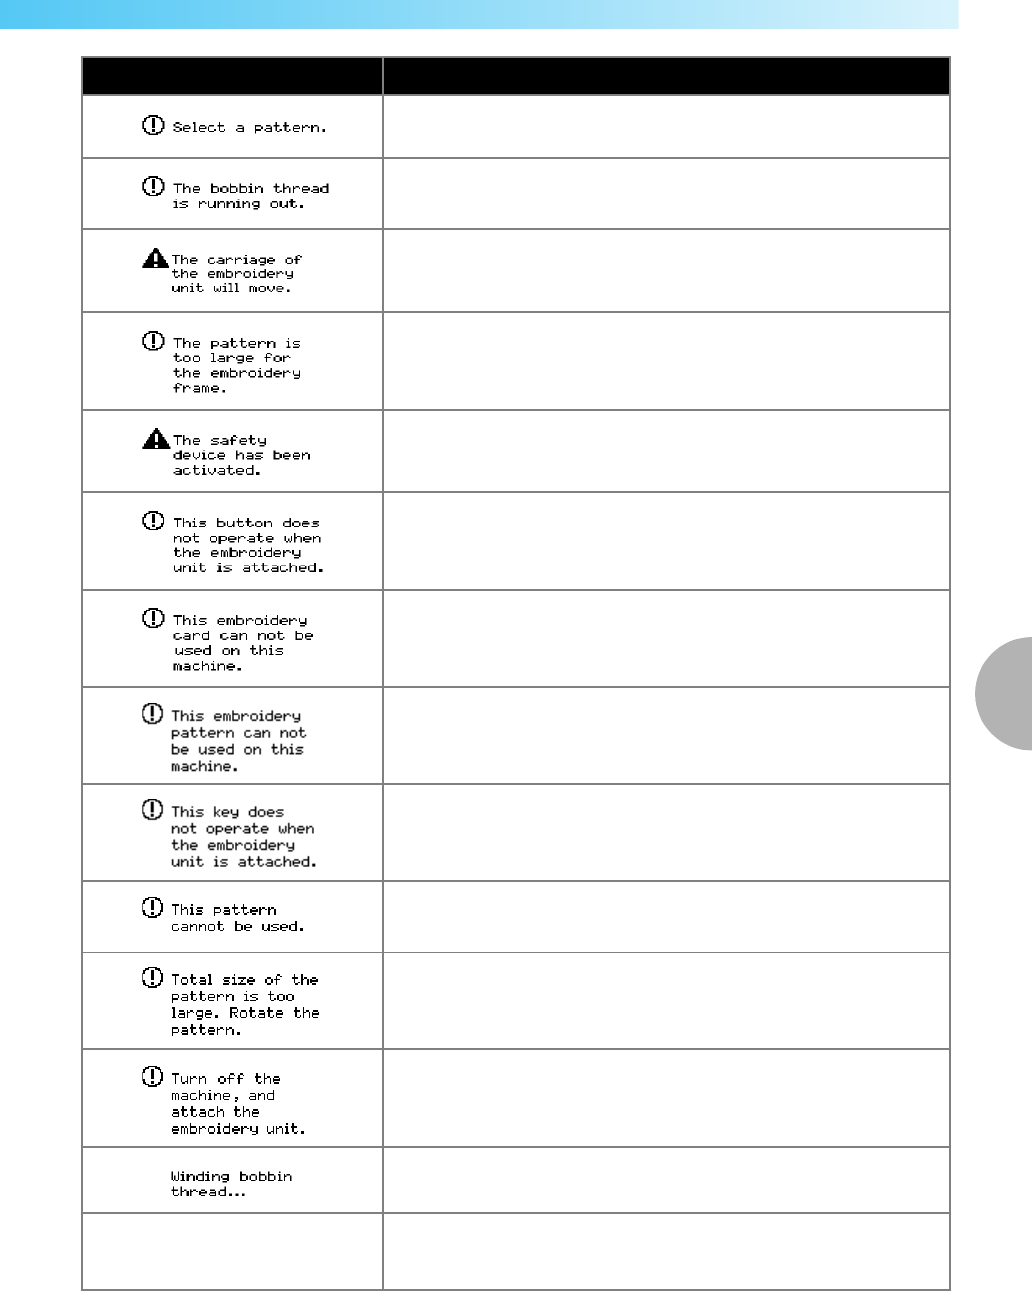
List of symptoms ...........................................................................................................................................195
Adjusting the LCD.........................................................................................................................................204
Libble takes abuse of its services very seriously. We're committed to dealing with such abuse according to the laws in your country of residence. When you submit a report, we'll investigate it and take the appropriate action. We'll get back to you only if we require additional details or have more information to share.
Product:
Forumrules
To achieve meaningful questions, we apply the following rules:
First, read the manual;
Check if your question has been asked previously;
Try to ask your question as clearly as possible;
Did you already try to solve the problem? Please mention this;
Is your problem solved by a visitor then let him/her know in this forum;
To give a response to a question or answer, do not use this form but click on the button 'reply to this question';
Your question will be posted here and emailed to our subscribers. Therefore, avoid filling in personal details.
Register
Register getting emails for Brother Innov-is 1250D at:
new questions and answers
new manuals
You will receive an email to register for one or both of the options.
Get your user manual by e-mail
Enter your email address to receive the manual of Brother Innov-is 1250D in the language / languages: English as an attachment in your email.
The manual is 8,62 mb in size.
You will receive the manual in your email within minutes. If you have not received an email, then probably have entered the wrong email address or your mailbox is too full. In addition, it may be that your ISP may have a maximum size for emails to receive.
If you have not received an email with the manual within fifteen minutes, it may be that you have a entered a wrong email address or that your ISP has set a maximum size to receive email that is smaller than the size of the manual.
The email address you have provided is not correct.
Please check the email address and correct it.
Your question is posted on this page
Would you like to receive an email when new answers and questions are posted? Please enter your email address.