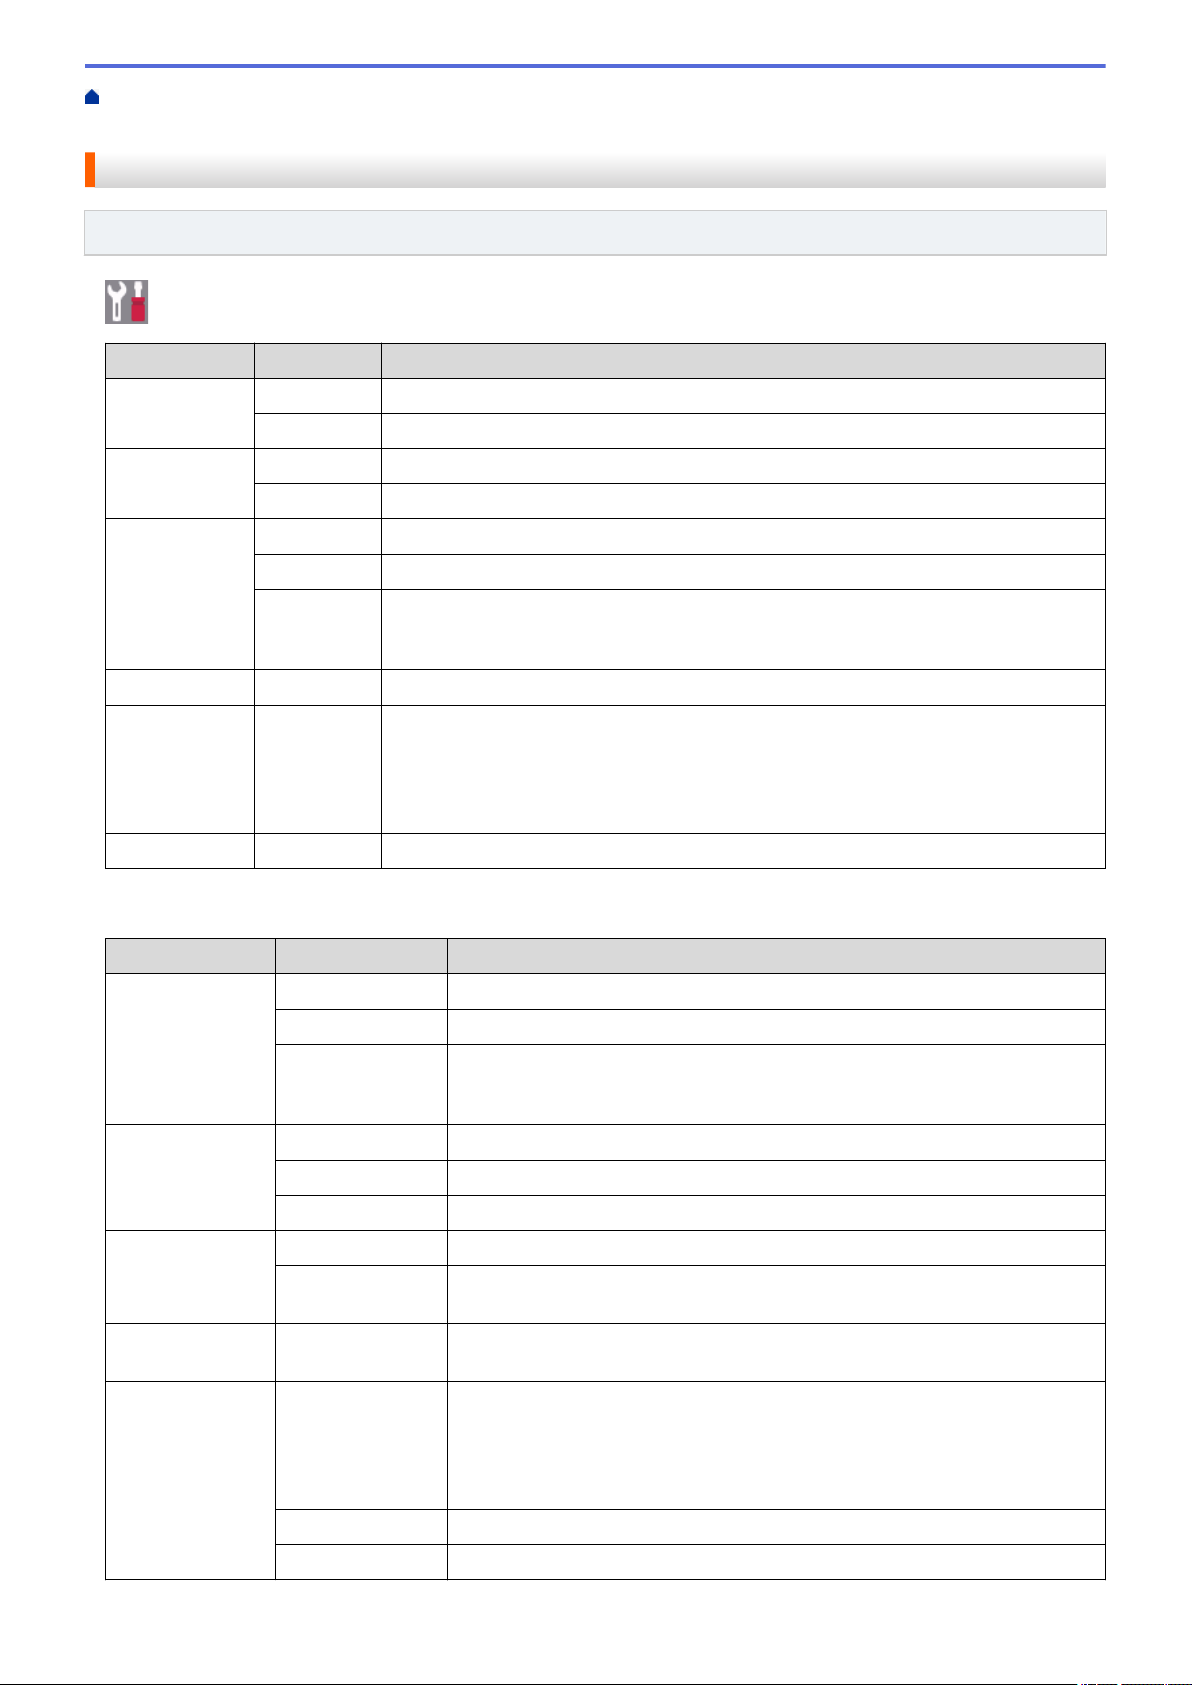
Before You Use Your Brother Machine...............................................................................................1
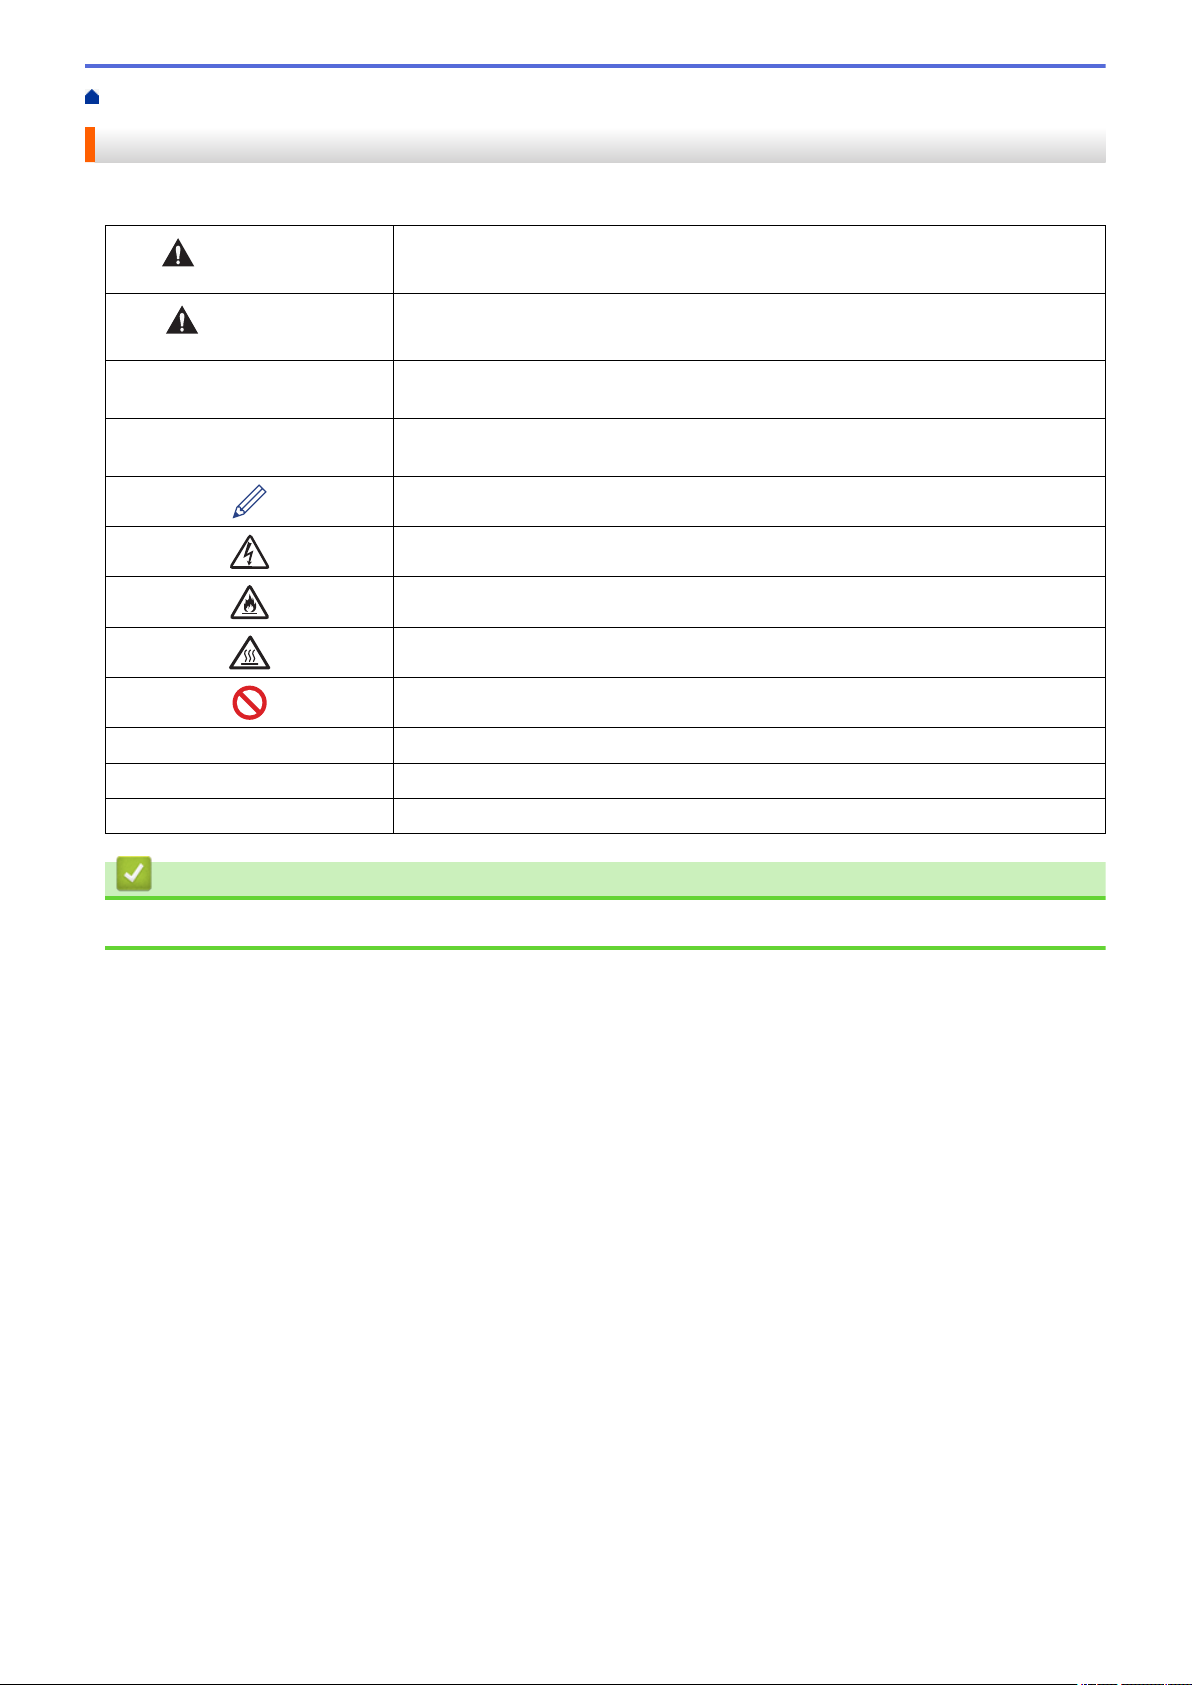
Definitions of Notes........................................................................................................................................2
Important Note...............................................................................................................................................4
Introduction to Your Brother Machine.................................................................................................5
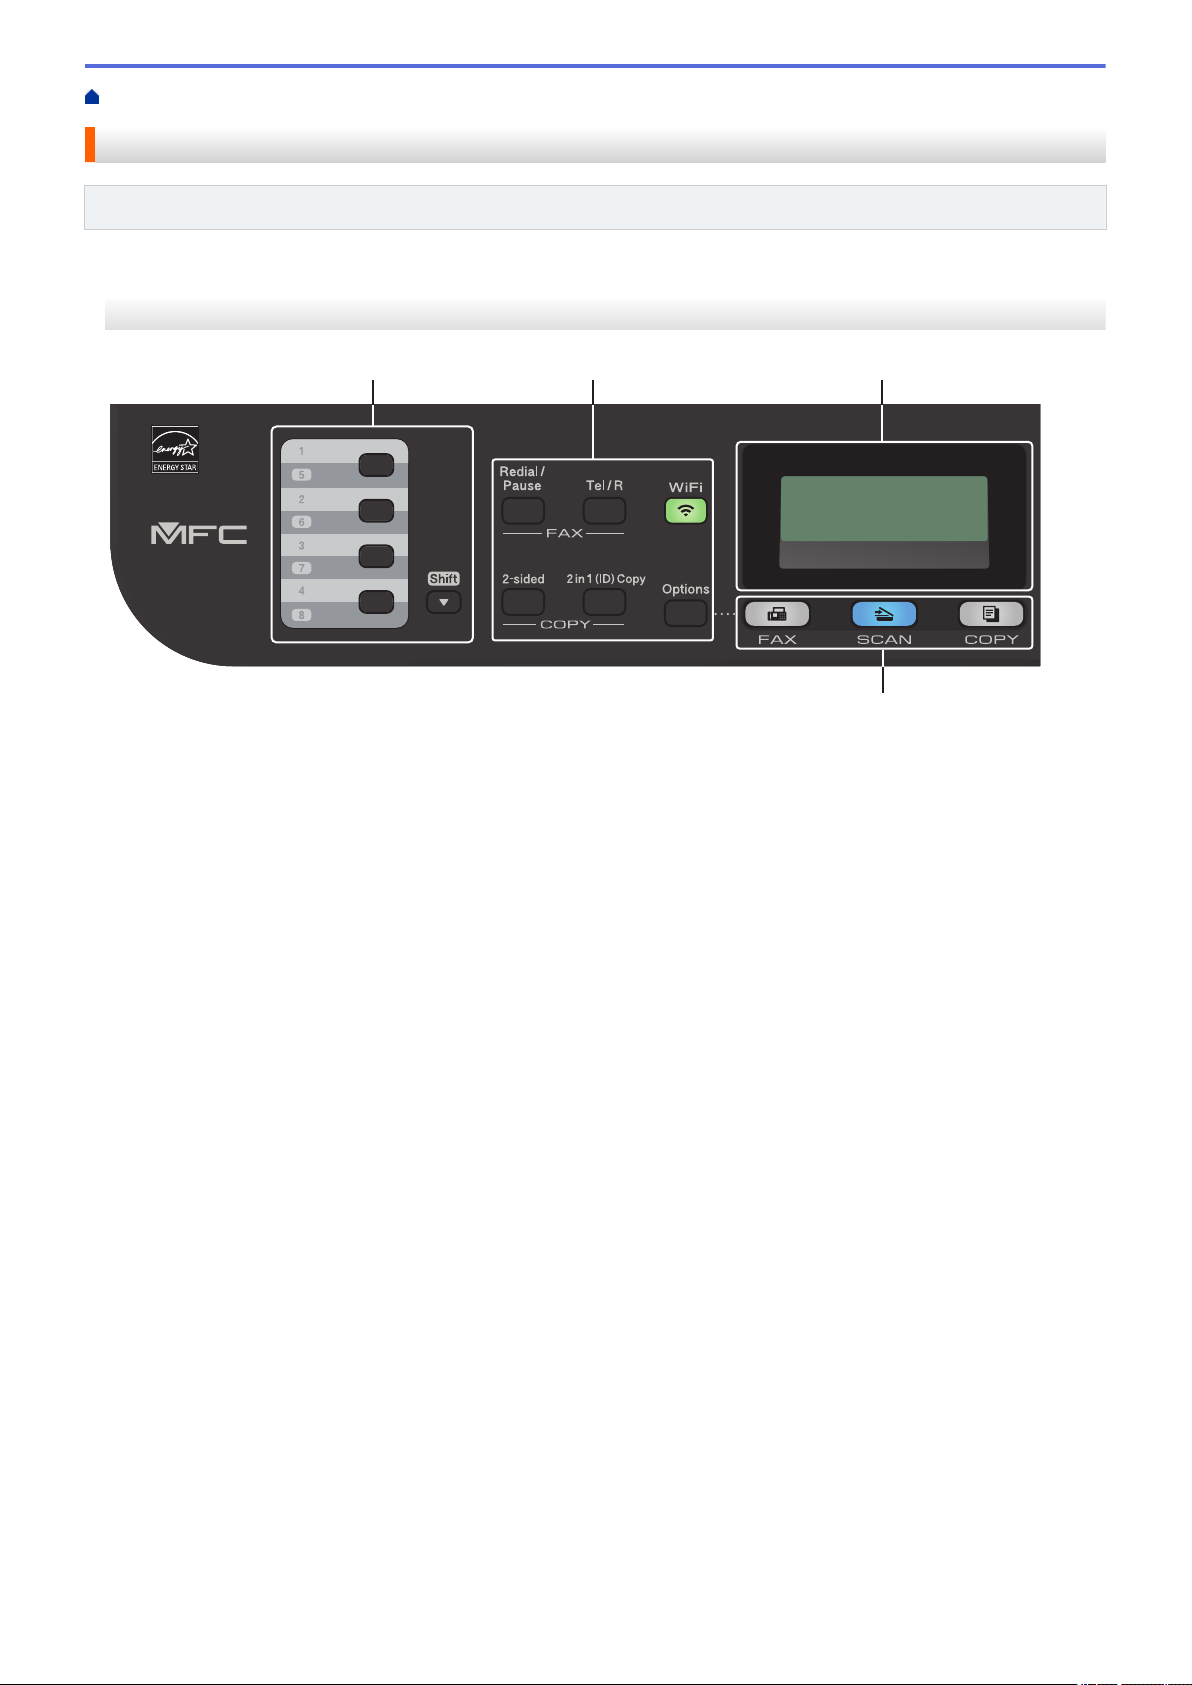
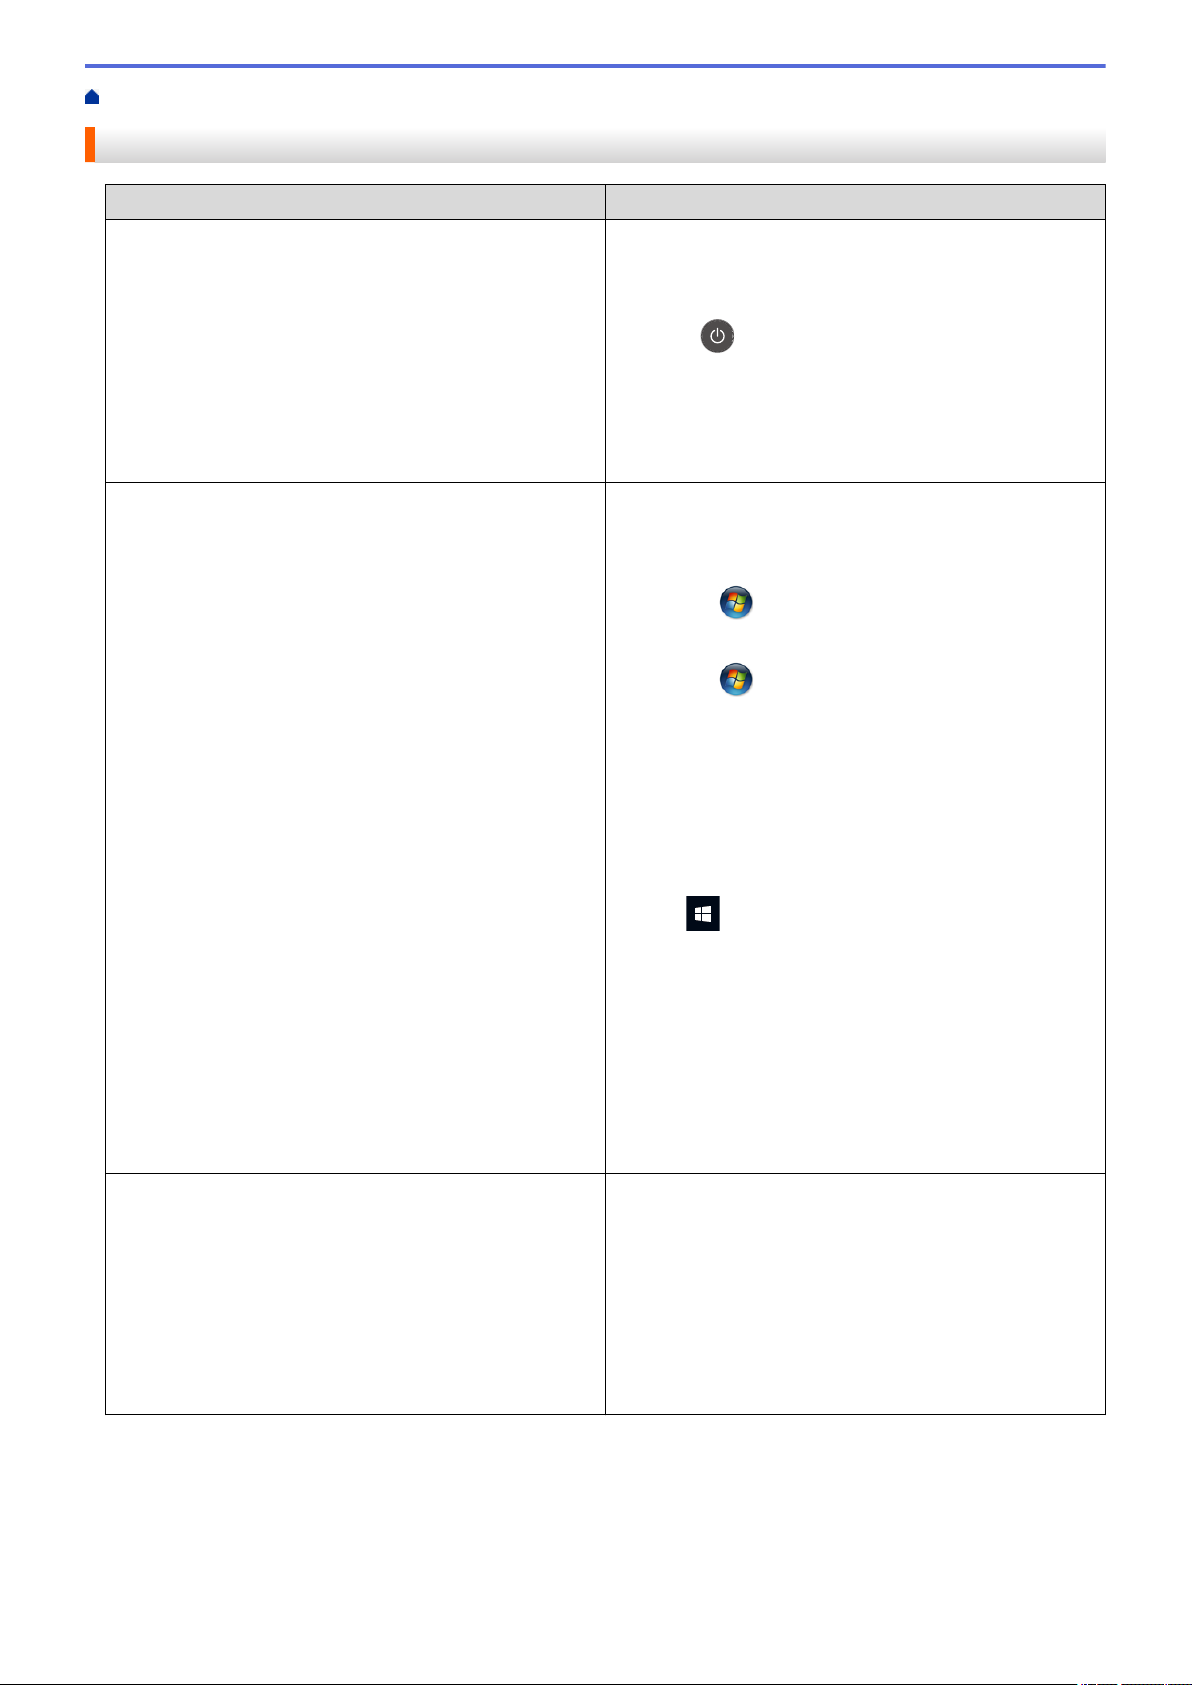
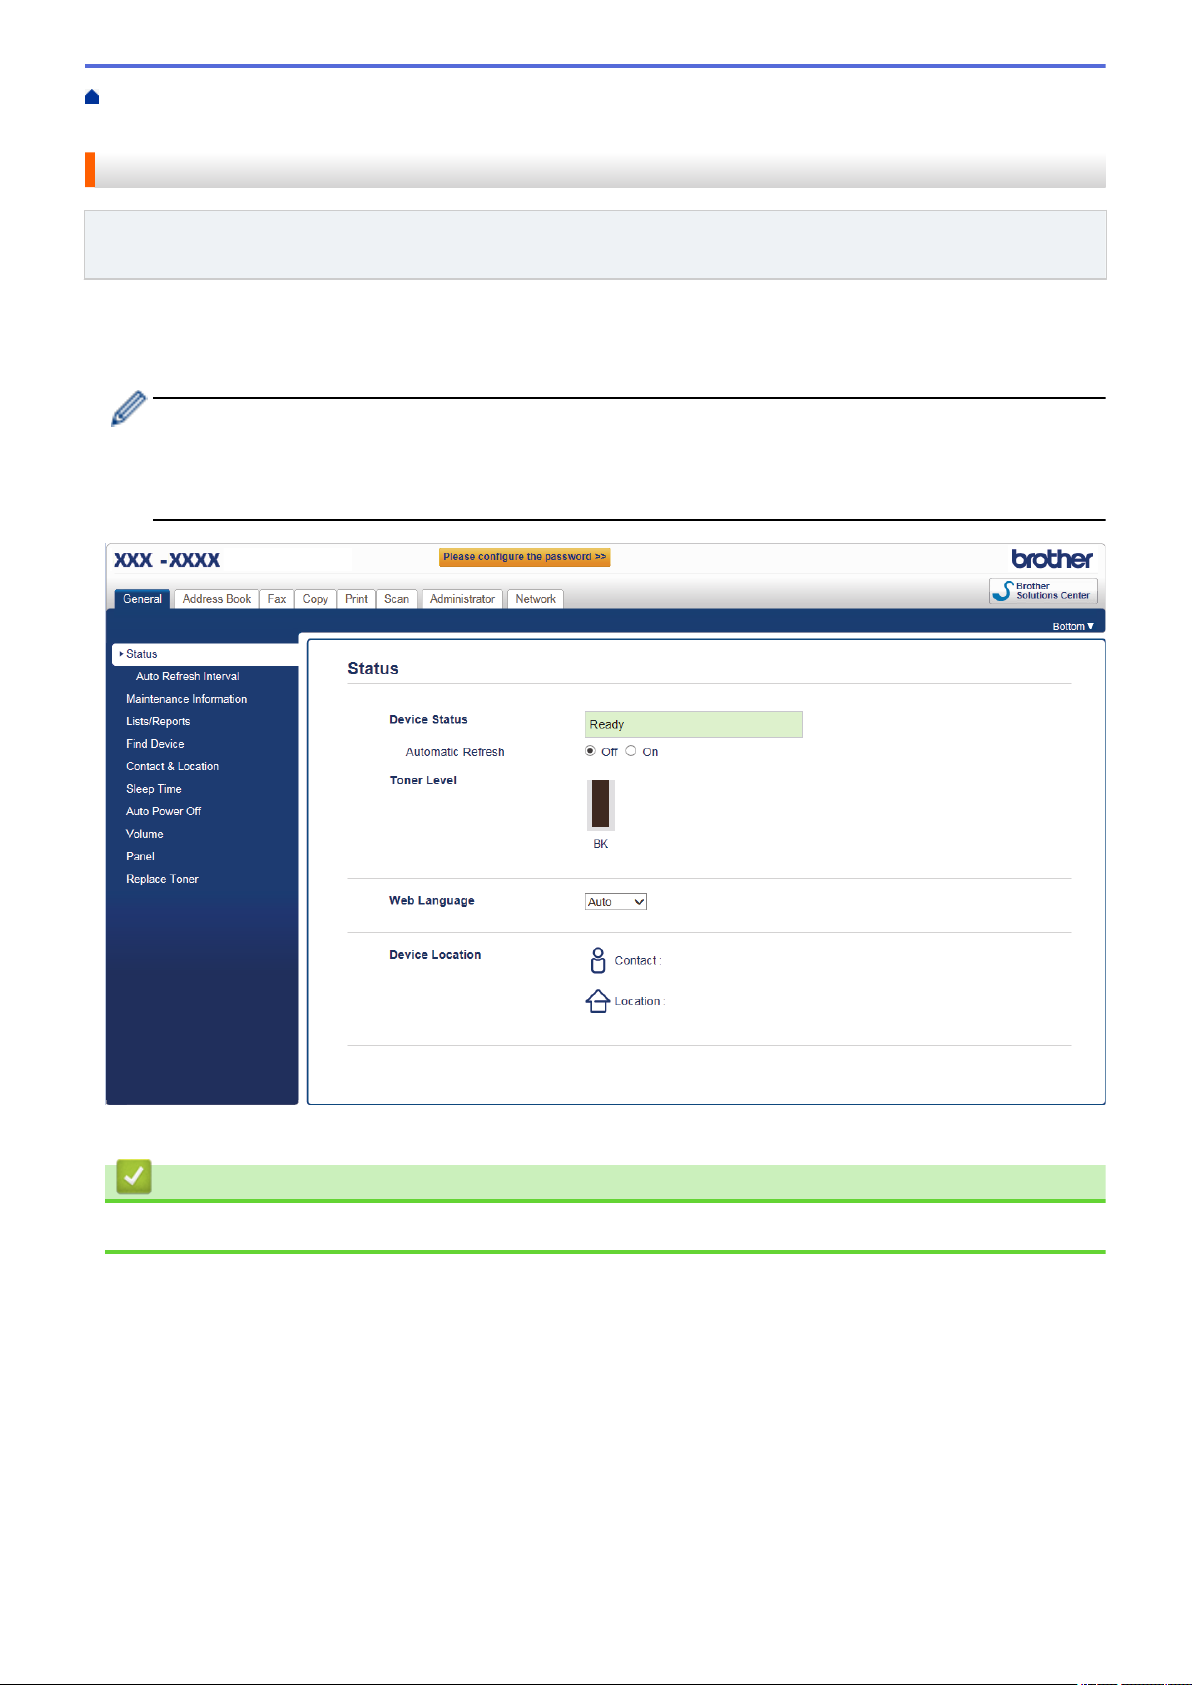
Control Panel Overview.................................................................................................................................6
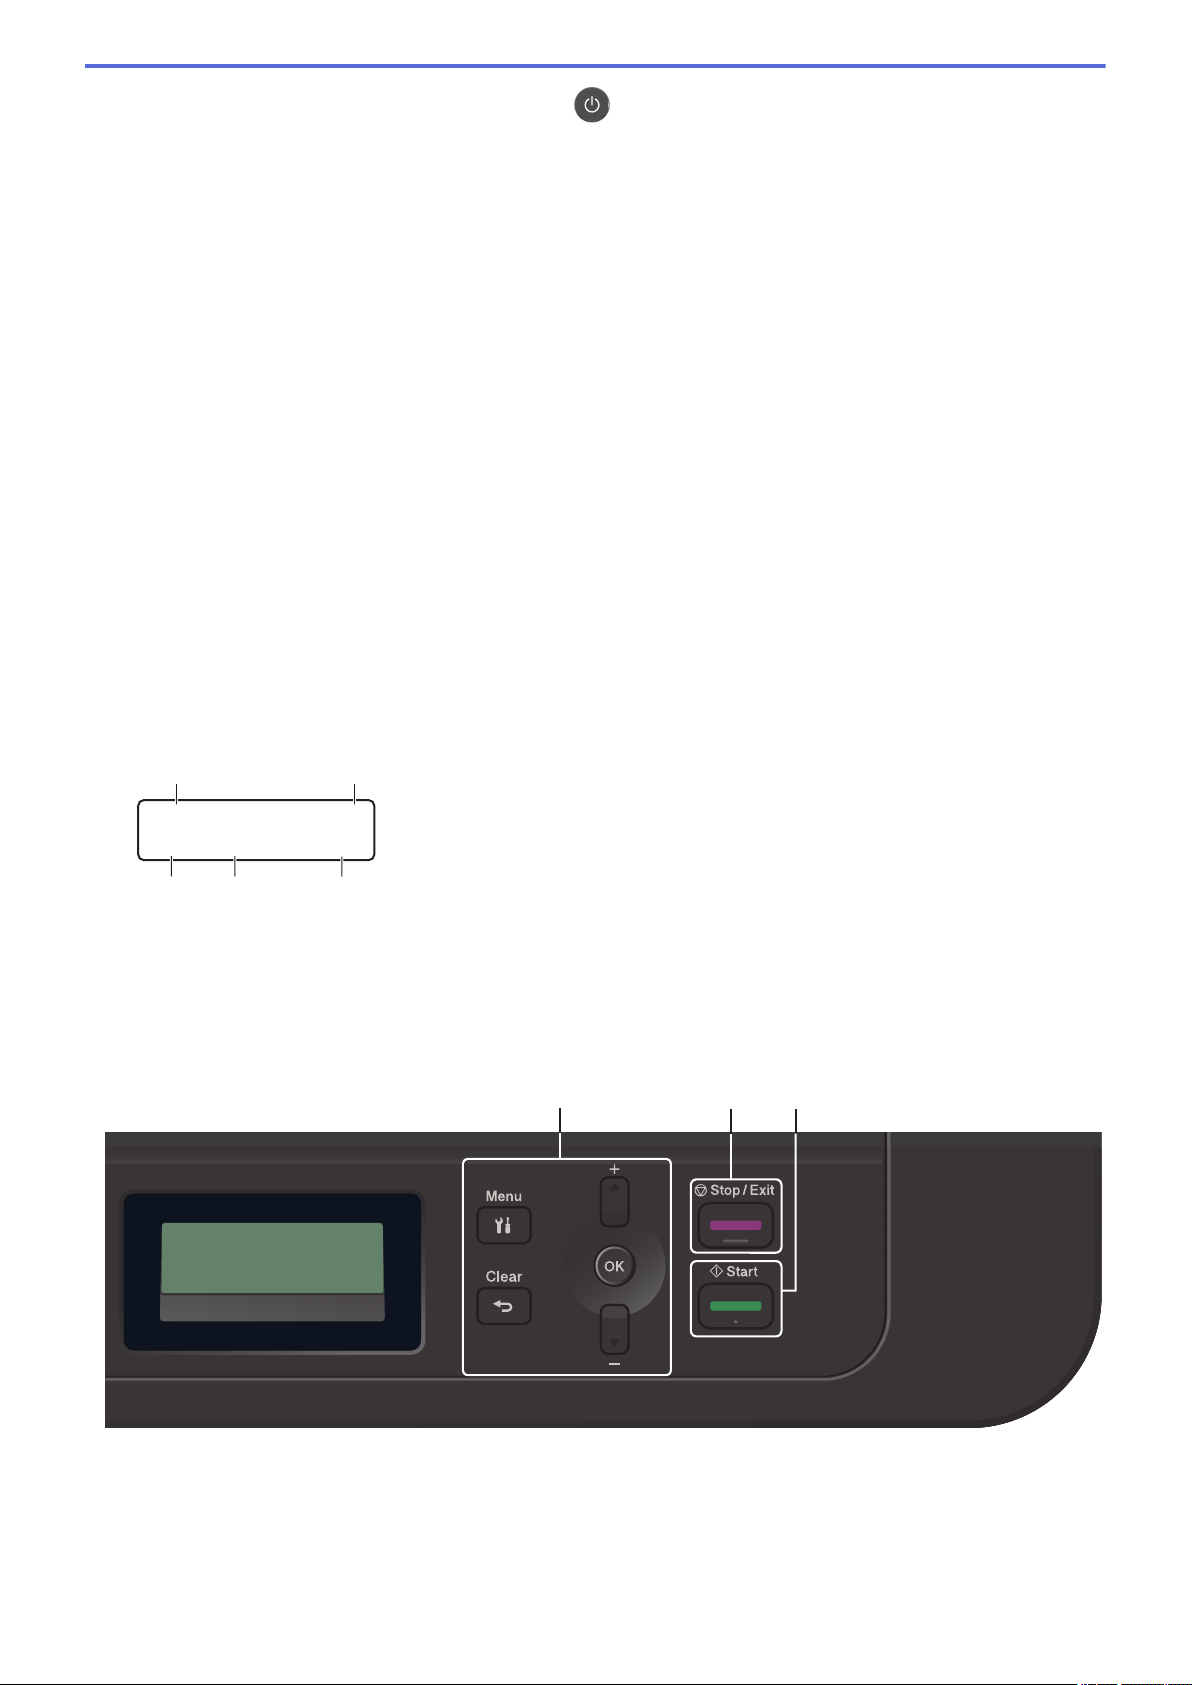
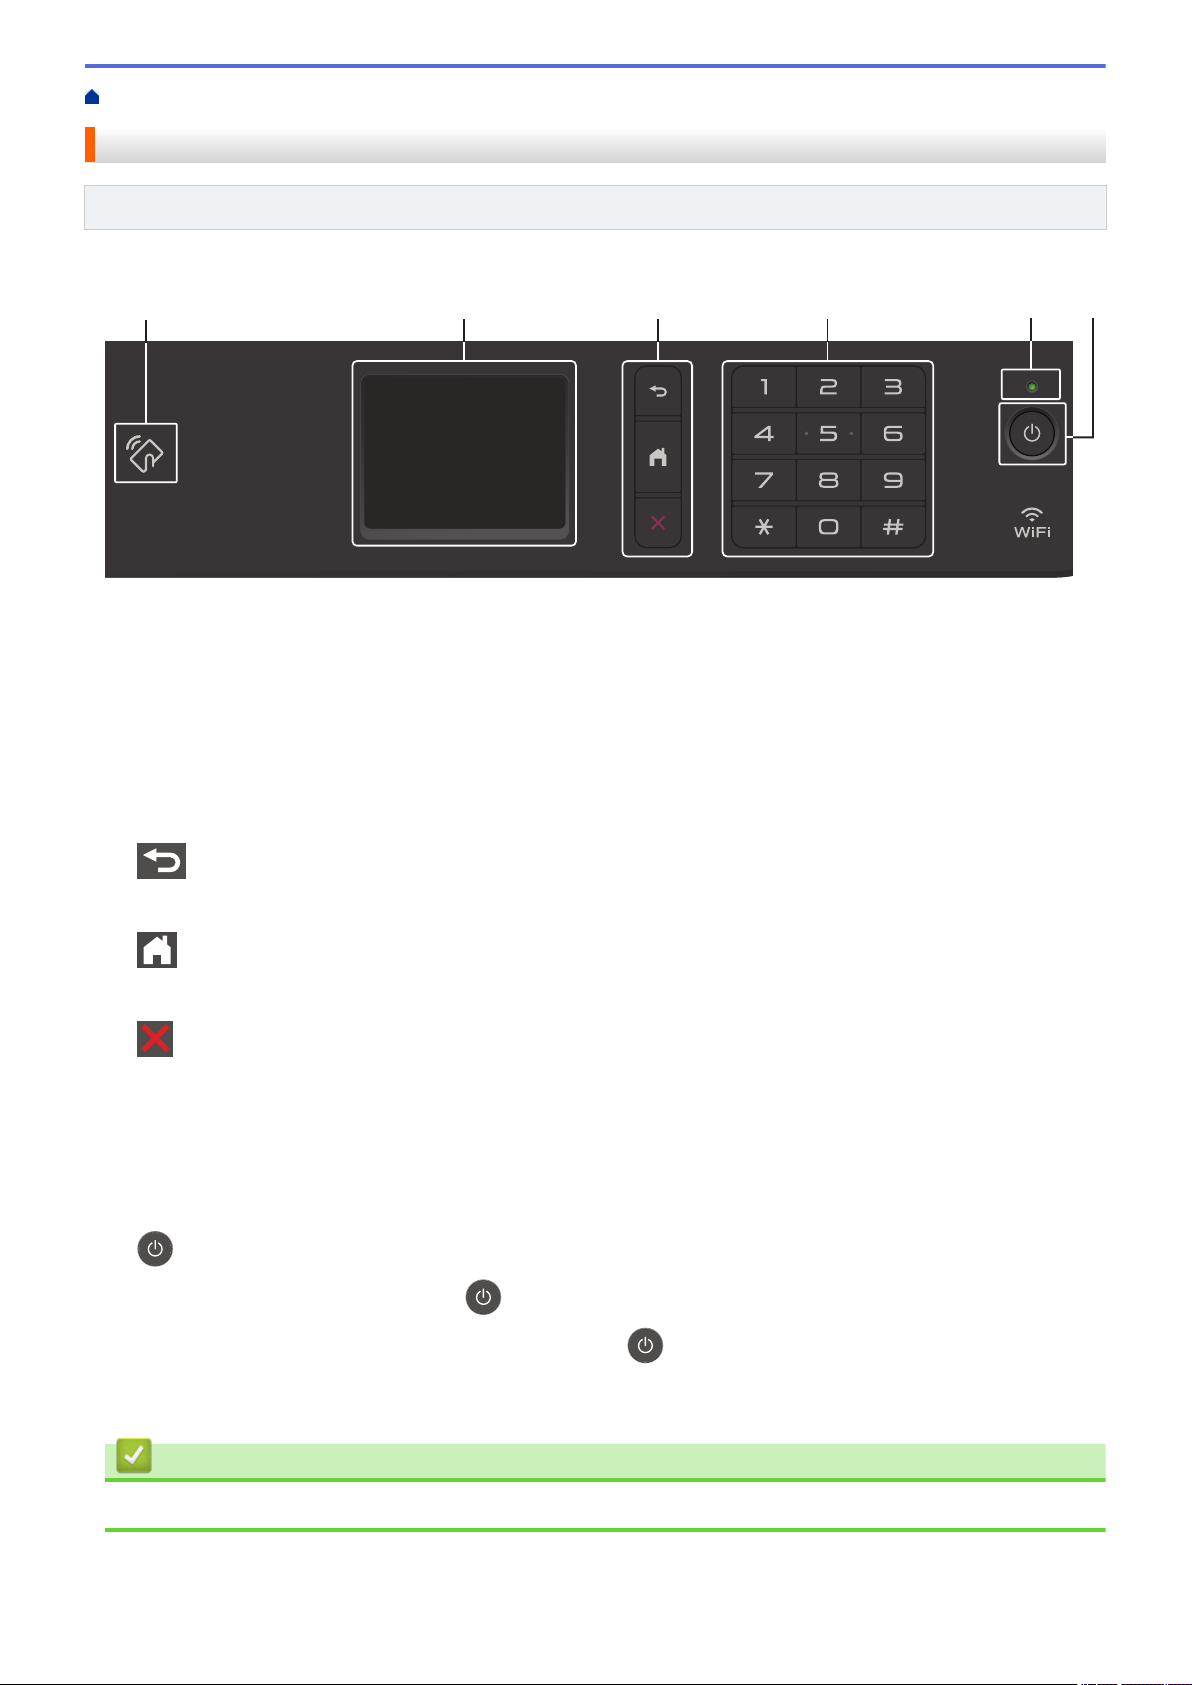
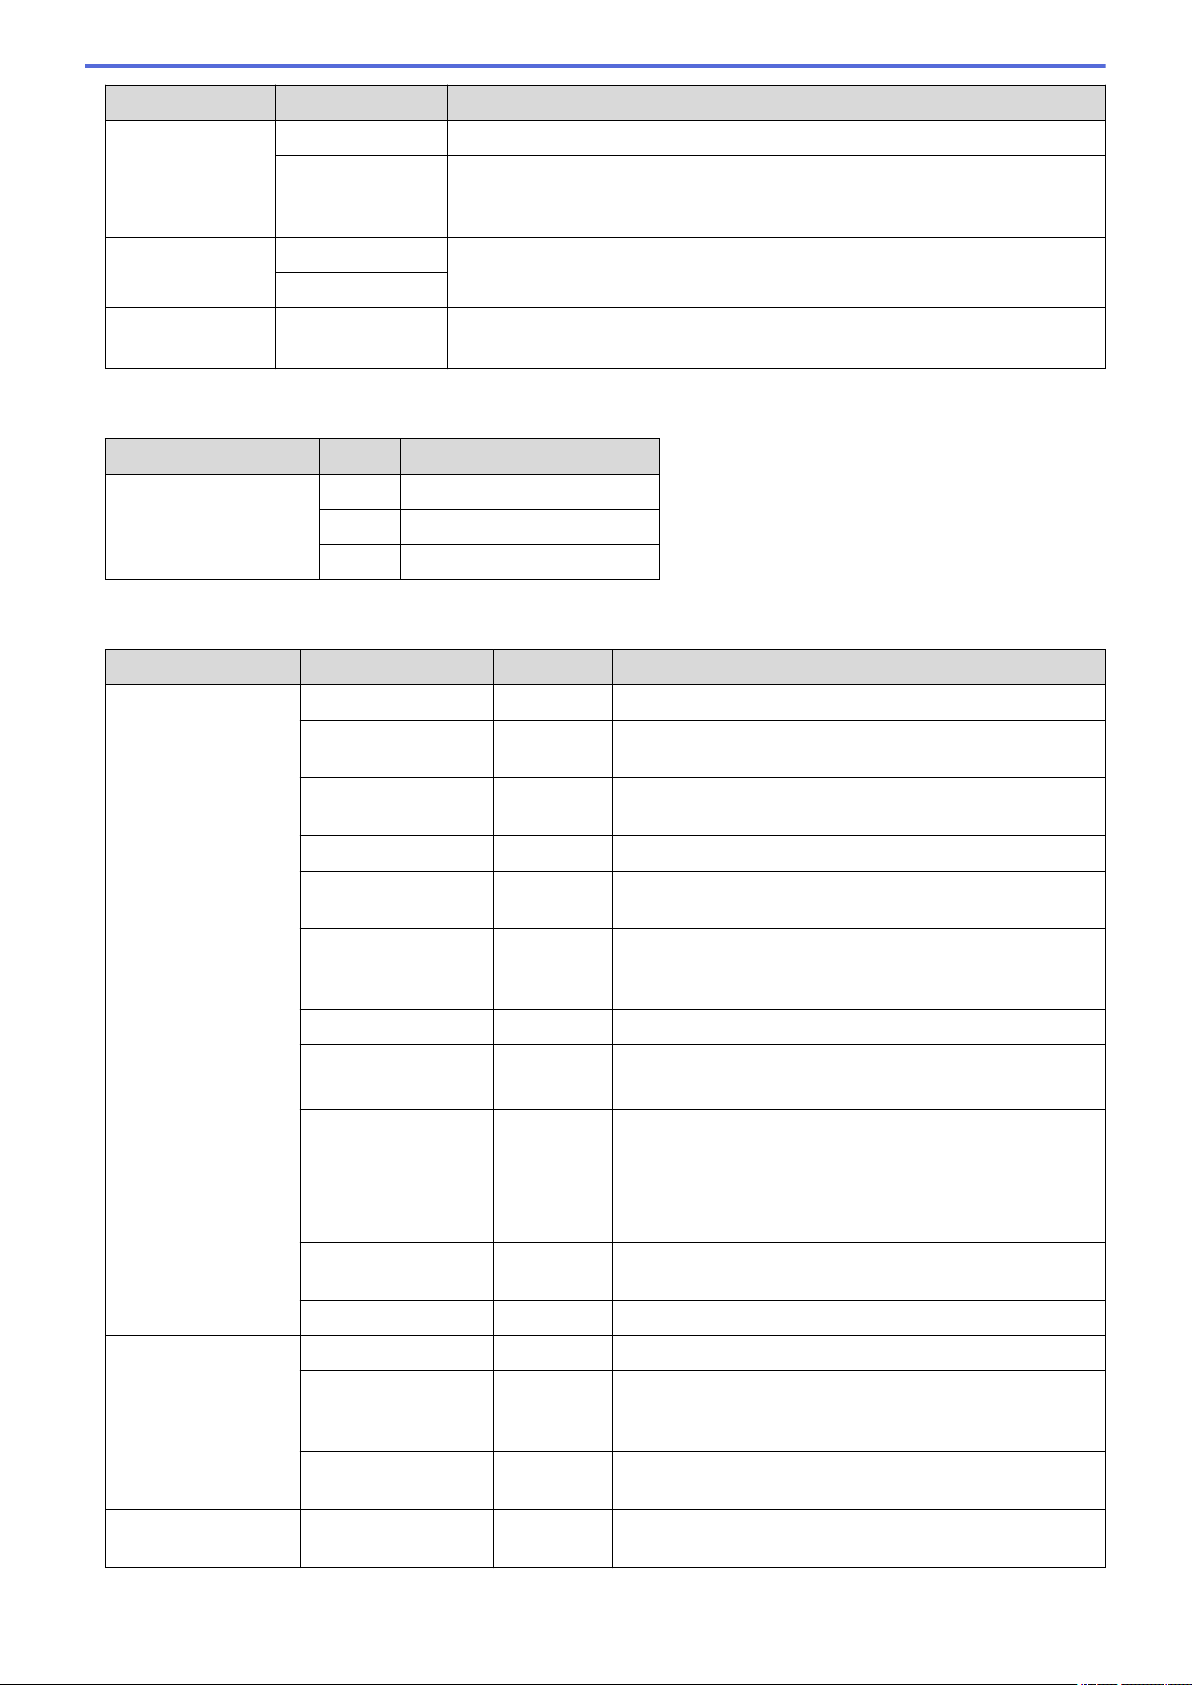
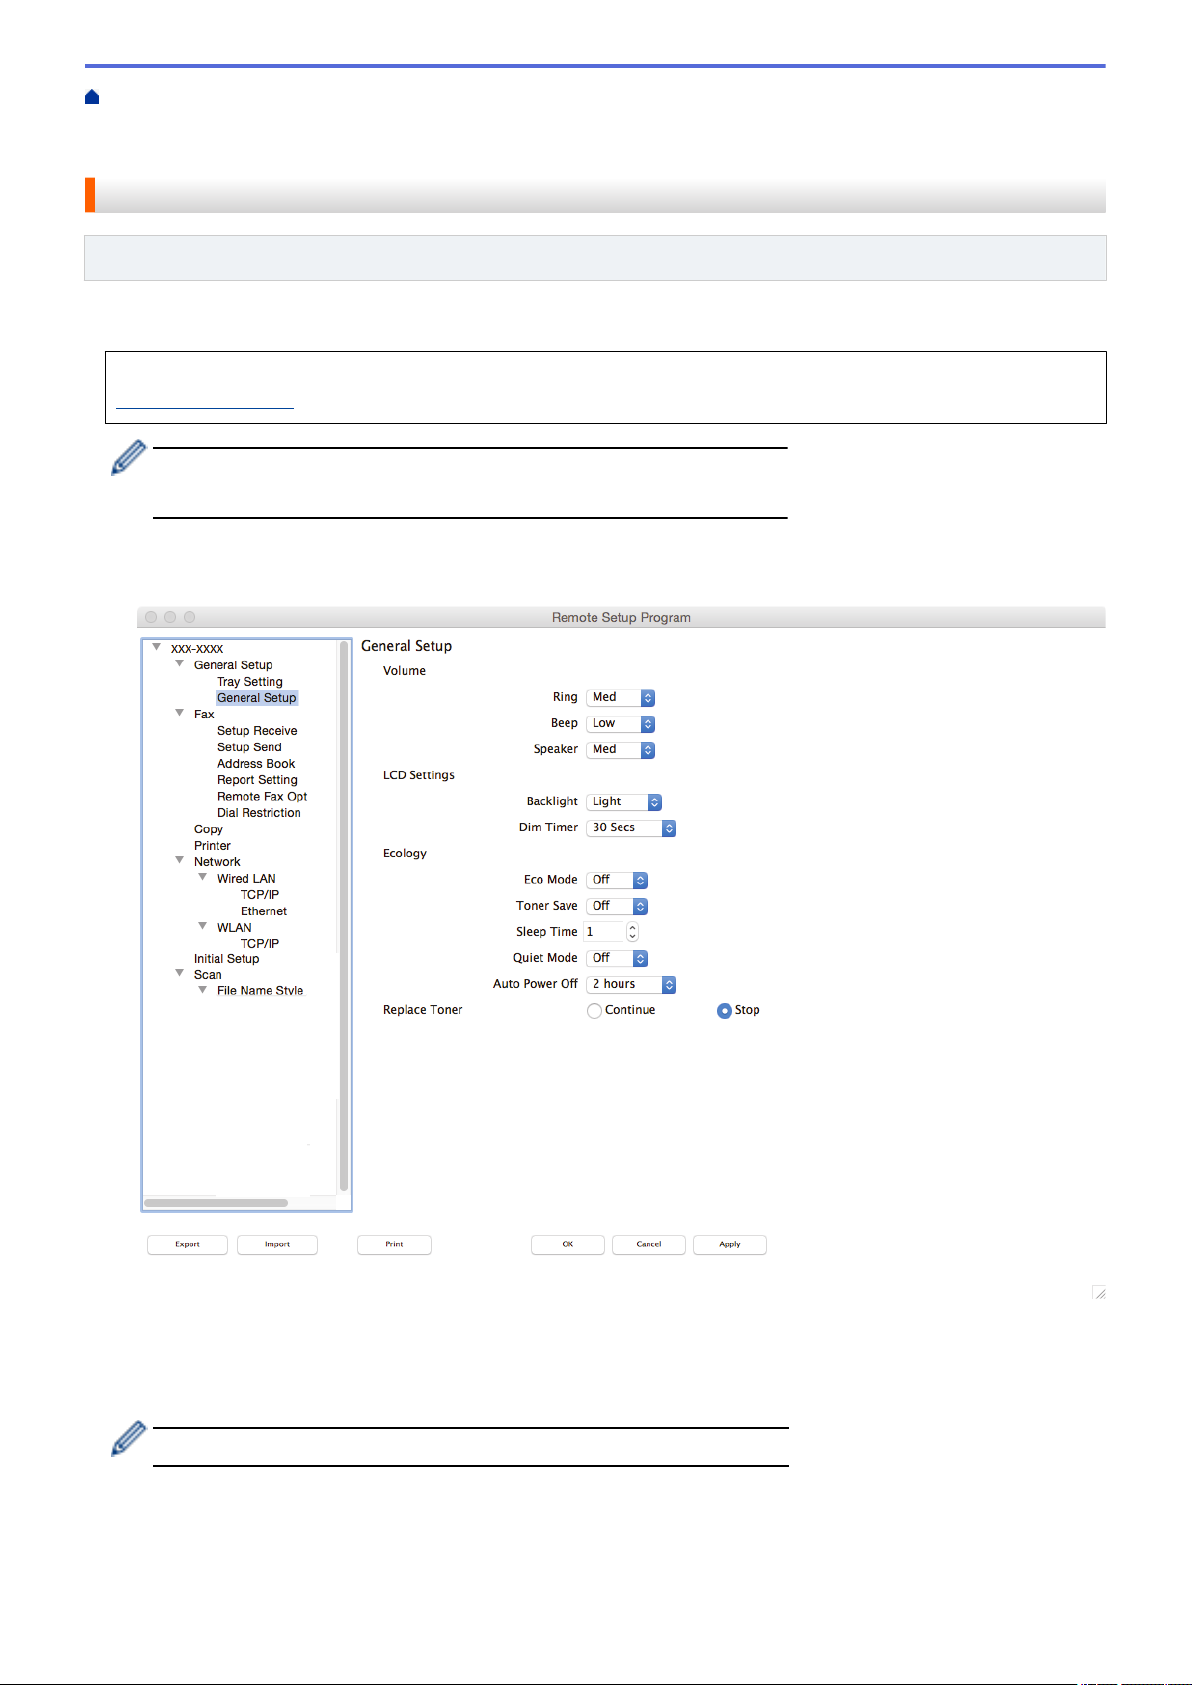
Control Panel Overview...............................................................................................................................11
Load and Print Using the Paper Tray.................................................................................................23
Load and Print Paper in the Manual Feed Slot..................................................................................26
Paper Settings..............................................................................................................................................33
Change the Paper Size and Paper Type............................................................................................34
Change the Check Paper Size Setting...............................................................................................35
Load Documents in the Automatic Document Feeder (ADF).............................................................38
Load Documents on the Scanner Glass.............................................................................................39
Unscannable and Unprintable Areas...........................................................................................................40
Using Special Paper.....................................................................................................................................41
Monitor the Status of the Machine from Your Computer (Mac)..........................................................60
Cancel a Print Job........................................................................................................................................61
Test Print......................................................................................................................................................62
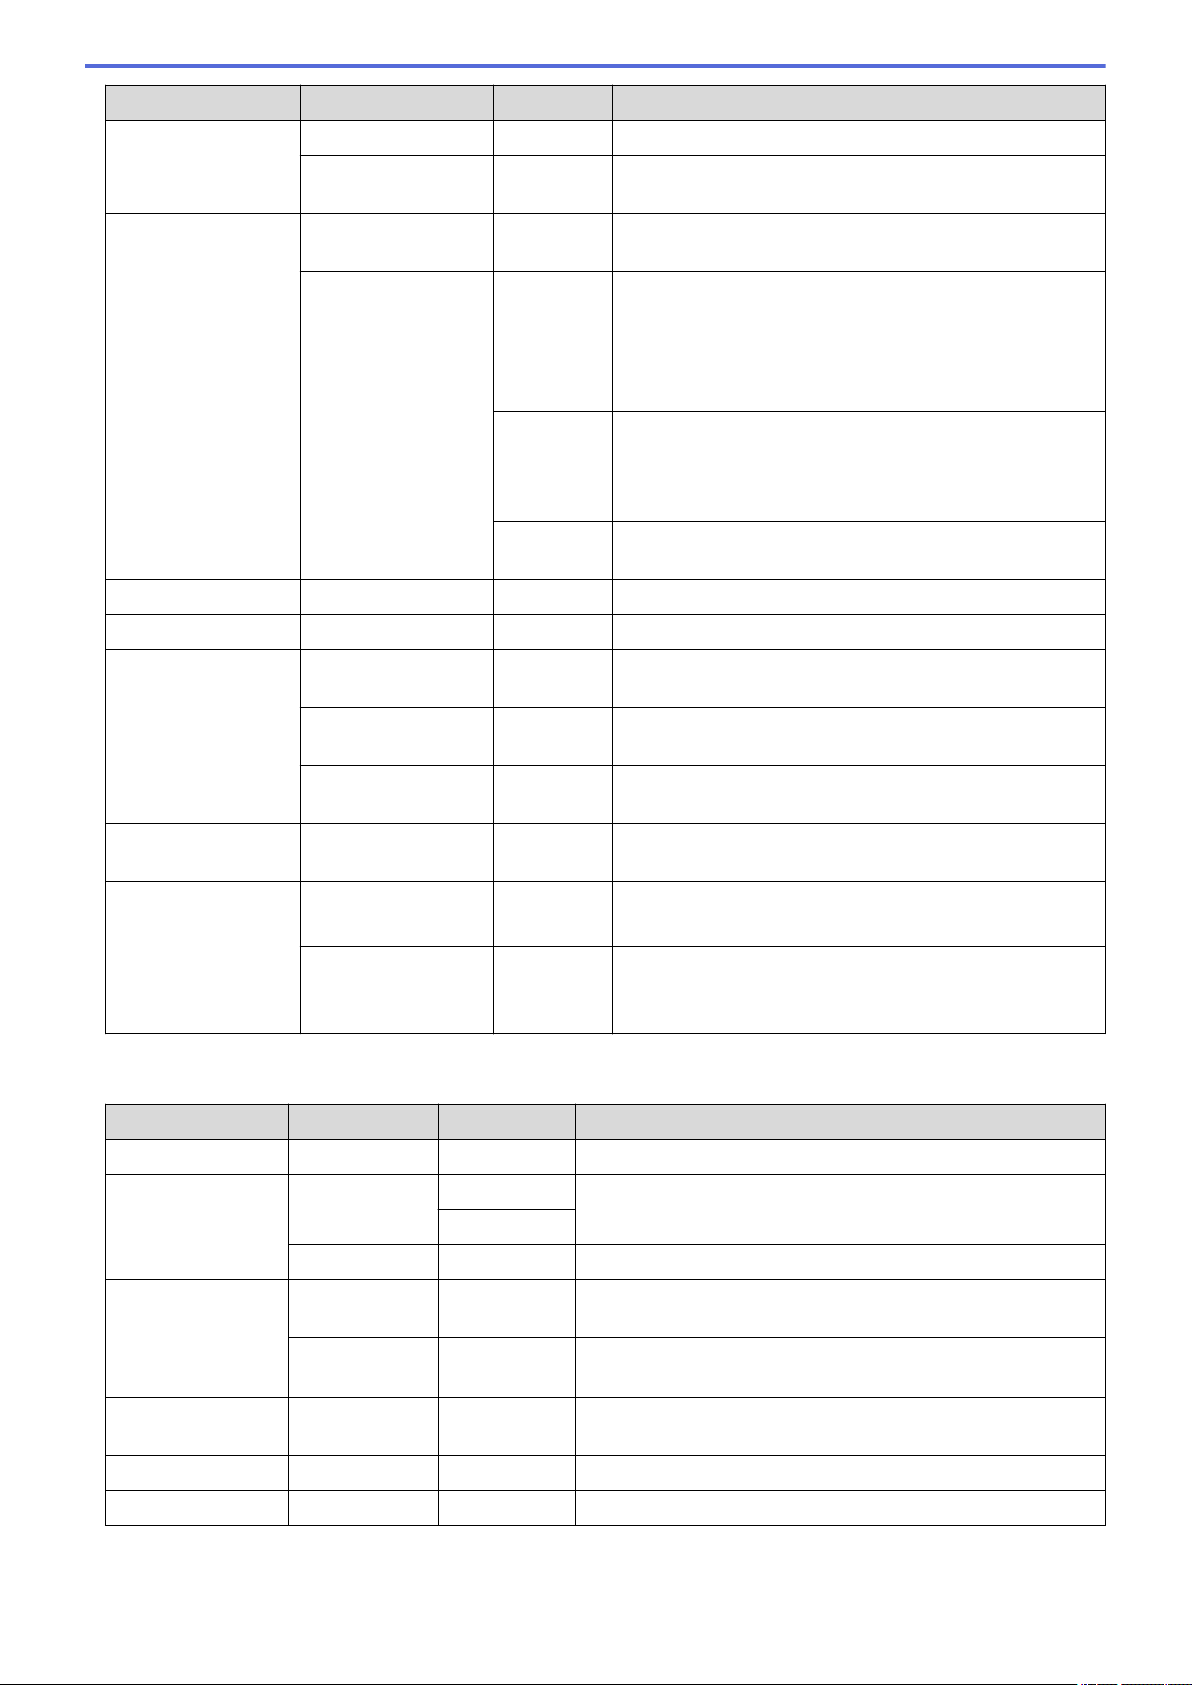
Copy a Document......................................................................................................................................151
Enlarge or Reduce Copied Images............................................................................................................153
Make N in 1 Copies Using the Page Layout Feature.................................................................................155
Copy an ID Card........................................................................................................................................159
Copy on Both Sides of the Paper (2-sided Copy)......................................................................................161
Send a Fax.................................................................................................................................................167
Send a Fax.......................................................................................................................................168
Send a 2-sided Fax from the ADF....................................................................................................172
Send a Fax Manually........................................................................................................................173
Send a Fax at the End of a Conversation........................................................................................174
Send the Same Fax to More than One Recipient (Broadcasting)....................................................175
Send a Fax in Real Time..................................................................................................................178
Send a Fax at a Specified Time (Delayed Fax)................................................................................179
Add a Cover Page to Your Fax.........................................................................................................180
Cancel a Fax in Progress.................................................................................................................183
Check and Cancel a Pending Fax....................................................................................................184
Receive a Fax............................................................................................................................................187
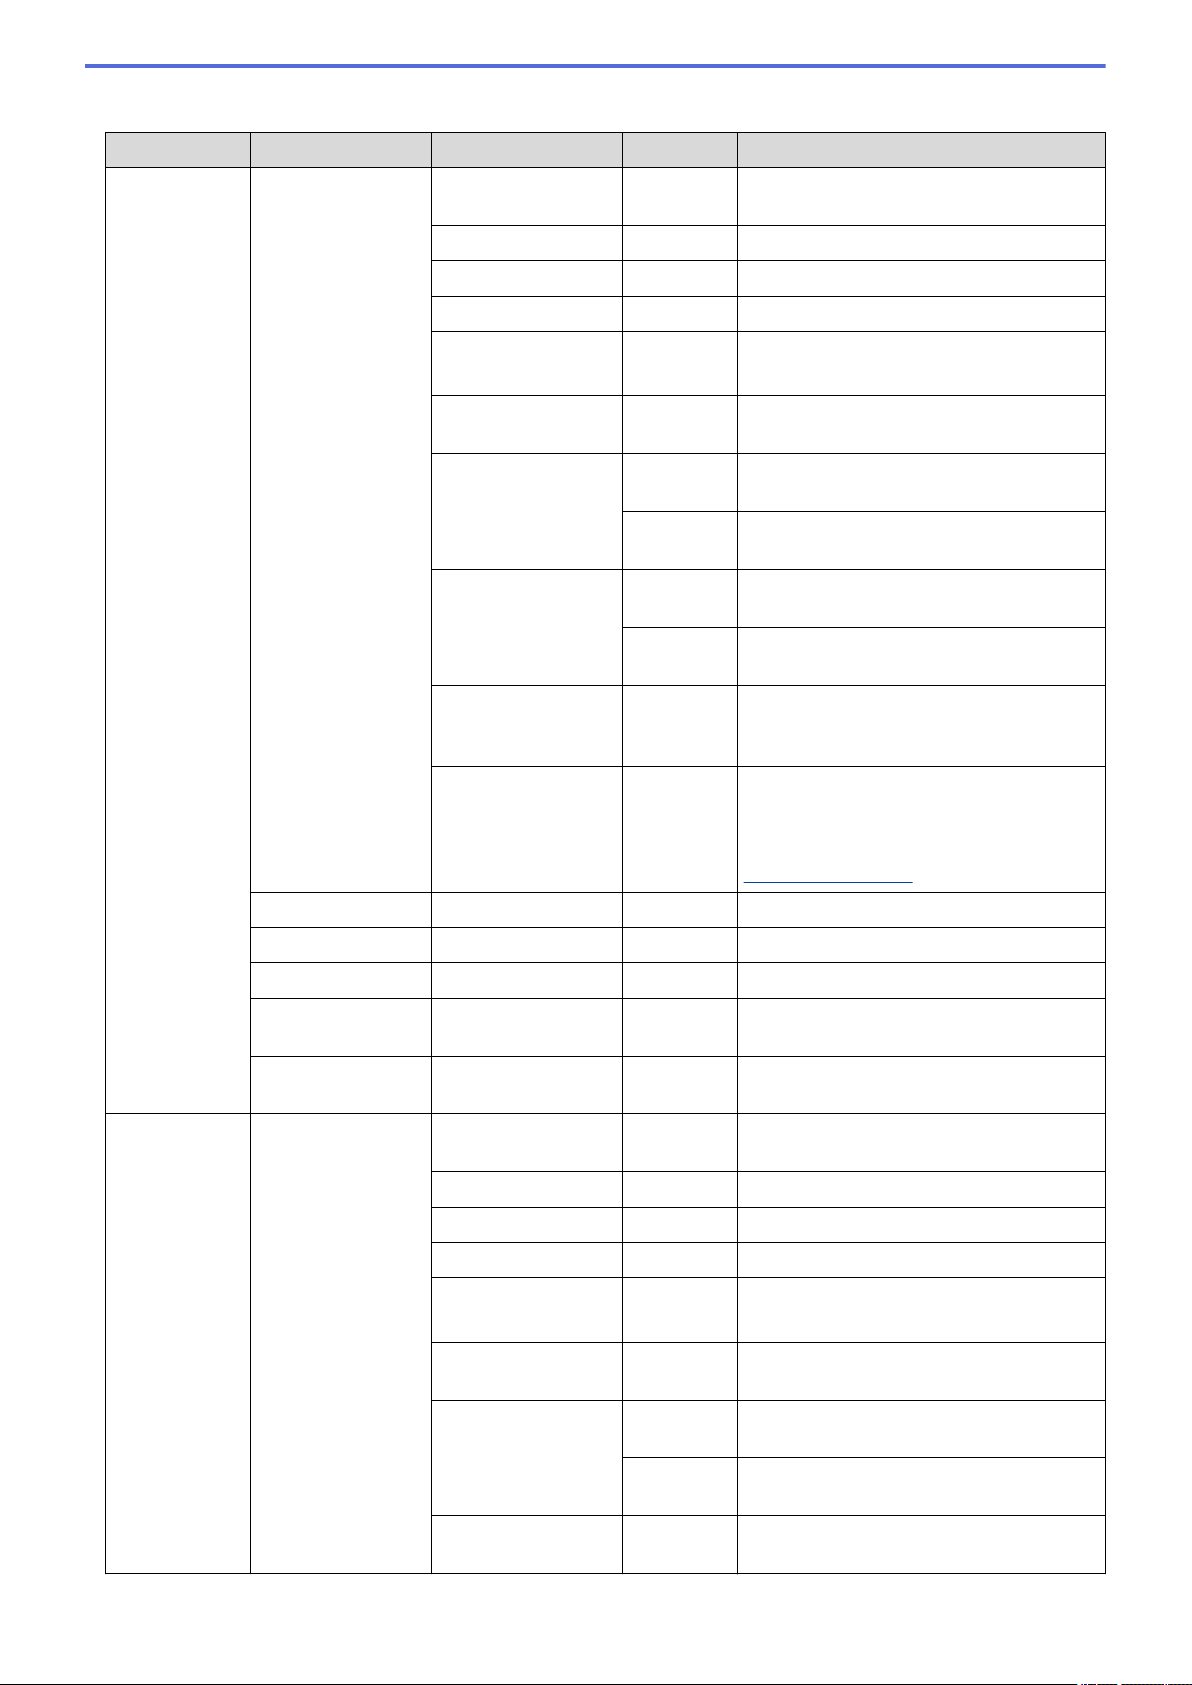
Brother Web Connect.................................................................................................................................385
Home > Table of Contents
iii
Brother Web Connect Overview.......................................................................................................386
Online Services Used with Brother Web Connect............................................................................387
Conditions for Using Brother Web Connect......................................................................................389
Set Up Brother Web Connect...........................................................................................................393
Scan and Upload Documents Using Brother Web Connect.............................................................403
Download and Print Documents Using Brother Web Connect.........................................................404
Google Cloud Print.....................................................................................................................................407
Google Cloud Print Overview...........................................................................................................408
Before Using Google Cloud Print.....................................................................................................409
Print from Google Chrome™ or Chrome OS™.................................................................................413
Print from Google Drive™ for Mobile................................................................................................414
Print from Gmail™ Webmail Service for Mobile................................................................................415
Document is Jammed in the Top of the ADF Unit............................................................................459
Document is Jammed under the Document Cover..........................................................................460
Remove Small Scraps of Paper Jammed in the ADF......................................................................461
Paper Jams................................................................................................................................................462
Paper is Jammed in the Paper Tray.................................................................................................463
Paper is Jammed in the Output Paper Tray.....................................................................................465
Paper is Jammed in the Back of the Machine..................................................................................466
Paper is Jammed inside the Machine..............................................................................................468
Paper is Jammed in the 2-sided Tray...............................................................................................470
Improve the Print Quality............................................................................................................................475
Telephone and Fax Problems....................................................................................................................480
Set Dial Tone Detection....................................................................................................................484
Set Telephone Line Compatibility for Interference and VoIP Systems.............................................485
Other Problems..........................................................................................................................................499
Transfer Your Faxes or Fax Journal Report...............................................................................................501
Transfer Faxes to Another Fax Machine..........................................................................................502
Transfer Faxes to Your Computer....................................................................................................503
Transfer the Fax Journal Report to Another Fax Machine...............................................................505
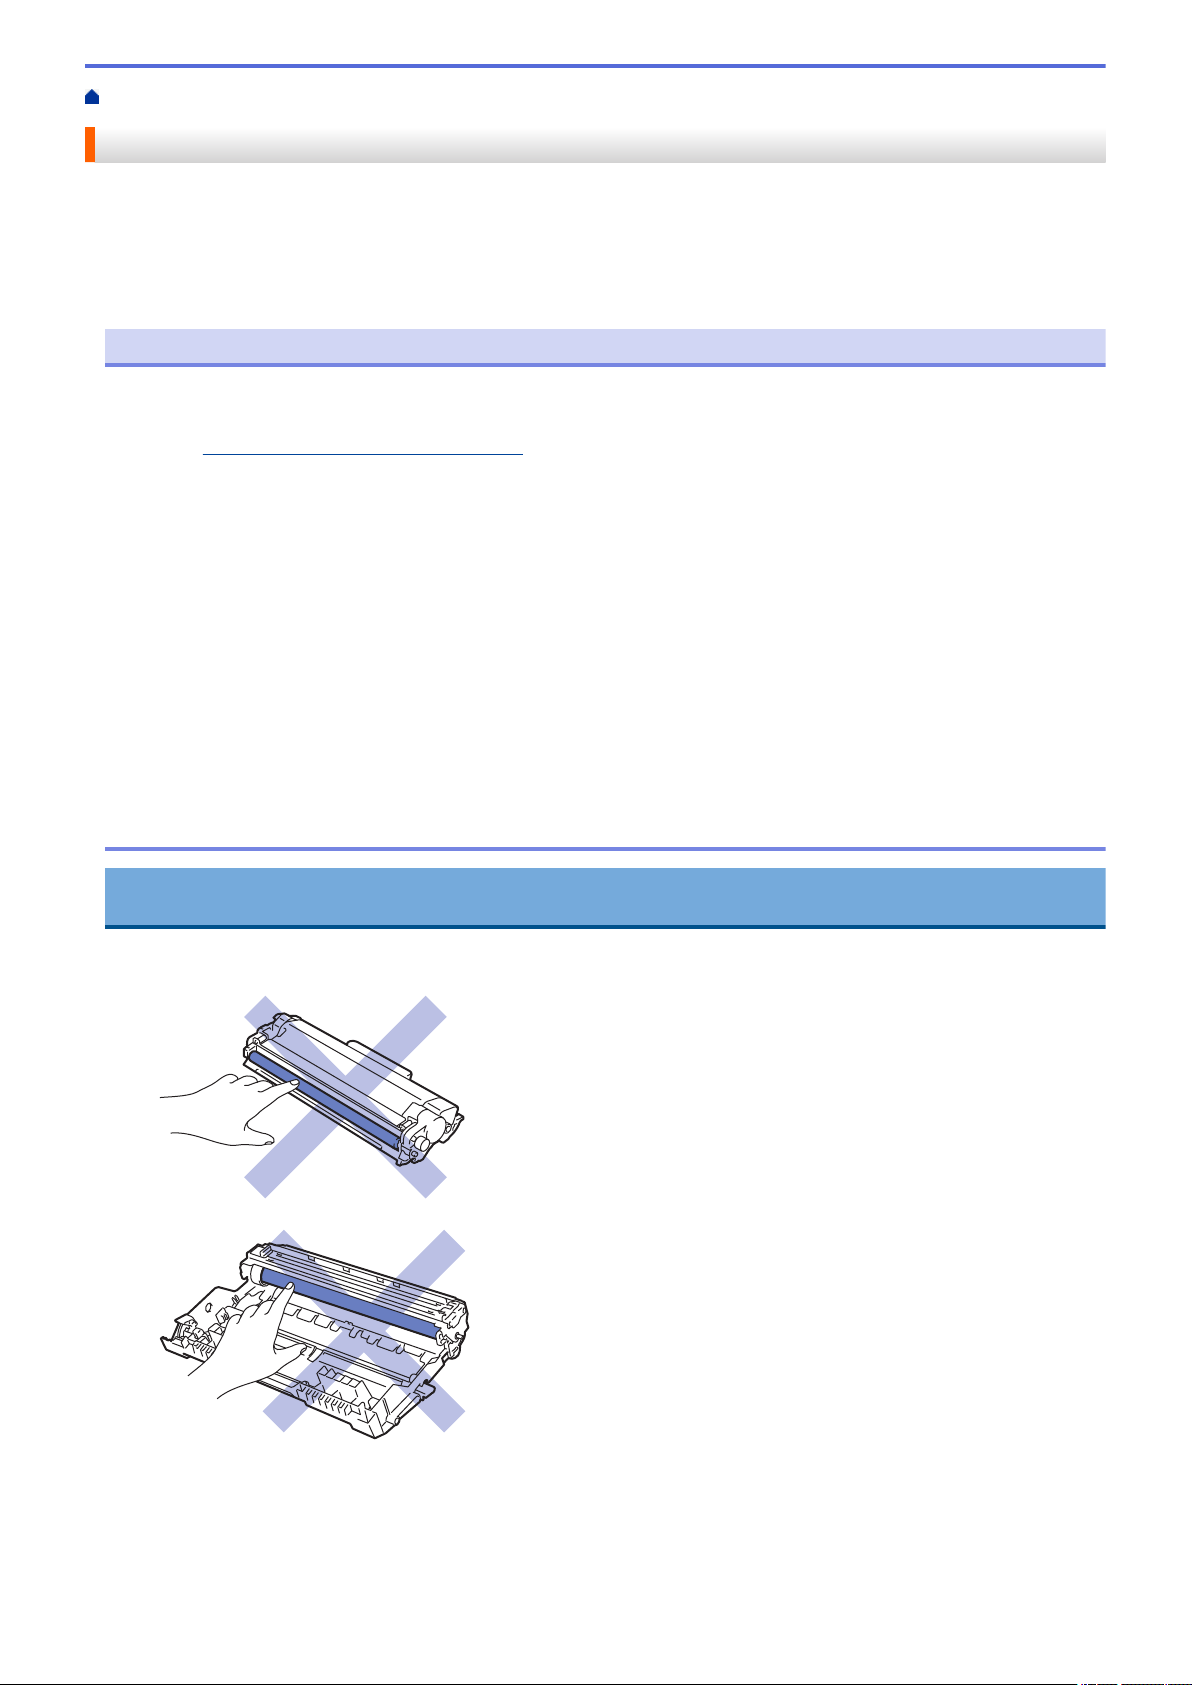
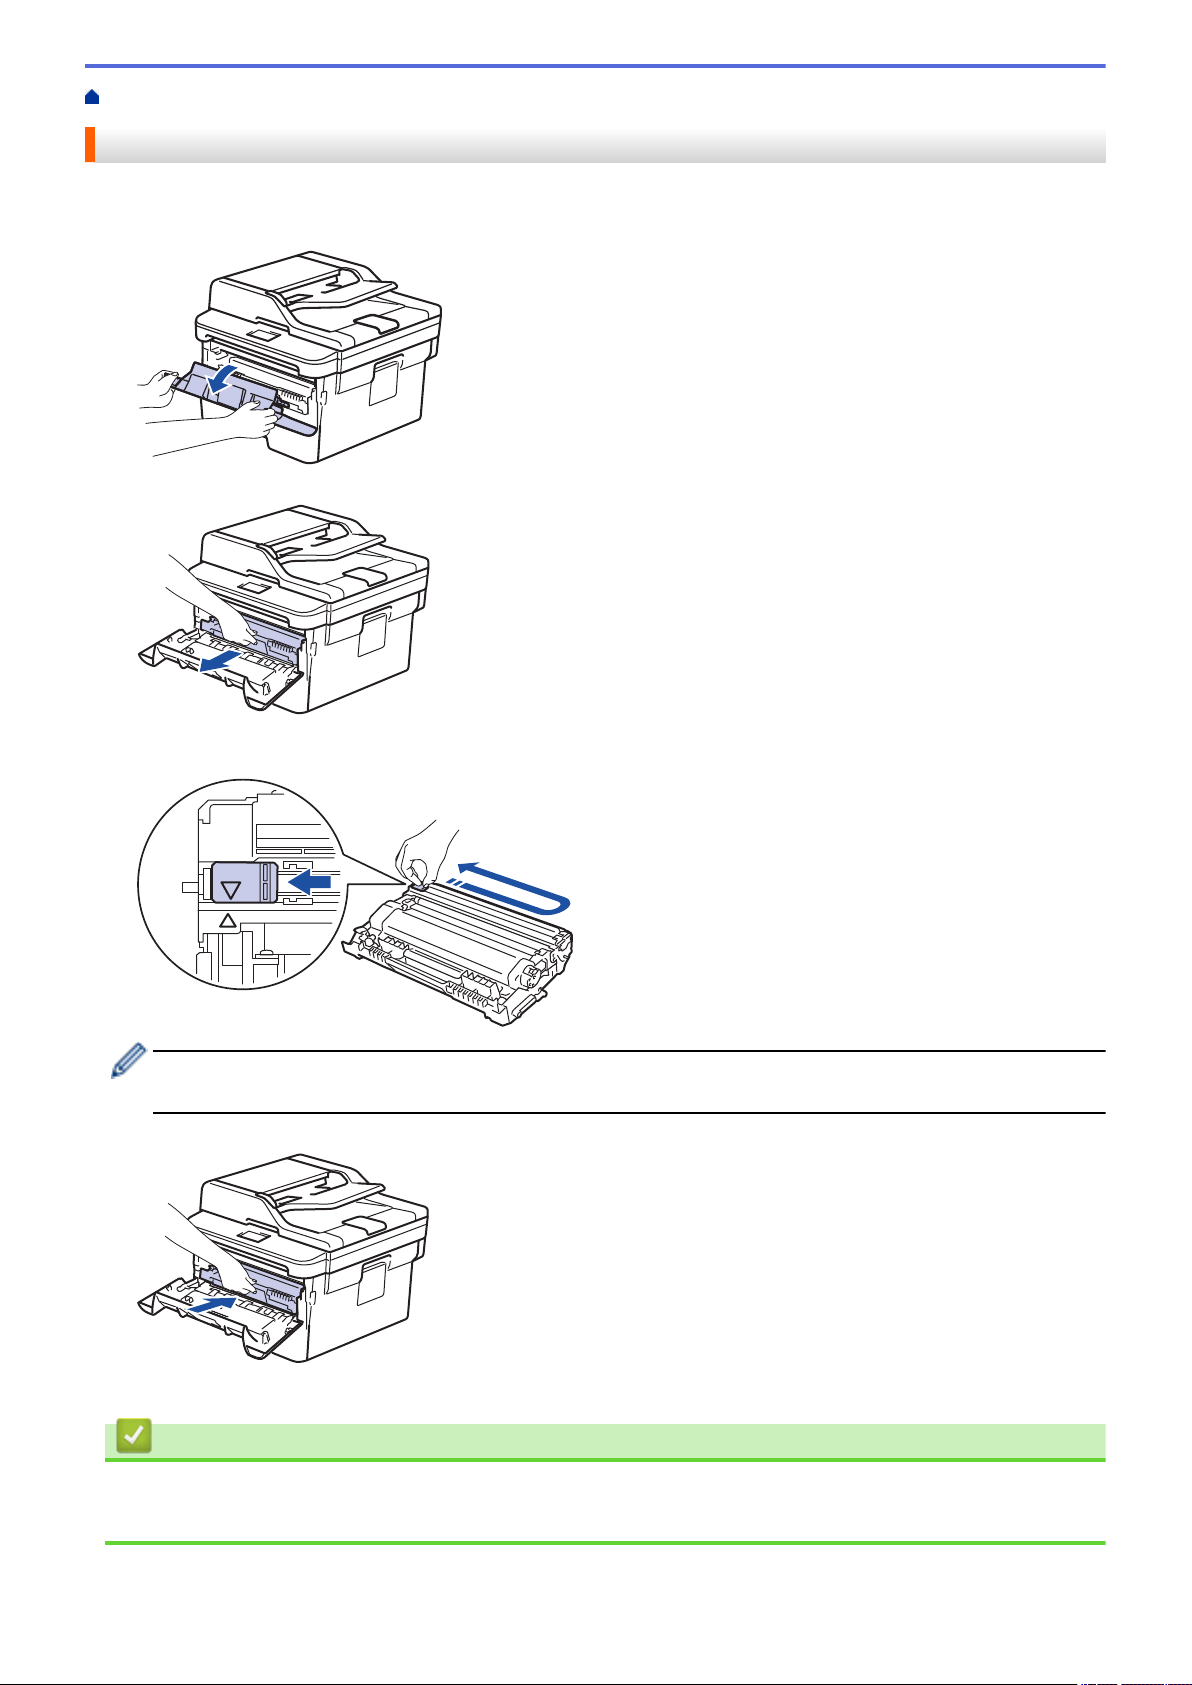
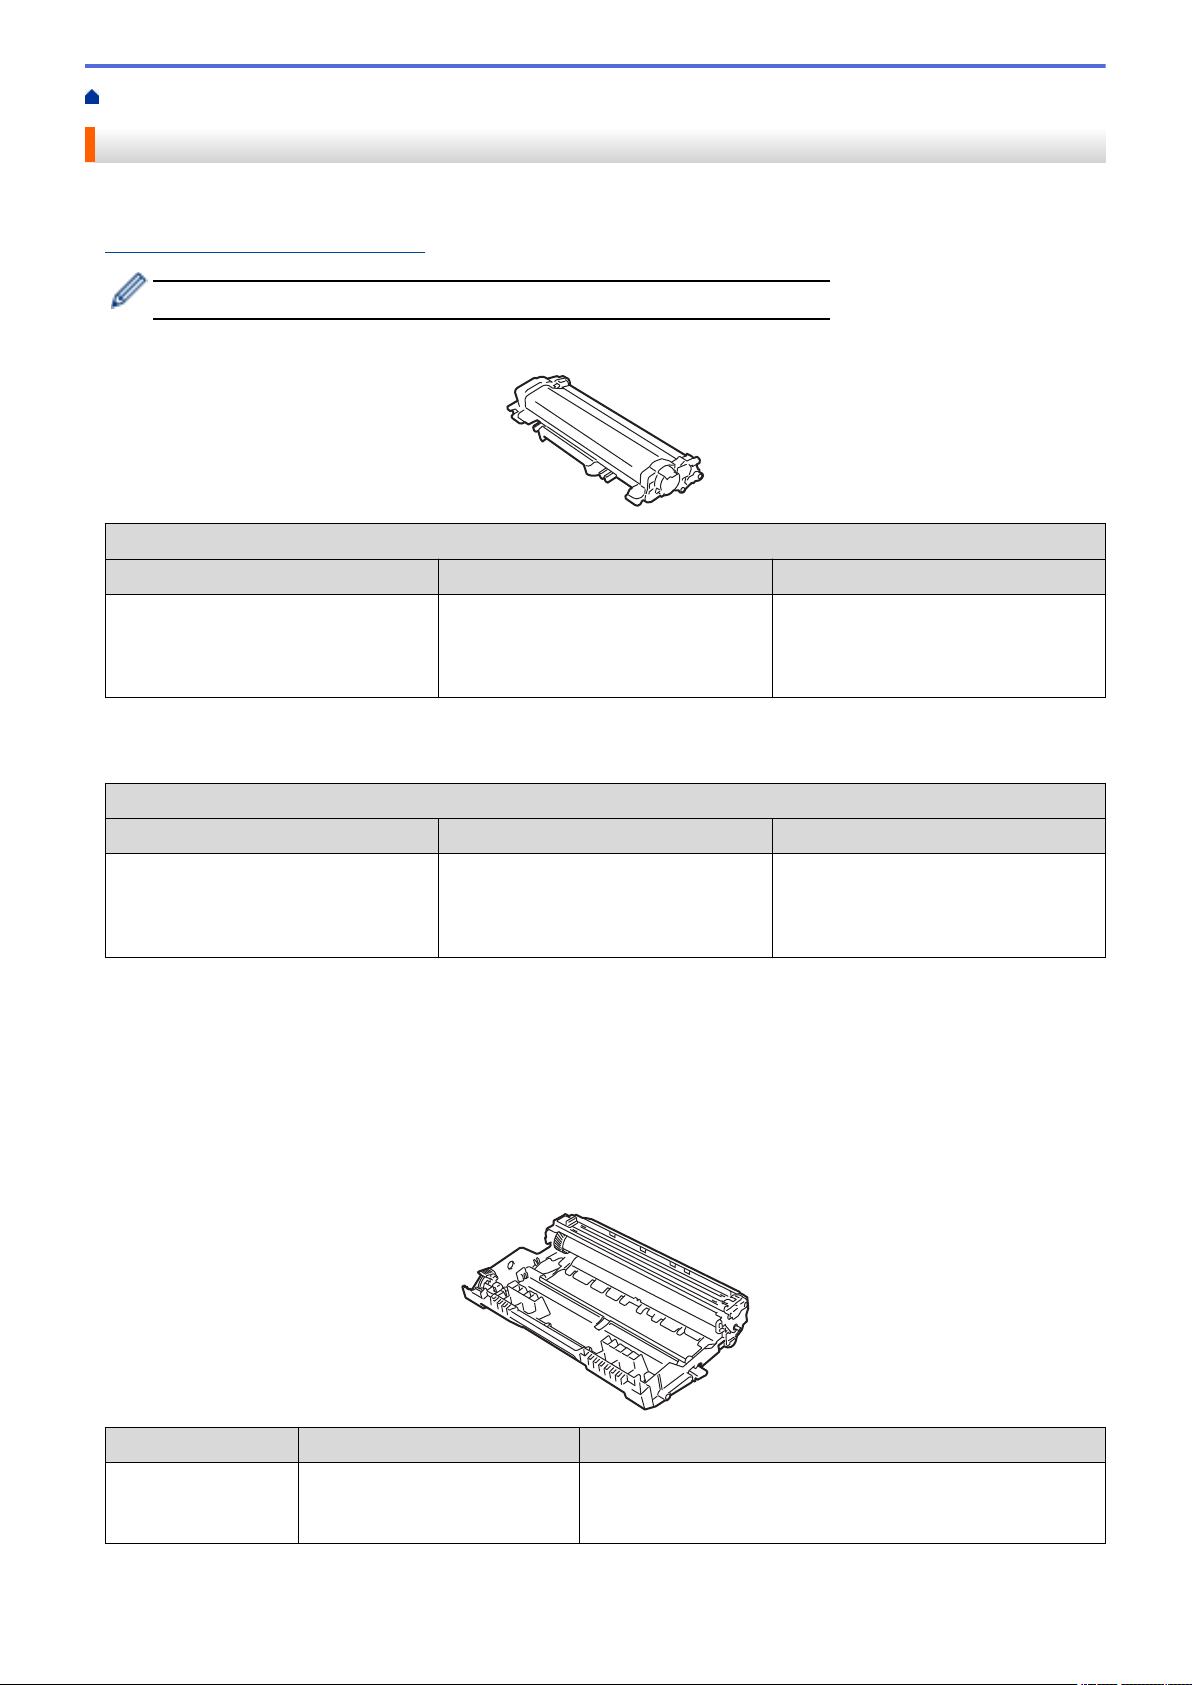
Replace the Toner Cartridge............................................................................................................516
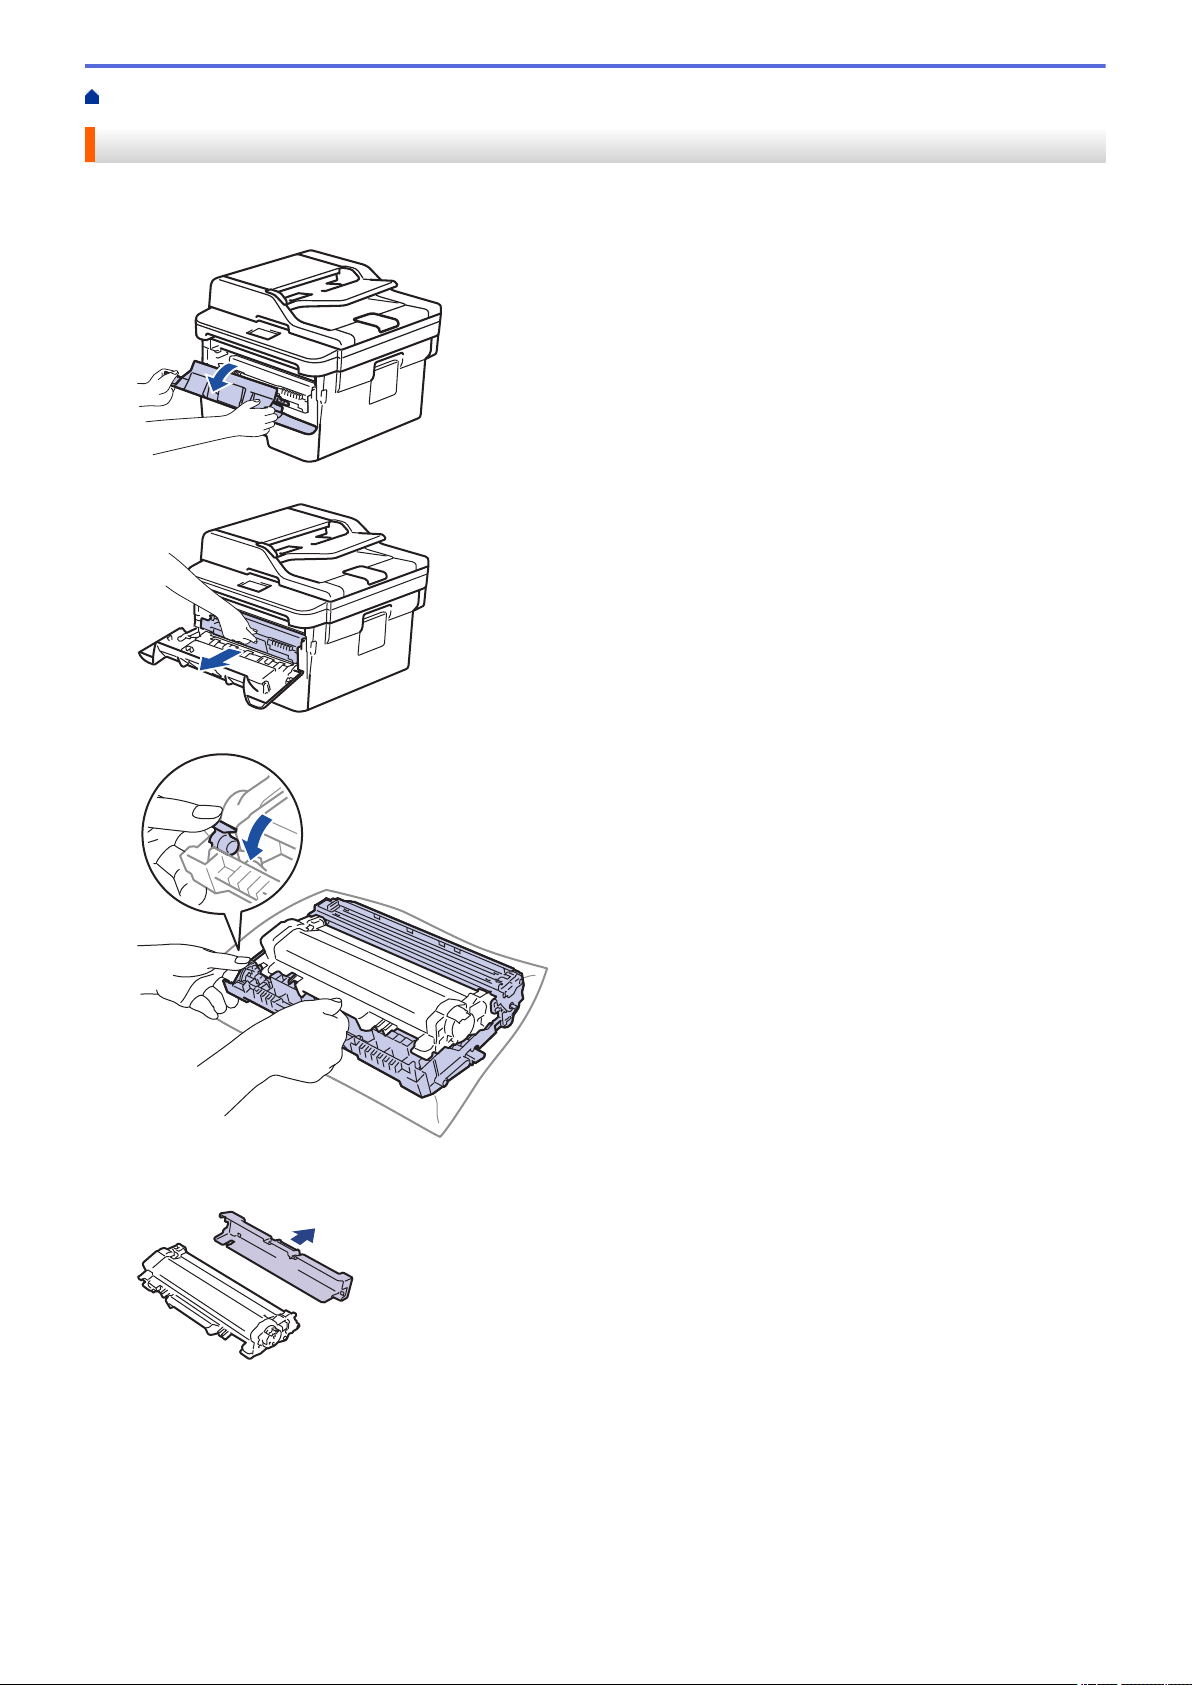
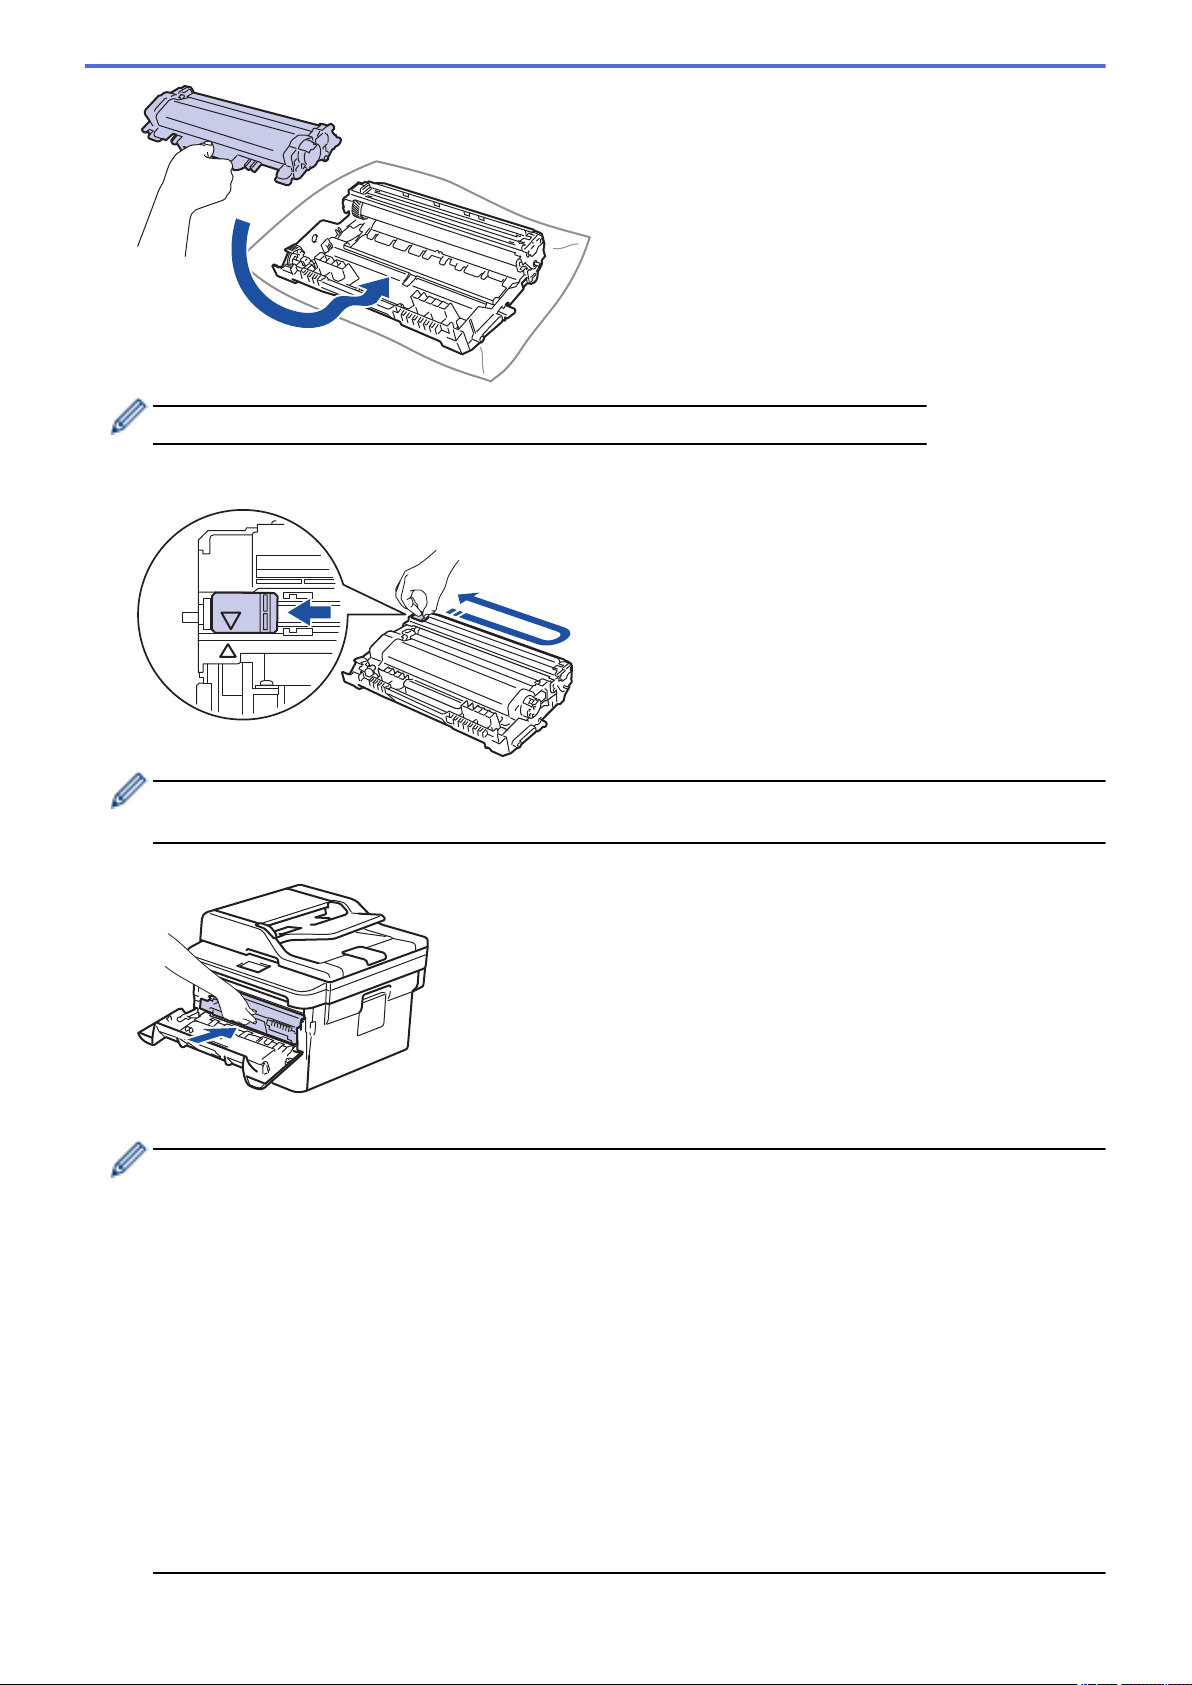
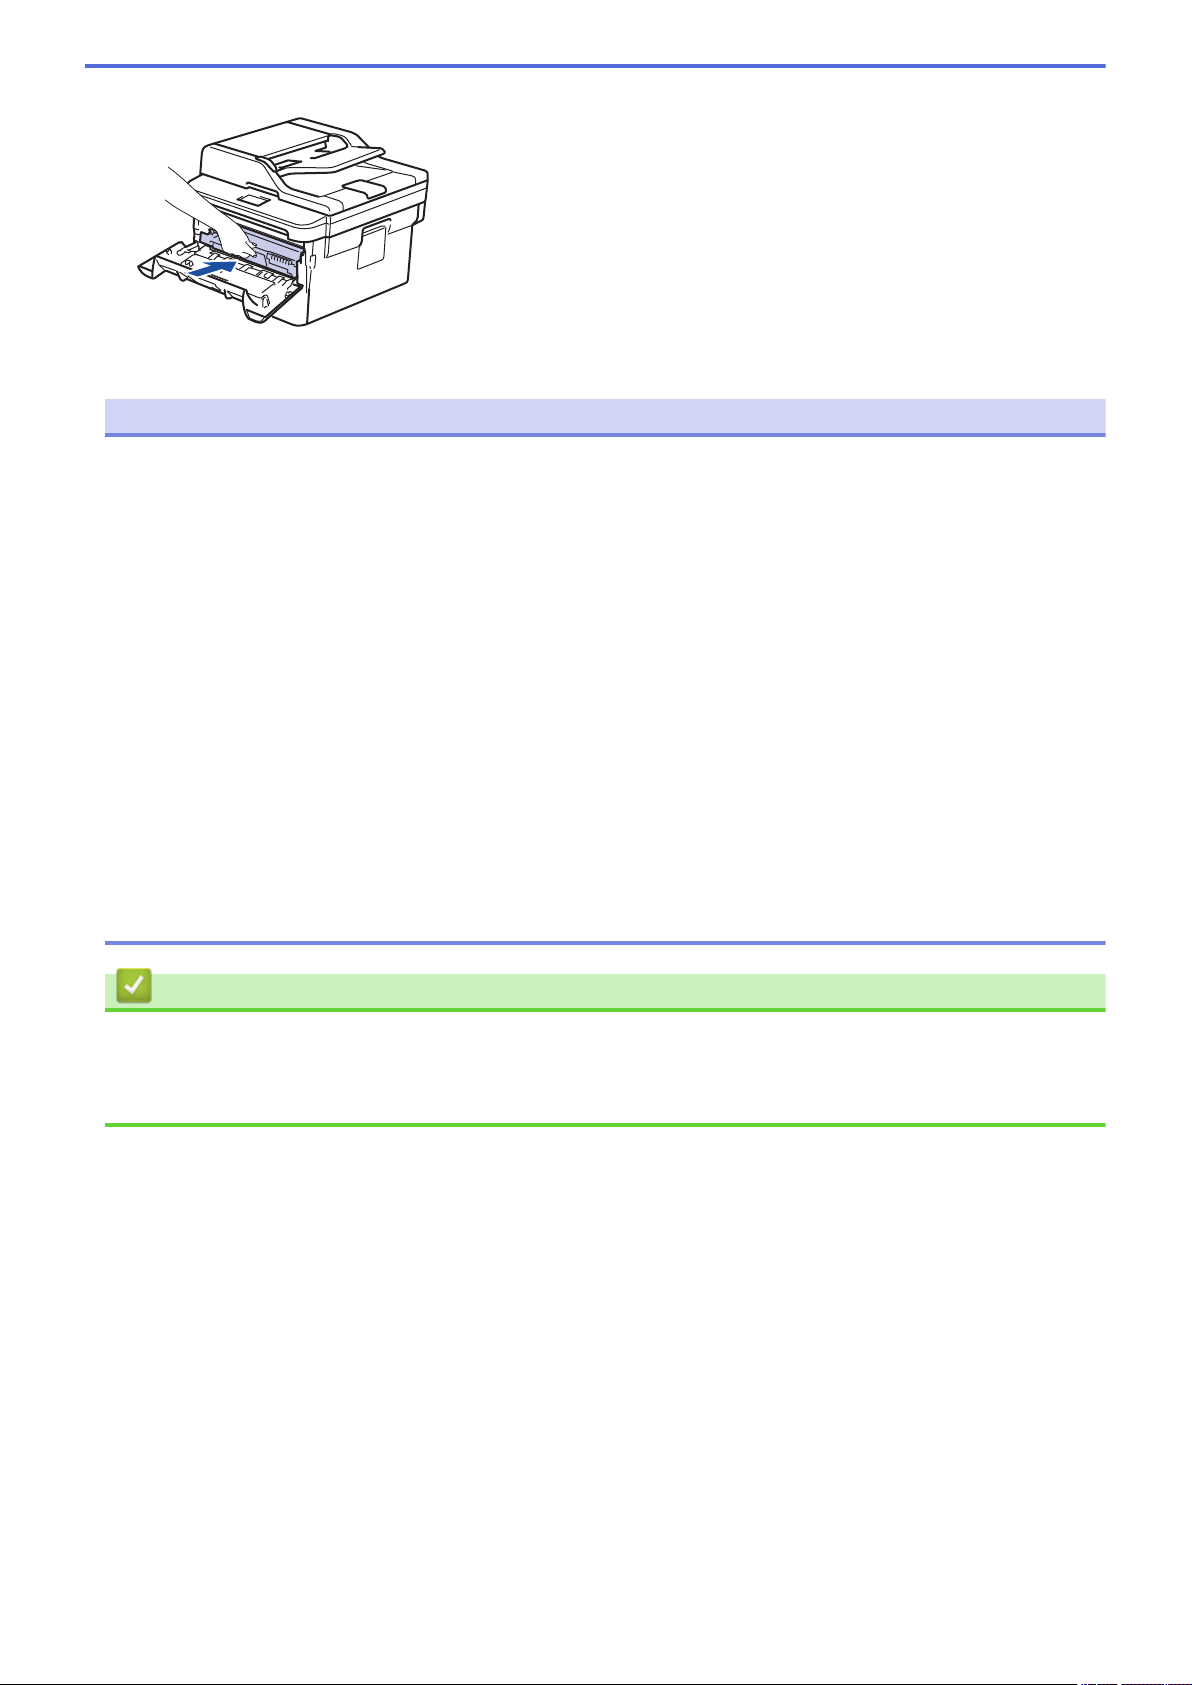
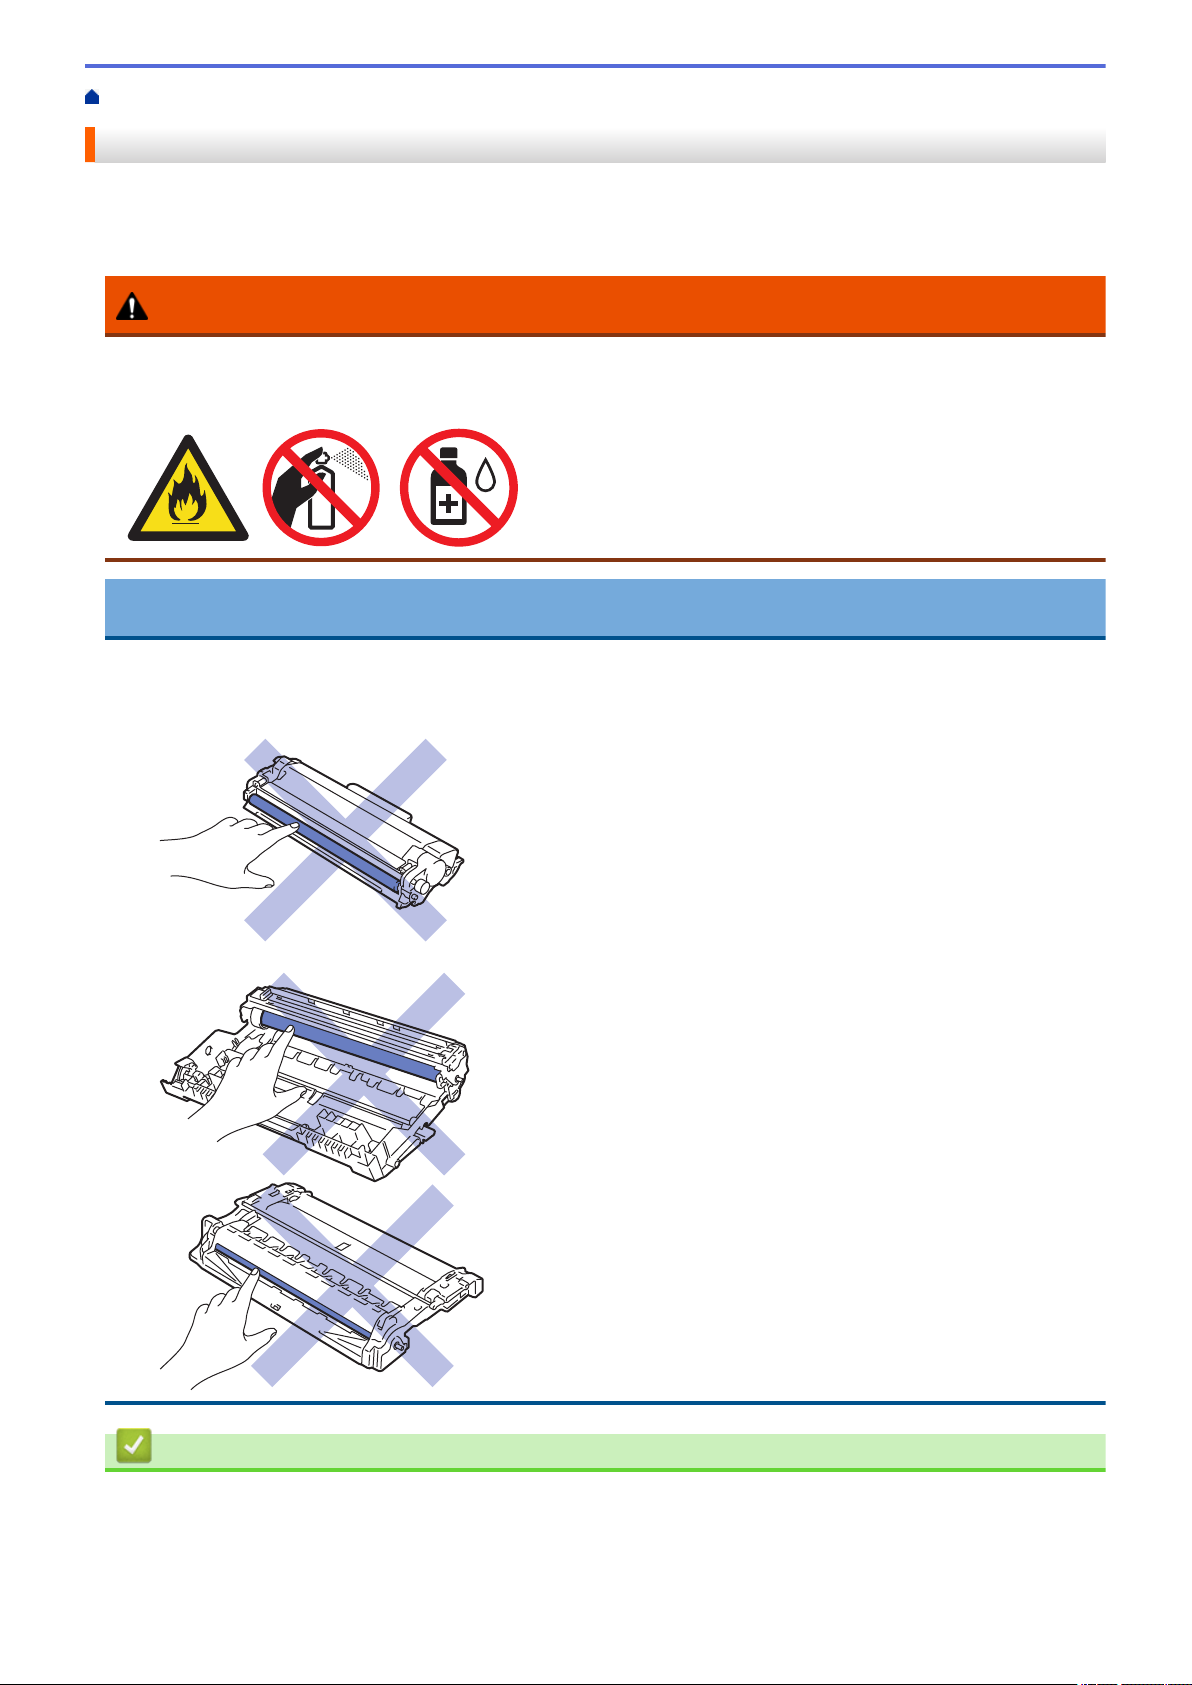
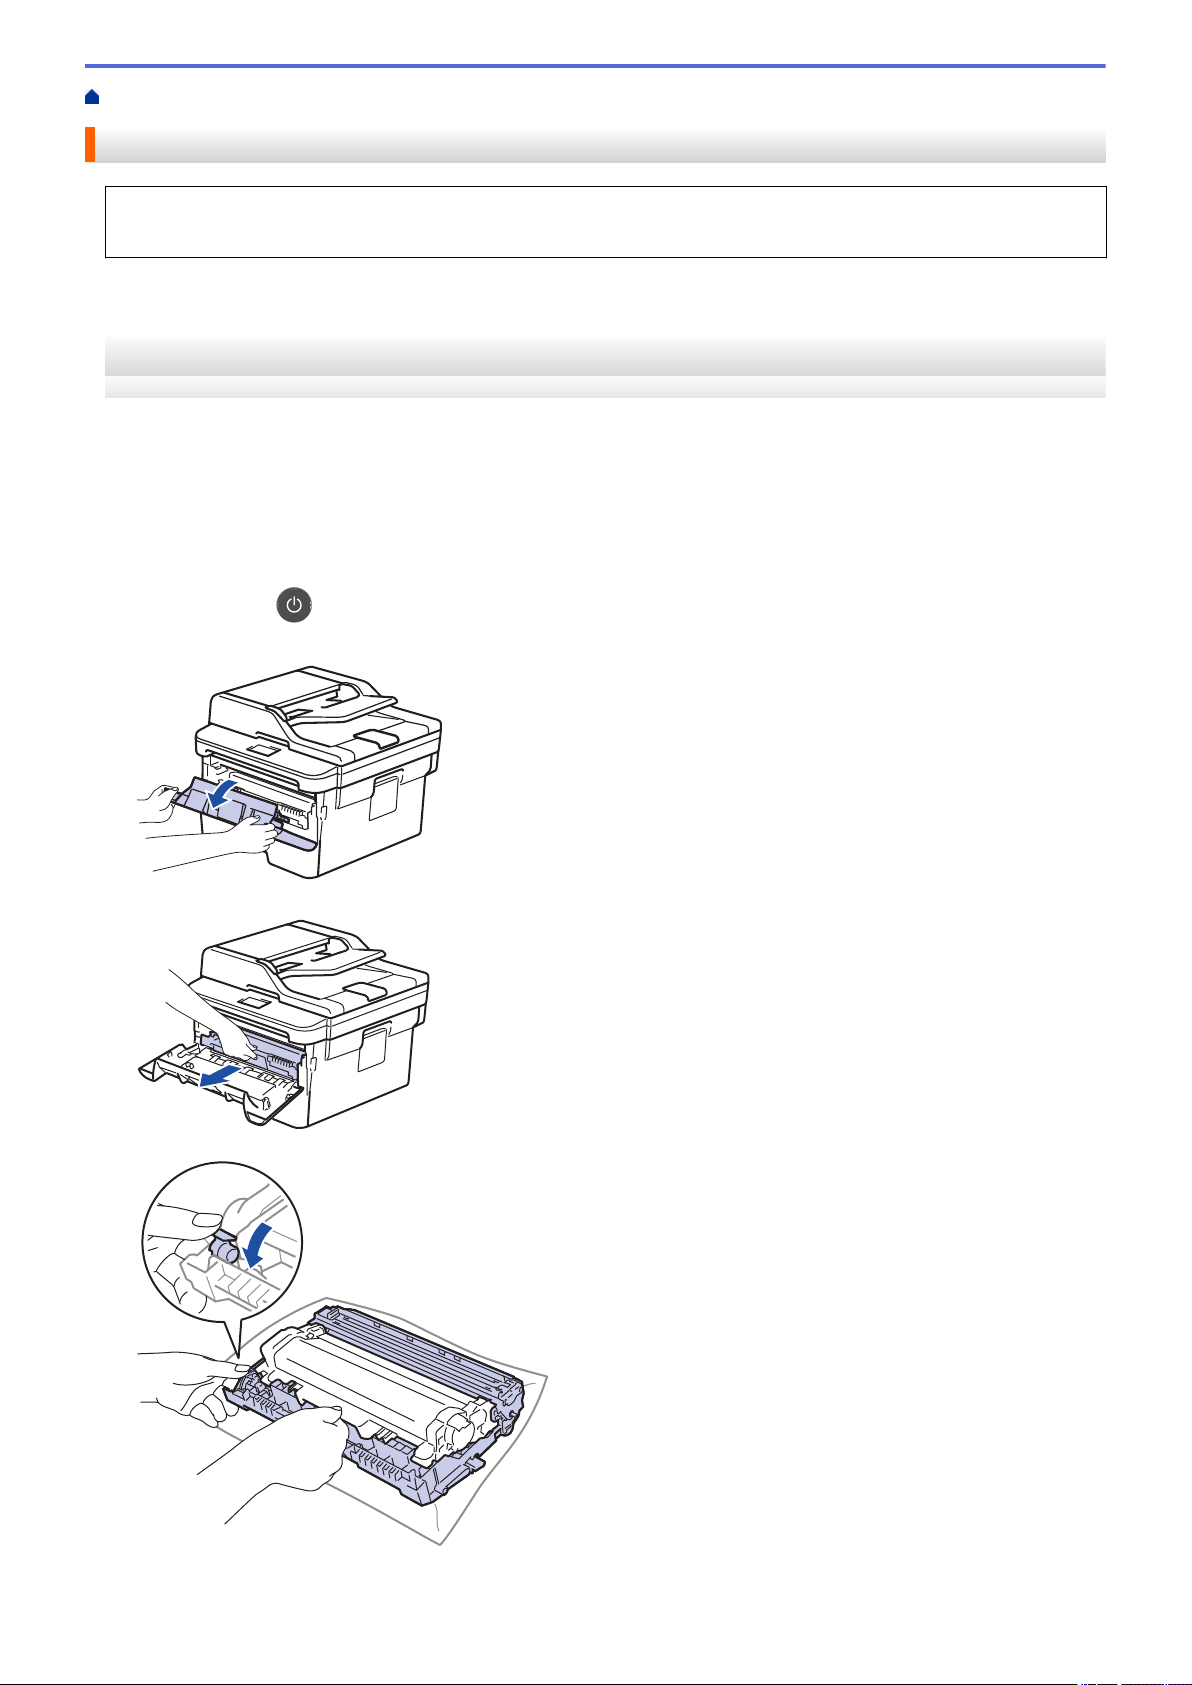
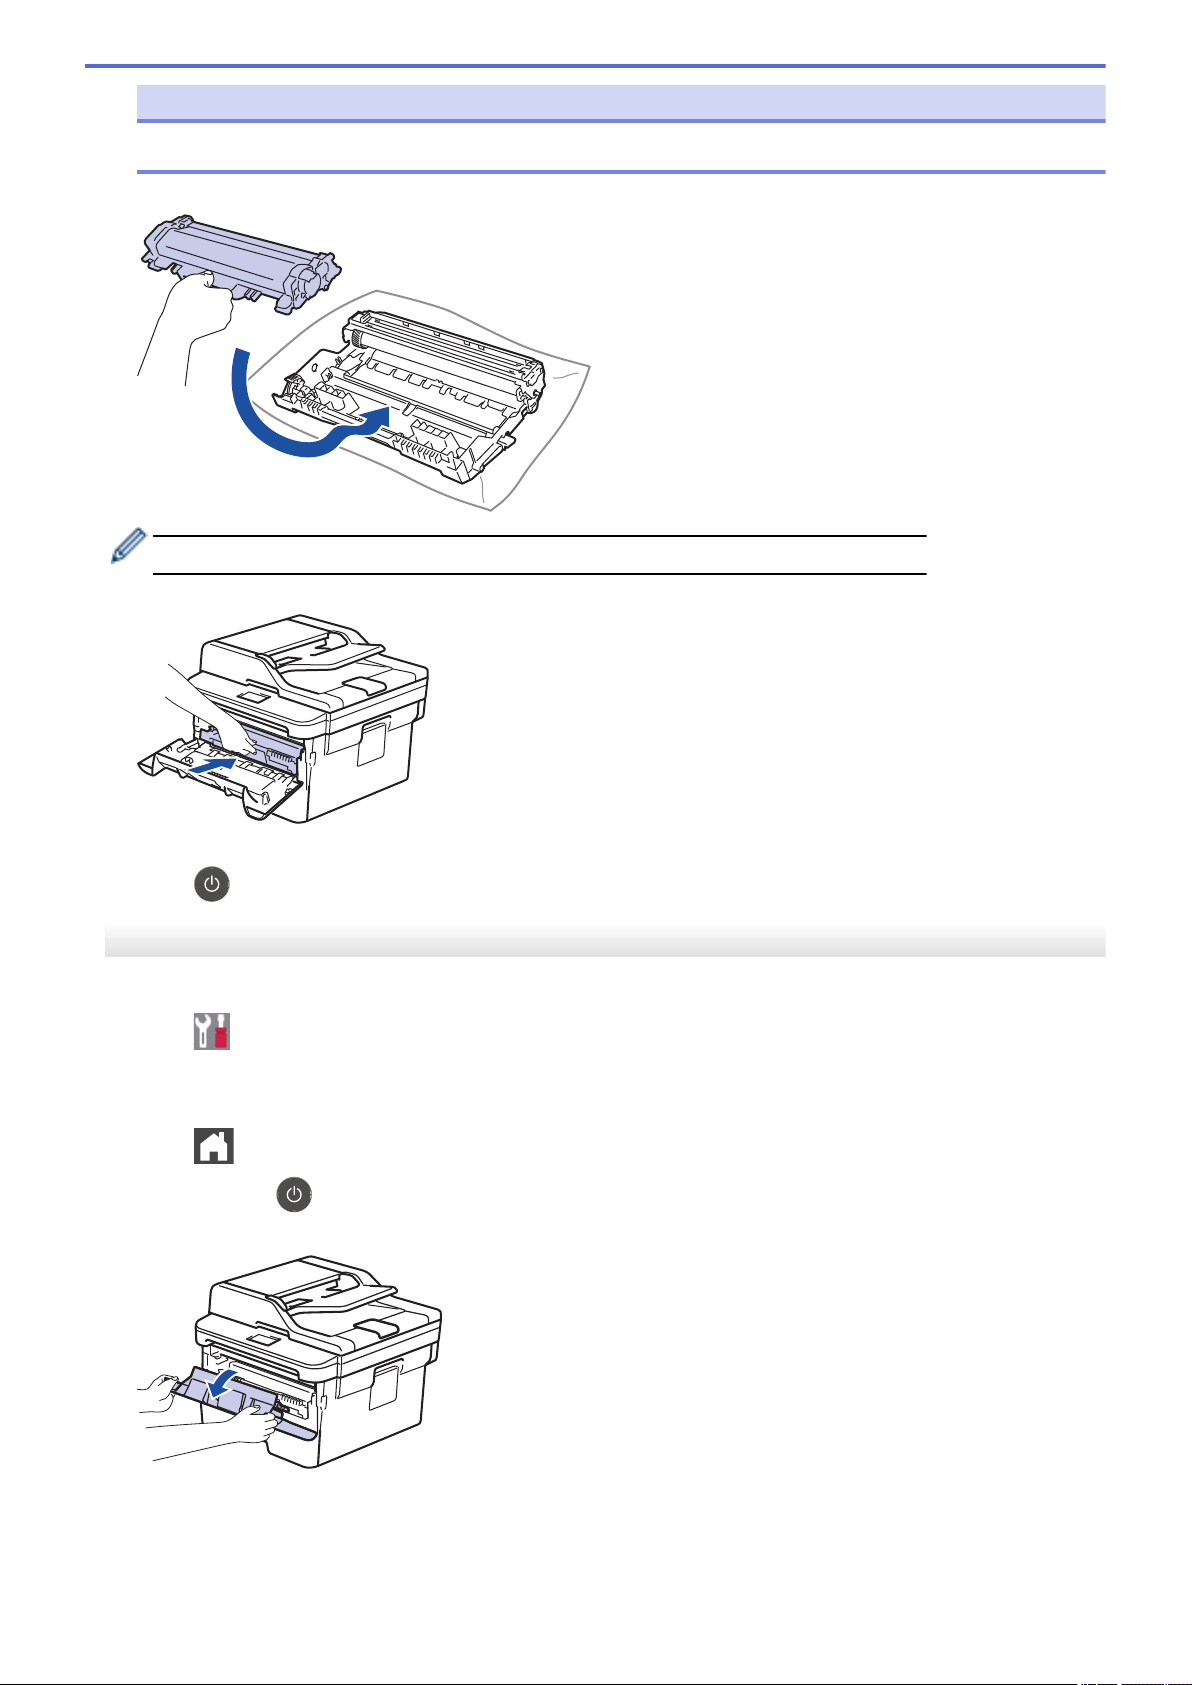
Replace the Drum Unit.....................................................................................................................519
Clean the Machine.....................................................................................................................................521
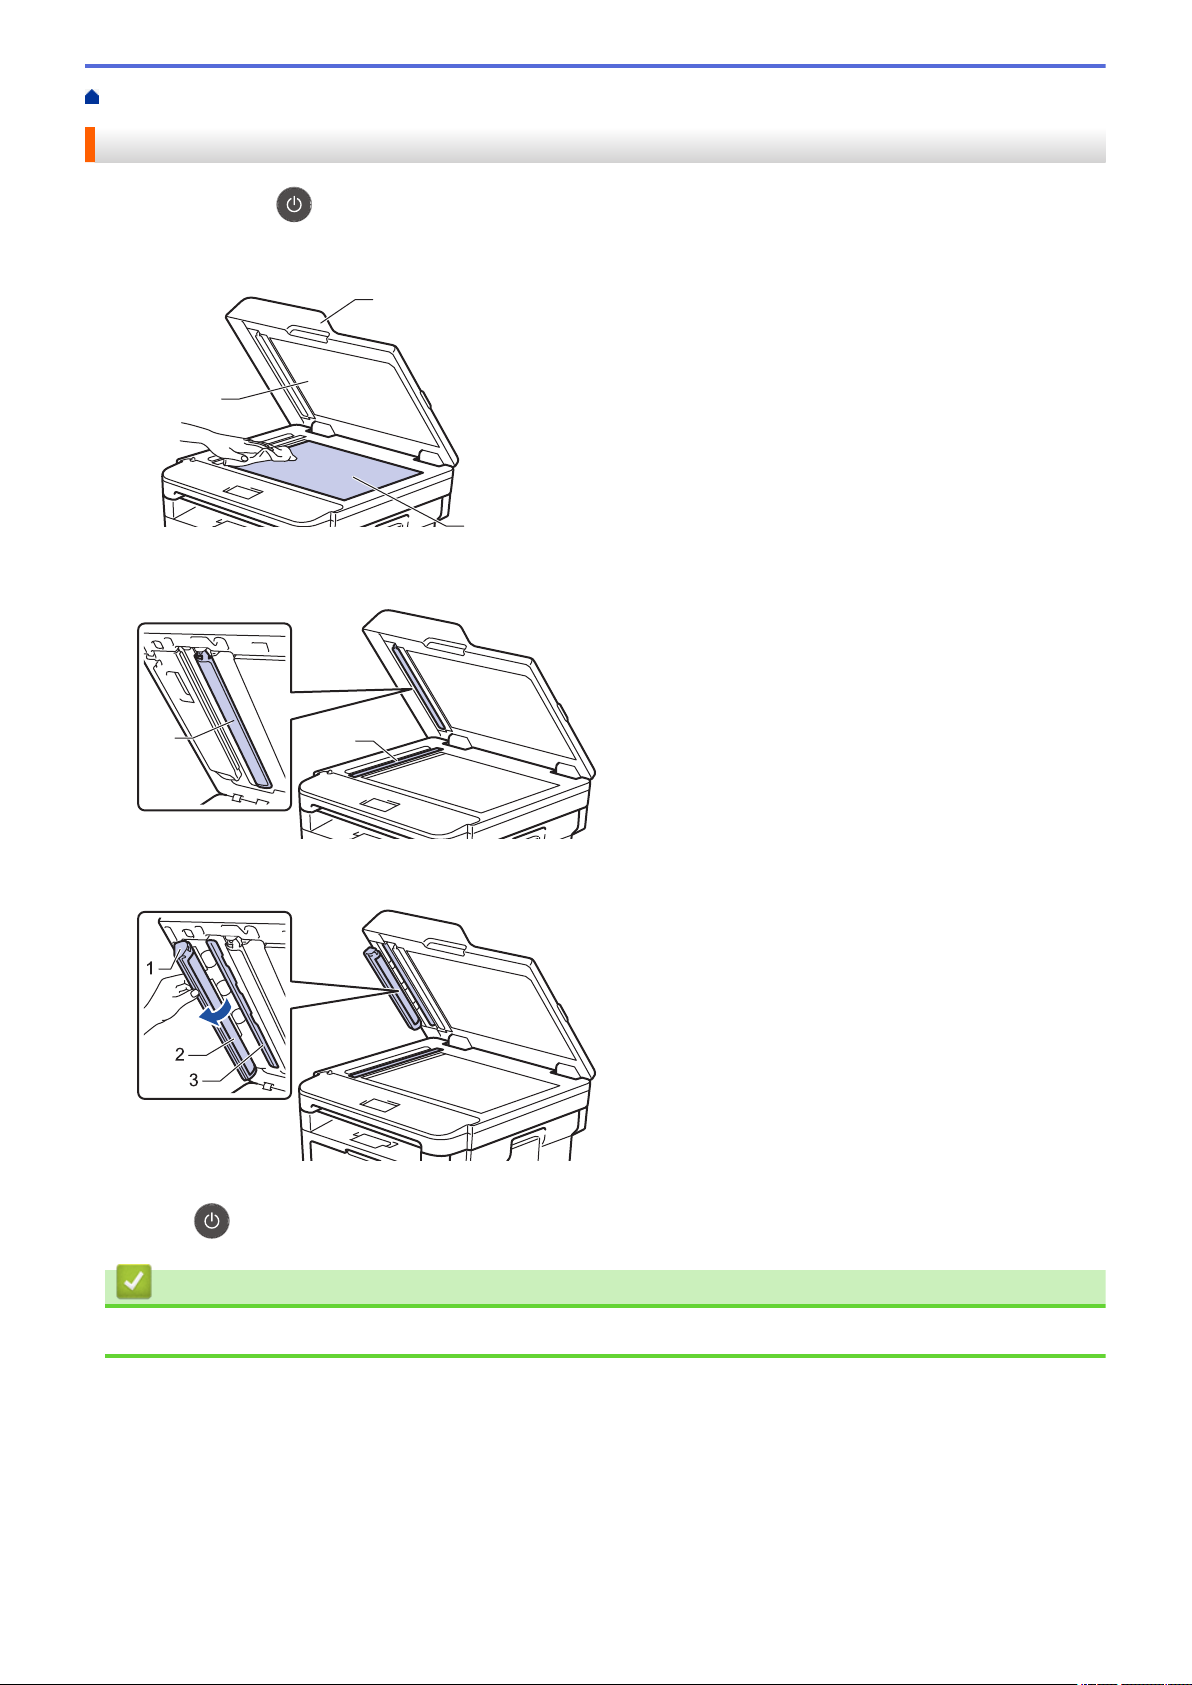
Clean the Scanner............................................................................................................................523
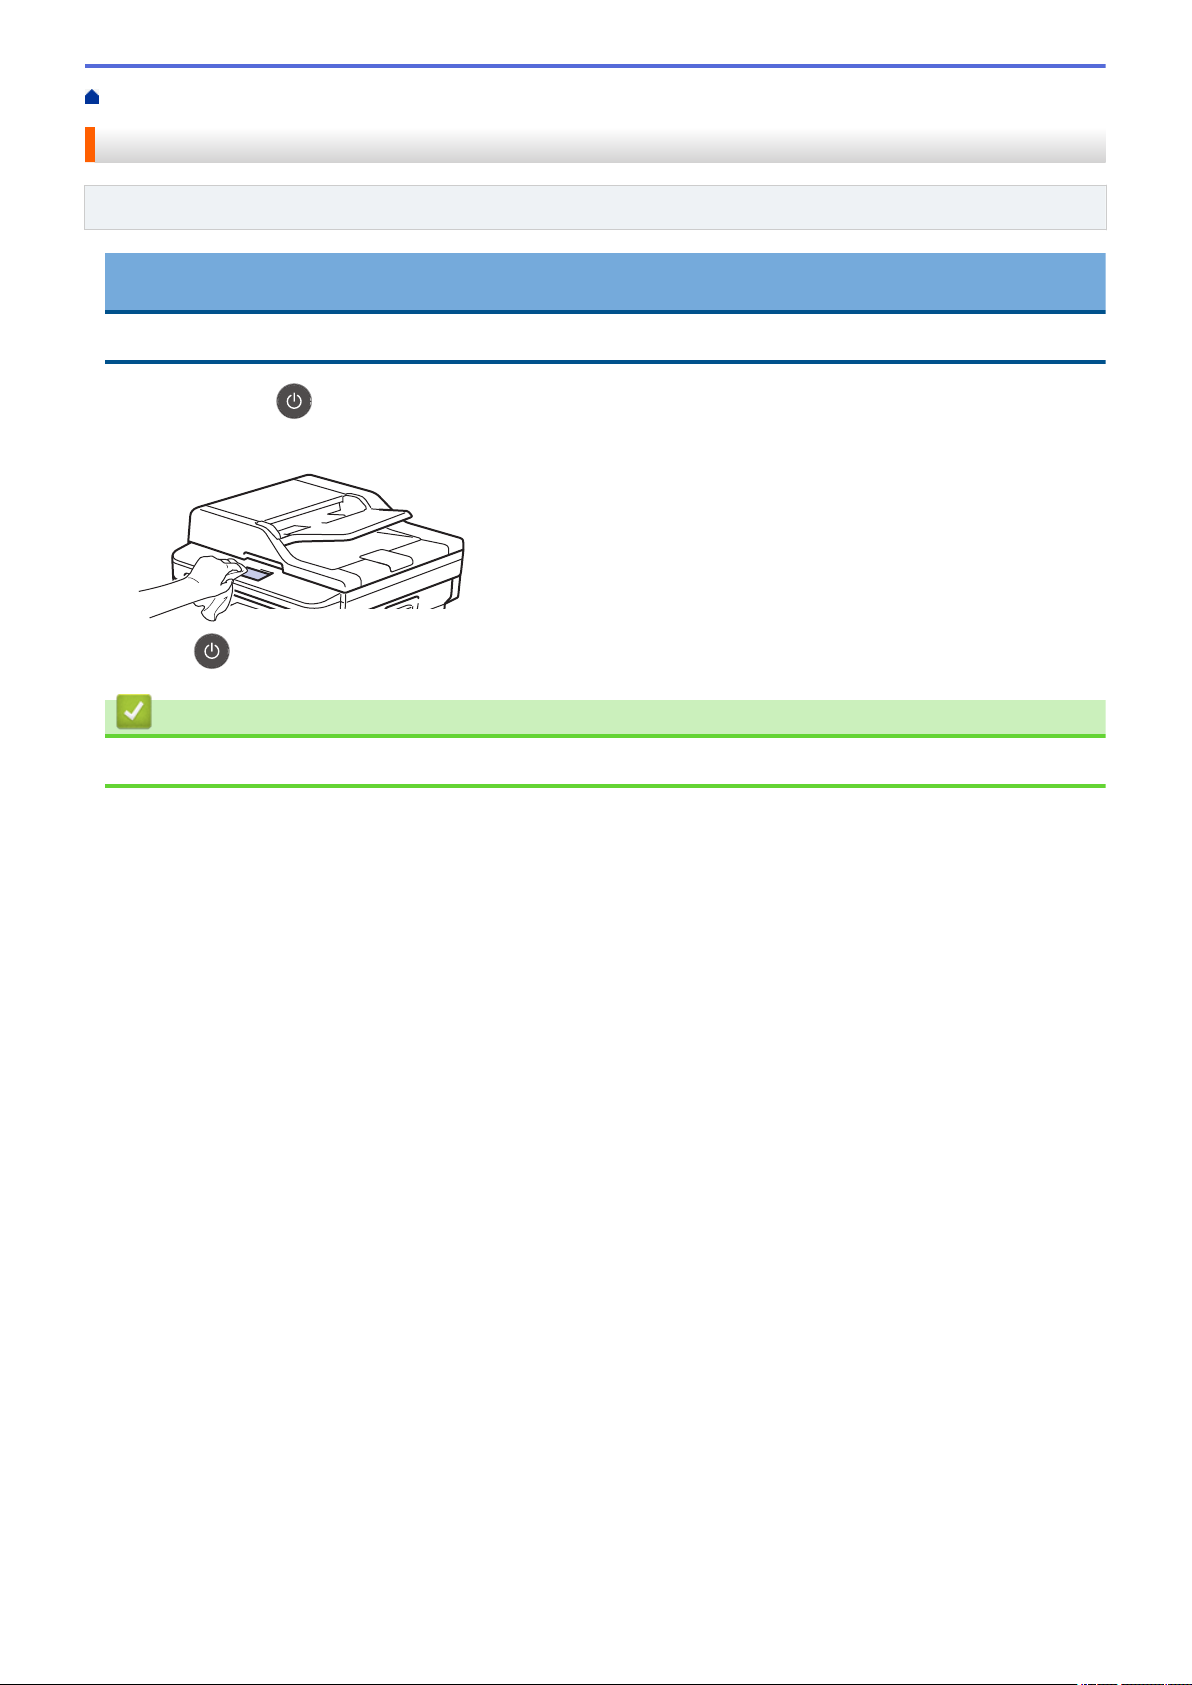
Clean the Touchscreen LCD............................................................................................................524
Clean the Corona Wire.....................................................................................................................525
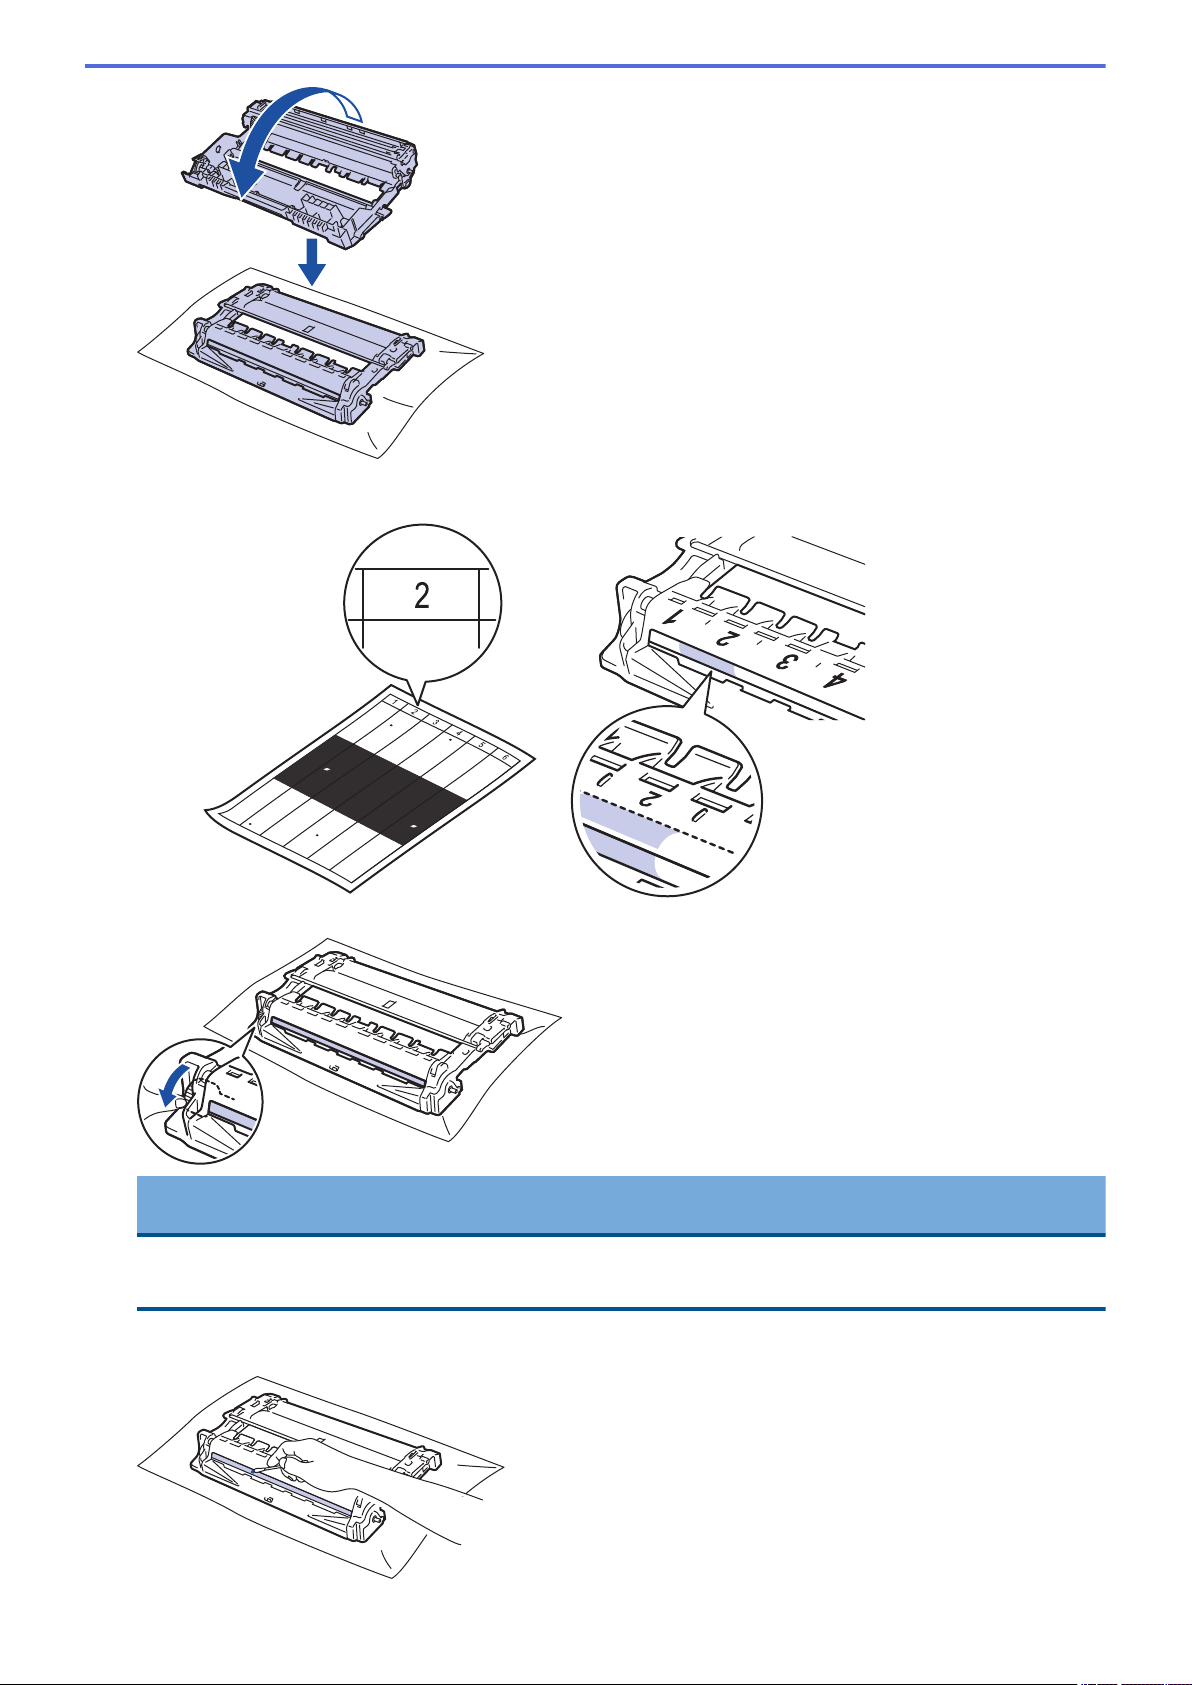
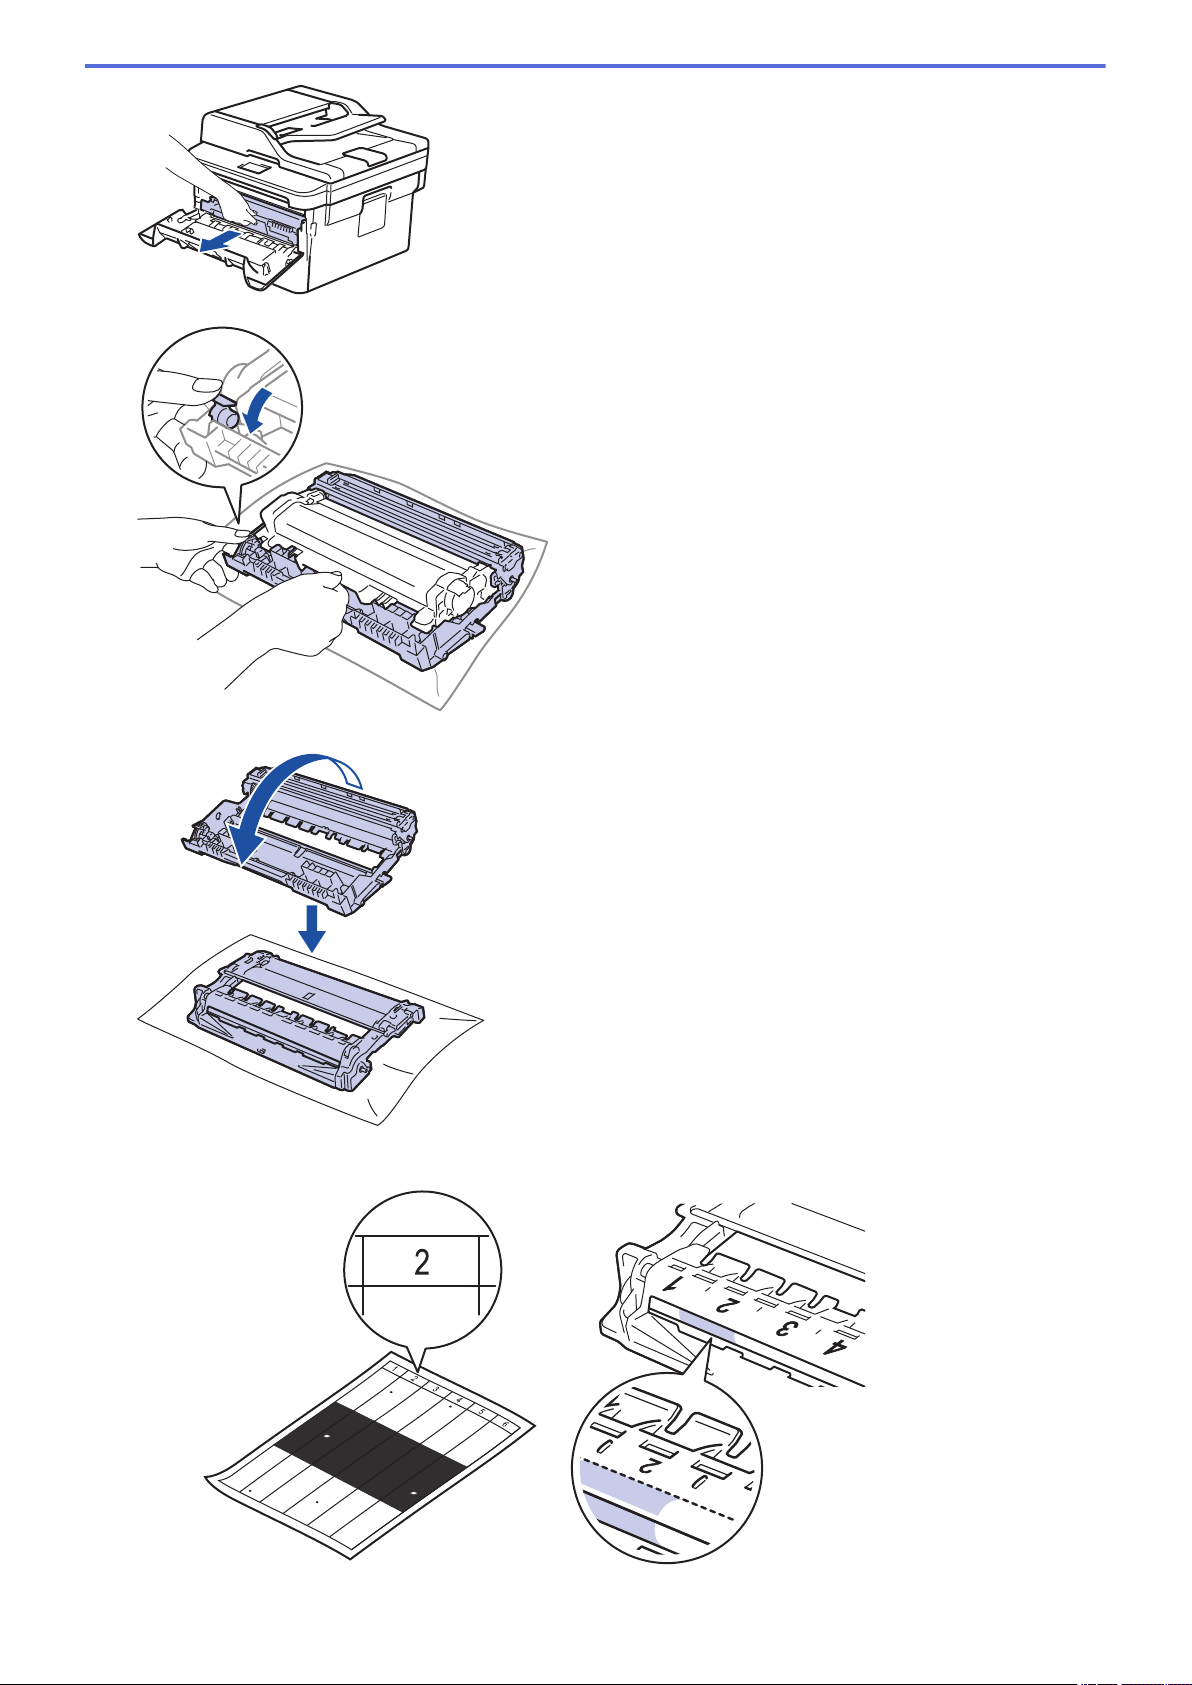
Clean the Drum Unit Using Drum Dot Print......................................................................................526
Clean the Paper Pick-up Rollers......................................................................................................532
Check the Remaining Part Life..................................................................................................................533
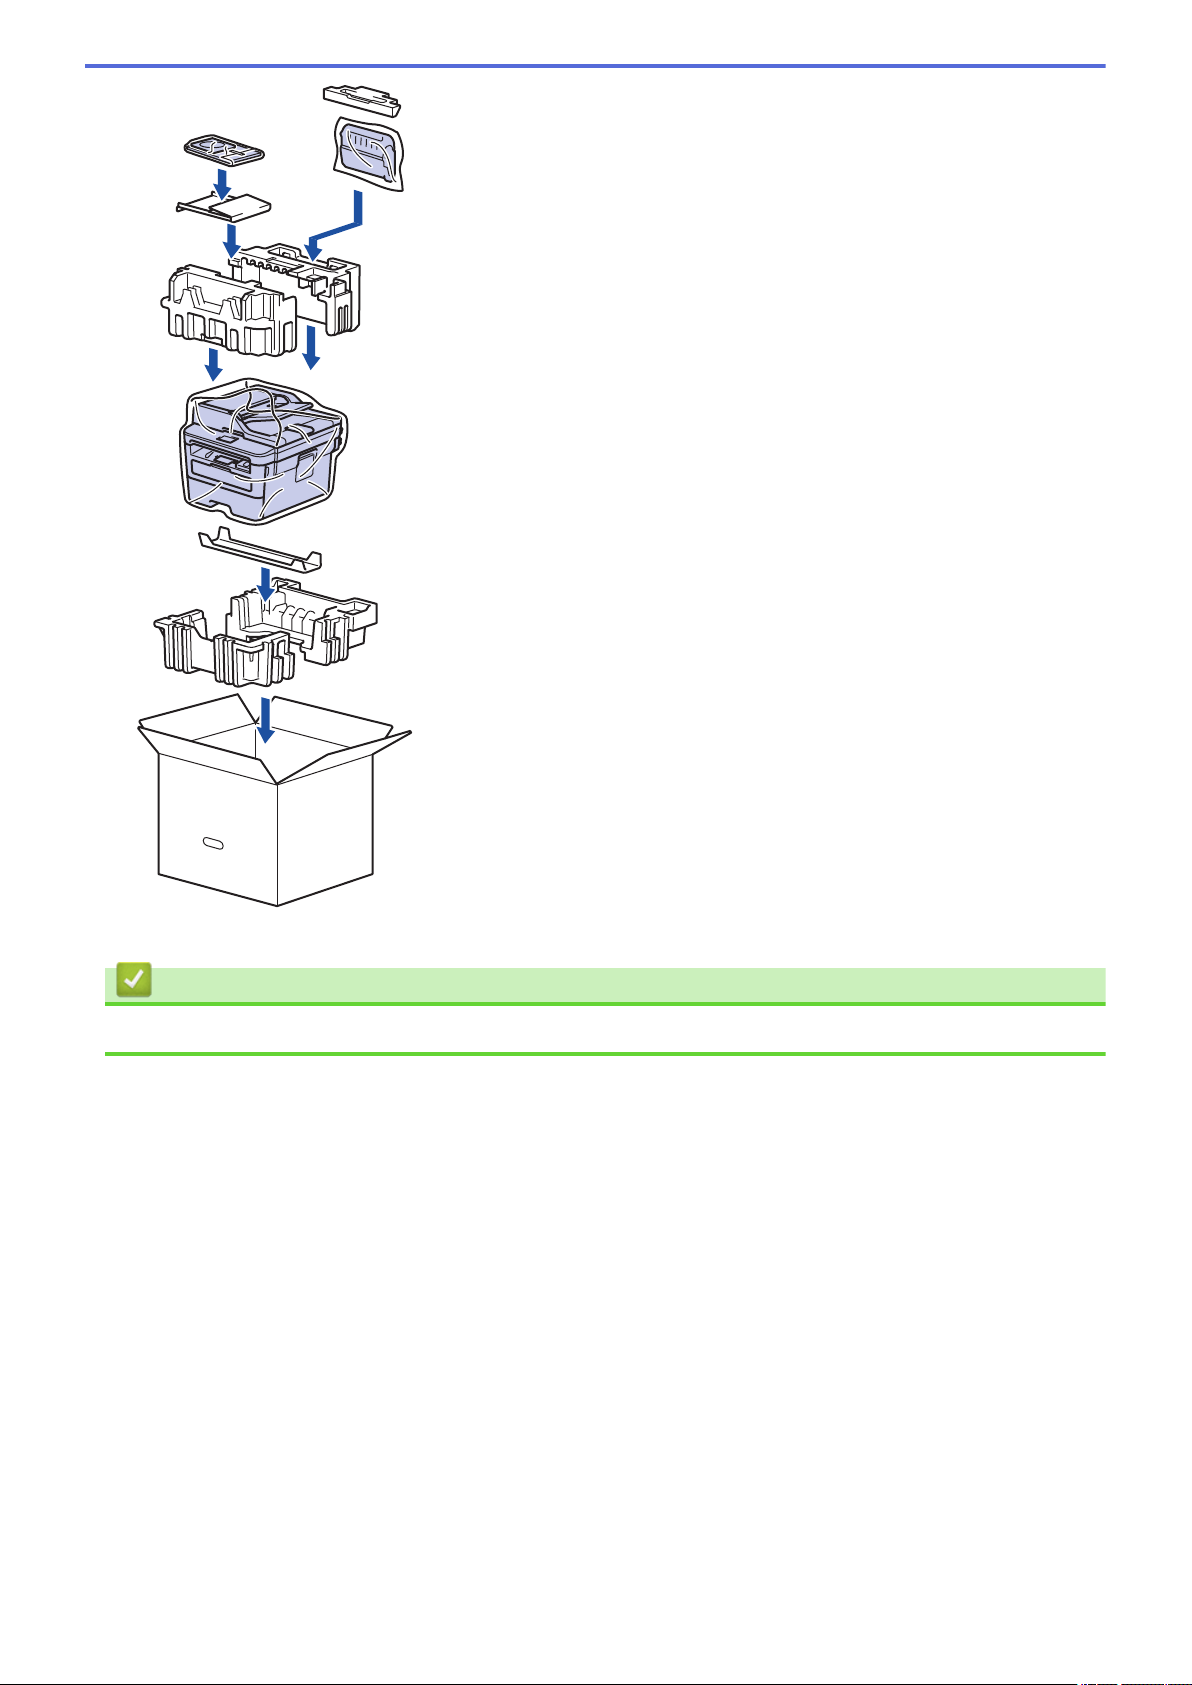
Pack and Ship Your Brother Machine........................................................................................................534
Libble takes abuse of its services very seriously. We're committed to dealing with such abuse according to the laws in your country of residence. When you submit a report, we'll investigate it and take the appropriate action. We'll get back to you only if we require additional details or have more information to share.
Product:
Forumrules
To achieve meaningful questions, we apply the following rules:
First, read the manual;
Check if your question has been asked previously;
Try to ask your question as clearly as possible;
Did you already try to solve the problem? Please mention this;
Is your problem solved by a visitor then let him/her know in this forum;
To give a response to a question or answer, do not use this form but click on the button 'reply to this question';
Your question will be posted here and emailed to our subscribers. Therefore, avoid filling in personal details.
Register
Register getting emails for Brother DCP-L2552DN at:
new questions and answers
new manuals
You will receive an email to register for one or both of the options.
Get your user manual by e-mail
Enter your email address to receive the manual of Brother DCP-L2552DN in the language / languages: English as an attachment in your email.
The manual is 11,54 mb in size.
You will receive the manual in your email within minutes. If you have not received an email, then probably have entered the wrong email address or your mailbox is too full. In addition, it may be that your ISP may have a maximum size for emails to receive.
If you have not received an email with the manual within fifteen minutes, it may be that you have a entered a wrong email address or that your ISP has set a maximum size to receive email that is smaller than the size of the manual.
The email address you have provided is not correct.
Please check the email address and correct it.
Your question is posted on this page
Would you like to receive an email when new answers and questions are posted? Please enter your email address.