English - 4
1 609 929 B76 • TMS • 30.11.00
■ Before any work on the machine itself, pull
the mains plug.
Use only grinding tools with a permissi-
ble speed at least as high as the no-load
speed of the machine.
Roughing and cutting discs become
very hot while working; do not touch un-
til they have cooled.
■ Clean the grinder spindle and all parts to be
mounted. For clamping and loosening the
grinding tools, lock the grinder spindle 6 with
the spindle locking button 2.
Actuate the spindle locking button 2 only
when the grinder spindle is at a standstill!
Roughing/Cutting Disk
The hole of the roughing/cutting disk must fit on
the centring shoulder of the mounting flange 9
without play. Do not use reducer pieces or adapt-
ers.
When using a diamond cutting disk, take care
that the direction of rotation arrow on the dia-
mond cutting disk and the direction of rotation of
the machine (direction of rotation arrow on the
machine head) agree.
For mounting, see the illustration page.
Screw on the clamping nut 11 and tighten with
the two-hole spanner (see Section “Quick Clamp-
ing Nut”).
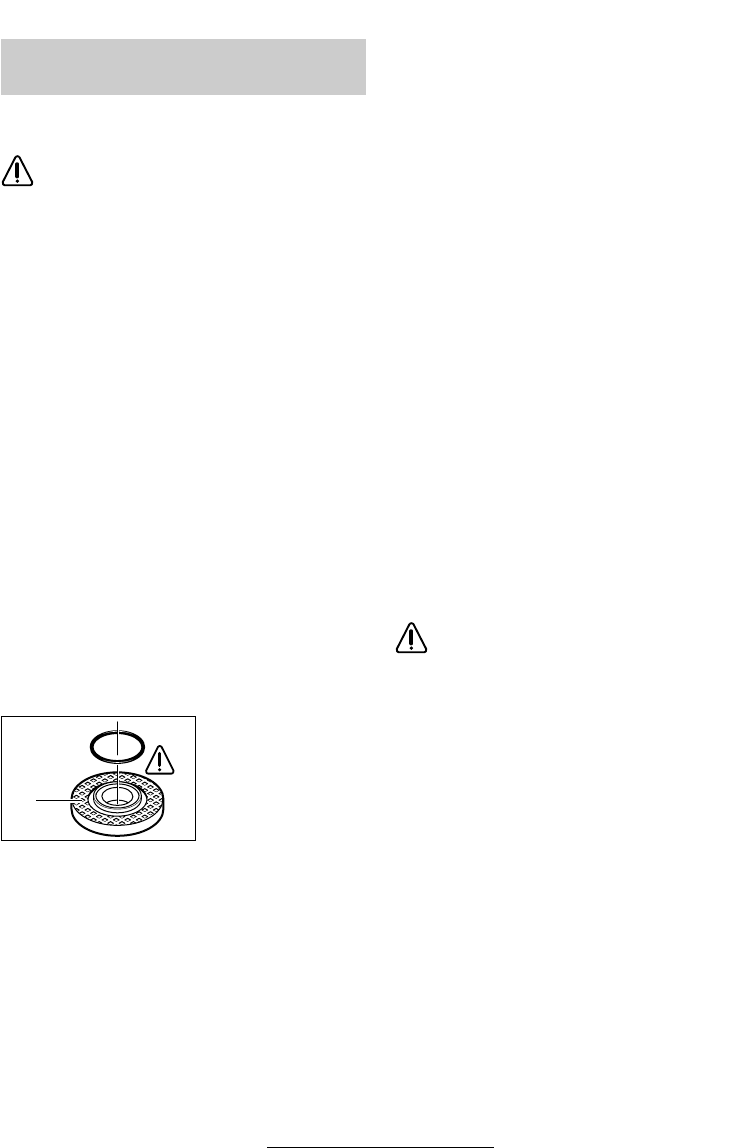
An O-ring (plastic
part) is inserted in
the retainer flange 9
around the spigot.
If the O-ring is missing or is damaged, it must
in all cases be replaced (Order No.
1 600 210 039) before the retainer flange 9 is
mounted.
☞
After mounting the grinding tool and be-
fore switching on, check that the grind-
ing tool is correctly mounted and that it
can turn freely.
Flap disc
Remove the protective guard 5 and mount the
hand protector 17. Place the special retainer
flange 9 (optional extra, Order No.
2 605 703 028) and the flap disc on the grinder
spindle 6. Screw on the clamping nut 11 and
tighten with the two-hole spanner.
Rubber Sanding Plate 19
Remove the protective guard 5 and mount the
hand protector 17.
Before the rubber sanding plate 19 is mounted
first place the 2 spacers 18 onto the grinding
spindle.
For mounting, see the illustration page.
Screw on the round nut 21 and tighten with the
two-hole spanner.
Cup Brush 22/Disc brush
Remove the protective guard 5 and mount the
hand protector 17.
The grinding tool must be able to be screwed
onto the grinding spindle 6 until it rests firmly
against the grinder spindle flange at the end of
the grinder spindle threads. Tighten with an
open-ended spanner.
Grinding cup
When working with grinding cups, use a
special guard 15.
The grinding cup 16 should always protrude
from the guard 15 only as far as absolutely nec-
essary for the work to be performed in each case.
Adjust the guard 15 to this distance.
For mounting, see the illustration page.
Screw on the clamping nut 11 and tighten with a
suitable offset two-hole spanner.
Mounting the Grinding Tools
(Optional Accessories)
9