72
Fixing the hob
Each hob is supplied with a special gasket and
a set of brackets to be used for securing it to
the worktop.
To install the hob, proceed as follows:
– Remove the pan supports and burners from
the hob.
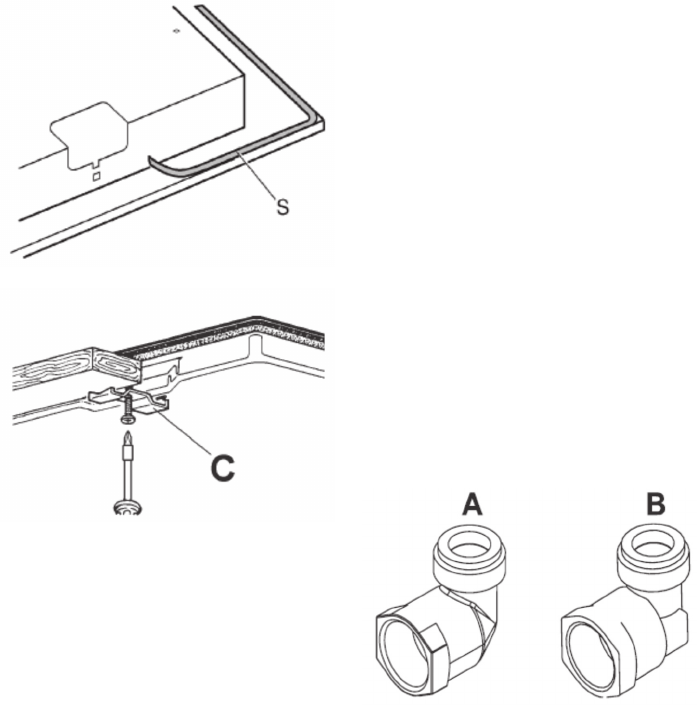
– Turn the appliance upside down and fi t gasket
(S) around the outer edge (fi g. 3).
– Place the hob in the unit opening and fi x it
with screws (V) of brackets (G) (fi g. 4).
Installation environment
This appliance is not equipped with a combus-
tion products exhaustion system. Fumes must
therefore be exhausted to outside the building
by means of an extractor hood or extractor fan
designed to start as soon as the appliance is
set into operation.
The room in which the appliance is installed
must be naturally ventilated to allow correct
gas combustion and room ventilation; the mini-
mum volume of air required is 20 m
3
.
Fresh air must be drawn through permanent
vents in the walls communicating with the ex-
terior.
Ventilation may also be supplied via an adjacent
room in compliance with UNI-CIG 7129 and
7131).
Wall vents must have a minimum surface area
200 cm
2
.
Gas Connection
Make sure that the appliance is set up for the
available gas type (see the label under the ap-
pliance).
Follow the instructions indicated in “Gas con-
version and adjustment” if the appliance must
be adapted for use with different gas types.
The appliance must be connected to the gas
supply by means of a rigid metal pipe, in compli-
ance with UNI-CIG 7129, or a seamless fl exible
steel pipe in compliance with UNI-CIG 9891.
Certain models are supplied with two unions:
a cylindrical union (A) and a conical union (B)
(fi g.5). Choose the appropriate union according
to the country of installation.
The weight of the connecting pipe must not be
borne by the gas train.
Once installation is complete, apply a soapy so-
lution to the seal to check that it is gas tight.
fi g. 3
fi g. 4
fi g. 5