DR750S-1CH
3
Basic settings ............................................................................................................51
Time settings ...................................................................................................................................52
Video settings
................................................................................................................................. 54
Resolution ....................................................................................................................................................................... 54
Image quality
.................................................................................................................................................................. 54
Enhanced night vision................................................................................................................................................... 55
Brightness
........................................................................................................................................................................ 55
Recording settings ......................................................................................................................... 56
Recording type settings ................................................................................................................................................ 56
Voice recording............................................................................................................................................................... 56
Date & time display
........................................................................................................................................................ 57
Speed unit
...................................................................................................................................................................... 57
Video segment length
................................................................................................................................................... 57
Lock event les
............................................................................................................................................................... 57
Sensitivity settings ..................................................................................................58
G-Sensor (Normal mode) / G-Sensor (Parking mode) ............................................................. 59
Motion detection (Parking mode)
..............................................................................................60
System settings ........................................................................................................61
LED .................................................................................................................................................... 61
Recording status ............................................................................................................................................................ 61
Security (Normal mode)
................................................................................................................................................ 61
Security (Parking mode)
............................................................................................................................................... 61
Wi-Fi (Parking mode)
..................................................................................................................................................... 62
Proximity Sensor ............................................................................................................................62
Voice guidance
...............................................................................................................................62
Volume
............................................................................................................................................. 62
Scheduled Reboot..........................................................................................................................62
Speed alert
......................................................................................................................................62
User text overlay
............................................................................................................................62
Wi-Fi settings ............................................................................................................63
Login credentials ............................................................................................................................63
Wi-Fi auto turn o
.......................................................................................................................... 63
Cloud settings ...........................................................................................................64
Enable Cloud service ..................................................................................................................... 64
Cloud service hotspot settings
....................................................................................................65
Push notication settings
.............................................................................................................66
FW Language ............................................................................................................67
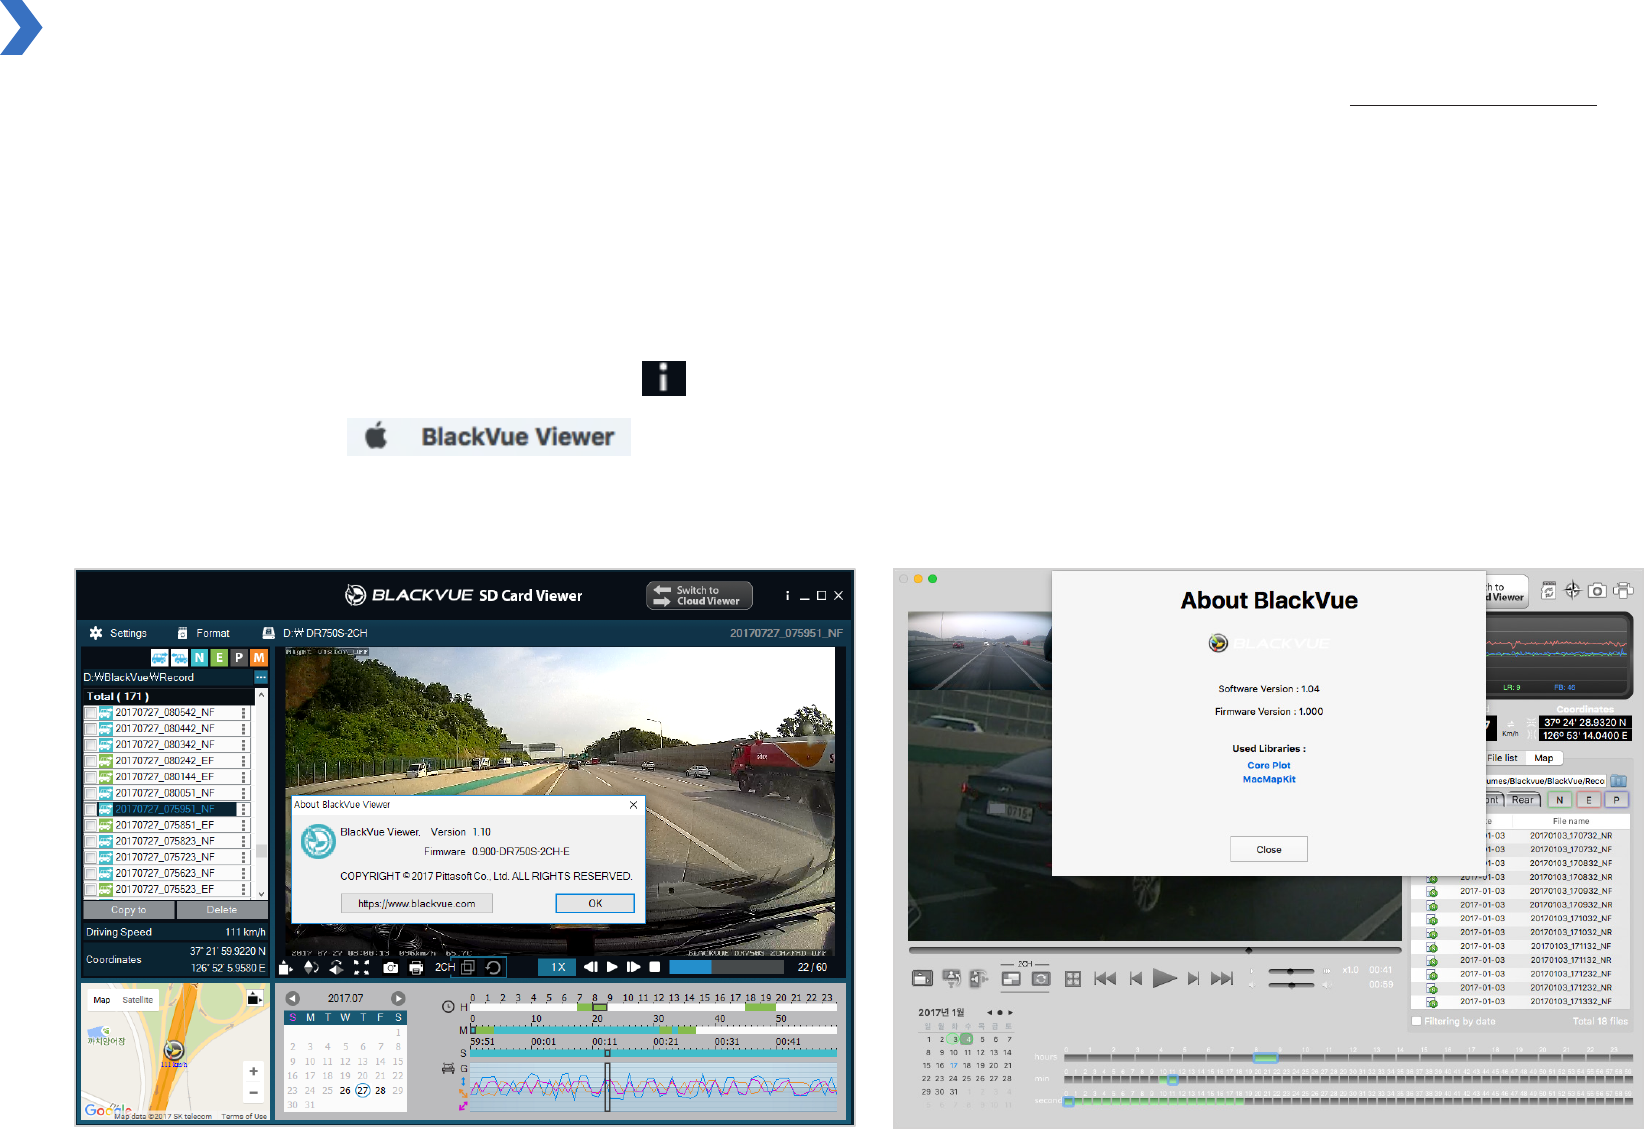
Changing settings using your computer (Windows/Mac) ... 68
BlackVue Viewer settings........................................................................................69
Select language .............................................................................................................................. 69
Speed unit on map.........................................................................................................................69
Select map service
.........................................................................................................................69
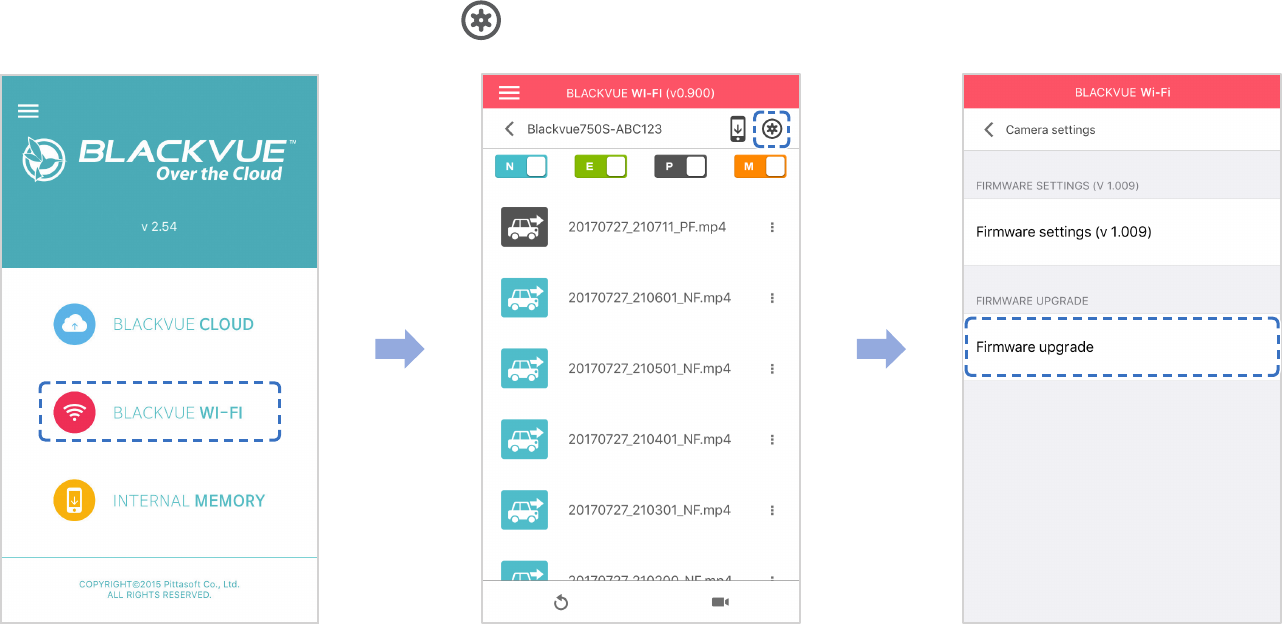
Firmware settings ....................................................................................................70
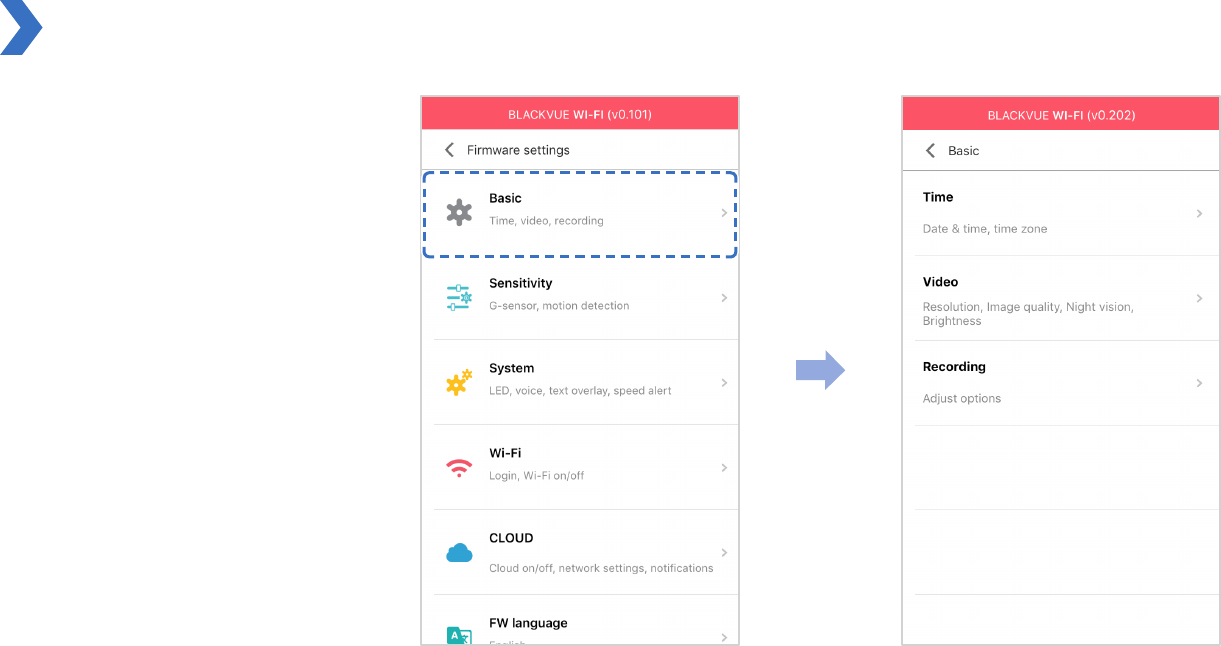
Basic settings ..................................................................................................................................71
Time settings ................................................................................................................................................................... 71
Video settings
................................................................................................................................................................. 72
Recording settings
......................................................................................................................................................... 73
Sensitivity settings ........................................................................................................................ 74
G-Sensor (Normal mode) / G-Sensor (Parking mode) ............................................................................................. 74
Motion detection (Parking mode)
.............................................................................................................................. 75
Advanced sensitivity settings for normal and parking mode
............................................................................... 75
System settings ..............................................................................................................................77
LED .................................................................................................................................................................................... 77
Proximity Sensor
............................................................................................................................................................ 78
Voice guidance
............................................................................................................................................................... 78
Volume
............................................................................................................................................................................. 78
Scheduled Reboot.......................................................................................................................................................... 78
Speed alert
...................................................................................................................................................................... 79
User text overlay
............................................................................................................................................................ 79
Wi-Fi settings ..................................................................................................................................80
Login credentials ............................................................................................................................................................ 80
Wi-Fi auto turn o
.......................................................................................................................................................... 80
Cloud settings .................................................................................................................................81
Enable Cloud service ..................................................................................................................................................... 81
Cloud service hotspot settings
.................................................................................................................................... 82
Push notication settings
............................................................................................................................................. 82
Applying the settings ....................................................................................................................82
About the Cloud Service ...........................................83
Connect to BLACKVUE CLOUD (Optional) ............................ 83
Optional accessories .................................................88
Parking mode hardwiring kit (Optional) .............................. 88
Parking mode battery pack (Optional)
................................. 89