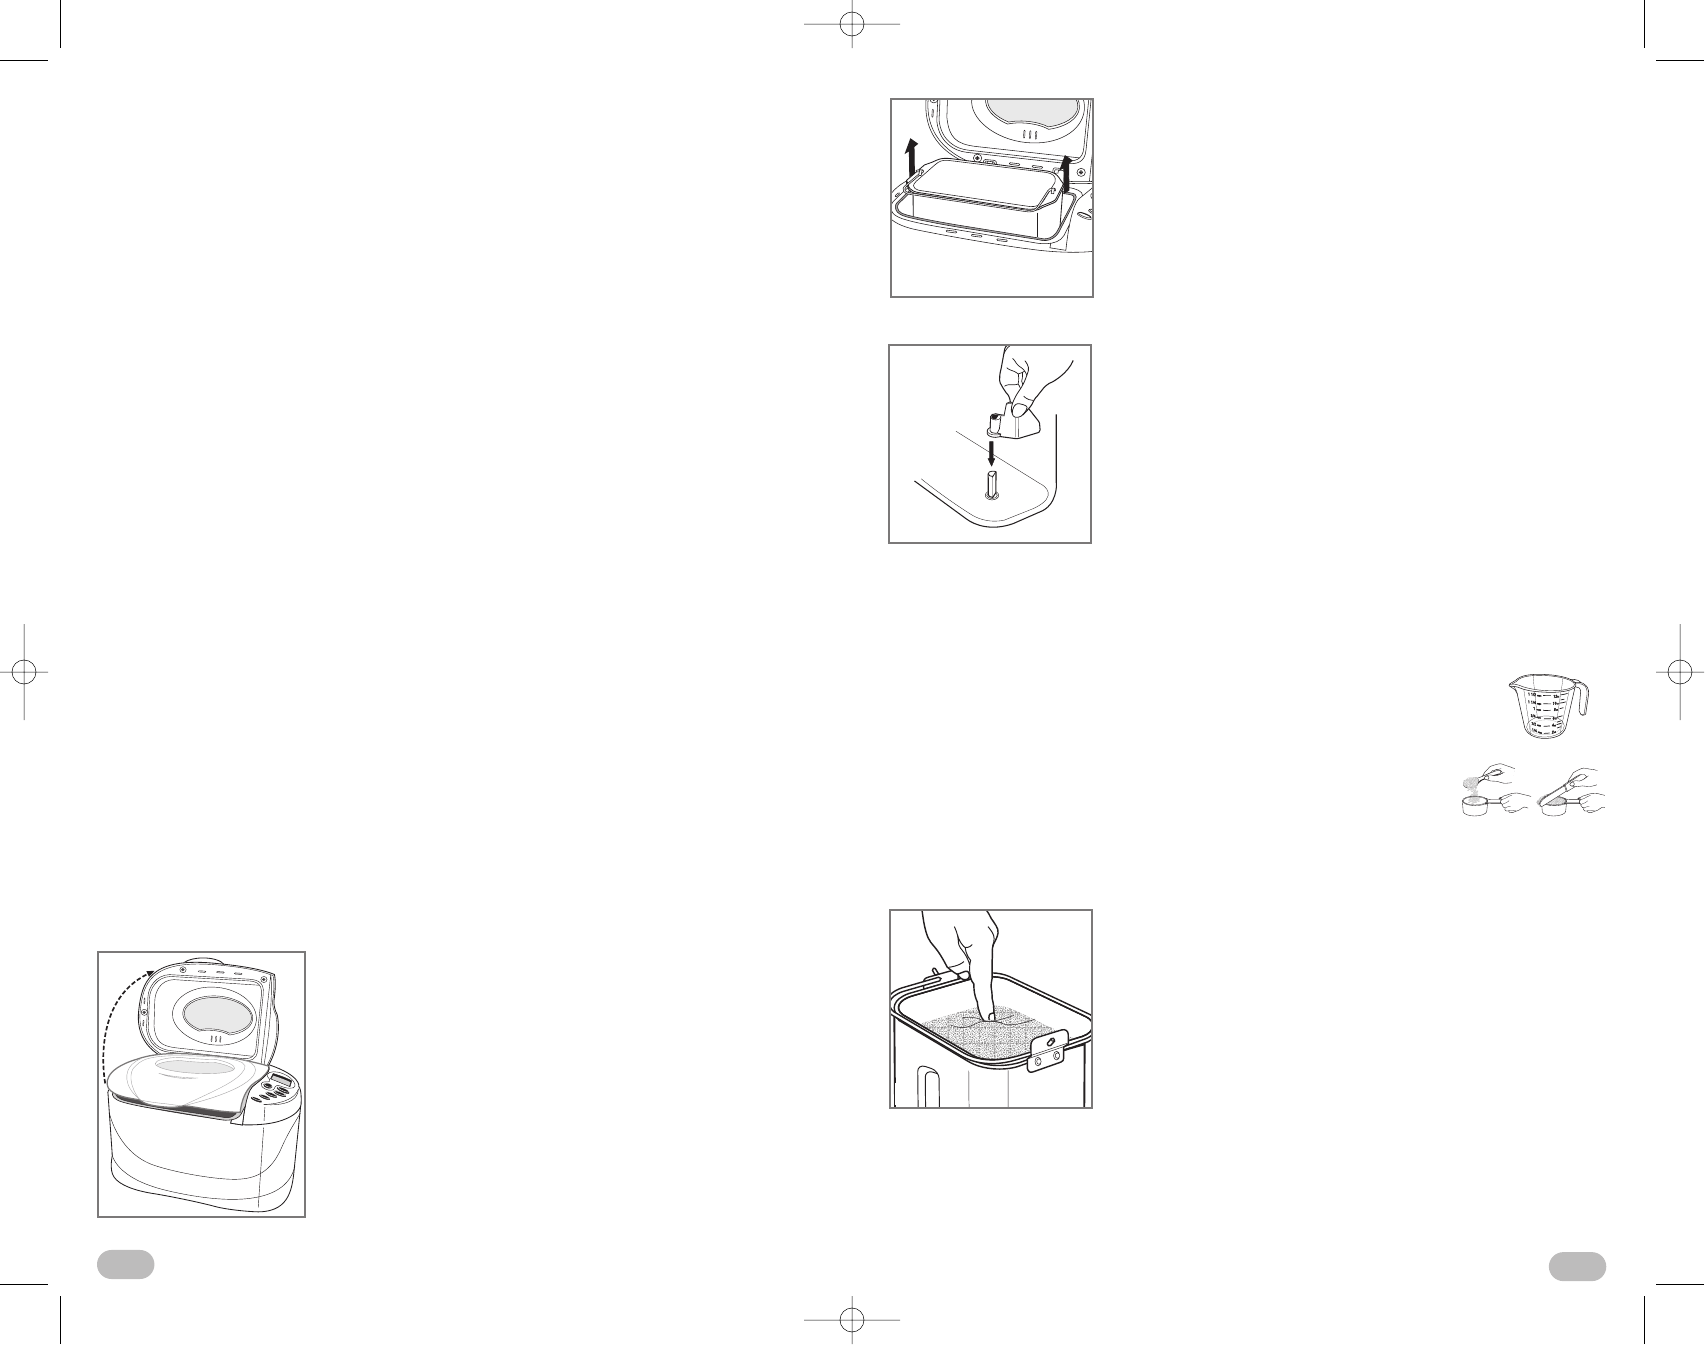
• Grasp the sides of the bread pan and pull straight
up to remove (D).
2 Attach Kneading Blades
• Align the flat side of the hole in the kneading blade
with the flat side of the shaft (E).
• Push the blade firmly onto the shaft to secure in place.
READY TO BAKE
Note: You can select one of the recipes and specific instructions provided on
pages 14-22.
Adding Ingredients into Bread Pan
• To measure liquids, use a see-through measuring cup and check
measurement at eye level.
• When measuring dry ingredients, use standard dry measuring
cups or measuring spoons and level off with the straight-edge
of a knife or metal spatula.
• Add ingredients at room temperature.
• Add ingredients in order listed: liquid - then dry - then yeast (always last).
• Make small indentation with your finger or the back of
a spoon in the top of the dry ingredients and add the
yeast to the indentation (F). Do not let the yeast touch
the liquid below.
9. Avoid delay: The delay-bake function cannot be used for Rapid Bake I and
II or the Dough setting. It is not recommended for Whole Grain, Quick Bread
or Preserves.
10. Test the water: For most breads, use water that is 80° to 90°F (26,6 °C
to 32,2 °C); for Rapid Bake breads, use water at 110°F to 120°F (43,3 °C
to 48,8 °C).
11. Choosing crust color: The first time bread is baked, select the light
setting. If you like a darker crust, make a note and select a darker crust
for future breads on that cycle.
12. There is a 15-minute delay on most programs before mixing begins.
13. Some note-worthy solutions:
If bread is:
• too brown - select a lighter crust.
• too light - select a darker crust and do not open the unit during the
baking cycle.
• too coarse - make sure you add salt.
• too heavy - use less flour (1 tsp. at a time).
• too low - use less flour or more yeast or water that is not too hot,
or check the date on your yeast.
• too high - try less yeast (1/4 tsp. at a time).
• collapses in the center - dough is too wet or flour is not strong enough,
or amount is too great for the unit.
GETTING STARTED
• Unpack your unit and remove packing materials.
• Peel off clear protective film from control panel.
• Wash all parts as instructed in Care and Cleaning.
• Select a location for the unit. Make sure you have enough space above the unit
to open the lid.
1
Remove Baking Pan
• Using the lid handle, lift and open the lid (C).
C
D
E
F
10
9