• Carga de agua en la caldera
Español 7
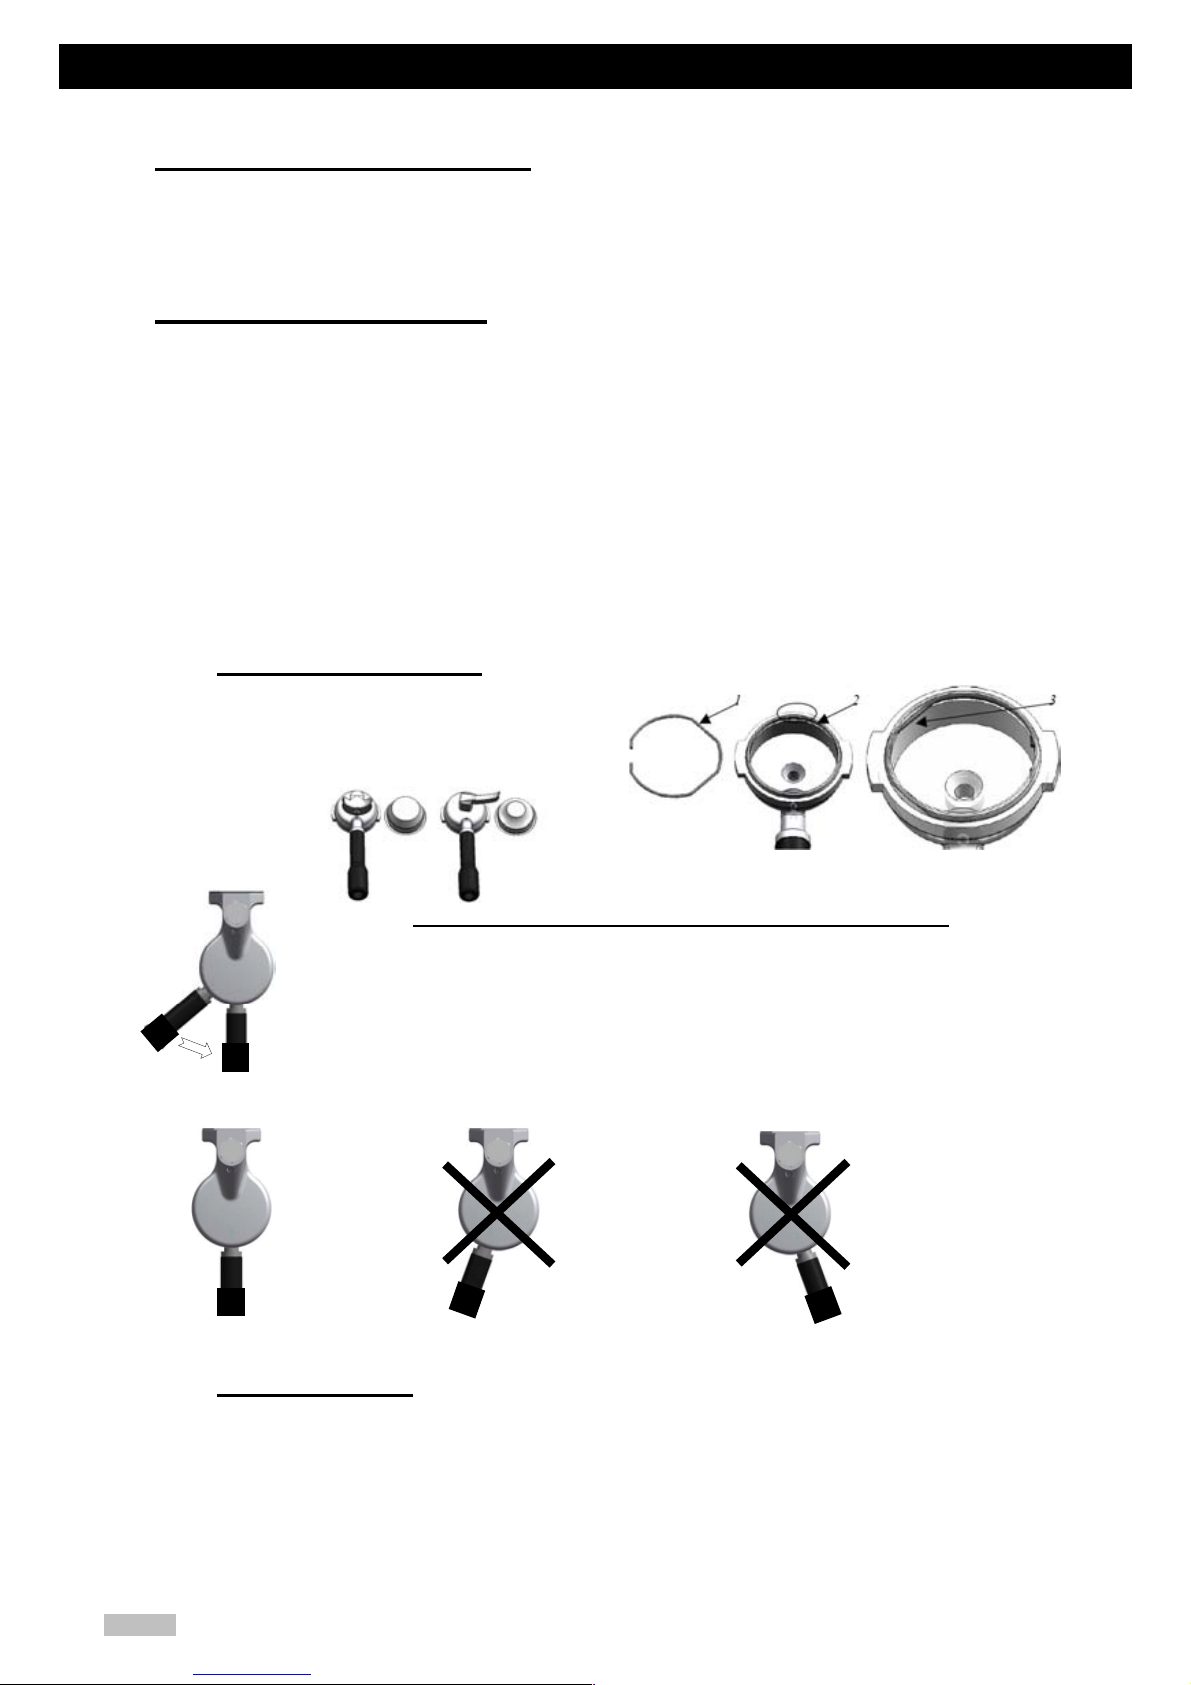
Porta-cacillo y cacillo para una
dosis de café
Porta-cacillo y cacillo
para dos dosis de café
4. Carga de agua en la caldera
La carga de agua de la caldera de agua/vapor se realiza automáticamente. La máquina realiza el llenado
automáticamente. Sin embargo, el agua para el grupo expreso circula por un circuito diferente, realizándose su
llenado manualmente (accionando el funcionamiento del grupo expreso).
5. Puesta en marcha inicial
• Si la máquina está preparada para conexión a red, abra la válvula de paso de agua externa a la
máquina de café. En caso de que esté preparada para utilizar depósito, asegúrese de que dispone de
agua en el mismo.
• Conecte el interruptor general.
• Accione el pulsador erogador, o un botón de la centralita, hasta que salga agua de forma continua
por el grupo erogador. De este modo nos aseguramos de que el intercambiador térmico de la máquina
está lleno de agua.
• Abra el grifo de vapor hasta que salga vapor. Así evacuamos el aire que pueda quedar en la caldera.
• Todos los modelos de Office vienen provistos de un sistema Salva Resistencia; en caso de que la
máquina se quedase sin agua, la resistencia se desconectaría automáticamente, evitando posibles daños
a la máquina.
5.1. El conjunto porta-cacillo
1.- Muelle cierre porta-cacillo
2.- Alojamiento del Muelle cierre porta-cacillo
3.- Colocación del Muelle porta-cacillo.
5.2. Colocación del porta-cacillo en el grupo erogador
El porta tiene en los laterales dos salientes, deben hacerse coincidir con unas entradas
que tiene el grupo, cuando sea así gire de izquierda a derecha hasta conseguir que el
mango del porta quede totalmente perpendicular a la máquina de café.
POSICIÓN CORRECTA DEL PORTA EN EL GRUPO
5.3. Erogación de café
• Retire de la máquina de café el porta-cacillo.
• Coloque sobre el cacillo la dosis de café que precise para realizar un café a su gusto.
Preferentemente que el café esté recién molido. Utilice el cacillo adecuado para ello.
• Presione el café con el prensa café.
• Posicione el porta-cacillos en el grupo y asegúrese que está bien ajustado, coloque la taza debajo de
la salida del porta-cacillos.
• Accione el interruptor de erogación o seleccione la opción que desee de la centralita electrónica.
CORRECTO NO HA
ENTRADO
SUFICIENTE
LAS GOMAS
ESTAN
GASTADAS