DISPLAY The control board offer several features: you can simple set the starting address,
run the pre-programmed program or make a reset. The main menu is accessed
by pressing the Mode-button, browse through the submenu by pressing Up or
Down.
Press the Enter-button in order to select the desired menu.
You can change the selection by pressing Up or Down. Confirm every selection
by pressing the Enter-button.
You can leave every mode by pressing the Mode-button. The functions provided
are described later in this manual.
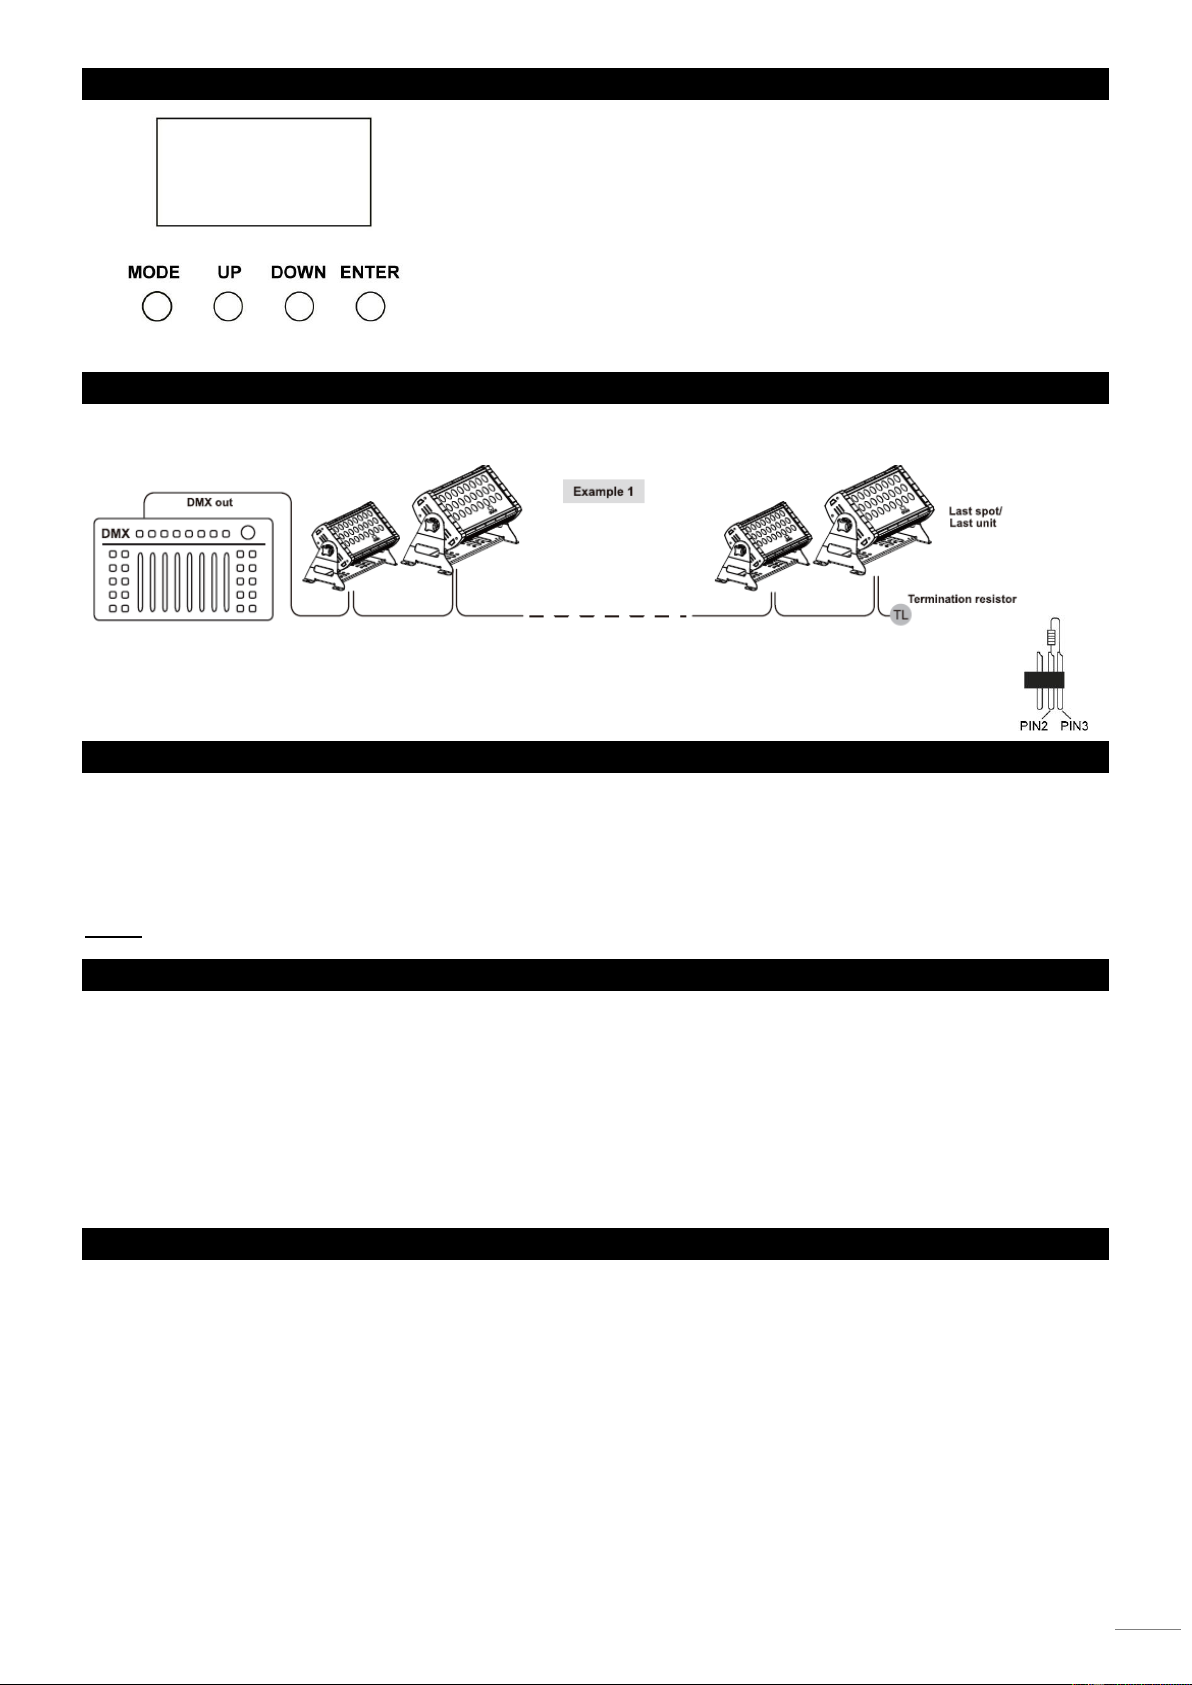
DMX-512 CONNECTION
If you are using a standard DMX controller, you can connect the DMX output of the controller directly to the DMX input of the
first unit in a DMX chain. Always connect the output of one unit with the input of the next unit until all units are connected.
If you use a controller with 5 pin DMX connection you will need to use a 5-pin to 3-pin adapter.
At the last fixture, the DMX cable has to be terminated. Solder a 120 Ohm resistor between signal (-) and signal (+)
into a 3-pin XLR connector and plug this into the DMX output of the last fixture in the chain.
MASTER/SLAVE OPERATION
The master/slave operation enables that several same units can be controlled by one “master” unit.
Connect the first unit “DMX OUT” socket with the second unit “DMX IN”, using a 3pin DMX Cable. Repeat this process with the
third, fourth etc. or see a above section “DMX-512 connection”. Choose the unit that will control all other and set this in master-
mode via display. The other units that must react on the master, you must set in slave-mode. The “Slave” will synchronously
follow the “Master” .
Noted: Any unit can be the “Master” or “Slave”.
DMX OPERATION MODE SELECTION
Press [MENU] to enter the main menu and then [UP] or [DOWN] until the display shows ‘Personality’ . Press [ENTER]. With
[UP] and [DOWN] you can now select one of the following DMX operation modes:
• ‘STAGE’ (12 channels)
• ‘Arc.1’ (three channels – RGB)
• ‘Ar1.d’ (four channels – RGB + dimmer)
• ‘Arc.2’ (five channels – RGBWA)
• ‘Ar2.d’ (six channels – RGBWA + dimmer)
• ‘Ar2.s’ (seven channels – RGBWA + dimmer + strobe effect)
• ‘HSv’ (three channels – hue, saturation, brightness)
ID ADDRESS ASSIGNMENT
You can assign up to 66 ID addresses to each DMX address. This allows the grouping of devices. In 12-channel DMX mode,
the devices of a group (same DMX address) can be controlled together (via channels 1 to 11) or separately by making another
differentiation based on the IDs via channel 12.
• Press [MENU] to enter the main menu and then [UP] or [DOWN] until the display shows ‘ID Address’ . Press [ENTER].
• With [UP] and [DOWN] you can now select one of 66 ID addresses.