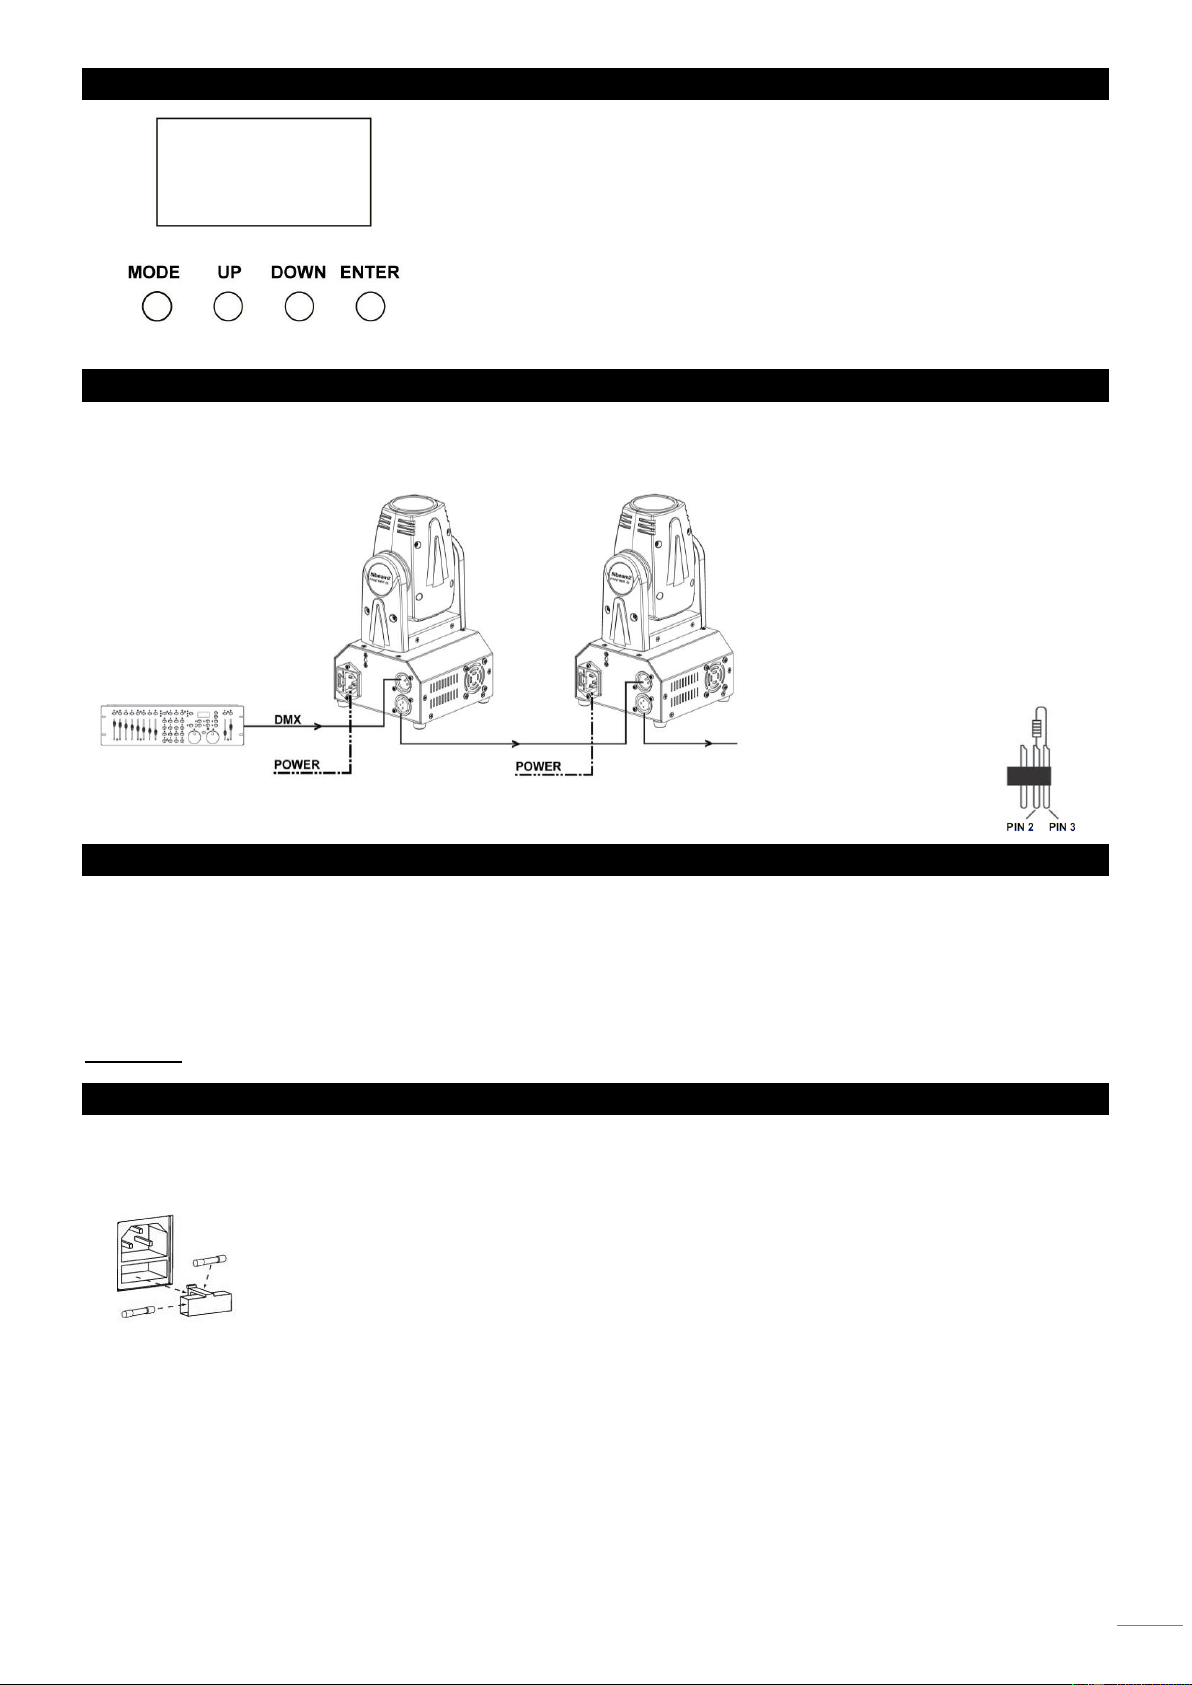
WYŚWIETLACZ Panel sterowania oferuje kilka funkcjonalności: możesz łatwo ustawić
adresowanie DMX, włączyć gotowe programy lub zresetować urządzenie. Menu
główne jest dostępne po naciśnięciu przycisku Mode. Możesz się poruszać w
menu za pomocą przycisków Up oraz Down.
Naciśnij Enter, aby wybrać pożądany tryb.
Możesz zmienić wybór naciskając Up oraz Down. Potwierdź każdorazowo nowy
wybór naciskając Enter.
Możesz opuścić tryb naciskając Mode. Funkcje urządzenia są opisane w dalszej
części instrukcji.
POŁĄCZENIE DMX512
Si vous utilisez un contrôleur DMX classique, vous pouvez relier la sortie DMX du contrôleur directement à l’entrée DMX du
premier appareil dans une chaîne DMX. Reliez toujours la sortie d’un appareil à l’entrée de l’appareil suivant jusqu’à ce que
tous les appareils soient reliés. Si vous utilisez un contrôleur avec connexion DMX 5 pôles, vous devez utiliser un adaptateur 5
pôles / 3 pôles.
Sur le dernier appareil, le cordon DMX doit être terminé par un bouchon. Soudez une résistance 120 ohms entre
signal (-) et signal (+) sur une prise XLR 3 pôles et branchez-la à la sortie DMX du dernier appareil de la chaîne.
TRYB MASTER/SLAVE
Tryb master/slave pozwala na to, aby kilka takich samych urządzeń powielało ustawienia jednego urządzenia “master”.
Podłącz 3-pinowy kabel DMX do wyjścia DMX w pierwszym urządzeniu oraz wejścia DMX w kolejnym urządzeniu. Powtórz
proces z trzecim, czwartym itd. urządzeniem, albo zobacz sekcję powyżej (Połączenie DMX). Wybierz urządzenie, które będzie
kontrolować pozostałe, oraz za pomocą panelu z wyświetlaczem ustaw w nim tryb „master”. Pozostałe urządzenia, które
powinny przyjmować ustawienia urządzenia „master”, należy ustawić w trybie „slave”. Teraz wszystkie urządzenia będą
pracować tak samo.
Informacja: Każde urządzenie może pracować jako “master” lub “slave”.
WYMIANA BEZPIECZNIKA
Jeśli bezpiecznik jest niesprawny, wymień go na nowy egzemplarz tego samego typu i wartości. Przed wymianą bezpiecznika
wyciągnij kabel zasilający z gniazda.
Instrukcja: Krok 1: Otwórz śrubokrętem zasłonkę bezpiecznika na tylnym panelu.
Krok 2: Wyciągnij bezpiecznik.
Krok 3: Włóż nowy bezpiecznik w obudowę.
Krok 4: Zasłoń obudowę bezpiecznika oryginalnym plastikiem.