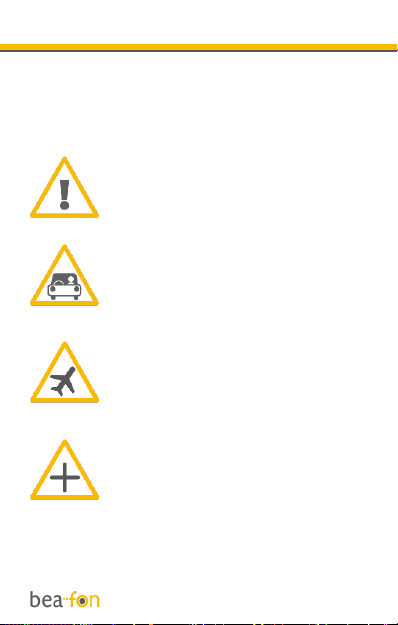
685421
55
Zoom out
Zoom in
Previous page
1/71
Next page
User Manual EN
SL630
2
General Information
Congratulations on the purchase of your
Bea-fon SL630!
Please read this information before using
the phone to make a better use of your
phone. We are not responsible for any
damage due to your misunderstanding of
this information and misacting.
We are endeavouring to improve our
products and services. We reserve all the
rights to revise and change the
description of this product and its
software as well as this user’s manual
without obligation to notify any person of
such revisions and changes.
This user manual is for your better use of
this phone not an approval of any
accessories. All the pictures in this
manual are for reference only. There may
be slight difference between the
appearance of phone/ keys/ contents of
display used in this manual and those of
your phone. Please refer to your phone
for actuality. Some features introduced in
this manual are network or subscription-
3
supported features. Please contact your
network operator for further information.
Please check the package contents to
ensure that all components listed below
are included. If the product is defective or
if there is a component missing,
immediately contact the retailer where
you purchased this handset.
4
General Information
Your Bea-fon SL630 box contains:
1 mobile phone (SL630)
1 desktop charger (SL630)
1 travel charger (SL630)
1 battery (SL630)
1 USB cable (SL630)
User manuals (SL630)
If you find the size of the script not easily
readable for you, you can also find this
manual on our website, where you will be
able to adjust the size of the script.
Go to: www.beafon.com/Products
Device Code:
This device code ensures that
unauthorized persons will not be able to
use your phone. The default code is 0000
PIN-Code:
The PIN-code was supplied to you by
your network operator together with your
SIM card and/or adjusted/set up by
yourself.
5
Directory
General Information ............................ 1
General Information ............................ 4
Device Code: ................................... 4
PIN-Code: ....................................... 4
Directory ............................................ 5
Your Phone ......................................... 9
Getting started.................................. 11
What is a SIM card? ....................... 11
Insert the SIM card and Micro SD card
................................................... 11
Insert the battery as follows ............ 13
Charging the battery ...................... 13
Switching the telephone on or off ..... 15
Display (Standby mode) .................. 16
LED describtion .............................. 16
Screen icons:................................. 16
Menu Operation ............................. 19
Torch ............................................ 19
Connect an optional headset ............ 20
Make a call .................................... 21
Make a call using the phone book ..... 21
Answering a call ............................. 22
Operations during a call .................. 22
Hands Free .................................... 23
Menu ............................................... 23
Shortcut key functions .................... 24
Phonebook ....................................... 25
6
To access the phonebook ................ 25
Add new contact: ........................... 25
To edit a Phone Book entry: ............ 26
To delete all entries from the phone or
SIM card ....................................... 26
To copy all entries from the phone or
SIM card ....................................... 26
Store a Phonebook entry to a Speed
dial key (2-9) ................................ 27
Direct Number: .............................. 27
Making calls using the Photo Contacts
................................................... 28
Create photo contact ...................... 28
Messages ......................................... 30
Inbox: .......................................... 31
Drafts: .......................................... 31
Outbox: ........................................ 31
Sent messages .............................. 32
Message settings ............................ 32
Voicemail server ............................ 33
Call history ....................................... 34
Missed Dialled and Received ............ 34
Delete call logs .............................. 34
Organizer ......................................... 35
Alarm ........................................... 35
Tasks ............................................ 35
Calculator...................................... 36
Multimedia ....................................... 38
Image viewer ................................ 40
7
FM-radio ....................................... 41
File Manager .................................. 42
Settings ........................................... 43
Profiles (Tone settings) ................... 43
Silent mode ................................... 43
SOS settings.................................. 44
Phone settings ............................... 47
Time and date: .............................. 47
Language: ..................................... 47
Pref. Input method: ........................ 47
Display: ........................................ 47
Call settings .................................. 48
Caller ID: ...................................... 48
Call waiting: .................................. 48
Call divert: .................................... 48
Call barring: .................................. 48
Call time reminder: ........................ 48
Answer Mode: ................................ 49
Advanced settings .......................... 49
Black list: ...................................... 49
Network settings ............................ 49
Network selection: ......................... 50
Set automatic or manual mode ........ 50
Security settings ............................ 50
Connectivity: ................................. 50
Bluetooth: ..................................... 50
Visibility: ....................................... 51
My device: .................................... 51
Search audio device: ...................... 51
8
Search audio device descripton: ....... 51
My Name: ..................................... 52
Restore factory settings .................. 52
Basic Specifications: ....................... 52
Troubleshooting ................................ 53
Intended operation/use ...................... 57
Phone ........................................... 57
Battery ......................................... 59
Recycling ......................................... 62
For your safety ................................. 63
Traffic safety: ................................ 64
Operating environment: .................. 64
Electronic equipment: ..................... 65
Pacemakers: ................................. 65
Hearing aids?................................. 66
Other medical equipment: ............... 66
Approved locations: ........................ 67
Potentially explosive atmospheres: ... 67
Vehicles: ....................................... 68
Information ...................................... 69
Certification information (SAR): ....... 69
Declaration of Conformity: .............. 70
Limitation of liability: ...................... 70
More information ............................ 71
Address ........................................ 71
9
Your Phone
1
Left menu key / Main menu key
2
Dialing / History Calls
3
Direct dialing numbers M1
4
* Key, Press this button on the idle
screen to enter the following symbols :
* /+ /P / W.
5
Receiver
6
Navi key:
Key up: On the idle screen this button
takes you to the Messages menu.
Key down:
On the idle screen this button takes
10
you to the favorite contacts.
Key left:
On the idle screen this button takes
you to the Calendar
Key right:
On the idle screen this button takes
you to the Alarm
7
OK key
8
Right menu key, On the idle screen
this button takes you to the
Phonebook menu.
9
Power on/off /End key
10
Direct dialing numbers M2
11
Camera key
12
# Key, Long press can switch between
in silent mode with general modes; In
edit mode, change the input method.
13
SOS button
14
Polyphone loudspeaker
15
Volume key +
16
Volume key 15/17 - Torch key, Long
press the flashlight
17
Volume key -
11
Getting started
What is a SIM card?
Every mobile phone has a SIM card
(Subscriber Identity Module). This is a
micro-chip that holds your personal
information such as names and phone
numbers. Your phone won’t work without
it. If you already have contacts on your
SIM card, they can be transferred in most
cases.
Keep the SIM card away from children.
The SIM card can easily be damaged or
bent. You should therefore handle the
SIM card with care during installation
and/or removal.
Insert the SIM card and Micro SD
card
1. Make sure that the phone is switched
off and the charger is disconnected
from the phone.
2. Turn the phone over and remove the
battery cover.
12
If the battery is already inside, remove it.
3. You can see two card slots (left side:
SIM, right side: Micro SD).
4. Slide the SIM card carefully into the
SIM card slot. Make sure that the
gold-coloured connectors on the SIM
card are facing downwards and that
the bevelled corner is on the left side.
5. Memory Card: Slide the Micro SD card
into the Micro SD card slot. Make sure
that the gold-coloured connectors on
the micro SD card are facing
downwards.
13
Insert the battery as follows
1. Insert the battery by aligning the gold
contacts in the battery compartment
on the phone.
2. Push down on the upper section of the
battery until it 'clicks' into place.
3. Close the battery compartment by
sliding the cover closed until you hear
a ‘click’.
Charging the battery
There are two ways of SL630 battery
charging:
A. Desktop charging
14
B. Handset charging
The lithium battery of the mobile phone
can be immediately used after unpacking.
A new battery, is not fully charged, and
performs best after performing a full
charge/discharge 3 times:
1. Plug the charger into the charger
connector.
2. Plug the other end into an electrical
outlet.
3. The phone may need several hours for
reaching a fully charge.
When your phone is power off, it
might take a few seconds to show
charging display and it shows charge
complete when finished.
When your phone is power on, the
battery icon flickers when it starting
charging and become still with full
bars in battery icon when finished.
4. The battery is fully charged when the
red LED is off. Disconnect the charger
from the phone and the AC outlet.
15
Note: Charge the battery for at least 12
hours before using the phone for the first
time.
Switching the telephone on or off
Make sure that you SIM card is in your
mobile phone and that the battery is
charged.
1. Press the red key to switch the phone
on.
2. If prompted, choose your language
and press OK.
3. If you have entered a PIN-code
before, the phone will ask for the code
now. Enter the PIN-code and confirm
by pressing OK.
4. To turn off your phone, press and hold
the red key for two seconds.
If you don’t insert a SIM card, your phone
shows Insert SIM. None of the functions
related to SIM card can be used. You can
make an emergency call only.
Note: If you enter an incorrect PIN-code
3 times in succession, the phone will
require you to enter the PUK-code. You
have received this PUK-code together
with your SIM card.
16
Display (Standby mode)
1
2
3
4
5
6
7
8
1. Signal status 5. Time
2. Pictograms 6. Date and day
3. Battery status 7. Menu
4. Network operator 8. Names
LED describtion
Green LED
Incoming call, missed call
or unread message
Red LED
Battery low (flash),
Battery charging (light)
White LED
Torch
17
Screen icons:
Signal Strength
The vertical bars show the
network connection strength. SIM
card has signals.
New messages
This icon shows when you receive
a new message.
SIM Card has an unread message
The inbox is full.
This icon flickers when the inbox
is full and you need to delete
messages to receive new
messages.
Earphone
This icon shows when you plug
the earphone in. Voice will be
heard from the earphone.
Missed Calls
This icon shows when you are
viewing the missed call. SIM card
has a missed call.
Alert Type
Ring
Silent mode on and Vibration only
Vibrate and ring
18
Call Divert
This icon shows when you divert
all calls unconditionally. SIM card
has been set up call divert.
Turn alarm on
This icon shows when you turn
alarm on.
Roaming
This icon shows when your phone
is in roaming state. SIM card is
roaming.
Bluetooth
This icon shows when the
Bluetooth is active.
Battery capacity
This icon’s colour changes
according to the status of battery
capacity: , , ,
19
Menu Operation
Menu lists are used for set up and
operation.
The left and right menu keys initially are
Menu ( ) and Phonebook ().
Press Menu ( ) and the display changes
and the soft keys become OK and Back.
Use Up or Down to move up or down
menu lists, and OK or Back for the next
or previous display.
Key
Function
Arrow key up
Message
Arrow key down
Photocontacts
Arrow key left
Calendar
Arrow key right
Alarm
OK key
Main menu
Torch
Press and hold on the side volume keys
of the phone to switch the built-in torch
on/off.
20
Connect an optional headset
You can use a headset (not supplied) with
the micro usb type, plugged into the
Headset socket on the bottom of the
handset.
When using headsets, including Beafon
approved ones, pay attention to volume
levels and read its user guide for safety
instructions. Do not connect incompatible
products.
When correctly inserted the headset icon
is shown.
Headset Connector:
Plug in headset accessory for headset
use. (micro USB)
21
Call function
Make a call
1. To make a call, enter the phone
number with the prefix and press the
green key. For international calls,
enter ‘+’ by pressing for 2 sec.
Then enter the country code followed
by the telephone number, in which
the 0 of the prefix must be dropped.
2. If you have entered a wrong number,
press the soft key ‘right’ Clear to
remove the number to the left of the
blinking cursor.
3. Press the green key to call the
number.
4. Press the red key to end the call or to
cancel the call attempt.
Make a call using the phone book
If you have saved a name and number in
the phone book, you can also use the
phonebook to make a call.
In standby mode, press the soft key
‘right’ to go to Phonebook.
1. Scroll with the up and down arrow key
to the name you want to call.
22
2. Press the green key to call the
number.
3. Press the red key to end the call or to
cancel the call attempt.
Answering a call
When there is an incoming call, the
phone rings and/or vibrates and shows
the number or the corresponding name.
1. Press the green key or Answer if you
would like to answer a call.
2. Press the red key or silent if you
would like to reject a call, or for
ending the connection after the call.
Earphone/Bluetooth Mode): When
plugging the earphone (including
Bluetooth earphone), you can answer a
call by pressing the key on the earphone.
Operations during a call
Press the right Menu key for Hands free
Press left menu key Options” to perform
following operation during a call:
Mute: de/activate the microphone
Phonebook: To go to Phonebook.
Hold: Hold this call.
Message: To go to Messages.
23
New Call: To dial the number
End: End this Call.
Hands Free
During a call you can turn the hands free
equipment on (Loudspeaker on).or off
with the right Menu key.
Menu
Press the up arrow key to go to the
Menu. Scroll through the menu using the
arrow keys.
1. Phonebook
1. Contacts
2. Add new
contact
3. Speed dial
4. Direct
Number
5. Phonebook
settings
2. Message
1. Write SMS
2. Inbox
3. Drafts
4. Organizer
1. Alarm
2. Tasks
3. Calculator
4. Calendar
5. Services
5. Multimedia
1. Camera
2. Image viewer
3. FM Radio
4. File Manager
6. Settings
1. Profiles
24
4. Outbox
5. Sent
messages
6. Message
settings
3. Call history
1. Missed call
2. Dialled calls
3. Received
calls
4. Delete call
logs
2. SOS settings
3. Phone
settings
4. Call settings
5. Network
settings
6. Security
settings
7. Connectivity
8. Restore
factory
setting
Shortcut key functions
With helping the 5 key navigation, you
have for quick access in idle mode
following functions:
Taste
Funktion
Arrow key up
Messages
Arrow key down
Favorite contacts
Arrow key left
Tasks
Arrow key right
Alarm
OK key
Main Menu
25
Phonebook
You can store names and phone numbers
in the Internal phone book (up to200)
and in the SIM phone book (SIM
dependent, but a maximum of 250).
To access the phonebook
In idle mode, press Right menu key.
In idle mode, press Left menu key,
Phonebook and press OK
Note: Indicates entries in SIM phone
book, Indicates entries in the internal
phone book.
Add new contact:
1. Select Menu, Phonebook and press
OK.
2. Select Add new contact and press OK.
3. Select Preferred storage, To SIM or To
Phone, if you choose To phone: you
can edit Name, Number and Caller
ringtone. Press Options and Save if
you want to save the contact.
26
To edit a Phone Book entry:
1. Press right menu key to phone book
search which one You want to change,
press left menu key select Edit then
modify the name, press Down modify
the number.
2. Press Option and OK to save the
change(s).
To delete all entries from the phone
or SIM card
1. Select Menu, Phonebook and press
OK..
2. Select Phonebook settings and press
OK.
3. Select Delete all Contacts and press
OK.
4. Select From Phone or From SIM
Delete all
5. Press OK again to confirm
To copy all entries from the phone or
SIM card
1. Select Menu, Phonebook and press
OK.
2. Select Phonebook settings and press
OK.
27
3. Select Copy all and press OK
4. Select To Phone or To SIM From
SIM/Phone
5. Press OK again to confirm
Store a Phonebook entry to a Speed
dial key (2-9)
1. Select Menu, Phonebook and press
OK.
2. Select Speed dial and Press OK
3. Set Status to On, press down to Set
numbers.
4. Press OK the display shows ,2-9
5. Press Up or Down to choose the key
to save to
6. Press OK to confirm the memory
entry.
Direct Number:
1. Select Menu, Phonebook and press
OK.
2. Select Direct Number and press OK.
Add M1 and M2 dial numbers.
Press in Standby mode M1 or M2 for call
28
Making calls using the Photo
Contacts
In the default screen, press the
downwards arrow key.
Here you can select up to 8 photo
contacts. Scroll with the Arrow keys to
the desired photo contact and then press
the Call key (green key).
The photo contacts appear on the
external display. Carry out the following
steps in order to assign a photo to this
contact:
Create photo contact
1. In the default screen, press the Arrow
key (downwards) in order to go to the
photo contact menu.
2. Use the arrow keys to scroll.
3. To edit a photo contact, press the left
menu key (Edit).
4. Enter the name in the first line and
the phone number in the second line
5. In the third line, press the left menu
key Options and add a photo; you
can select the following:
a. Select from file: Select a picture
you have already saved.
29
b. From camera: Take a picture
directly using the camera.
6. In the fourth line, you can select a
ringtone.
7. Once you have edited the contact,
press the left menu key (Options) and
select Save and confirm with the left
menu key (Select).
Important: For a contact picture, please
use the 240x320px resolution in the
camera image settings. (Press key 1 in
Camera mode to switch the resolution)
Note: To save images, you need a Micro
SD memory card up to 16GB. (Not
included in the accessories)
30
Messages
Write messages
1. Select Menu, Messages and press OK
2. Press Write SMS
In this menu, you can compose
messages.
The number of letters used can be seen
at the upper right edge of the display.
Text input:
The following functions are available:
Press 0 to add a space.
Press the * key to add special
characters; using the Arrow keys”,
you can navigate to the desired
symbols.
Press the arrow key to move the
position indicator to the left or right.
Press Delete to delete a letter; to
delete the entire text, press and hold
Delete.
Press the # key to switch between
upper and lower case and word
recognition: ABC, abc, 123 and pay
attention to the symbol in the top left
of the display.
31
Inbox:
The Inbox is for storing received SMS
messages. Depending on the selected
mode, the phone vibrates or rings when
you receive a new message. And in the
standby mode you see this icon until
you have read the new SMS message.
You can choose the following options
while reading your received SMS:
View, Reply, Call sender, Forward,
Delete, Delete all and Save to Phonebook.
Note: The new message icon keeps
flickering in the standby mode when your
inbox is full. Please delete some
messages for receiving new messages.
Drafts:
By Drafts you can view the draft SMS
messages you have saved.
You can choose the following options
while reading your draft:
View, Send, Edit, Delete and Delete all.
Outbox:
The Outbox to view the messages you
don’t sent but saved.
32
You can choose the following options
while reading your sent SMS:
Send, Edit, Delete and Delete all.
Sent messages
The Sent messages to view the messages
you sent.
You can choose the following options
while reading your sent SMS:
View, Forward, Delete and Delete all.
Message settings
You can define the SMS settings. The
following functions are available:
SIM (Profile settings):
Here you can set, among others, the
message service centre number (SMSC)
(dependent on the network operator) and
other SMS settings.
Memory status:
With this option, the SMS memory status
from your SIM card and your telephone
are displayed.
Sent messages:
Switch on/off the storage of sent
messages
Preferred storage:
33
Select the storage location for the SMS
Telephone or SIM
Voicemail server
Voicemail is a service supplied by your
network operator. For more information
and for the voice mailbox number,
contact your network operator. When you
have a new voice mail message, your
phone will receive a message.
1. Select Menu, Messages and press OK
2. Select Message settings and press OK
3. Select SIM and press OK
4. Select Voice mail and press OK
5. Press Option and choose Call or Edit.
6. If you choose Edit, edit the name and
number of the voice mail. After enter
the number press OK.
In standby mode:
Press and hold key number 1 for directly
calling the Voice mail. Only the number
saved under voice mail address 1 is
called.
34
Call history
Missed Dialled and Received
The phone registers the phone numbers
of Missed, Received, Dialled and All calls.
When you press OK by Missed, Dialled or
Received, you can view the calls you
Missed, Dialled or Received. If you press
Option you can choose the following
options:
View, Call, Sent text message, Save to
Phonebook Add to Blacklist and Delete.
Delete call logs
You can delete all the records of the
Dialled, Missed and Received calls, you
can also choose delete All calls to delete
all the records of the above-mentioned
calls logs.
35
Organizer
Alarm
1. Select Menu, Organizer and press OK.
2. Select Alarm and press OK.
You can set a maximum of 5 different
alarms.
To set an alarm clock:
1. Select one alarm and press Edit.
2. Edit alarm: set On or Off, Time,
Snooze, Repeat, Alarm tone and Alert
type.
3. Press Save to save the Alarm.
When alarm sounds, you can stop the
alarm by pressing Stop. If you press
Snooze, the alarm stops and rings after 5
minutes again.
Tasks
1. Select Menu, Organizer and press OK.
2. Select Tasks and press OK
Press Options and select Add.
Enter the desired details.
To save the event, press Options and
Save.
36
If there are some existed event in the
task list, press the up / down key to
select an event to get into the options:
View, Add, Edit, Delete, Delete overdue,
Delete all and View uncompleted
Calculator
1. Select Menu, Organizer and press left
menu key.
2. Select Calculator and press left menu
key
The phone is provided with a calculator.
This calculator has limited accuracy and
rounding errors may occur, especially in
long divisions.
In Calculator mode, the following
functions are available to you:
Key
Function
1-0
insert a digit.
#
To insert a decimal
Arrow key up
+
Arrow key
down
-
Arrow key left
x
Arrow key
right
÷
Ok key
=
37
The keys 1 to 0 insert a digit.
To insert a decimal, press #.
Press the up and down arrow key for
+, -
Press M1 and M2 key for x and ÷.
Press Camera key for =.
To get the result, press Equal. Press and
hold Clear to clear the display for a new
calculation.
Calendar
1. Select Menu, Extras and press OK
2. Select Calendar and press OK
3. Add events:
4. Press Options and select Add event.
5. Enter the desired details.
6. To save the event, press Options and
Save.
7. If there are some existed event in the
task list, press the up / down key to
select an event to get into the
options: View, Add, Edit, Search and
Delete.
On the calendar interface, press the Navi
keys to browse through different days.
38
Multimedia
Camera
Taking photographs
Point the camera lens at a position or an
object and press the Camera key or the
OK key to take a photo. After the
snapshot has been taken, the photo is
shown on the display and automatically
saved.
Note: To save images, you need a
Micro SD memory card up to 16GB.
(Not included in the accessories)
With Options, the following options are
available:
Photos:
View the saved photos (in .jpg format).
You can send and also receive the photos
via Bluetooth.
The following functions are available to
your under Options: Show, Browser style,
Send, Use, Rename, Delete, Sort by,
Save and Image information.
Camera settings:
39
Set Shutter sound, EV, Contrast,
Anti-flicker, and Delay timer.
Image settings:
Defining the Image size, and Image
quality.
White balance:
Adapt to the ambient lighting conditions.
Scene mode:
Select between Automatic and Night
Effect settings:
Here you can add different photo effects.
Storage:
Select between: Phone or Memory card
(if available).
Restore setting:
Restore the default setting.
In photo mode, the following quick
functions are available:
Key
Function
1
Change image resolution
2
Image quality
4
White balance
6
Delay timer
Arrow key
up
Zoom in
40
Arrow key
down
Zoom out
Arrow key
(left)
Underexpose image
(EV-)
Arrow key
(right)
Overexpose picture
(EV+)
Restore setting:
Restore the default setting.
In Photo mode, press the left menu key
Options to access the following
functions:
Image viewer
1. Select Menu, Multimedia and press OK
2. Select Image viewer and press OK
View the saved photos (in .jpg format). You
can send and also receive the photos via
Bluetooth.
The following functions are available to
your under Options: View, Send, Use as,
Rename, Delete, Storage and Image
information.
41
FM-radio
1. Select Menu, Multimedia and press OK
2. Select FM-Radio and press OK
The tuned frequency is displayed.
In FM-Radio mode, the following
functions are available to you:
Key
Function
Arrow left
Search previous channel
Arrow
right
Search next channel
Arrow key
(upwards)
Set frequency up by 0.1Hz
Arrow key
(downwards)
Set frequency down by
0.1Hz
OK key
On/off the radio
function
Enter Options, you can make the
following operations:
Channel List:
There are 30 channels for you to store.
Manual Input:
Inputs the FM frequency you prefer.
Auto search:
42
Scan the stations and save the stations
found in the channel list.
Settings:
Play in the background:
This function also enables you to listen to
the radio even though you have left the
Radio menu.
Note: Auto search needs some time, so
please be patient.
For better radio reception connect a
headset to the headset socket.
File Manager
1. Select Menu, Multimedia and press OK
2. Select File Manager and press OK
Select Memory card and then press the
left menu key to access the submenus.
If you press Option by a file or folder you
can choose the following options:
Open:
To display the content of the selected
folder.
Send, New folder, Rename, Delete, Copy,
Marks serval, Move, Delete all files, and
Details.
43
Settings
Profiles (Tone settings)
Enter in the function; display the profile
mode list including General, Silent,
Meeting, Outdoor.
Select one mode and enter the option
menu:
Activate: Activate the profile mode.
Customize: Customize the profile mode
as following:
Alert type, Ring tone, Ringtone volume,
Message tone, Message volume, Keypad,
Keytone volume, Cover open, Cover
Close and System alert.
Reset: Reset the setting to the default.
Silent mode
Silent is a fixed profile with ring tone,
keypad tone and message tone disabled.
The alarm signals even if the phone is set
to silent. Press and hold # to
activate/deactivate Silent mode.
44
SOS settings
The SOS app is a simple function that can
save lives at a crucial moment. You can
save any number of contacts and an SMS
notification.
These SOS numbers, which can be
initially saved in sequence, will be dialled
automatically in an emergency as soon as
you press and hold the emergency call
button at the back of the mobile phone
for approx. 2 seconds.
Once the emergency call is enabled, a
warning tone will sound so that also the
people in close proximity will be able to
hear it.
After that, an SOS SMS will be sent to all
the SOS numbers saved, if enabled
As a next step, if the first SOS number is
dialled; if this is not available, the next
number will be dialled automatically, etc.
The phone tries to reach the SOS contact
for approx. 19 seconds (call confirmation
signal). If it is not reached, the phone will
terminate it automatically and dial the
next SOS number.
This function prevents a call from being
forwarded to the mobile box.
45
In most carriers in Europe, call
forwarding to the mobile box starts after
about 20 - 25 seconds.
Attention:
Please ensure that your SOS contacts set
the mobile box activation no sooner than
20 seconds.
Note:
If you want to stop or cancel the
emergency call, press the red key or the
SOS button.
When using a Prepaid card:
Always ensure for sufficient funds on your
prepaid card, since private emergency
call numbers cannot be dialed without
sufficient funds.
Outside of your network operator’s home
network, the international SOS 112 can
usually still be called.
46
Note:
If you save emergency call numbers such
as rescue, police, fire department, etc.,
you must clarify this in advance with the
respective institutions. No liability is
assumed for possibly incurred costs if you
call by mistake.
Important:
During an emergency call, the hands-free
function is enabled automatically. Do not
hold the phone to your ear!
SOS
1. Select Menu, Settings and press OK
2. Select SOS and press OK
SOS Status
You can turn the SOS button on/off.
SOS number
Define a maximum of 5 SOS numbers
and their priority sequence.
Enable/disable SOS SMS
Enable or disable additional Send SOS
SMS function.
SOS message
47
If the SOS call is started and not
answered, this text will be sent to SOS
numbers. The text can be changed as
desired.
Phone settings
Time and date:
Set Home city and time and date
Language:
Here you can choose the language you
want in your display.
Pref. Input method:
Here you can choose the Input method
you want for write.
Display:
Wallpaper
Select your favourite picture as the
wallpaper of the standby window.
Display
In this menu, you can show/hide the time
and date display in default mode.
LCD backlight:
LCD backlight for setting up the duration
(sec) of backlight and brightness.
48
Call settings
Depending on network operator support
and subscription, you can choose the
following options:
Caller ID:
Set the function of caller ID
Call waiting:
When this network service is activated,
the network notifies you of a new
incoming call while you have a call in
progress. Press OK to answer the waiting
call. The first call is put on hold or press
the red key to reject the call.
Call divert:
To divert your incoming calls to your
voice mailbox or some other phone
number (network service). Select the
divert option you want. Several divert
options may be active at the same time.
Call barring:
With this network service you can restrict
the making and receiving of calls with
your phone.
Call time reminder:
49
Choose to remind you Periodic (30-60
seconds) or select Single (1-3000
Seconds) or select Off.
Answer Mode:
Cover answer
Open the phone to answer the incoming
call.
Any Key
You can press any key to answer a call.
Auto answer when headset mode
The phone answer the call automatically.
Advanced settings
Black list:
With this function you can block incoming
phone numbers.
Network settings
This menu has connection with the
network suppliers, so please get in touch
with them when you use this function. If
you want to get into one network which
doesn’t have the roaming protocol with
the original network you have been in,
the phone will display the content that
you can make an emergency call.
50
Network selection:
Depending on network operator support,
you can choose the following options:
Selection mode
Set automatic or manual mode
Security settings
You can choose the following options:
SIM security: To turn your SIM PIN
code On or Off, change PIN and change
PIN2.
Phone security: To lock your phone with
a password. The default password is:
0000.
Change password: Here you can
change your password of: Phone
password.
Connectivity:
You can connect wirelessly to other
Bluetooth compatible devices.
Bluetooth:
In standby mode: Press the down arrow
key to go directly to Bluetooth.
You can choose the following options:
51
Power:
Here you can choose to turn Bluetooth On
or Off.
Visibility:
you can set the visibility on or off.
My device:
List of saved devices and enables you to
add new devices; Search new device.
Search audio device:
Search for available Bluetooth audio
devices. If Bluetooth is not enabled you
can enable it now by pressing Yes.
Search audio device descripton:
1. Press OK, the phone is going to
search for new devices.
2. Select the devices you want to
connect with and press Pair.
3. When connecting with another
Bluetooth device you need a shared
passcode. Enter the passcode and
press OK.
4. Select the device from the list and
press Option. Can choose the
following options: Connect, Rename,
Delete and Delete all.
52
My Name:
Here you can set the Bluetooth device
Name.
Advanced:
Here you can set your: Audio path,
Storage and check the My address.
Restore factory settings
To reset some of the menu settings to
their original values. The password is:
0000
Basic Specifications:
Network
Dual-Band
GSM 900/DCS1800
Dimension
101x50.5x19.5mm
Battery
Li-ion 3.7V - 800mAh
Standby time:
up to 250 hours*
Talk time:
Up to 480 minutes*
*Variation in operation times may occur
depending on SIM card, network, and
usage settings, usage style and
environments.
53
Troubleshooting
If problems or irregularities occur while
using the phone, please refer to the
information in the following table. If a
particular problem cannot be solved using
the following information, please contact
the dealer where you purchased the
phone.
The phone cannot be turned on:
Check whether the battery is correctly
inserted into the telephone.
Check the battery status, charge the
battery for 24 hours or replace it, if
necessary (a six-month warranty
applies).
Check whether the PIN code was
entered correctly.
If the PIN code is entered incorrectly
3 times, the SIM card will be blocked
and you will need the PUK code
(please contact your carrier for your
PUK code).
SIM card error:
Dirt on the contact areas of the SIM
card? Clean the contact areas of the
SIM card.
54
SIM card is not inserted properly,
insert the SIM card correctly.
SIM card does not function or is
damaged? Get your SIM card checked
by your network operator.
Network connection cannot be made:
Bad reception? Move to an open space
or if you are in an enclosed space,
near the window.
You are out of range of the mobile
network. For information about
coverage, please contact your
network operator.
SIM card is invalid. Contact your
service provider.
Bad voice quality:
Poor network connection quality on
the part of the network provider?
Press the end key and select again.
You may be routed to a network
connection or phone line with better
quality.
Poor quality of the local telephone
line? Press the end key and select
again. You may be routed to a
network connection or phone line with
better quality.
55
Try turning the volume up louder.
Outgoing calls cannot be made:
Check the phone number and try
again.
Have you activated call barring? If so,
please disable all call barring.
Check whether the SIM card is
registered on the network.
Check whether enough credit is on
your SIM card.
You do not receive incoming calls:
Check whether the SIM card is
registered on the network.
Check whether the phone is turned
on.
Check the signal strength
Have you activated call barring? If so,
please disable all call barring.
Send SMS does not work
Please check the SMSC number
(message centre number) in the
following menu item:
Messages - Settings - SMS settings -
SIM - SMSC Address: Your carriers
message centre number should
appear here.
56
Display is black:
Check the battery status, charge the
battery, or replace it.
Check the background image.
Did the phone get wet?
Blocked PIN:
Check whether the PIN code was
entered correctly. If the PIN code has
been entered incorrectly 3x, the SIM
card is locked and you will need the
PUK code: (Please contact your
network operator for your PUK code).
I cannot hear the conversation partner:
During a call, please use the side
buttons to adjust the call volume.
Note: If a specific problem cannot be
solved using the information above, visit
our website www.beafon.com and select
the product page of your phone and read
the FAQ (Frequently Asked Questions) or
contact the customer support. Please do
not try to repair the phone yourself.
57
Intended operation/use
Phone
If you follow the recommendations below,
you will prevent the warranty from early
becoming null and void, and you will
continue to enjoy your product for years
to come.
Please use original accessories only or
accessories approved by your mobile
phone manufacturer. Failure to use
original and/or approved accessories
may result in poor performance,
damage to the phone or even to your
body, and may affect local
telecommunication equipment.
Please turn off the mobile phone
before cleaning it. Use a wet or
antistatic cloth for cleaning; avoid
using chemicals or cleansing lotions
that may cause damage to the phone.
Because the mobile phone can
generate electromagnetic fields, avoid
placing it near any magnetic objects
such as a computer or a hard drive.
Interferences are generated when the
mobile phone is used near certain
58
electronic devices, e.g., a TV set, a
telephone, a radio, and a computer.
Never leave the mobile phone
exposed to sunlight or in an
environment with strong radiation as
high temperatures will significantly
shorten the life of the electronic
components.
Always keep the mobile phone dry as
liquids could damage the integrated
circuit.
Never apply strong force to the phone
and do not drop it. Forceful actions of
this type can damage the circuit.
Please do not connect incompatible
devices to the phone.
Do not attempt to disassemble the
mobile phone or its battery.
Do not keep the mobile phone
together with a flammable or
explosive material.
Never attempt to charge the phone
without first inserting the battery.
Do not paint the phone. Paint can
cause the moving parts to stick
together and thus prevent the proper
operation.
To disconnect the device from the
mains, unplug the power cord from
59
the mains outlet. Therefore, the
device must be positioned in such a
way as to ensure unhindered access
to the mains outlet at all times, so
that you can pull out the plug from
the mains outlet immediately in an
emergency. To prevent fire hazard,
always pull out the plug from the
mains outlet after each use of the
device.
All notes apply likewise to the phone,
battery, charger, and all the accessories.
Should one of these parts malfunction,
send it to your dealer. The staff will assist
you and repair the device, if necessary.
Battery
Your phone is supplied by means of a
rechargeable battery.
Note that a new battery will not reach
its full charge until it is fully charged
and discharged two or
three times! Although the battery can
be charged and discharged hundreds
of times, it will eventually degrade. If
the operating time (talk and standby
time) is considerably shorter
60
compared to the normal operating
time, you should buy a new battery.
Disconnect the charger from the
network and from the device when it
is no longer needed! When the battery
is fully discharged, it may take a few
minutes for the charge indicator to
appear on the display or for you to
make calls.
Use only batteries and chargers
approved by your phone
manufacturer. Unplug your charger
from the mains outlet when not in
use. Do not leave the battery in the
charger for more than a week since
overcharging may shorten its life.
A fully charged battery discharges
over time when not in use.
Extreme temperatures have an
adverse effect on the performance of
your battery.
Use the battery only for its intended
purpose. Do not use damaged
chargers or batteries.
Do not short-circuit the battery. An
unintentional short-circuit may occur
when the plus and minus poles of the
battery are connected directly by means
of a metallic object. Short-circuiting the
61
poles may cause damage to the battery
or the connecting object.
Do not throw batteries into fire as there is
risk of explosion! Batteries can also
explode if they are damaged.
Batteries must be disposed of
properly!
Do not attempt to open or destroy
batteries. If a battery features liquid
leaking from it, make sure that this
liquid does not come into contact with
the skin or eyes. In case of contact
with skin or eyes, rinse immediately
with plenty of water or seek medical
advice.
Dispose of batteries according to
official regulations (e.g., regarding
recycling). Never dispose of batteries
together with household waste.
Keep temperatures between 15°C and
25°C. A phone with a too cold or
warm battery may not work
temporarily, even if the battery is fully
charged. The battery performance is
particularly affected at temperatures
below freezing.
62
Recycling
Always return your used electronic
products, batteries, accumulators, and
packaging materials to dedicated
collection points. In this way you help
prevent the uncontrolled waste disposal
and promote the reuse of material
resources.
The crossed out wheeled bin
symbol found on the product,
battery, packaging material, and
in the documentation means
that electrical and electronic
products, batteries, and accumulators
should be disposed of separately from
your household waste at their end-of-life.
This regulation applies in the European
Union. Do not dispose of these products
with the unsorted household waste
63
For your safety
Read these simple guidelines. Failure to
observe these rules can have harmful
consequences or contravene regulations.
Do not turn on the phone if the
use of mobile phones is
prohibited, or may cause
interferences or danger.
Traffic safety
Do not use your phone when
driving a vehicle.
Turn off the phone during
a flight
Mobile phones can cause
interferences with aircraft
systems.
Turn off the phone in hospitals
Follow all rules and regulations.
Turn off the phone near
medical equipment.
64
Turn off the phone at filling
stations
The mobile phone must be
turned off in the vicinity of
filling stations and other places
with explosive goods.
Interferences
Mobile phones may cause
interferences that could affect
the performance.
Traffic safety:
Do not use your phone when driving a
vehicle. Always secure the phone in its
holder; do not place the phone on the
passenger seat, or in a place where it
may come off in case of a collision or a
sudden brake manoeuvre. Remember:
Traffic safety always has priority!
Operating environment:
Always observe special regulations
applicable in a particular area, and always
turn off the phone when the use of
mobile phones is prohibited, or if
interferences are caused by the phone, or
if dangerous situations may arise.
65
Always keep the device in its normal
operating position.
Parts of the phone are magnetic. Metal
parts can be attracted by the phone, and
people with hearing aids should not hold
the phone to the ear with the hearing aid.
Always secure the phone in its holder as
metal parts can be attracted by the
handset. Do not place credit cards or
other magnetic media near the phone as
the data contained therein may be
erased.
Electronic equipment:
Most modern electronic devices have RF
(radio frequency) shielding. However,
certain electronic devices may not be
protected from the RF signals from your
mobile phone.
Pacemakers:
Pacemaker manufacturers recommend
that a minimum distance of 20 cm
between a mobile phone and a
pacemaker be maintained in order to
avoid potential interferences with the
pacemaker. These recommendations are
consistent with the independent research
and recommendations of Wireless
66
Technology Research. For people with a
pacemaker:
You should always keep a minimum
distance of 20 cm between the mobile
phone and the pacemaker when the
phone is turned on.
You should not keep the phone in the
breast pocket.
When using a mobile phone, you
should hold it to the ear that is
farthest away from your pacemaker to
reduce the risk of possible
interferences.
If you have a reason to suspect that
an interference has occurred, turn off
your phone immediately.
Hearing aids?
Some digital mobile phones may cause
interferences with some hearing aids.
Should that be the case, please contact
the service provider.
Other medical equipment:
Operation of a radio, including a mobile
phone, may interfere with the function of
insufficiently shielded medical equipment
in certain cases. If you need information
to adequately shield a medical device
67
from external RF energy, or have
questions about other subjects, please
contact a physician or a medical device
manufacturer. Turn off your phone in
healthcare facilities when prompted by
signs, notices or other written
regulations. In hospitals or healthcare
facilities, equipment that could be
sensitive to external RF energy may be
used in certain cases.
Approved locations:
Approved locations:
Turn off your phone wherever the use of
a mobile phone is prohibited.
Potentially explosive
atmospheres:
Turn off your phone when in any area
with a potentially explosive atmosphere
and obey all signs and instructions.
Sparks in such areas could cause an
explosion or fire resulting in bodily injury
or even death. Users are advised to turn
off the phone while at filling stations.
Users are reminded of the need to
observe restrictions on the use of radio
equipment in fuel depots (fuel storage
and distribution areas), chemical plants,
or where blasting operations are in
68
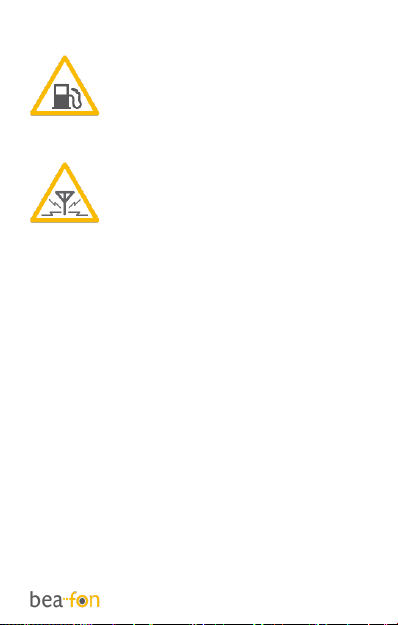
progress. Areas with a potentially
explosive atmosphere are often, but not
always, clearly marked. They include,
e.g., the below deck on boats, chemical
transfer or storage facilities, vehicles
using liquefied petroleum gas (such as
propane or butane), areas where the air
contains chemicals or particles such as
grain, dust, or metal powders, as well as
any other area where you would normally
be advised to turn off your vehicle
engine.
Vehicles:
In certain cases, RF signals may
interfere with the function of improperly
installed or inadequately shielded
electronic systems in your vehicle
(e.g., electronically controlled petrol
injections, electronic ABS (anti-lock
braking) systems, electronic cruise
control, airbag systems).
For information about your vehicle,
please contact your vehicle manufacturer
or its representative. You are also
advised to contact the manufacturer of
equipment installed in your vehicle.
69
Information
Certification information (SAR):
This phone model meets the
requirements for electromagnetic fields.
The SAR (specific absorption rate)
regulates a standard value of 2.0 W/kg as
the mean value per 10 grams of body
tissue, and this mobile phone type has a
test value of: 0.855W/kg, that is in line
with the EU Radio Equipment Directive
(RED) 2014/53/EU. The SAR values may
vary depending on national regulations
and the network band.
You can download a copy of the
declaration of conformity at any time
from our homepage at:
http://beafon.com/service/certification/
70
Declaration of Conformity:
Bea-fon Mobile GmbH hereby declares
that the SL630 model complies with the
essential requirements and other relevant
provisions of EU Directive (RED)
2014/53/EU. The full text of the
declaration of conformity can be
requested at any time.
Limitation of liability:
Bea-fon Mobile GmbH shall not bear
any liability for any relevant, indirect,
special, incidental, or inevitable
injuries caused by using this product,
including injuries which can be
predictable or not.
For any losses caused by natural
disasters (such as earthquakes, flood,
etc.) or other events or accidents
(including deliberate or accidental
misuse by the user in the context of
these accidents or other unusual
circumstances), which are outside the
scope of our liability, we disclaim any
responsibility and liability.
71
More information
Should you have questions or want to get
more information about any of our
products, you can visit our
websitewww.beafon.com. or even
contact us.
E-mail: support@beafon.com
Address
BEAFON MOBILE GmbH
4722 Peuerbach
Enzing 4
Austria
V1.0
55


Need help? Post your question in this forum.

Forumrules


Report abuse

Libble takes abuse of its services very seriously. We're committed to dealing with such abuse according to the laws in your country of residence. When you submit a report, we'll investigate it and take the appropriate action. We'll get back to you only if we require additional details or have more information to share.

Product:

For example, Anti-Semitic content, racist content, or material that could result in a violent physical act.

For example, a credit card number, a personal identification number, or an unlisted home address. Note that email addresses and full names are not considered private information.

Forumrules

To achieve meaningful questions, we apply the following rules:

Register

Register getting emails for Beafon SL630 at:


You will receive an email to register for one or both of the options.


Get your user manual by e-mail

Enter your email address to receive the manual of Beafon SL630 in the language / languages: English as an attachment in your email.

The manual is 0,9 mb in size.


You will receive the manual in your email within minutes. If you have not received an email, then probably have entered the wrong email address or your mailbox is too full. In addition, it may be that your ISP may have a maximum size for emails to receive.

Others manual(s) of Beafon SL630

Beafon SL630 User Manual - German - 72 pages


The manual is sent by email. Check your email

If you have not received an email with the manual within fifteen minutes, it may be that you have a entered a wrong email address or that your ISP has set a maximum size to receive email that is smaller than the size of the manual.

The email address you have provided is not correct.

Please check the email address and correct it.

Your question is posted on this page

Would you like to receive an email when new answers and questions are posted? Please enter your email address.


Info