765270
27
Zoom out
Zoom in
Previous page
1/29
Next page
Bartec Auto ID Ltd. JUL 2021
TECH350
Tyre Pressure Monitoring System Tool
User Guide
On/Off: hold down
for a few seconds
More information:
on some screens more
TPMS information can be
viewed
Rubber/Plastic case
USB C cable
connector
Up/Down/Left
/Right
Navigation
OBD
Socket
Enter
Home/Back/Esc:
returns to Home menu
Display
TECH350 User Guide 2021
2 | P a g e
FOREWORD
Thank you for choosing the TECH350. This manual will help you get your tool up &
running and explains how to get the most out of all its great features.
PLEASE ENSURE THAT YOUR TOOL IS FULLY CHARGED BEFORE YOU FIRST USE
IT AND BEFORE REGISTRATION.
If you need any further assistance, please visit the support pages on our website at
www.bartecautoid.com
TECH350 User Guide 2021
3 | P a g e
LIST OF CONTENTS
FOREWORD ........................................................................................................... 2
LIST OF CONTENTS ............................................................................................... 3
IMPORTANT NOTICES ............................................................................................ 4
SAFETY PRECAUTIONS ........................................................................................... 5
BEFORE GETTING STARTED ................................................................................... 7
KIT COMPONENTS ................................................................................................. 7
REGISTRATION ....................................................................................................... 8
CHARGING TOOL ................................................................................................. 11
POWER ON/OFF SEQUENCE ............................................................................. 11
HOME MENU ...................................................................................................... 12
MORE TPMS INFORMATION ............................................................................... 13
SELECT A VEHICLE ............................................................................................... 13
NEW SERVICE ...................................................................................................... 14
1/6 CHECK SENSORS .......................................................................................... 15
2/6 PROGRAMMABLE SENSOR ............................................................................ 17
3/6 RELEARN ...................................................................................................... 18
4/6 OBD DIAGNOSTICS ..................................................................................... 20
5/6 TECHNICAL INFORMATION ........................................................................... 21
6/6 REVIEW VEHICLE DATA ................................................................................ 22
SETTINGS ............................................................................................................. 23
TPMS DESKTOP ................................................................................................. 24
REPORTS ............................................................................................................. 24
UPDATING THE TOOL VIA USB CABLE ................................................................ 26
APPENDIX ............................................................................................................ 27
TECHNICAL SPECIFICATION .................................................................................. 29
TECH350 User Guide 2021
4 | P a g e
IMPORTANT NOTICES
SAFETY DEFINITIONS
All Danger, Warning, Important, and Note messages must be followed for your safety. These
safety messages are in the following form
DANGER: Means you may risk possible loss of life.
WARNING: Means you may risk possible bodily harm.
CAUTION: Means you risk damage to the vehicle or the tool.
These safety messages cover situations Bartec is aware of. Bartec cannot know, evaluate and
advise you as to all the possible hazards. You must be certain that any conditions or service
procedures encountered do not jeopardise your personal safety.
COPYRIGHT
No part of this manual may be reproduced, stored in a retrieval system or transmitted, in any
form or by any means, electronic, mechanical, photocopying, recording, or otherwise, without
the prior written permission of Bartec.
DISCLAIMER
All information, illustrations, and specifications contained in this technical instruction manual
are based on the latest information available at the time of publication. The right is reserved to
make changes at any time without obligation to notify any person or organization of such
revisions or changes. Further, Bartec shall not be liable for errors contained with the furnishing,
performance or use of this material.
TECH350 User Guide 2021
5 | P a g e
SAFETY PRECAUTIONS
Read carefully the installation, operating and maintenance instructions in the Operator’s
manual.
Do not allow unqualified persons to use this equipment. This will prevent injury to persons and
damage to the equipment.
The work place must be dry, sufficiently lit and well ventilated.
Do not forget that breathing carbon monoxide (odourless) can be very dangerous and even
fatal.
WHEN WORKING ON THE VEHICLE:
Wear suitable clothing and act in such a way as to prevent industrial accidents.
Before starting, check to be certain the gear shift is in neutral (or in PARK (P) if the
transmission is automatic) and put the handbrake on and check to be sure the wheels
are completely locked.
Do not smoke or use naked flames when working on a vehicle.
Wear safety glasses to protect your eyes from dirt, dust or metal chips.
DISPOSING OF EQUIPMENT
Do not dispose of this equipment as miscellaneous solid waste but arrange to have
collected separately.
The re-use or correct recycling of electronic equipment (EEE) is important in order to
protect the environment and human health.
In accordance with European Directive WEEE 2012/16/EU, special disposal points are
available for waste electrical and electronic equipment.
Public administrators and producers of electrical and electronic equipment are involved
in facilitating the re-use and recovery of waste electrical and electronic equipment
through these collection activities and use of appropriate planning arrangements.
Unauthorised disposal of waste electrical and electronic equipment is punishable by
law with appropriate penalties.
DISPOSING OF BATTERIES
The TECH350 contains a Lithium Polymer rechargeable battery which is accessible to
the user.
Batteries must be recycled or disposed of properly. Do not throw batteries away as part
of normal refuse disposal.
Do no throw batteries on to an open fire
CORRECT USE OF THE TOOL
Do not expose the tool to excessive moisture.
Do not use the tool near sources of heat or polluting emissions (stoves, ovens, etc.).
Do not drop the tool.
Do not allow the tool to come into contact with water or other liquids.
Do not open the tool or attempt to perform maintenance or repair operations on any
internal parts.
You are advised to keep the packaging and to re-use it if the tool is moved to another
site.
TECH350 User Guide 2021
6 | P a g e
WHEN USING THE TOOL REMEMBER:
Do not subject the tool to magnetic or electric interference.
RECEPTION, MAINTENANCE AND GUARANTEE:
Inspect the tool when delivered. Damage sustained during shipment is not covered by the
guarantee. Bartec will accept no responsibility for material or bodily harm resulting from
inappropriate use of the product, failure to maintain it, or incorrect storage conditions.
Bartec provides training for clients desirous of acquiring the knowledge required for the correct
use of its products.
Only personnel authorized by Bartec are permitted to make any repairs that may be necessary.
This tool is guaranteed against any manufacturing fault for 12 months as of date of invoice
(parts and labour) only if product has been correctly used. Serial number must stay readable
and proof of purchase must be retained for presentation upon request.
Bartec Auto ID Ltd
Unit 9
Redbrook Business Park
Wilthorpe Road
Barnsley
S75 1JN
+44 (0) 1226 209226
TECH350 User Guide 2021
7 | P a g e
BEFORE GETTING STARTED
1. Charging
NOTICE: Only use the power supply or USB cable that is included in the TECH350 tool kit to
charge this tool. The use of un-approved power supplies may damage it and will void the tool
warranty.
2. Registration
The Bartec TECH350 can be registered through the TPMS Desktop software, found at
www.tpmsdesktop.eu. This allows the user to update the tool to the latest software through
the method they prefer.
3. Update
Once the tool is registered through TPMS Desktop, verify the software level loaded to the level
available online and update the tool if necessary. Updating through the TPMS Desktop is
recommended.
4. Disconnecting from PC
NOTICE: Before disconnecting the tool from a PC, please ensure to “safely remove hardware”
first, by locating the “Safely Remove Hardware” icon on the lower right hand side of the PC
screen. This will prevent the data on the tool from being corrupted.
KIT COMPONENTS
The TECH350 kit inside the tool box includes:
TECH350 TPMS activation tool
OBD Cable
USB cable
Identifying Kit Components and Features
The TECH350 tool is battery operated and generates a low-frequency magnetic field to
activate tyre sensors. It receives UHF radio signals from the tyre sensors typically at 434MHz.
USB Cable
OBD Cable
TPMS
activation
tool
TECH350 User Guide 2021
8 | P a g e
REGISTRATION
Automatic registration takes place when the tool is first turned on. Registration enables the
notification of software updates and the ability to download update files to the tool. Once an
account has been made with TPMS Desktop, the tool will be registered to that account, and
the latest available updates will be downloaded.
To register a tool, navigate to the Bartec TPMS Desktop at tpmsdesktop.eu on your PC.
Download the TPMS Desktop software, and then install it using ‘setup.exe’. When the TPMS
Desktop has been load for the first time, the user will be presented with the following:
Screen when you first turned the
tool on.
TECH350 User Guide 2021
9 | P a g e
Select ‘Register’ to create a new account. The following screen will be displayed:
It is important to fill in all fields completely and accurately. This information will help Bartec
remain in contact regarding updates and other important TPMS information. Choose a
username (without a space) and password.
If the details are accepted, this message will show:
The following email should arrive within a few minutes:
When clicking ‘Confirm account’ it will bring the user to the website and the following page
will show that the registration was successful. Return to the TPMS Desktop to login.
TECH350 User Guide 2021
10 | P a g e
After Login, the main screen of the TPMS Deskop is displayed.
Connect the TECH350 to the computer. The TPMS Desktop will automatically register the
tool, and will display the message: “tool successfully registered”. The TPMS Desktop will
then check for any updates that can be applied to the tool. Alternatively, the user can
navigate to ‘Update’.
Once registered, the user will see the tool listed, along with a whether the tool is up to date:
Updating the TECH350 and keeping it up to date using the TPMS Desktop is recommended.
TECH350 User Guide 2021
11 | P a g e
CHARGING TOOL
The TECH350 is shipped with a minimum charged battery. It is recommended that the tool is
charged 2+ hours before first use. For optimum performance, always keep it sufficiently
charged.
The TECH350 will notify the user when the battery has low power, and the battery icon will
change colour from white to red. When there is an insufficient amount of power remaining in
the battery, the TECH350 will save all of the TPM Data and then power itself off.
POWER ON/OFF SEQUENCE
Press and hold the power button for two seconds to power on the tool. To power off the
tool, press and hold the power button for three seconds.
Auto power off is after 10 minutes of inactivity. This can be changed in the Settings menu.
The unit automatically powers up when the charger or USB port is in use auto power off is
not operational. The tool cannot be operated when plugged in.
TECH350 User Guide 2021
12 | P a g e
HOME MENU
New Service
Used to check sensors, relearn sensors to the vehicle,
perform OBD diagnostic, program sensors, and
receive TPMS information
Resume Service
Used to resume your last job
History
Used to call up all stored works. User is able to search
by registration or model, and can also use this history
function to upload and clear Service Data.
Toolkit
Allows the user to test the signal strength of a keyfob
(RKE Test), and test the strength of a UHF signal (UHF
monitor).
Settings
Used to set up your personal settings in the tool
language, units, auto off, sound, etc.
Training
Used to get tips related to TPMS
TECH350 User Guide 2021
13 | P a g e
MORE TPMS INFORMATION
If you see this icon on the screen press for more TPMS information or TPMS
options.
SELECT A VEHICLE
When starting a New Service, the user will be prompted to select the vehicle that
requires TPMS maintenance. Scroll through the menus to select the correct
manufacturer, model and year to see all available service functions.
TECH350 User Guide 2021
14 | P a g e
NEW SERVICE
Check Sensors
This uses a quick and easy to follow
process which allows the user to read
sensors, process the data, read battery
status & IDs.
Relearn
All relearn procedures are available
OBD Diagnostics
Used to diagnose vehicle problems, receive
sensor IDs and reads the vehicle VIN
Program Sensor
Create
Copy/clone ID (single)
Copy/clone ID (set)
Copy using stored data
Enter ID manually
Multiprogramming
Identify Universal sensor
Technical Information
Detailed sensor & service kits information
Vehicle Data
Allows the user to review the service data
captured with the TECH350
TECH350 User Guide 2021
15 | P a g e
1/6 CHECK SENSORS
Use this function to test the fitted sensors before continuing with further steps.
To check the status of the TPMS sensors on the vehicle, select Check Sensors from the Service
Screen. A screen similar to the following should be displayed:
Use the arrow keys to select the sensor which needs to be read.
LF activated sensors
To test a sensor the tool should be placed alongside the valve stem and the ‘Test’ key
pressed.
Tool Positioning
Do NOT touch the metal rim. The tool needs to point through the rubber at the sensor.
(Note: with Ford Banded sensors the tool should be held 180°/opposite from the stem’s
position)
Non-LF activated sensors (some Beru sensors up to 2009)
If the tool requires rapid tyre deflation (of the order of 10psi or 0.5bar), then deflate the tyre
and place the tool alongside the stem while pressing the test key.
During testing, the screen confirms the sensor type being tested and displays a progress bar.
Different makes of Sensors respond at different speeds/ time intervals.
TECH350 User Guide 2021
16 | P a g e
POSSIBLE READING SCENARIOS
Note that if a faulty Sensor has been replaced, some method of relearn procedure will need to
be followed, as explained later in this manual.
Successful Sensor Read
Sensor was successfully activated and
decoded. Displays pressure (in Bar or PSI) at
wheel location.
Failed Sensor Read
No Sensor Activation or Decode. May be wrong
sensor fitment or non-functioning sensor. Tool will
prompt to attempt reading the sensor 3 times.
Duplicate ID
A Sensor with a duplicate ID has been read. Tool will
direct to re-read those sensors.
Wrong Sensor Type
A Sensor was activated and decoded, but
does not match the protocol for the Make Model
Year that the tool was set-up for.
No Pressure
Low Sensor Battery
Sensor’s internal battery has dropped below a
certain voltage threshold.
TECH350 User Guide 2021
17 | P a g e
2/6 PROGRAMMABLE SENSOR
The “Program Sensors” on the service menu enables the function of programming aftermarket
replacement sensors like the HUF IntelliSens, Alcar Sensors, Alligator sens.it or the Schrader
EZ-sensor. Even when they are already mounted in a wheel or programmed to another vehicle.
The user can choose from a selection of sensors which match the preselected MMY.
Copy Sensor Set
Used to Copy/Clone a winter tyre set with the same ID´s as the summer
tyre set. Requires the reading of the old sensor to program the same ID on
the replacement sensor to avoid the relearning process.
Create ID
Used to create a single sensor with a new ID. Can be repeated as many
times as requested. The ID needs to be relearned to the vehicle’s ECU. The
following pages will describe this procedure.
Copy/Clone ID
Used to Copy/Clone a single ID. Can be repeated as many times as
requested. Requires the reading of the old sensor to program the same ID
on the replacement sensor to avoid the relearning process.
Enter ID Manually
Used to create a Sensor with a new ID that can be typed in manually. This
option only appears for some sensors. If it is not possible to copy the ID,
enter the same ID manually, which is written on the sensors body.
Copy Using
stored data
Gives you the option of using stored IDs either read from the TPMS sensors
or from the vehicle OBD
The current coverage list is available at www.bartecautoid.com
The user has the option to either create or copy the ID.
Notice: Sensors need to be read before copying.
Sensors that can be programmed by the tool may have slightly different procedures and times.
TECH350 User Guide 2021
18 | P a g e
Recommended sensor position for programming:
3/6 RELEARN
To find out which relearn type is available for a vehicle, just turn on the tool and select Relearn.
Or refer to the current coverage list at www.bartecautoid.com > Downloads.
Stationary Relearns:
Stationary Relearns use the vehicles on-board TPMS system to listen for transmissions from
sensors while the vehicle is in a “Learn Mode”.
Once the vehicle is in Learn Mode, use the tool to activate the sensors. The vehicle will listen
for the sensor IDs and learn them to the vehicle.
Active (Drive) Relearns:
Some vehicles can be reset by driving. Refer to the on-screen relearn procedures for details on
how far/long to drive. It can take up to 20 minutes to relearn the sensor IDs.
OBD Relearns:
OBD connection allows the TECH350 to directly program the vehicle electronics module with
sensor IDs.
Note that not all vehicles support vehicle communications modes.
OBD can be connected when all sensors are successfully read and the message “All Sensors
OK” is displayed.
Please use the Technical Information” menu and select “View Vehicle Info” to find the OBD
location.
Relearn Information:
This contains extra information about the relearn for the selected vehicle, which can assist you
if you have any problems. An example would be for some Toyota and Lexus vehicles which use
a summer and winter tyre set.
After selecting a Relearn method, follow the instructions given by the tool to relearn Sensors.
TECH350 User Guide 2021
19 | P a g e
As well as the pressure and temperature, we also display the mode” of the sensor. In some
cases the mode cannot be changed and isn’t important, but in some cases it will need to be
changed in order for the relearn to work.
For example if sensors for a vehicle show “Park” or “Drive” they are already in the correct mode.
Otherwise use the Mode Changecommand in the Quick Access Menu. If the sensors are
shown as Ship, Off or Test mode, put them in Park mode, using the “Mode Change” command
in the Quick Access Menu
Press the to access the Quick Access Menu and see the options available for the vehicle
requiring a Relearn. Options that are not required on a vehicle will not be displayed.
Special service advice for Toyota Models:
Toyota ECU
Reset
If at any time the vehicle TPMS Reset button is pressed with the new
sensor IDs fitted, the ECU OBD relearn will not work until the Toyota
ECU Reset is selected (with the tool connected to OBD). The TPMS
Reset button should only be used to set new tyre pressures, and on
some vehicles to change between winter and summer ID sets.
Special service advice for Kia and Hyundai Models:
Reset YD Sensor
For some Kia and Hyundai vehicles with the newer low line TRW YD
sensors, this allows you to put the sensors back into the correct mode
(Sleep or Rest) to work with the vehicle.
Selected tyre.
Processing order:
Left Front,
Right Front,
Right Rear,
Left Rear
TECH350 User Guide 2021
20 | P a g e
These specific Service advices will only appear if applicable for the preselected Make,
Model and Year combination.
4/6 OBD DIAGNOSTICS
OBD
Diagnostics
This option will only be
listed for vehicles that
Bartec has OBD
coverage for. It reads
information from the
vehicle such as the VIN,
DTCs (Diagnostic
Trouble Codes) and the
IDs of the sensors.
TECH350 User Guide 2021
21 | P a g e
5/6 TECHNICAL INFORMATION
Sensors do not have to be read to access the following information.
View Replacement Parts
Used to show all Replacement Sensor part numbers that can be
fitted to the preselected MMY
View Service Kits
Used to show all Replacement Service Kit part numbers that
can be fitted to the preselected MMY
View Sensor
Characteristics
Used to show technical sensor information of the sensor that
needs to be fitted. e.g. Nut torque settings
Technical
Information
Gives detailed
information about
replacement parts,
service kits, sensors,
vehicles and service
tips.
View
Vehicle
Information
This option provides
information about the
Relearn method, the
OBD port location and
if there are
programmable Sensors
for the preselected
MMY available.
View
Service
Tips
This option provides
information about the
specific meaning of
the TPMS light as well
as common
mechanical faults for
the preselected MMY.
TECH350 User Guide 2021
22 | P a g e
6/6 REVIEW VEHICLE DATA
Sensors and OBD need to have been read for data to be shown.
The menu gives direct access to specific screens that display the Vehicle data. This option is
helpful if the user wants to have a second look at the Sensor and OBD Data.
TECH350 User Guide 2021
23 | P a g e
SETTINGS
Connections
Connect with an OBD cable and TPMS Desktop.
General
Check and update time and date on the tool, and change the
language displayed
Sound
Enable or disable tool sounds
TPMS
Change the units displayed when reading a TPMS sensor, for
Pressure, Temperature, and the TPMS ID
Power
Change the length of time before the tool automatically turns off
Tool Info
Display the tool info, including software version, serial number
etc.
Update Tool
Update the tool to the latest software (requires the tool to be
registered; see page 14).
Restore Default
Restore the tool settings to factory settings.
TECH350 User Guide 2021
24 | P a g e
TPMS DESKTOP
The TPMS Desktop provides revolutionary technology to help
manage Bartec TPMS tools on a PC. The TPMS Desktop is designed to work with the following
Bartec tools; TECH400, TECH300, TECH500, TECH350, TECH450, TECH600, and the
TAP100/200.
Go to www.tpmsdesktop.eu to download your FREE copy now!
Reports
Complete job reports recorded and stored when needed
Update
Automatically retrieve update files from the current registered account
Vehicle List
Lookup TPMS information for a vehicle quickly and easily
Display
Software available to display vehicle details, tyre pressure and tread depth
readings on a TV or Monitor for Tyre shop garages or waiting rooms
REPORTS
Search, view and print job reports. This preformatted and detailed record contains the
necessary job information needed for users and customers! To sort or filter reports by date,
make, model and year. Or to print a report and attach it to the invoice as proof of work
completed. Reports can be used to create customer receipts and limit liability.
UPDATE
Register and update the Bartec Tool with the latest software. This feature helps to keep control
of all tools in use and updates them with the most current software available. Simply connect
the tool to a PC with TPMS Desktop installed and click
Update
. This is the preferred method
for updating the TECH350.
VEHICLE LIST
Browse the extensive vehicle and sensor database. Search by make, model and year to quickly
find the data needed: OBD location, TPMS relearn, sensor information it’s all there with
TPMS Desktop. Plus, the database is regularly updated.
TECH350 User Guide 2021
25 | P a g e
SYSTEM SETTINGS
Configure the TPMS Desktop Application to meet the tyre shop’s needs. Connectivity is just a
few clicks away with TPMS Desktop.
DISPLAY
Garage/Tyre shop display screen functionality enables the technician to show the customer
their vehicle readings on a TV or monitor in the garage or waiting room. Gives the customer
more confidence and sells more tyres.
TECH350 User Guide 2021
26 | P a g e
UPDATING THE TOOL VIA USB CABLE
The tool is compatible with PCs running Windows operating systems.
Step 1:
Power on the TECH350 and connect to a PC. The Tool will display a USB icon, to indicate
that it is ready to receive update files.
Step 2:
Navigate to TPMS Desktop, and login. If the User does not have TPMS Desktop or has not
registered the TECH350, please refer to the Registration pages in this document.
Step 3:
TPMS Desktop will check for the latest available update for the TECH350. If there is an update
available, a notification will be displayed. Select ‘OK’ to confirm that the update can be applied
to the tool.
Step 4:
TPMS Desktop will download the update files to the TECH350. When the files have been
successfully downloaded, the TECH350 will install the files. Do not unplug the tool before the
update has completed.
IMPORTANT: Please ensure that you “safely eject hardware” from the PC before unplugging
the TECH350. This is to prevent data on the tool from being corrupted.
Step 5:
The tool is now updated and ready to go. The user can confirm that the tool is up to date via
TPMS Desktop. The software version can also be checked in the Tool Info screen.
Trouble Shooting Tips:
If Windows does not recognize the tool, please check that the USB cable is connected,
that the tool is in update mode, and that there are no unnecessary update files on your PC
available.
If the tool becomes corrupted after being disconnected from the PC without safely
ejecting it, the user can perform a check to attempt to fix the issue. To do so, right click on
the drive you wish to scan, and navigate to “Properties”. Select “Tools” from the available
options, and then select “Check”, to allow the PC to begin checking the device.
TECH350 User Guide 2021
27 | P a g e
APPENDIX
APPENDIX A: Vehicle Identification Number (VIN)
When using the TECH350 tool, it is important for the user to verify the Model Year to help
insure looking for that proper sensor and using the proper vehicle
COMs when necessary.
By using the vehicles VIN and locate the 10th digit from the left
the user can in most cases accurately determine the vehicle’s
Model Year. Take that digit and reference the chart on this sheet.
This will be the Model Year which needs to be selected on the tool.
APPENDIX B: TPMS SYSTEM REVIEW
When cycling the ignition for off to run, the TPMS tell-tale should come on,
and go off. This would indicate a system with no fault present.
Solid Light: Pressure Problem
Check the tyre pressures, and adjust to placard.
NOTE: Some vehicles are equipped with sensors in
the spare. Also, with some vehicles, over pressure
may turn on the light.
Flashing Light: System Problem
System problems can range from faulty sensor(s) to
sensors on the vehicle that haven’t been learned to
that vehicle.
10th Digit in
VIN
Year
W
1998
X
1999
Y
2000
1
2001
2
2002
3
2003
4
2004
5
2005
6
2006
7
2007
8
2008
9
2009
A
2010
B
2011
C
2012
D
2013
E
2014
F
2015
G
2016
H
2017
J
2018
K
2019
3 = 2003
TECH350 User Guide 2021
28 | P a g e
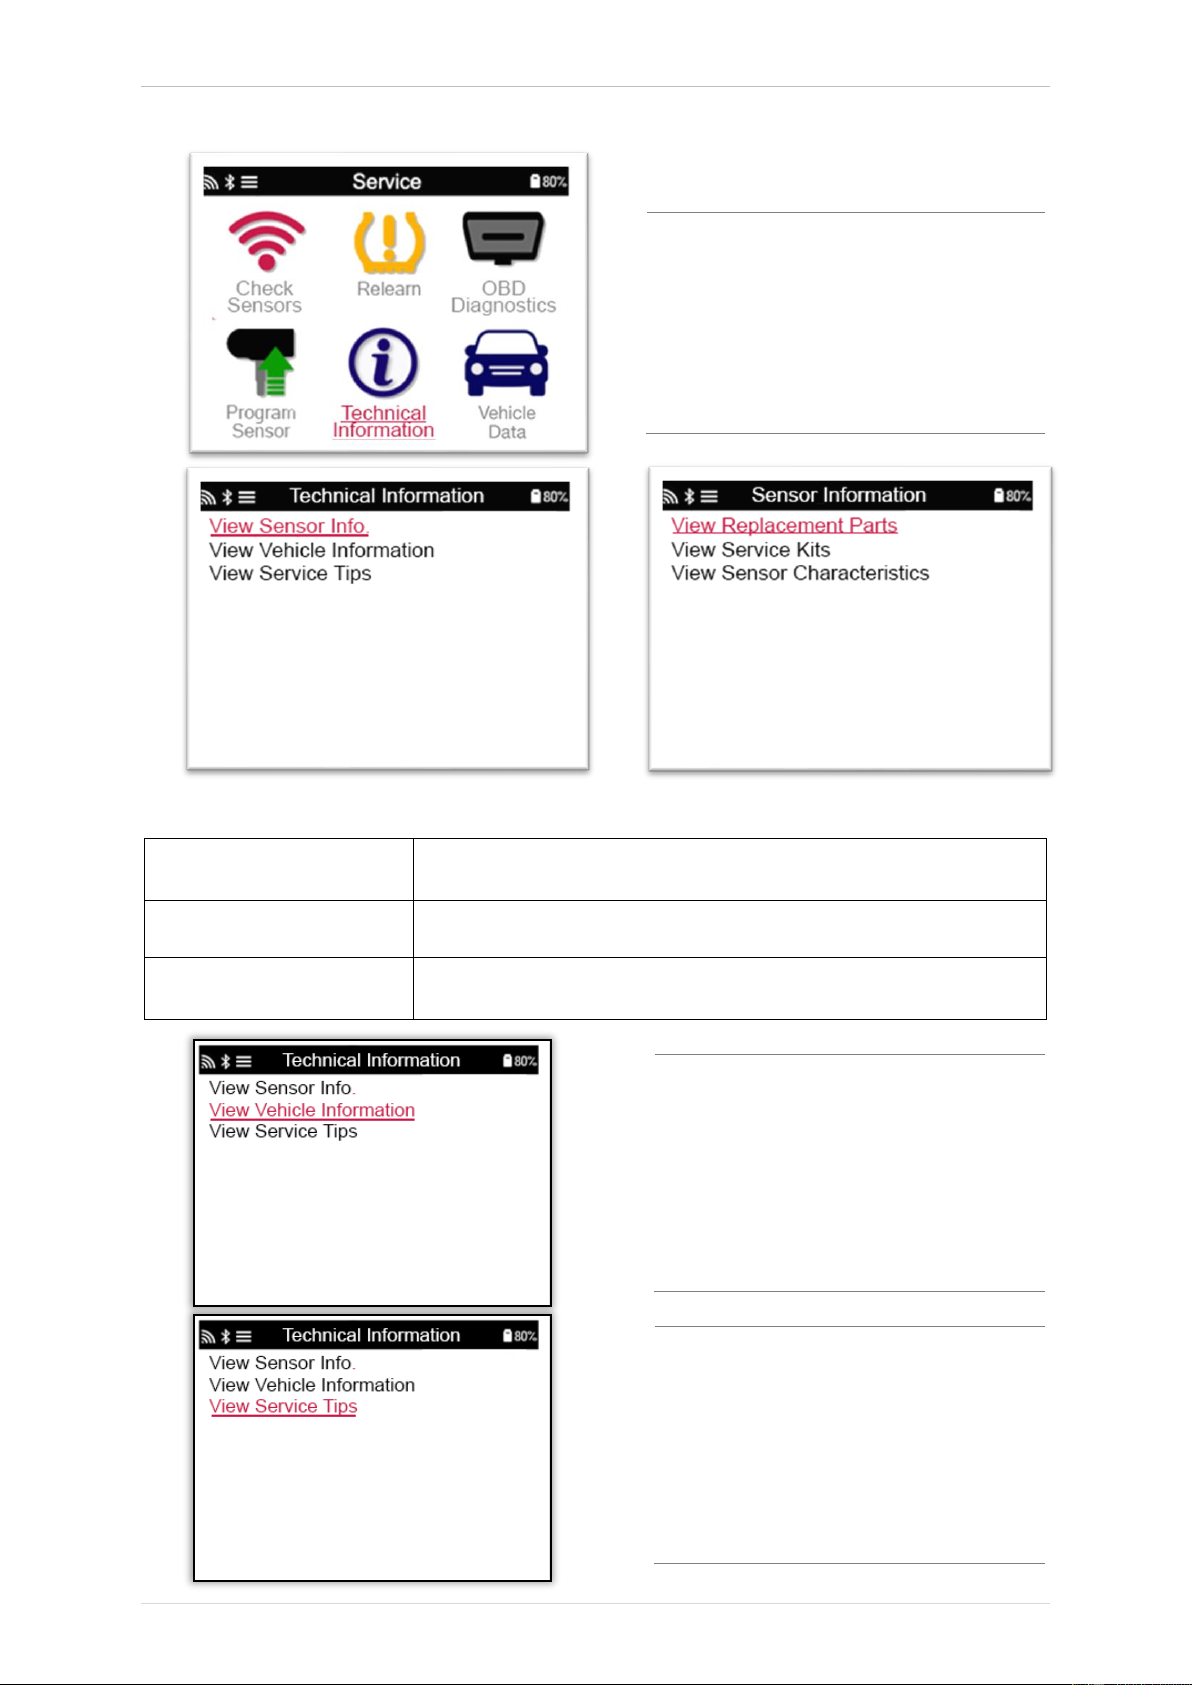
APPENDIX C: MODES and MODE CHANGING
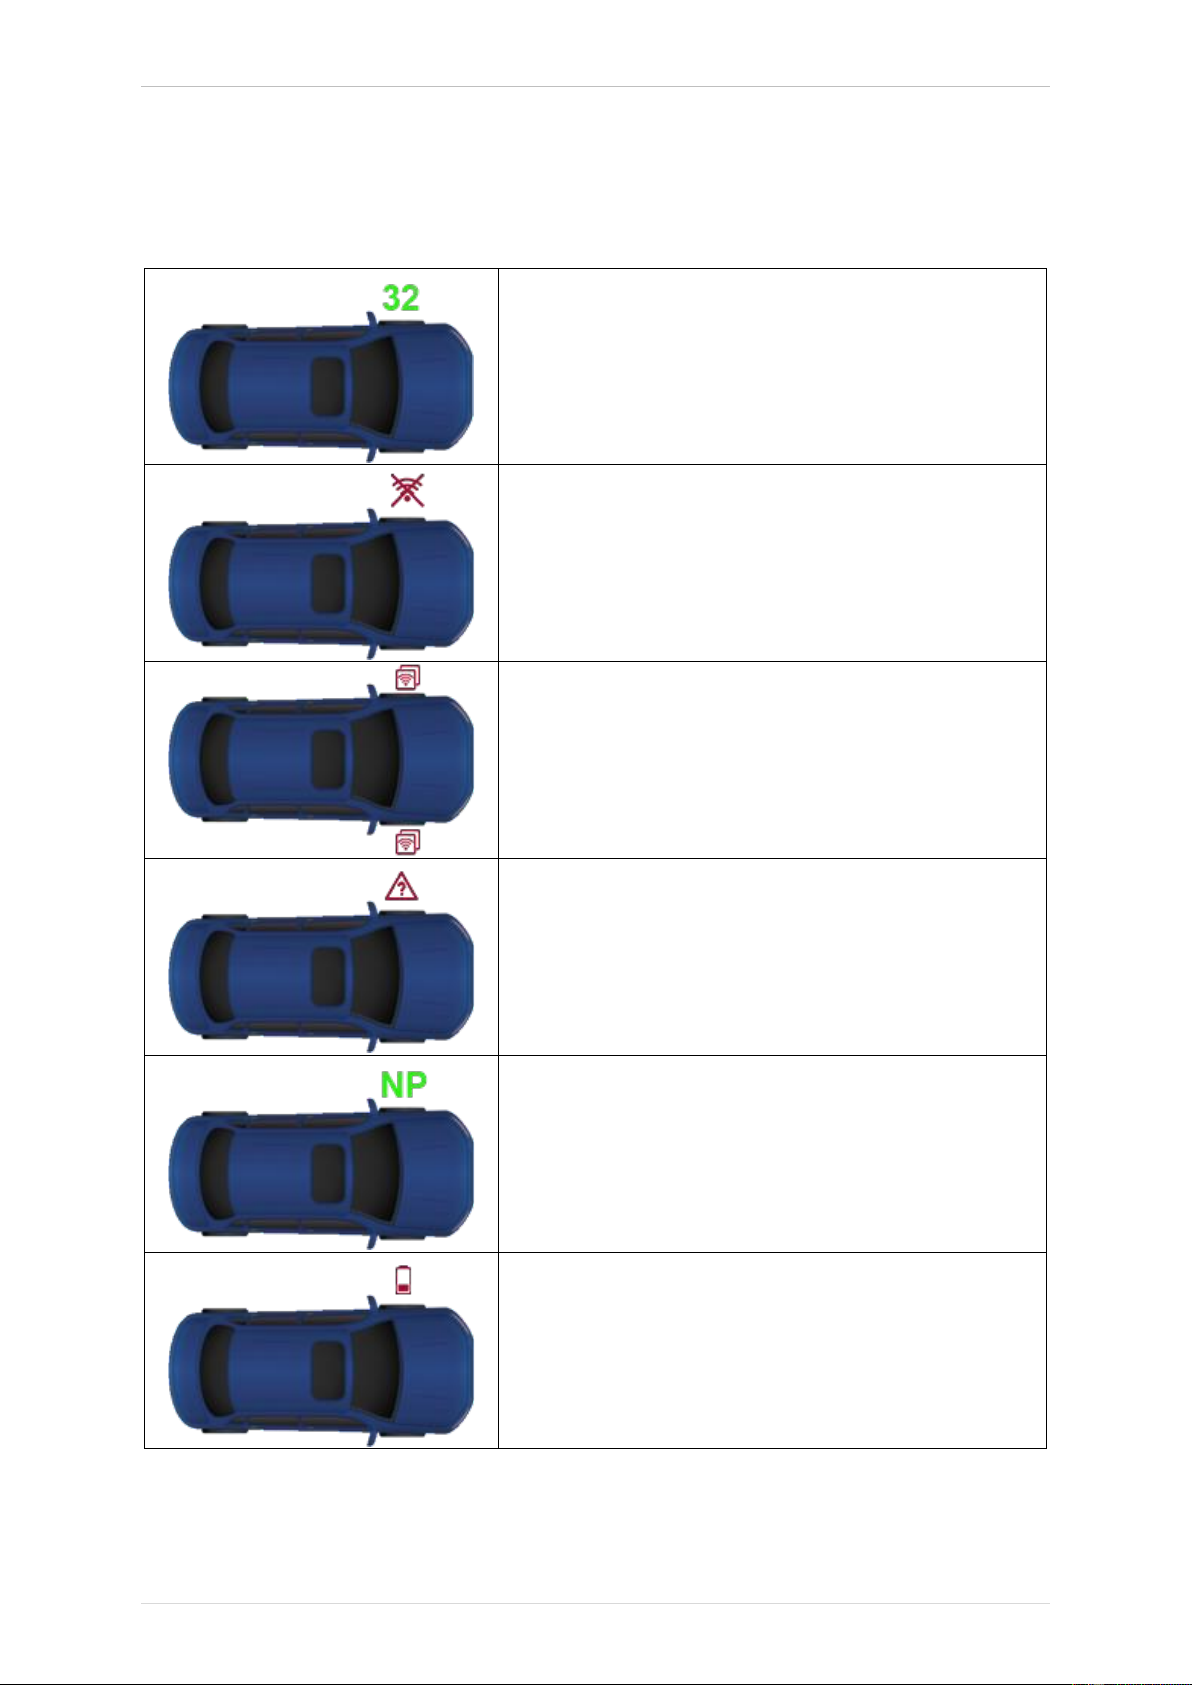
Sensors can have many different “modes” when they have been read, such as Learn, Tool LF,
YD Sleep, YD Rest, Hi Norm Dly. Some of those are called sleep mode to preserve battery life.
Mostly, these modes are not important because the sensor will be supplied already in the
correct mode to use. But for some sensors made by Continental it is important that the mode
is displayed as “Park”, as otherwise it will not work on the vehicle.
The TECH350 tool has the ability to perform the necessary mode change. If a sensor is shown
as “Ship”, Test” or “Off” and the relearn toolkit provides the option “Set Sensor to Park Mode”,
please use this option to change the sensor mode into the correct one:
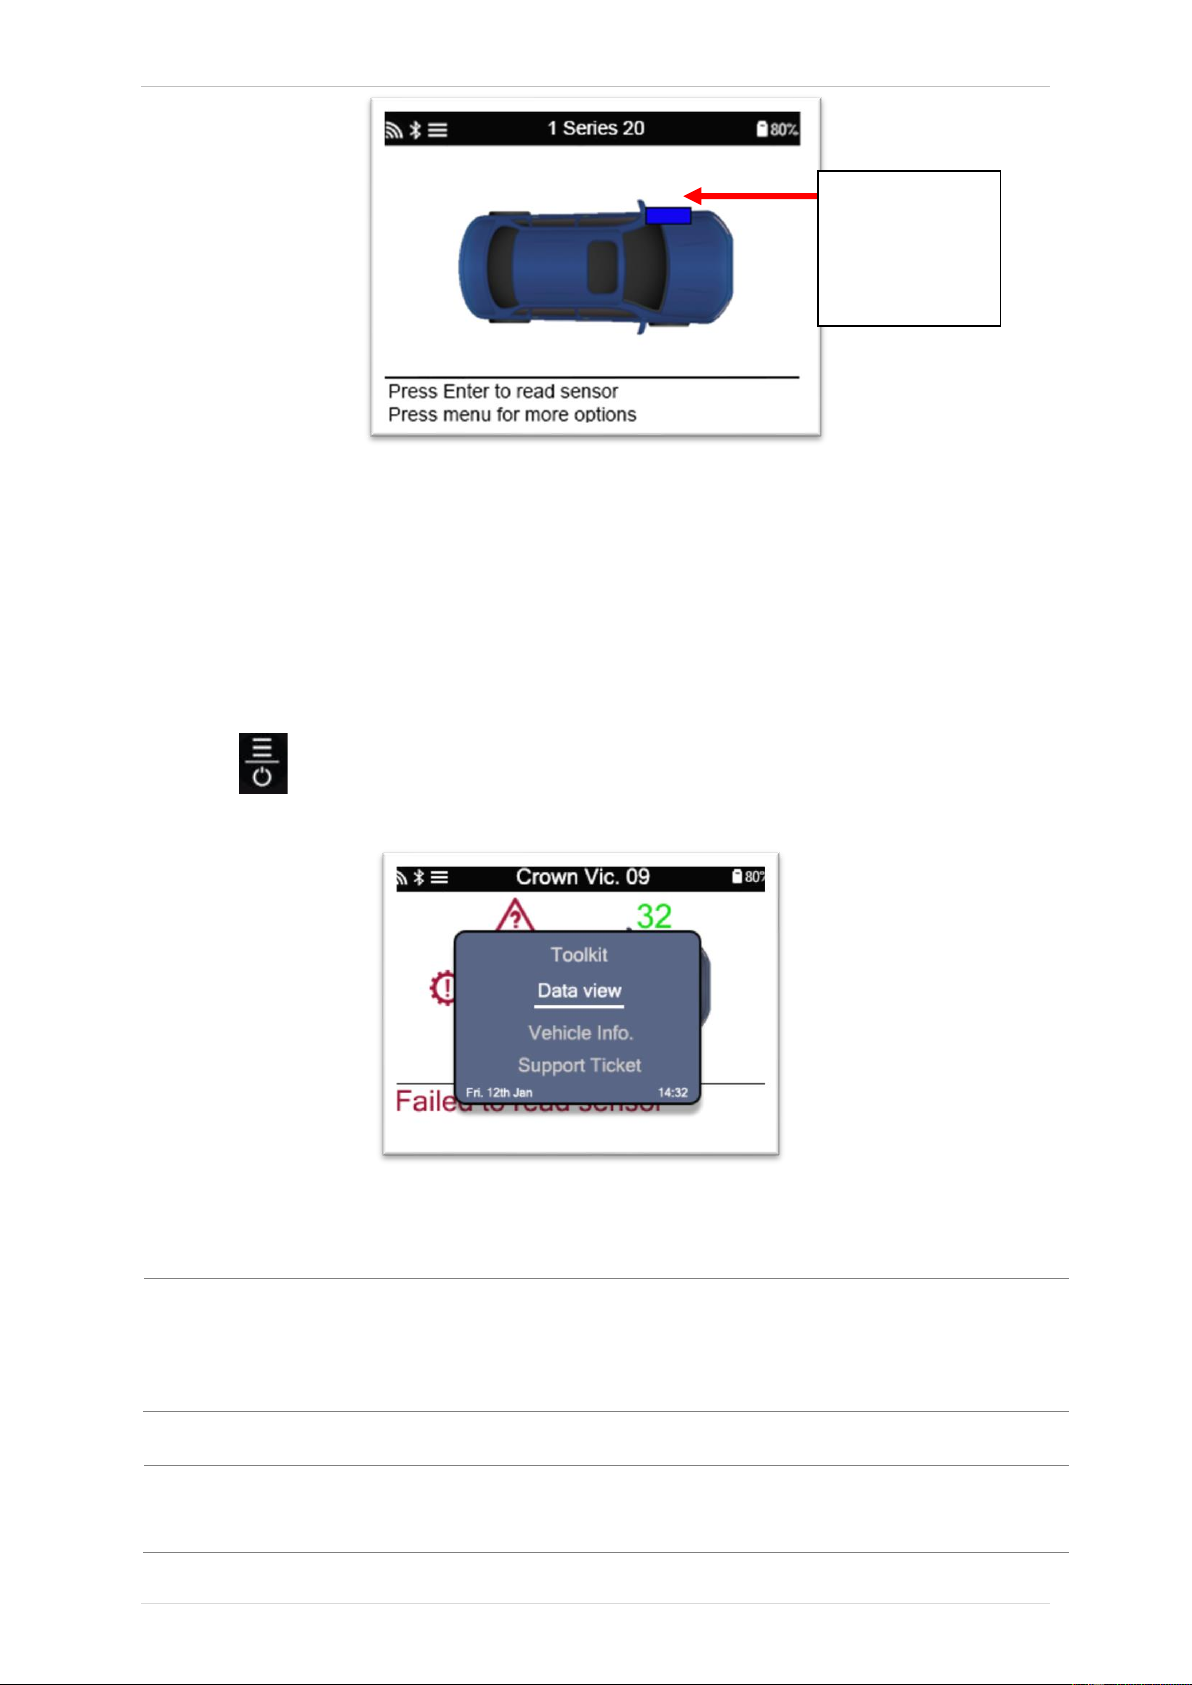
Go to “Relearn” and select vehicle (MMY).
Press enter when relearn procedure shows.
Select the spanner in the upper left corner with the Up/Down buttons. Press Enter.
Select “Set Sensor to Park Mode”, press Enter.
Go to the wheel, hold the tool near the sensor and press “Test”.
Repeat for each wheel.
Start the Relearn procedure.
Also, some sensors are supplied in a mode where they cannot be read by the tool unless they
are pressurized in a wheel. Some examples would be replacement sensors bought from a Ford
dealership, and some Mitsubishi Continental sensors.
APPENDIX D: COMMS ERROR TROUBLESHOOTING
If a problem or error occurs during the COMMS process, follow the steps below before calling
customer support.
Check vehicle ignition
Vehicle ignition must be in the RUN position in order for vehicle COMMS process to complete.
Check cable to tool connection
Ensure the OBD cable is connected at the OBD socket.
Check cable connection at vehicle
Make sure OBD cable connection is good.
Verify Make, Model, and Year
COMMS can change from Model to Model, and Year to Year. Verify the tool is set-up to the
proper MMY.
Verify tool power level
If the tool has a low battery charge, this may affect the COMMS process. Charge tool and try
again.
TECH350 User Guide 2021
29 | P a g e
TECHNICAL SPECIFICATION
Power Supply
Lithium Polymer rechargeable battery (replaceable).
Max power consumption
1.5W Schrader TPM, 0.5W all others
Display
LCD 16-bit colour, graphic, resolution 320x240
Keyboard
7 keys, dust, water and grease-resistant
Input/output
USB C used to Connect to PC for firmware update and audit
file download.
Vehicle connection
Uses OBD cable to connect to the vehicle
Working environment
Temperature 0°C - 45°C, Humidity: 20-55%
Storage environment
Temperature 10°C - 50°C, Humidity: 20-60%
Dimensions
187mm x 107mm x 47mm
Weight(including batteries)
490g
Radio frequency bands in which this equipment operates:
315-433MHz - receive only
125KHz - 10uT @ 8cm maximum magnetic field
Simplified EU Declaration of Conformity
Bartec Auto ID Ltd hereby declares that this device is in compliance with the essential
requirements and other provisions of Directive 2014/53/EU (RED).
The full text of the EU Declaration of Conformity is available at:
https://www.bartecautoid.com/pdf/simplified-eu-declaration-of-conformity.pdf
Simplified UK Declaration of Conformity
Bartec Auto ID Ltd hereby declares that this device is in compliance with the essential
requirements and other provisions of The Radio Equipment Regulations 2017.
The full text of the UK Declaration of Conformity is available at:
https://www.bartecautoid.com/pdf/simplified-eu-declaration-of-conformity.pdf
27


Need help? Post your question in this forum.

Forumrules


Report abuse

Libble takes abuse of its services very seriously. We're committed to dealing with such abuse according to the laws in your country of residence. When you submit a report, we'll investigate it and take the appropriate action. We'll get back to you only if we require additional details or have more information to share.

Product:

For example, Anti-Semitic content, racist content, or material that could result in a violent physical act.

For example, a credit card number, a personal identification number, or an unlisted home address. Note that email addresses and full names are not considered private information.

Forumrules

To achieve meaningful questions, we apply the following rules:

Register

Register getting emails for Bartec Tech 350 at:


You will receive an email to register for one or both of the options.


Get your user manual by e-mail

Enter your email address to receive the manual of Bartec Tech 350 in the language / languages: English as an attachment in your email.

The manual is 1,98 mb in size.


You will receive the manual in your email within minutes. If you have not received an email, then probably have entered the wrong email address or your mailbox is too full. In addition, it may be that your ISP may have a maximum size for emails to receive.

Others manual(s) of Bartec Tech 350

Bartec Tech 350 User Manual - German - 30 pages

Bartec Tech 350 User Manual - Dutch - 30 pages

Bartec Tech 350 User Manual - French - 30 pages


The manual is sent by email. Check your email

If you have not received an email with the manual within fifteen minutes, it may be that you have a entered a wrong email address or that your ISP has set a maximum size to receive email that is smaller than the size of the manual.

The email address you have provided is not correct.

Please check the email address and correct it.

Your question is posted on this page

Would you like to receive an email when new answers and questions are posted? Please enter your email address.


Info