108611
16
Zoom out
Zoom in
Previous page
1/34
Next page
GB 11GB 10
assemblyassembly
The most important dimensions are shown on the previous
page. You can set the height of the telescopic pipe. Take the
allowable tolerances into account.
Position the discharge and the electrical connection in such a
way that it will be easy to hook up the hood.
Draw a vertical centre line on the wall (centre of the extractor
hood). Begin the line at the ceiling and end it at the point
where the underside of the extractor hood should come. Be
careful to keep the minimum distance between the hob and
the extractor hood.
Place the fastening clip against the wall so that it rests
against the ceiling. Keep the marking notches of the
attachment bracket on the centre line that has been marked-
out. The arrow on the flanged rim indicates the middle of the
cooker hood. Mark the attachment holes.
Drill the holes (ø 8 mm).
Put the plugs into the wall and fix the fixing bracket to the
wall with the screws supplied (5 x 50 mm).
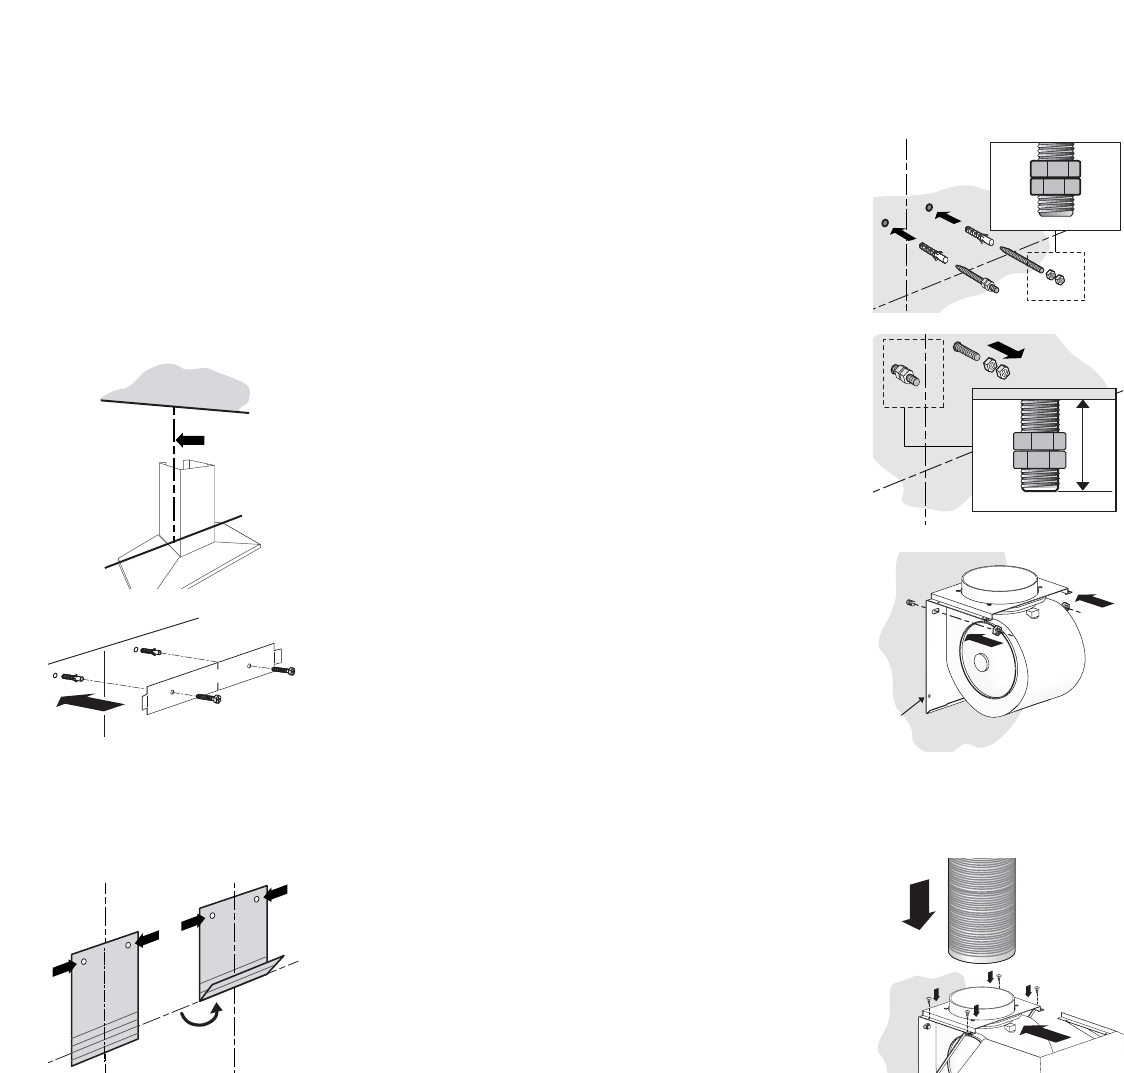
Fold or cut the template depending on type and mark the
upper fixing holes.
Drill the fixing holes (2 x ø 10 mm).
Fix the plugs.
Screw two nuts onto the threaded ends in the opposite
direction.
Screw the threaded ends into the wall leaving 20 mm
projecting.
Remove the nuts.
Hang the suspension module at the ends of the wires.
Screw the nuts on.
Make sure that the module is exactly level on all sides. You
can check this by means of the two marking notches near
the top and bottom of the wall plate.
Drill the bottom fastening holes (2x ø 6 mm).
Secure the motor module with the screws and plugs
supplied.
models WS90..A / WS90..D
Slide the hood over the motor module (1).
Secure the hood on the top with
four tapping screws (2).
Slide the flexible discharge hose onto the motor module (3).
general
marking out and fitting
20
ø6
1
2
3
suspend the hood
16


Need help? Post your question in this forum.

Forumrules


Report abuse

Libble takes abuse of its services very seriously. We're committed to dealing with such abuse according to the laws in your country of residence. When you submit a report, we'll investigate it and take the appropriate action. We'll get back to you only if we require additional details or have more information to share.

Product:

For example, Anti-Semitic content, racist content, or material that could result in a violent physical act.

For example, a credit card number, a personal identification number, or an unlisted home address. Note that email addresses and full names are not considered private information.

Forumrules

To achieve meaningful questions, we apply the following rules:

Register

Register getting emails for ATAG WS 9011 DM at:


You will receive an email to register for one or both of the options.


Get your user manual by e-mail

Enter your email address to receive the manual of ATAG WS 9011 DM in the language / languages: English, German, Dutch, French as an attachment in your email.

The manual is 3,76 mb in size.


You will receive the manual in your email within minutes. If you have not received an email, then probably have entered the wrong email address or your mailbox is too full. In addition, it may be that your ISP may have a maximum size for emails to receive.

The manual is sent by email. Check your email

If you have not received an email with the manual within fifteen minutes, it may be that you have a entered a wrong email address or that your ISP has set a maximum size to receive email that is smaller than the size of the manual.

The email address you have provided is not correct.

Please check the email address and correct it.

Your question is posted on this page

Would you like to receive an email when new answers and questions are posted? Please enter your email address.


Info